If the PC refuses to boot, does not work correctly, or is very slow after installing any software, it is not necessary to call a wizard to reinstall the system. You can restore your computer's functionality yourself by rolling back the system to an earlier restore point.
- Rollback Windows 7 normally
- How can I roll back my computer to the last known known good configuration?
- Procedure to restore Windows 7 in safe mode
- How to roll back Windows updates?
- Using a boot disk
Today we will talk about the most common ways to roll back a Windows 7 system. Starting such a process will help you solve problems with your computer that arise as a result of incorrectly removed or installed programs, drivers, services, OS updates, and so on.
Before performing a rollback, we strongly recommend that you make sure that your device is connected to power. If you use system recovery tools, you will need a high-speed Internet connection that provides stable communication with the servers of the official Microsoft website. Please note that network access is not required when using the installation image disk.
It will not be superfluous to create a backup copy of personal files and important data in order to avoid loss of information on the hard drive in the event of various types of failures that violate the rollback procedure. In addition, you can prepare drivers for your network card and USB devices, because not all versions of Windows will be able to automatically load the necessary components.
How to roll back a Windows 7 system using the standard method?
The first method is suitable for cases when the Windows system starts in normal mode, but during operation, the computer regularly produces all kinds of errors, slows down, freezes, and so on. To enter the standard OS recovery program, follow the step-by-step instructions below:
- Click the “Start” button and begin entering the phrase “system restore” in the search bar;
- Go to the appropriate point;
- The “Restore system files and settings” window will appear, in it simply click “Next”;
- In the next dialog box, you will need to specify the Windows 7 rollback point to which you want to return. Pay attention to the specific date and time at which points are created so as not to roll back too far;
- All you have to do is confirm your choice and click the “Finish” button;
- In the window that opens, read the nuances of the upcoming procedure and click OK;
- Next, the computer will reboot and you will see a message indicating that the OS was successfully restored.
It is worth noting another similar method of rolling back to the selected restore point:
- Press the Win + R key combination and enter rstrui.exe in the command line;
- In the “Recovery” item, press the “Next” button;
- In the next window, you need to select a restore point and roll back the OS using similar steps described in the top example;
- Wait for the system to automatically shut down and restart the computer;
- Congratulations, if you followed the algorithm correctly, the rollback was successful.
It is noteworthy that the user can independently create a Windows 7 system restore point. To do this, you need to follow these steps:
- Go to the Start menu and open “Control Panel”;
- In the “System” tab we find the “System Protection” item;
- A window will open in which you should left-click your system drive and go to settings (below the item called “Protection Settings”);
- Check the box next to “Restore settings and previous versions of files”;
- Indicate the amount of memory allocated for your system restore points and click “Finish”.
Reasons for rollback
There are many reasons for this. First of all, this is the incompetence of the user himself. Knowledge about the computer and working with it is not enough, but the desire to delve into the folder called Windows, where all the information about this system is stored, takes over. Situations arise when, due to inexperience or carelessness, necessary data is deleted and, starting from the first reboot, the computer stops working.
The second cause of rollback is viruses. The computer is constantly exposed to a significant number of virus attacks, and viruses can easily penetrate the system. This should never be forgotten, especially when working with the Internet.
How to roll back a Windows 7 system to the last successful configuration?
The simplest method is to roll back the operating system to a working state. This is relevant in cases where the user is unable to log into the OS in the usual way; therefore, the ability to restore Windows 7 using standard means is not available.
- The first thing to do is restart the computer and press the F8 key when turning it on;
- A section of additional parameters will open with several ways to boot the PC or laptop system;
- The boot option we need is “Last Known Good Configuration”, select it and click Enter.
If we cannot get rid of the problem, move on to the next more detailed solution to the problem.
If the computer does not turn on
It’s worth making a reservation right away: if a personal computer or laptop does not start at all, the reason should be sought in the hardware component - rolling back the system will not help here. If Windows 7 “refuses” to turn on at one of the early stages, the user should try one of the two recovery options suggested below.
Rollback in Safe Mode
As a rule, if the system is working but needs to be rolled back, the user will see a black screen prompting him to switch to safe mode after the next startup. In this case, to roll back Windows 7 a few days ago, it is recommended:
- Agree to run Windows 7 in any of the “safe” options.
- Do not turn off your computer or laptop while drivers are loading.
- Launch “Control Panel” - it will now open in the “Icons” category.
- Go to the “Recovery” item.
- Click on the “Start System Restore” button.
- Roll back Windows 7 in the same order as described in the first section.
The computer will automatically restart; If, upon completion of the recovery, the problem is only partially resolved, you should manually, while remaining in safe mode, remove unnecessary programs and system updates. To do this you will need:
- After starting Windows 7 again in safe mode, go to the “Control Panel” and open the “Administrative Tools” section.
- Select "System Configuration".
- Switch to the "Download" tab.
- And check the “Safe Mode” checkbox, and then successively click on the “Apply” and “OK” buttons.
- Now, by clicking on the “Restart” button, the user will be able to make changes to Windows 7 as long as needed; To disable cyclic entry into safe mode, you should repeat the manipulations on the “Boot” tab in the reverse order.
Running the recovery tool
As a result of several unsuccessful attempts to boot Windows 7, the screen will prompt you to run the system restore tool. To roll back to a previous state, the user needs:
- Agree to launch the utility.
- Wait until the system detects the problem and prepares a means to solve it.
- Click on the “Restore” button.
- And then - “Done.” In a few minutes, Windows 7 will be in working order again.
Tip: the user can view a list of errors that led to the inability to start Windows 7 by clicking on the “Display diagnostics and fix description” link.
Using the installation disc
If you don’t succeed in starting Windows 7 using the methods listed above, in order to roll back the system, you should use any media with an OS installation image: an optical disk, a flash drive, an external HDD, and so on. Having a disk in hand, the user must:
- Insert it into the drive (for a flash drive - into any USB connector) and, after restarting the computer, select startup from the installation media by pressing any keyboard key.
- Select the language for interacting with Windows 7, keyboard layout.
- And, once in the “Installation” section, click on the “System Restore” link.
- When the computer detects all operating systems present on the hard drive.
- Select the one you need - in this case it is Windows 7.
- And by running “System Restore”.
- Proceed with the procedure described in detail in the previous section.
Tip: if a previously created image of Windows 7 is saved on the hard drive, the user can click on another link located under the first one: “Restore system image.”
In the future, to make it easier for yourself to try to roll back Windows 7, it is recommended to use special backup programs like Acronis True Image - or do not forget to archive data in a timely manner and regularly create restore points.
How to restore the system using safe mode?
It is noteworthy that this option is suitable not only for the “seven”, but also for Windows 8, 10, XP and Vista. Detailed instructions:
- We restart your computer or laptop as soon as it starts to turn on - press F8;
- An interface will appear with a choice of boot type, click “Safe Mode”;
- Wait until the system starts and go to Start;
- Enter the text “recovery” in the search bar and select the appropriate item;
- A menu will appear in which you should click “Select another Windows 7 system restore point”;
- Specify the desired point in the list to return to its original state, click “Next”, then “Finish”;
- Give your consent to make the necessary changes to the parameters and click OK;
- The device will reboot, now you can check the OS for troubleshooting.
Let's sum it up
You can roll back Windows 7 a few days both in a running operating system and if it does not start properly. In the first case, the user will be helped by the “System Restore”, “Backup and Restore” options, as well as the removal of incorrectly applied updates. In the second - switching to safe mode, launching the system recovery tool and, finally, a rollback made from the installation disk.
Thank the author and share the article on social networks.
At restore points, the system registers only important (in its opinion) changes. Therefore, if a program was deleted, or a virus “worked,” then there will be no complete restoration. In general, this system service is buggy and can do little except eat system resources.
Operating system update rollback process
The method is quite simple; its use will allow you to get rid of unnecessary program updates, driver files and other components. To return the previous OS state, follow the sequence below:
- Go to “Control Panel”, enter “System”;
- Here we look for “Update Center”, located in the lower left corner of the interface (the item is indicated in small print);
- Next, click on the “Installed updates” section (located at the bottom left);
- In the pop-up window you will see a whole list of various software, the updated components of which can be removed;
- Right-click on the object you are interested in and select “Delete”, thereby the system will return the program or service to its factory settings or previous state.
How to return the previous version on your computer?
To do this, you need to go to the Start menu (on your desktop). Then open the “Options” item, then select “Update and Security”, and select the “ Recovery”
" This tab allows you to roll back Windows to its original state if the integrity of the system is compromised.
Interesting materials:
Which fitness bracelet should you choose in 2022? Which French press should you choose for coffee? Which geotextile to choose for strawberries? Which city to choose in Canada? Which graphics tablet should a beginner choose? Which programming language should I choose to start with? Which online clothing store to choose? Which cable to choose for fast charging? Which cable to choose for Internet in an apartment? Which cauldron should you choose for a fire?
Roll back Windows using a boot disk (flash drive)
First of all, to implement this task, we need a system image with the required version of the Windows system. You can download the original distribution on our website or on the official Microsoft web resource; you can also download the OS using the Windows ISO Downloader utility. Don't forget to make sure that your drive has enough free space to store the ISO image (4 GB or more is recommended).
To create a bootable flash drive with the distribution, we recommend using one of the following utilities: UltraISO, WinSetupFromUS B or Rufus . The software is not demanding on PC resources, is great for beginners and amateurs, and includes a convenient menu, clear tips, and a useful backup function. Here you will find all the necessary information on the topic of how to burn Windows to a flash drive. Below are examples with GUI applications.
The process of restoring from a system image will avoid a complete reinstallation of the OS and will help even in cases where none of the above methods brought any results. Follow our instructions:
- Connect the installation flash drive with the same edition of Windows;
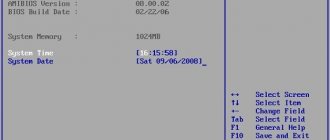
- When rebooting/turning on the PC, enter the BIOS by pressing the F9 or F11 buttons;
- In the BIOS, go to the device selection section and specify the source with the distribution, save the settings and exit the BIOS;
- Wait for the Windows 7 installation window; at the bottom of it you need to select “OS Recovery”;
- In the options menu, click on the item with the same name (as shown in the screenshot);
- Now we perform the usual actions similar to the first point in our article (select a control point, agree with the warnings in the notification window, and so on);
- After starting the recovery, be sure to wait for it to finish;
- Now you can check if your computer is working properly.
Briefly about the need to restore the system
Despite the high stability of operation, modern operating systems are also susceptible to the influence of various factors coming from user actions, third-party or standard programs, as well as malware. Failures caused by these factors can instantly limit access to the desktop, programs or user files. After changing a number of settings or installing any programs, the computer or laptop may simply not start in normal mode, and diagnostics and recovery will be required.
It is worth saying thanks to the developer of the operating system, Microsoft Corporation, which integrates and regularly updates special tools for diagnosing, repairing and restoring its software products. One such program is the Windows 7 Recovery application.
For your information! This functionality first appeared in Windows XP, which was released in 2001. It was this and a number of other features that made it the most popular OS in the world at one time. Later it gave way to the then new Windows 7.
The interface and features of Windows operating systems differ depending on the version: in some places not much, but in others dramatically. That is why Windows 7 will be discussed next, the system of which can be rolled back in various ways.
CCleaner will allow you to create points and load into them whenever you want


