How to restore Windows 10 via BIOS.
But this method can only be used if you have an installation disk or flash drive with a distribution kit of a licensed operating system with the version and bit depth that you have installed; this option is not possible without an external drive.
First of all, you need to start by setting the BIOS to read the disk immediately when you start the computer.
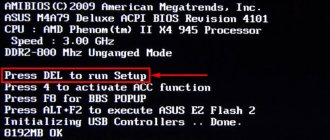
If preparing automatic recovery does not make it possible to restart the computer normally, you need to do it forcibly by holding down the shutdown buttons for 10-15 seconds, as soon as the system starts to boot, you need to press one of the keys: F1, F4, F3, Delete, F8 (tell exactly which one exactly what you need to press cannot be done, as it depends on the motherboard model on your device).
You can look in the instructions for your computer or on the manufacturer’s website to find out which key you will need to log in. On most PCs, the “Delete” button is used; on laptops, the key combination “ctrl+alt+esc” can be used. After the BIOS starts, go to the Boot section.
You need to find the “1st boot device” parameter, which can be located in the “Boot Device Configuration”, “Advanced Features”, “Boot”, “Boot Sequence” section. There you will need to set the parameter for the CDROM or PXE UND I disk to boot from a flash drive:
Press “F10” to save the result, insert the disk into the drive or connect the flash drive on which the distribution is stored, then reboot the device.
After the computer boots, the initial system installation menu will appear, where you will need to click on the “System Restore” button.
The “Select actions” menu will open; select “Diagnostics”.
Then go to the “Advanced options” item.
Next, click on “System Restore”.
After clicking, a window will open asking you to select a restore point.
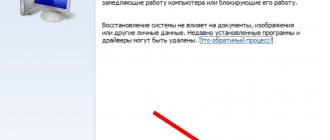
Startup Repair scans your computer for errors and fixes them when they are found. You can try to run the utility, but in most cases, after searching, it usually displays a message that the computer could not be restored.
If you had a rollback provided and your Windows was successfully restored after the above steps, then after this you will need to go into the BIOS and return the hard drive boot priority back to first place.
— How to restore Windows 10 via the command line. If you did not create a checkpoint, you can try restoring the Windows 10 system via the command line. To do this, you will also need a boot disk or flash drive with the Windows operating system installed on the computer.
What is a “Bootloader” and what role does it play in the system?
The Windows operating system, which is most often installed on various devices, has a built-in Bootloader utility. It is the one that launches the OS when the user presses the Power button to turn on their PC.
This happens after the BIOS (a special set of firmware that operates separately from the OS) has successfully checked all the hardware parts of the device for functionality.
According to this scheme, not only stationary PCs and laptops are included, but also mobile devices (tablets and smartphones).
The "Loader" is responsible, in particular, for performing the following actions:
- preparing PC hardware components to launch the OS kernel;
- direct loading of this kernel, which is located on the hard drive or transmitted over the network;
- transferring computer control to the OS kernel.
Why might there be problems with it?
Sometimes, when turning on a computer (stationary or portable - laptop), users may encounter one of the messages that appears on the black monitor screen: An operating system wasn't found or No bootable devices found. They also indicate that you need to press a certain key combination to restart the system. One of the reasons for these errors to occur is problems with the “Loader”.
On a black screen when loading Windows, a message may appear stating that the operating system was not found (An operating system wasn't found)
When the BIOS has successfully completed checking all the hardware parts of the PC and decided that the device is ready for use, it needs to transfer control of the launch of the “OS” to the “Bootloader”.
The notification errors described above appear on a black screen if it cannot be found in the place where it should initially be located (usually the first sector of the boot disk).
Accordingly, it turns out that there is simply no one to run the system in which the PC must operate.
Problems with the Bootloader are indicated by a message on a black screen stating that a bootable device was not found.
Why a problem may occur in the form of a missing boot record:
- The disk has bad sectors.
- The computer does not see the existing hard drive.
- The old OS was installed on top of the new one.
- The second OS was installed on the computer.
- The disk is missing a “Bootloader” file called bootmgr on Windows 10.
- The user installed a conflicting hard drive, connected an unsupported storage device (flash drive) or other peripheral device. Try removing the device (if it is a USB drive) and restarting your PC.
- There was a sudden power outage or other malfunction in the house. The result was an unexpected computer shutdown.
- The user forced the PC to shut down using the Power button when the computer froze or was updating.
- There are dangerous malware on your PC.
How to get the Bootloader back on Windows 10
To get access to your operating system again as quickly as possible and continue working in it, use one or more of the methods described below.
Automatic startup repair using Windows installation disc
The simplest solution is to run an automatic system recovery tool through the Windows installation disk of the version that is installed on your PC.
If you do not have the original disk, take any other bootable OS drive (flash drive, external hard drive, etc.). It can be easily created using a utility from Microsoft, which must be downloaded from the company’s official website.
To do this, however, you will need another computer, since you do not yet have access to yours.
Let us describe in detail the steps to launch the recovery tool:
- First, connect the bootable media to the computer. Turn on the PC. When the device starts to boot, you need to go to the so-called Boot menu: press either Escape or F12.
Press Escape or F12 to open Boot Menu - In the blue menu that launches, select from the list of all devices connected to the PC the media that you inserted into your computer earlier. So, loading will occur not through the hard drive, but through a bootable USB flash drive or disk.
- The screen will turn blue. You will be prompted to select a language. Click on the one you need.
- The initial Windows installation screen will then appear on the display. Here we immediately pay attention to the left corner of the window below. There will be an inscription “System Restore”. To launch the required sections, click on it.
Left-click on the “System Restore” link, which is located in the lower left corner - In the menu to select an action, click immediately on the third section, dedicated to finding and solving existing faults in the system.
- After that, click on the “Startup Repair” option.
Click on Startup Repair to start the process - The recovery wizard will ask the user to select the OS for which to perform the troubleshooting procedure.
- Then the process of finding and fixing errors will begin. The “Bootloader” should be restored as a result, as well as access to the OS and, accordingly, the “Desktop”.
Recovering boot files via the Command Line
This solution method is more complex than automatic recovery, since it involves working with the “internals” of the operating system using special codes that are entered in the black “Command Line” editor.
For this method, you also need to find or create a boot disk or other drive with the OS distribution that was installed on your computer.
In this article we look at recovery using Windows 10 as an example:
- Boot your PC from the installation disk or other storage device, as described in the instructions above. In the “Diagnostics” block, go to “Advanced options”, and then click on the “Command Line” item.
- You can also open it using the keyboard shortcut Shift + F10. The combination is valid from the moment you are asked to select the interface language.
- In the black “Command Line” editor, type three codes in turn and press Enter to execute them:
- diskpart;
- list volume;
- exit.
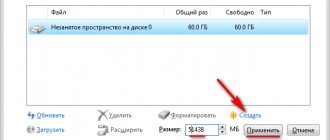
Enter the list volume command to display information about volumes and disks in the black editor - After executing the list volume code, you need to pay attention to the Latin letter of the hard drive on which all the important system files of your “OS” and, accordingly, the boot document are located. It may not end up being drive C, although for the most part it is on it that the OS is installed. Let's remember this letter. We will need it later.
- After executing the exit code, you just need to enter another command like this: bcdboot c:windows. Instead of the letter “c”, insert, if necessary, the one you remembered in the previous step. Press Enter as usual. This code will help you restore the "Bootloader".
Enter the command bcdboot c:windows to recreate the Windows boot files - A message will appear in the window that new boot files have been successfully created. All you have to do is restart your device, but from the hard drive (unplug the flash drive or remove the disk) to check if this method worked. Please note that after recovery, starting the operating system may take longer. If error number 0xc0000001 occurs, restart again and the problem will be resolved.
Another way to solve the problem in the Command Line
If the previous method did not work, immediately use another one: all manipulations will also be performed in the “Command Line”, but this time you will need to type more codes:
- Open the Command Prompt using the instructions from the previous section of this article.
- Enter diskpart again, and then list volume. Now we study the sections much more carefully. You need to determine which volume will be used in subsequent commands.
- If you have a system with UEFI and GPT, in the list you should see a hidden partition with the FAT32 file system and a size of 99 - 300 MB. If the BIOS is MBR, then a partition of 500 MB in size (after a clean installation of Windows 10) or less with the NTFS file system should be detected. We remember the number of this section (Volume 0, Volume 1, etc.). In the codes below we will use the letter N instead of a number. We also pay attention to the letter corresponding to the one on which Windows system files are stored.
Remember the volume number with the FAT32 file system - Then enter the codes one by one (be extremely careful when doing this):
- select volume N;
- format fs=fat32 or format fs=ntfs (depending on what file system is on the volume);
- assign letter=Z (name the section the letter Z);
- exit (close the Diskpart utility);
- bcdboot C:Windows /s Z: /f ALL (where C is the drive with Windows files, Z is the letter that we assigned to the previously hidden partition).
Enter the first command select volume N, where N is the volume number that you remembered earlier - If you have several operating systems, you need to repeat entering these commands, only with a different file location.
- After this, you need to print another batch of commands:
- diskpart;
- list volume;
- select volume N (the number of the hidden volume to which we assigned a letter);
- remove letter=Z (remove the letter so that the volume is not displayed in the system when the device reboots);
- exit.
- After all the manipulations, close the black editor and restart the PC from the hard drive to check if the problem is solved.
Restoring the system via the command line while the computer is on.
If you do not want to restart your computer, you can restore the system via the command line from Windows. To do this, you will need to insert the disc into the DVD-ROM while the PC is loaded. Then launch the command line by pressing the hotkey combination “Win + R” and in the search bar of the “Run” window, enter “sfc /scannow” and click “OK”. After which the broken system distributions will be copied from the boot disk automatically. System recovery and rollback are quite quick and trouble-free.
After installing a clean Windows 10, it is recommended to enable the creation of restore points, otherwise you will not be able to roll back the system again. You can see how to do this in the video:
Source
Uninstalling updates
One of the methods to restore the system to a working state is to remove the latest updates. Use this method if problems with WIndows started after system updates:
- Press the Win I key combination.
- Select Update & Security.
- On the left, click on “Windows Update”.
- Select View Update History.
- Click on “Uninstall updates”.
- Use the date column to find the latest updates.
- Right-click on them and select “Delete”.
How to restore Windows 10 via BIOS
Restoring Windows 10 through BIOS takes snapshots of all system files, which can be fixed if there is a problem. Microsoft has disabled this feature by default, at least on most computers, and hasn't explained why it doesn't allow you to roll back the system. Perhaps this task uses a lot of space, and the company is reducing its disk space requirements.
System Restore will use some space to store its snapshots, so you probably won't want to do this on low-cost laptops and tablets that don't have much storage space. However, if you have a large hard drive on your computer, this won't be a big problem.
Keep in mind that System Restore is disabled by default, so no snapshots are created, and it's best to try resetting the system to factory settings first. If you're having problems, re-enabling this feature won't help because you won't have any old snapshots to restore.
When you enable this option again, Windows will create a new snapshot of your system in a corrupted state if the OS is faulty. If you want to enable and use System Restore, you must do so before you experience a problem.
If you were unable to roll back the system to a previous restore point, you can try doing it through the BIOS. In this case, using a boot disk, the damaged boot sector of the HDD will be restored. To do this, you will need to create a bootable Windows USB flash drive.
Restart your computer and go to the BIOS menu. Select the BOOT menu section and change the priority boot order of the USB device. Save the settings and exit the BIOS.
After the PC restarts, you will see the initial Windows installation menu. Select System Restore.
The “Select Action” window will open; select "Diagnostics".
Open Advanced Options.
Next, select "System Restore".
A dialog box should open in which you will need to select a restore point.
Next, a computer scan will start, during which all errors will be detected and corrected. If the OS is successfully restored after the above steps, you will need to return boot priority from the HDD in the BIOS.
Restoring screen resolution
After restoring Windows 10, the screen resolution may be lost, then do the following:
Right-click on the desktop.
Select Screen Options.
In the “Screen Resolution” tab, select the one you need and save.
How to restore the system via BIOS Windows 10?
Windows 10 is already an order of magnitude more stable than the operating systems (OS) of the 2000s, but it also crashes quite often. Any computer or laptop (HP, Asus, Lenovo, Dell and others) is susceptible to system failures. It is impossible to completely protect against them, so every user should know how to restore the system via BIOS Windows 10 . Otherwise, you will have to constantly call the experts. There is no need to be afraid, you can actually do everything yourself, and with the help of our instructions, even a beginner will not get confused.
If all the methods I described did not help you, let's look at the possible reasons for this
1 You updated the BIOS on Windows 10, changed the system to UEFI, but you made a mistake and installed a version that is not for your motherboard. It is also possible that the ROM is physically unable to service the new UEFI system, as it takes up a lot of computer resources.
The solution is banal. You need to take your PC to a service center, where the BIOS will be quickly restored (of course, if the people working there are really pros)!
2 The ROM board is damaged, and it contains the BIOS itself.
The solution is again trivial. We buy a new ROM chip for your motherboard and carefully insert it into the connectors (in most cases, motherboard manufacturers do not solder it, but simply insert it into the connector).
Windows 10 has crashed, how can I restore it on a laptop or PC?
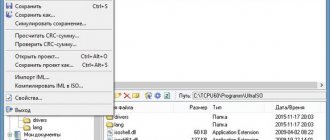
If there is no access to the system, you will have to carry out all manipulations at the level of the BIOS and Live CD drives. Since it is impossible to restore Windows 10 on a Lenovo laptop and other devices without a special disk, it is worth finding the installation distribution in advance. It can be a disk with a licensed system or a mounted flash drive. To create a suitable drive you need an OS image and an application like UltraISO. Proceeding further, we assume that the disk or flash drive is already ready.
How to restore Windows 10 on an Acer laptop:
Unfortunately, it is not possible to restore Windows 10 through BIOS without a disk or USB drive. In previous versions of the OS, a similar function was built-in, but it is missing in the top ten. A disk or flash drive is required.
Additional recommendations for system recovery
We are forced to admit that the two methods listed above are not always enough to normalize the operation of the OS. Sometimes additional procedures are needed.
Important! It’s not always possible to get away with minimal effort; sometimes it comes down to reinstallation. Since reinstalling Windows 10 via BIOS is not difficult, we will not consider the procedure in detail. Usually, after launching the Live USB drive, it is enough to click on the “Install” button and follow the wizard’s prompts.
These are all working methods on how to reset Windows 10 via BIOS and restore its operation. In most cases they will work, but sometimes you have to reinstall the OS. Repeated installation does not entail serious consequences, because the data on the main logical drive will be saved, and the procedure itself takes about 15 minutes.
Source
When might a system restore be necessary?
If various problems occur, it is recommended to first restart your personal computer (desktop device, tablet, laptop). If rebooting the operating system does not correct the operation of the necessary files, you will need to perform the OS recovery procedure through the BIOS.
Possible cases of using this resource:
The first thing the PC owner should do is roll back the operating system to the settings made during the initial installation (factory settings). If the procedure could not be activated or the process did not lead to the desired result, proceed to work with the BIOS block.
How to roll back Windows 10 via BIOS
There are two options for rolling back the Windows 10 operating system - using additional media on which the image of the required Windows is installed, and without a boot disk or removable flash drive. In the first case, the OS is launched as follows:
After this, the process of rolling back the current OS version to the previous state will begin. If there is no additional flash drive and there is no way to create one, choose the following option:
After moving to a new block, select the desired point and confirm the start of the procedure.
Options
Windows 10 has an additional tool that allows you to reset the system to its original state and save user files. Let’s take a closer look at it:
- Press the Win I key combination.
- Open the "Update and Security" section.
- On the left, select the “Recovery” section.
- Click the "Start" button.
- Choose whether to keep all files or delete them.
- Wait for the process to complete.
What problems arise
When activating the Windows rollback process on a personal device (desktop computer or laptop), various difficulties may arise. The average processing time for information is two hours. If the operation is delayed, it is necessary to check the functionality of the files used (the operating system itself, the recorded image, the selected status points).
BIOS is the main element of the operating system, setting the order of operations and ensuring the interaction of elements of a personal device. Rolling back the OS to the previous version helps fix some errors and malfunctions of built-in files and applications.
Source
What you need to start recovery
It is impossible to perform a “System Restore” purely through the BIOS, so you will need installation media with the version of Windows that you want to “reanimate.” It will have to be launched through the BIOS. You also need to make sure that there are special “restore points” that will allow you to roll back the settings to a working state. Usually they are done by the system by default, but if none are found, then “System Restore” will become impossible.
You also need to understand that when carrying out the recovery procedure, there is a risk of losing some user files or disrupting the functionality of programs that were recently installed. In this case, everything will depend on the creation date of the “Restore Point” you are using.
Method 1: Using installation media
There is nothing complicated in this method and it is universal for almost all cases. You only need the media with the Windows Installer correctly written on it.
The instructions for it look like this:
On our website you can also learn how to create a restore point on Windows 7, Windows 8, Windows 10 and a backup copy of Windows 7, Windows 10.
If you have Windows 7 installed, then skip step 5 from the instructions and click directly on “System Restore”.
Method 2: "Safe Mode"
This method will be relevant if you do not have media with the installer for your version of Windows. The step-by-step instructions for it are as follows:
On our website you can learn how to enter “Safe Mode” on Windows XP, Windows 8, Windows 10, as well as how to enter “Safe Mode” through the BIOS.
To restore the system, you will have to use the BIOS, but most of the work will be done not in the basic interface, but in “Safe Mode” or in the Windows Installer. It's worth remembering that restore points are also vital for this.
Source
Method number 3: use “safe mode”
While the computer system is passing the POST test
, press the “F8” key vigorously several times. From the list you must select the “Boot in Safe Mode” option. For different versions of Windows, this item may differ slightly in designation. However, in essence, this item is intended for the same thing - boot the system using only critical Windows services.
After the system has booted:
- Go to the control panel (naturally through the Start menu).
- Next, select the “Recovery” section.
Then, we activate the item we need “Start...system”.
We select the most suitable (in terms of time) backup from the displayed list and go to the kitchen to drink tea, coffee or another favorite drink.
This method is applicable to literally all versions of Microsoft operating systems. However, there are still some nuances in the process of implementing this method and they are unique to Windows 8.
Often, the owner of a high-speed eight simply cannot use safe mode due to the resistance of the software to boot this OS. And again, good news - we will teach you, dear reader, what needs to be done in order to force the capricious eight to open an additional boot menu by pressing the “F8” key.
Let's look at the pictures, read, learn and act!
Insert the installation system distribution or emergency boot disk of Windows 8 (how to set a CD/DVD drive or flash drive as the priority boot loader,
Then, go to the “Diagnostics” block.
Now, click on the “Advanced options” icon.
Finally, select the “Command Line” tool that interests us.
- In the command console we write - bcdedit /set {globalsettings} advancedoptions true.
- Exit the cmd software environment.
- Your next choice is “Continue...”.
This method is also relevant for the new-fangled ten (Windows 10), and also works flawlessly when the user’s computer is equipped with an SSD solid-state drive with an optimized boot process.