While turning off Windows 10 updates isn't permanent unless you're disconnected from the internet, there are several ways to temporarily turn off Windows updates. We will also look at how to disable Windows 10 updates forever 2022.
Even though Windows 10 has a way of allowing updates even after changing settings, keep an eye on the best current solutions to prevent them. Note that you can create a script or batch file to automate one of these workarounds.
How to disable the update
Method 1: through parameters
1. Open Start and go to Settings. To do this, click on the gear icon.
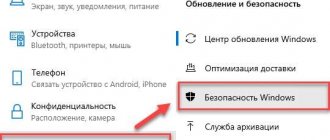
2. Go to the "Update and Security" section.
3. Click on the “Advanced options” item.
- In the "Pause updates" section, set the date by which you want to turn off updates - they can be paused for a maximum of a month.
- In the "Choose when to install updates" section, you can delay installation for 365 days.
Method 2: Through Services
1. In the Start menu, type “Services.” Run the application as administrator.
2. Scroll through the list of all services and launch Windows Update.
3. Turn off the service by clicking the Stop button.
In the Startup Type line, select Disabled.
The service was successfully disabled, but the system periodically restores it. To change this, go to the Recovery tab and set the top three lines to Do nothing.
Go to the "Login" tab. Select the “With an account” radio button and click on the “Browse” button.
Click the "Advanced" button.
Then click the “Search” button. In the list of users, select Guest and click OK.
Remove the dots in the Password and Confirmation fields. Click "Apply".
4. Disable scanning through the scheduler.
To do this, open the Start menu and type “Task Scheduler.” Run as administrator.
Expand the branch “Task Scheduler Library” - “Microsoft” - “Windows”.
Open Windows Update, right-click on the Scheduled Start task and select Disable.
Open the "Update Orchestrator" branch and disable the two tasks "Schedule Scan" and "Schedule Scan Static Task".
5. Restart your computer for the changes to take effect.
Thus, we blocked the update service: we disabled scanning jobs in the scheduler, prohibited the system from restarting the service in case of failures, and prohibited the service from starting, limiting its rights.
Method 3: Through the command line
1. In Start, type Command Prompt. Run as administrator.
2. Type the command takeown /fc:\windows\system32\usoclient.exe /a and press Enter.
3. Next, open the C:\windows\system32 folder, find the “usoclient.exe” application, right-click on it and select “Properties”.
4. Go to the Security tab. Click the "Edit" button.
Open all the users in the list one by one and uncheck the “Allow” box. Then click on “Apply”.
Ready! We have prohibited all users from launching the application and the system will no longer automatically search for and install updates.
To restore the original settings, run Command Prompt as an administrator and run the command icacls c:\windows\system32\usoclient.exe /reset
Method 4: through group policies
This method only works on Windows 10 Professional and Enterprise versions.
1. In the Start menu, type the command gpedit.msc and run Group Policy Editor as an administrator.
2. Expand the branch “Computer Configuration” – “Administrative Templates” – “Windows Components” – “Windows Update”.
In the right window, open “Automatic update settings”.
3. In Settings, set the switch to Disabled. Click "Apply" and close the editor.
The next time you try to update, you will see the message “Your organization has disabled automatic updates.”
Method 5: through the registry
1. From the Start menu, type regedit and run Registry Editor as an administrator.
2. Expand the branch HKEY_LOCAL_MACHINE – SOFTWARE – Policies – Microsoft – Windows. Right-click on the Windows branch and select “New” – “Partition”.
Type the name for the section WindowsUpdate.
3. In the WindowsUpdate section, create another section called AU.
4. Right-click on the AU section and create a new parameter: New – DWORD Value (32 bits).
Type the name for the parameter AUOptions.
Open this parameter and enter “2” in the “Value” line.
5. Close the Registry Editor window.
All is ready! This option will notify you about the availability of new updates - decide for yourself whether to install them or not.
Method 6: via metered connection
This method may be suitable if you are connected to the Internet via a wireless network.
1. Go to Start and select Settings.
2. Go to the “Network and Internet” section.
3. Click the connected wireless network.
4. Select the radio button in the “Set as metered connection” item.
The system will think that you have limited Internet traffic and will try to reduce its consumption by disabling the download of new major updates.
Why do you need to update the system?
Microsoft releases scheduled system updates every month. In addition, there may be unscheduled additions and adjustments to existing packages, which help to urgently correct something in the installed program.
As a rule, in such small update packages the main part is aimed at improving the security of the operating system. However, when they are installed, fixes are always made or new features and extensions are added.
Extensive system updates are released once or twice a year. Thanks to them, a new version of the operating system is installed on a computer or laptop. But to avoid a heavy load on the network, everything you need is delivered in small packets. Quite often and persistently.
However, if the update does not work as intended by the developers, then you have to wait for the next version. The best option is to return to the previous version of the operating program. To do this, just select the appropriate item in the settings.
Using a third party program
The methods shown above seem complicated and you don't feel like manually changing system settings? Then special programs will come to the rescue, applying the necessary settings in a couple of mouse clicks.
After launching the program and applying the settings, restart your computer for them to take effect.
Although the developers claim that the applications are safe, I recommend checking them for vulnerabilities through the website virustotal.com before launching.
Windows Update Blocker
The application can be downloaded at: sordum.org/9470/windows-update-blocker-v1-5
After downloading, unzip the archive and run the Wub.exe file. Set the switch to the “Disable Updates” position and check the “Protect Services Settings” checkbox. Click the "Apply Now" button.
O&O ShutUp10
The program can be downloaded at: oo-software.com/en/shutup10
In the “Manage Windows Updates” section, activate two items:
- Disable automatic system updates (Windows-Update) (1 of 2)
- Disable automatic system updates (Windows-Update) (2 of 2)
Wu10Man
You can download the program at: github.com/WereDev/Wu10Man/releases
Windows Services. This tab disables download and installation services.
Hosts File. Windows servers are blocked here.
Pause Updates. Through this tab you can delay downloading for a certain period of time.
Group Policy. Here you can select one of the options:
- Enable automatic updates.
- Disable automatic updates.
- Notify about downloading and installation.
- Automatically download, but notify about installation.
Windows 10 Update Disabler
The application can be downloaded at: winaero.com/download.php?view.1932
After downloading the archive, unpack it.
Next you need to start the application as a service. To do this, open a command prompt with administrator rights.
Type the command C:\UpdaterDisabler\UpdaterDisabler –install
C:\UpdaterDisabler is the path where the archive was unpacked.
Press Enter.
The application is activated as a service that will monitor and block updates.
To disable a service, at the command line type C:\UpdaterDisabler\UpdaterDisabler –remove
Windows Updates Disabler
For many users, the simpler option would be to download third-party software and, by pressing a few keys, completely and successfully disable Windows 10 updates. To do this, we recommend using the Win Updates Disabler utility. At the moment, the current version of Win Updates Disabler is 1.4 , which you can download from the developer’s official website. Another advantage is that you can download a portable version of the program without having to install it.
Just run the program as an administrator and check the boxes that you want to disable. Once selected, click Apply Now and restart your computer. Additionally, the user has the opportunity to disable the defender or firewall in a similar way.
Conclusion
In general, it is not recommended to disable updates, since with each update the operating system becomes more stable and secure. If you need to disable system updates, you can use one of our methods. Another tricky solution is to enable a metered connection, which is described in the instructions: How to block an application from accessing the Internet in Windows 10.
How to disable Windows Defender
Windows Defender or Windows Defender is built-in antivirus software. When installing another antivirus, it is usually automatically disabled, transferring protection rights to the new program. But you can disable Defender manually.
Windows 10 Pro
In the Start menu, type gpedit.msc and start the service.
Next, open the branch: Computer Configuration - Administrative Templates - Windows Components - Windows Defender Antivirus.
In the right window, click “Turn off Windows Defender Antivirus.”
Select the Enabled option, click Apply.
Also in this thread, disable:
- "Allow the anti-malware service to start."
- “Allow the anti-malware service to run continuously.”
Go to the “Real-time protection” subsection and enable the “Turn off real-time protection” option.
Windows 10 Home
In the Home edition, Windows Defender is disabled through the registry settings (this method can also be used in the Pro edition).
The easiest way to disable it is through the O&O ShutUp10 program:
- Open the program and go to the "Windows Defender and Microsoft SpyNet" section.
- Activate the switch in the “Turn off Windows Defender” item.
Restart your computer.
Disable automatic downloading of drivers
The next thing that Windows 10 can download without users knowing is hardware drivers and their updates. You can also disable this action:
- Press the Win+X key combination and open Control Panel.
- Among other items, select the “System” section.
Open the System section in Control Panel - Next to the computer name you will see an option to change settings. Click on it. Click on "Change settings" next to the computer name
- Go to the "Hardware" tab. There you will see two sections, you need to click on “Device Installation Options”.
Select Device Installation Options from the Hardware tab - In the driver installation settings that open, select the “None” option. Then save the changes you made.
Set the device installation option switch to "No"
Where to see installed updates
1. From the Start menu, type “Control Panel” and launch the application.
2. Open Programs and Features.
3. Click on “View installed updates” on the left.
A list of all installed packages will open.
If after the update the system begins to generate errors or one of the programs stops running, the package can be removed. To do this, right-click on it and select “Delete”.
And to clean up disk space, I recommend periodically checking the cache and clearing it.
The cache is located in the following folder: C:\Windows\SoftwareDistribution\Download
Select all files, right-click and select “Delete”.
Setting a Wi-Fi download limit
It is also useful to disable Windows Update in cases where the user uses Wi-Fi to access the Internet. To refuse to download patches, just specify “Limited” in the wireless connection settings. To do this, perform the following steps:
- Open the window with parameters and find the item “Network and Internet”;
- Select the item that allows you to manage networks, then open the Wi-Fi properties;
- Make the connection option “Set as limit” active.
After completing these steps, auto-updates will not occur when using a wireless connection.
Using the power of the PowerShell application
- First of all, to work correctly with PowerShell, download the PSWindowsUpdateModule , available on the official Microsoft website;
- Unpack the downloaded archive into one of the directories on your computer’s hard drive: %USERPROFILE%\Documents\WindowsPowerShell\Modules or %WINDIR%\System32\WindowsPowerShell\v1.0\Modules ;
- the PowerShell command line as an administrator;
- It is important to import the loaded module with the command Import-Module PSWindowsUpdate (subsequent administration is carried out only taking into account this tool);
Next we are interested in the following commands:
Get-WUList - displays a list of available updates; Hide-WUUpdate - allows you to hide positions for certain criteria (name, type, KB number); Get-WUinstall - starts monitoring and installing updates;
- So, we type on the command panel Get-WUList, press Enter;
- Hide parts of the titles by entering Hide-WUUpdate -Title 'Realt*' ;
- Then we can hide values by KB number, for example: Hide-WUUpdate -KBArticleID KB4011571 ( and we do this for every unnecessary Windows update );
- All that remains is to hide by driver type using the command Hide-WUUpdate -UpdateType driver ;
- After performing the above manipulations, in the Status you will see the value H , indicating that a particular process has been disabled;
- We prohibit additions, close the interpreter by clicking on the cross at the top right or entering Exit;
- Restart your computer to activate the new features.
Cleaning the Winbt folder
The next step towards abandoning the “ten” will be to remove components that the computer has already loaded. It is possible and even necessary to remove Winbt, since they take up a significant amount of space on the computer (about 4GB), and if you decide to install updates, then there is no point in storing the information.
The Winbt folder is located on the main drive of the system (i.e. drive C). Removal is simple: start cleaning using the Win key (Windows flag) and R, a window will open in the search bar of which you must enter “cleanmgr”. Click "OK".>
- LiveJournal
- Blogger
Enter the command "cleanmgr"
After a while, you will see a window where you click “Clean up system files.” Then another window will appear, where you uncheck all the boxes except “Temporary Windows installation files” (if it is not there, close the windows, cleaning is not needed) and click “OK” again.
- LiveJournal
- Blogger
Disk Cleanup Program
After some time has passed, the cleaning is completed, your job is to restart your computer and breathe out - disabling the Windows 10 update is complete.
Do not delete this folder if you doubt your actions. Even if it stays on the computer until the moment when you finally decide that the new version is not needed, nothing will happen.
Temporarily disable auto-updates through Windows 10 Update settings
The options below will help you disable WinUpdates downloads for a limited period of time. They are a good solution for those who go on vacation or on a business trip and want to postpone the auto-update procedure, as well as eliminate various failures and errors, in order to avoid disruption of the stable functionality of Windows.
- Press Win+I, go to “Update and Security”, then “Windows Update”;
- In the interface on the left, select “Advanced options”;
- Uncheck the box “When updating Windows, provide updates for other Microsoft products”;
- After this, various software will not be able to update automatically, including Skype, Viber, Google Chrome, Mozilla Firefox, Internet Explorer, MS Office, Word, Excel, Access, PowerPoint, and so on.
Another method in “Advanced options”
To temporarily block updates, go to a similar item and look for the inscription “Pause updates”. Here we activate the slider, which will help prohibit downloading content for a 35-day period. Please note that after this period, the system will continue to download all currently available new products.
You can also take advantage of the new WinUpdate Delivery Optimization technology (abbreviated WUDO).
The innovation works on the principle of P2P protocols, similar to BitTorrent. That is, you have downloaded the updates, then your computer allows you to download them to other Internet users. This is done to relieve Microsoft developer servers. To avoid wasting your own traffic, we recommend that you go back to “Advanced settings” and click on the link “Choose how and when to receive updates.” The last thing you need to do is turn off the “Update from multiple locations” option.
If you are annoyed by your computer automatically restarting!
- We return to the update center;
- Open the “Restart Options” tab;
- The next step is to activate the “Show more notifications” item;
- The OS will no longer reboot your PC or laptop.
Method 3: Hide updates using the official Show or hide updates tool
Even before the official launch of Windows 10, Microsoft released a program that returns to the system the ability to hide unwanted driver updates or system updates.
- First download the tool from the following link.
- Launch the program and click Next to start scanning.
- Then click “Hide updates” and select the updates that you want to hide from the list, and then click “Next”.
- If you later want to return hidden updates, instead of “Hide updates”, select the “Show hidden updates” option.


