Headers and footers are fields located at the bottom and top of an Excel worksheet. The user adds a variety of information to them to help him work on the document. Data entered in the headers and footers appears on all worksheets.
1
A header and footer is undoubtedly a useful tool, but there are times when it needs to be removed from a document. From this article you will learn several ways to remove headers and footers from Excel spreadsheets.
How to remove the display of headers and footers
When users ask how to remove headers and footers, they often mean not the headers themselves, but the display mode of the Excel document in which they are displayed. The fact is that if the “Page Layout” display mode is enabled in an Excel document, then instead of one solid sheet, the user will see a sheet divided into pages. In this case, at the top and bottom of each page, where there should be headers and footers, the following inscriptions will be displayed: “Header” and “Footer”.
If you have exactly this problem and want to remove the display of these labels, then you just need to change the page display mode to “Normal”. To do this, go to the “View” tab and click on the “Normal” button.
You can also switch to normal display mode using the small buttons in the lower right corner of the Excel window (next to the scale slider).
Working in Excel 2003, 2007
The user will be able to configure the same headings, logos and date for all pages, or can configure the display of a different set of data for sheets.
Follow the instructions:
- Open the document you want to edit;
Select the "Page Layout" tab;
Click the Print Headers tile;
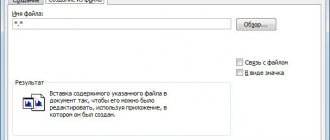
- In the window that opens, select the “Sheet” tab and fill in the fields “End-to-end lines”. The first field indicates the beginning of the document with text, the second - the end of the sheet. The resulting text will be added to the body of the document as a header and footer.
To add more than just text to the header and footer, in the Page Setup window, click on the tab and create an object, as described for the Excel 2010 version.
To create a header and footer faster, you can use the document markup builder.
Click on the indicated key, which
is located at the bottom of the sheet:
Now select top or bottom
by clicking on the top or bottom of the page, respectively.
Open a designer window. Then click on one of the three header/footer parts
(left, center, right). Next, click on the desired icons in the “Header and Footer Elements” field.
Result of adding page number:
Fig. 23 - creating numbering
Headers and footers in Excel 2010
When finalizing a document in the Microsoft® Excel® 2010 editor, you can add headers and footers
, representing text or graphic information containing the title of the chapter, the author of the book, section number and graphic design elements.
Let's look at how to insert headers and footers
.
Each section of the document can have its own header and footer. First, you need to select the “Page Layout” viewing mode by clicking on the corresponding icon in the lower right corner of the program window.
As you can see, there is a margin at the top and bottom of the page to place the header and footer. The header and footer area is also marked on the rulers located along the edges of the document page. By holding the left mouse button on the bounding area of the header and footer and dragging the cursor, you can determine the size of the header and footer area. It is worth noting that all basic text formatting is available in the footer.
Now go to the “Page Layout” tab and click on the “Page Setup” icon.
In the dialog box that opens, go to the “Header and Footers” tab.
Here you can select header and footer templates from the corresponding drop-down lists, for example, assigning the document page number as the header, and the workbook sheet number as the footer. Thus, the header and footer in Excel® is also used to place page numbering.
You can create your own header or footer template by clicking on the “Create Header” and “Create Footer” buttons.
In the dialog box that opens, you can customize the information in the footer, as well as its location.
You can also insert a header and footer into your document by going to the “Insert” tab and selecting the “Header and Footer
.
As you can see, the “Working with headers and footers” tab has opened. Designer”, where you can select all the necessary parameters for the created header and footer. It is worth noting that when executing this command, the worksheet will be divided into standard A4 sheets in portrait orientation according to the default settings in the Page Setup window.
To return to the worksheet, click on any cell.
The header and footer on the first page of a document may differ from the header and footer on all other pages. In an open worksheet window, click the text entry cursor in the header or footer text box.
On the “Design” tab, expand the “Options” button menu and activate the “Special header and footer for the first page” value.
Now you can format the header and footer of the first page without changing the header and footer of the remaining pages of the document. To return to the worksheet, also click on any cell.
You can also add different headers and footers to your document for even and odd pages. For this worksheet, click the text entry cursor in the header or footer text box.
On the "Design" tab, expand the "Options" button menu and activate "Different headers and footers for even and odd pages."
As you can see, the header title now says “Odd Page Header.”
In order to edit the header and footer, left-click on it and enter the necessary information in the text field that becomes active.
Then secure the entered information by clicking on an empty table cell.
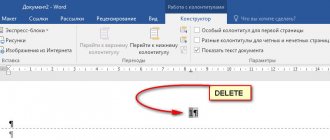
To delete a header and footer, left-click on the area of the header and footer that you want to delete.
Using the Delete or Backspace keys, delete all data in the header and footer area. If there is no data in the header and footer, the header and footer will not be displayed either.
Thus, using headers and footers, you can design a document for printing, displaying all the necessary information on it.
(0)
| Program overview | |||||
| 1. | Program interface | 4:21 | 2 | 81592 | |
| 2. | File menu | 2:28 | 0 | 24107 | |
| 3. | Tab bar | 5:03 | 1 | 22395 | |
| 4. | Command menu | 3:08 | 0 | 17111 | |
| 5. | Viewers | 3:41 | 0 | 15503 | |
| 6. | Basic program settings | 2:46 | 0 | 16380 | |
| Working with books | |||||
| 7. | Create, open, and save a workbook | 7:06 | 0 | 18127 | |
| 8. | Working with books | 4:20 | 1 | 14359 | |
| 9. | Cells and Cell Range | 4:39 | 1 | 18316 | |
| 10. | Cell names and notes | 5:17 | 11 | 18575 | |
| 11. | Data input | 2:37 | 0 | 14967 | |
| 12. | Autofill cells | 1:34 | 0 | 17148 | |
| 13. | Data Search | 2:23 | 0 | 15290 | |
| 14. | Data formatting | 3:22 | 0 | 14269 | |
| 15. | Graphically formatting cells | 2:47 | 0 | 14104 | |
| Working with tables | |||||
| 16. | Tables | 2:16 | 0 | 30881 | |
| 17. | Working with tables | 4:00 | 2 | 34632 | |
| 18. | Sorting data | 2:56 | 0 | 18707 | |
| 19. | Results | 2:02 | 0 | 16526 | |
| 20. | Calculated Columns | 2:02 | 0 | 20889 | |
| 21. | Data filtering | 2:35 | 0 | 15507 | |
| 22. | Custom filters | 2:03 | 0 | 12280 | |
| 23. | Pivot table | 3:05 | 0 | 46283 | |
| 24. | Calculated fields | 1:52 | 0 | 15340 | |
| 25. | Consolidation of tabular data | 2:30 | 0 | 18146 | |
| 26. | Table design | 2:23 | 0 | 13096 | |
| 27. | Record a macro | 3:00 | 0 | 24216 | |
| Formulas and functions | |||||
| 28. | Formula Review | 2:42 | 0 | 26065 | |
| 29. | Copying formulas | 2:35 | 0 | 13157 | |
| 30. | Arrays | 2:34 | 0 | 15438 | |
| 31. | Function Wizard | 3:59 | 0 | 16293 | |
| Working with charts | |||||
| 32. | Chart overview | 3:16 | 0 | 19140 | |
| 33. | Formatting a chart | 2:22 | 0 | 6493 | |
| 34. | Setting up chart axes | 2:02 | 0 | 31098 | |
| 35. | Chart scale options | 1:54 | 0 | 6545 | |
| 36. | Data Signatures | 2:35 | 0 | 5617 | |
Removing headers and footers in Microsoft Excel Hello everyone, today a user asked me how to delete text from the top of the table, he says the whole department tried to delete it and nothing worked. I looked, looked and said: “so these are headers and footers!” And after this incident I decided to write a short article about how to delete text that cannot be deleted at the top or bottom of an Excel table. There will be three ways to remove headers and footers, but I recommend using the third (last method) it is more convenient, it seems to me, although the taste and color... In short, let's move on to studying this issue.
Header and footer is an area located at the top and bottom of an Excel page.
They record notes and other data at the discretion of the user. At the same time, the inscription will be end-to-end, that is, when writing on one page, it will be displayed on other pages of the document in the same place. But sometimes users encounter a problem when they cannot disable or completely remove headers and footers. This happens especially often if they were enabled by mistake. Let's find out how you can remove headers and footers in Excel. Ways to remove headers and footers
There are several ways to remove headers and footers. They can be divided into two groups: hiding headers and footers and removing them completely.
Method 1: Hiding Headers and Footers
When hidden, headers and footers and their contents in the form of notes actually remain in the document, but are simply not visible from the monitor screen. There is always the option to enable them if necessary.
In order to hide headers and footers, just switch Excel from working in page layout mode to any other mode in the status bar. To do this, click the icon in the status bar “Normal” or “Page”.
After this, the headers and footers will be hidden.
Method 2: Manually removing headers and footers
As mentioned above, when using the previous method, headers and footers are not deleted, but only hidden. In order to completely remove headers and footers with all the notes and notes that are located there, you need to proceed in a different way.
- Go to the “Insert” tab.
- Click on the “Header and Footer” button, which is located on the ribbon in the “Text” tool block.
We delete all entries in the header and footer on each page of the document manually using the Delete button on the keyboard.
After all data has been deleted, turn off the display of headers and footers in the previously described way in the status bar.
Headers and footers are text placed in the top and bottom margins of an Excel sheet. Headers and footers can contain headings or technical information about the document.
This function is not used often, so many users do not know how to remove headers and footers in Excel. If you also encounter a similar problem, we suggest you read this article. The information will be relevant to users of all modern versions of Excel, including Excel 2007, 2010, 2013 and 2016.
When users ask how to remove headers and footers, they often mean not the headers themselves, but the display mode of the Excel document in which they are displayed. The fact is that if the “Page Layout” display mode is enabled in an Excel document, then instead of one solid sheet, the user will see a sheet divided into pages. In this case, at the top and bottom of each page, where there should be headers and footers, the following inscriptions will be displayed: “Header” and “Footer”.
If you have exactly this problem and want to remove the display of these labels, then you just need to change the page display mode to “Normal”. To do this, go to the “View” tab and click on the “Normal” button.
You can also switch to normal display mode using the small buttons in the lower right corner of the Excel window (next to the scale slider).
How to remove headers and footers
If you actually have headers and footers that appear at the top or bottom of the page when printed, and you want to remove them, then on the contrary, you need to enable the “Page Layout” mode. To do this, go to the “View” tab and change the page display mode from “Normal” to “Page Layout”.
After switching to the “Page Layout” mode, you need to double-click with the left mouse button on the footer.
As a result, the header and footer will be highlighted, and you can remove it from the page using the Delete button on your keyboard.
After this, the inscription “Header” will appear in place of the header and footer, which will not be displayed when printing. In order to continue working with the document, you can return to the normal display mode (Tab “View” - “Normal”).
How to change headers and footers
To edit notes at the top and bottom of a document:
1. In the top menu bar of the program, select the “Insert” tab.
2. “Text” block, “Header and footers” cell.
3. Page layout is activated in Excel.
4. The areas at the top and bottom of the page will become available for filling.
5. When working with header and footer blocks, the “Designer” option will appear in the top menu of Excel. By opening it, the user can insert a photo, time, and other header and footer elements into the blocks.
6. Turning your gaze to the right while in the “Design” tab, you can notice the parameters of different headers and footers for even/odd pages and the creation of a unique one for the title page. Activated/deactivated by a checkmark.
7. To deactivate the page layout mode, in the top menu of Excel, select “View”, the “Normal” option. Continue working with the document.
Another option for creating or editing is to select the “Markup” mode in the same “View” menu.
Another way to remove headers and footers
In addition, there is another way by which you can remove headers and footers from the pages of an Excel document. In order to use this method, you need to go to the “Page Layout” tab and click on the “Page Options” button.
As a result, the Page Setup window will appear. Here you need to go to the “Header and Footers” tab.
On the “Header and Footer” tab, click on “Create Header” or “Create Footer” (depending on which header you want to remove).
Next, a window for editing headers and footers will open. Here you just need to delete the header and footer text and click OK.
Finally, you need to close the “Page Settings” window by clicking on the “OK” button.
This will save your header and footer changes.
Adding a picture to the footer
In Excel, you can even insert a picture as a page footer. However, there is a certain “complication” associated with this - the image must fit the size of the element itself, otherwise it can fill the entire space (or part of it), as shown in the image below.
However, in this way you can create a background for the entire document, the main thing is to pre-process the image. A picture is added as follows (using Office 2016 as an example):
- Go to the “ View ” – “ Page Layout ” mode.
- Click on “ Header and Footer ” to open the designer.
- Click "Drawing».
- Select image source .
- Select an image and click “ Ok ”.
For editing, the designer provides a “ Picture Format ” button, but it only helps to adjust the size of the image, and not to adjust colors and make other settings.
This way you can cover even the entire page with an image. Just a couple of minutes is enough. In general, the opportunity is interesting, but practically little used, since a couple of marks with text are simpler than creating a logo.
Headers and footers on sheets
You can add headers and footers to the top or bottom of a printed worksheet in Excel. For example, you can create a footer with page numbers, date, and file name. You can create your own headers and footers or use many of the built-in headers and footers.
Headers and footers appear only in Page Layout
, in
preview
and on printed pages.
If you need to insert headers and footers on several sheets at once, you can use the Page Setup
.
When working with other types of sheets, such as chart sheets, you can only insert headers and footers on pages using the Page Setup
.
Inserting a picture
The function of adding pictures to the footer field is necessary to create a logo for a company or organization.
Also, this field can display the name of the employee who created the document, contact information and other data.
The logo is added to the upper left part of the page. If necessary, you can place the graphic in any other area of the header/footer.
Follow the instructions:
- Open the document and click on the “Page Layout” button, which is located at the bottom of the Excel workspace;
Fig. 24 – viewing sheet markings
- Click on the left header area;
- In the mode of viewing and editing markup, press the “Drawing” key. It is located on the program toolbar;
Fig. 25 - adding a logo
into each top and bottom section . Try to maintain the size of the logo (no more than 200 pixels in width, otherwise it will be printed on top of the created data table).
- In the window that appears, select the image storage. You can add files from your computer, search for them in the Bing search engine, or use your personal OneDrive storage.
Fig. 26 – choosing a method for loading a picture
Result of adding a logo to the header field:
Fig. 27 – ready-made company logo in the document field
Thematic videos:
« Previous entry
Add or change headers and footers in Page Layout view
Click the sheet on which you want to add or change headers and footers.
On the Insert
In the
Text
, click
the Header and Footer
.
Excel displays the worksheet in Page Layout
.
To add or change a header or footer, click the left, center, or right header text box at the top or bottom of the worksheet page (under Header
or above
Footer
).
Entering new header and footer text.
To start a new line of text in the header or footer, press Enter.
To insert a single ampersand (&) within the header and footer text, enter two ampersands. For example, to include the text "Subcontractors & Services" in the header, enter the value Subcontractors && Services
.
To finish working with headers and footers, click anywhere on the sheet. To close the header and footer without saving changes, press ESC
.
Click the sheet or sheets, chart sheet, or chart for which you want to add or change headers and footers.
Advice:
CTRL-
click them .
[Group]
appears in the header at the top of the sheet .
To deselect multiple sheets in a workbook, click any unselected sheet. If there are no such sheets, right-click the sheet tab and select Ungroup Sheets
.
On the Page Layout
in the
Page Setup
click
the dialog box launcher button
.
The Page Setup dialog box will appear.
.
On the Header and Footer
Click the
New Header
or
New Footer
.
Left field
,
Center
or
Right
and click the appropriate buttons to add header or footer information in this field.
"Header" />
To add or change header or footer text, make changes in the Left
,
Center
or
Right
.
To start a new line of text in the header or footer, press Enter.
To insert a single ampersand (&) within the header and footer text, enter two ampersands. For example, to include the text "Subcontractors & Services" in the header, enter the value Subcontractors && Services
.
Excel has many built-in headers and footers. You can work with sheet headers and footers in the Page Layout
.
For charts and chart sheets, use the Page Setup
.
Click the worksheet where you want to add or edit an embedded footer.
On the Insert
In the
Text
, click
the Header and Footer
.
Excel displays the worksheet in Page Layout
.
Select the left, center, or right header text box at the top or bottom of the worksheet.
Instructions for Excel 2010
Follow the instructions to create headers and footers in Excel 2010:
1 Create a document or open a previously used sheet;
2 Go to the “Insert” ;
3 Find the “Page Layout” and click on the button shown in the figure below;
Fig. 12 – “Page Options” key
4 A dialog box will appear containing 4 tabs. Each of these tabs is designed to edit a separate part of the document layout - pages, fields, footers and sheets. Select the "Header and Footers" ;
Fig. 13 – design settings window
5 Enter the top and bottom text in fields (2) and (5), respectively. Field (1) will display a preview for the added . To set up a unique header or footer for the first page, check the box (4) – special header or footer for the first page;
Fig. 14 - header and footer settings
6 If you don't want to use only text symbols, click on the Create and customize your own headers and footers by adding information about the date, time, logos, file names and other data.
Fig. 15 – window for creating custom sheet headings
Once you've finished creating your item, be sure to click on the Preview button to see how the item will look when printed.
The window for creating custom headers and footers is useful if you cannot find the desired format from the list of default options.
As shown in Figure 15 , it can be created using ready-made tools and functions.
Enter the text of the headings in the appropriate parts of the line (“Left”, “In”).
Click the buttons above to add features to the header and footer field.
Removing titles
Typically, the header and footer is divided into three parts:
- On the left is the company logo;
- In the center (or on the left if there is no logo) – the title of the document;
- On the right is the date, number of pages or author's name.
To delete a header and footer, simply select each of its elements one by one and press the DELETE key; if the header field is empty, it will no longer be displayed on the Excel sheet.
Fig. 16 - deleting header elements in the 2010 version of the program
Removing Headers and Footers in Microsoft Excel
Headers and footers are fields located at the top and bottom of an Excel sheet. They record notes and other data at the discretion of the user. At the same time, the inscription will be end-to-end, that is, when writing on one page, it will be displayed on other pages of the document in the same place. But sometimes users encounter a problem when they cannot disable or completely remove headers and footers. This happens especially often if they were enabled by mistake. Let's find out how you can remove headers and footers in Excel.
Kinds
They can be:
- Top ( Header
) – located at the beginning of each page of the document; - Bottom ( Footer
) – automatically added to the end of the Excel sheet.
Fig. 2 – document structure
Also, in Excel they may differ in content type:
Constant
– duplicated on each table sheet. Typically contains information about the file name. A permanent footer is created if there is a need to confirm that each table belongs to one document;
Intermittent –
changes on each sheet;
Stepped –
contains headings of several levels;
Categories –
type of official design, which includes the name of the publication, document, section.
Fig. 3 – header location
Ways to remove headers and footers
There are several ways to remove headers and footers. They can be divided into two groups: hiding headers and footers and removing them completely.
Method 1: Hiding Headers and Footers
When hidden, headers and footers and their contents in the form of notes actually remain in the document, but are simply not visible from the monitor screen. There is always the option to enable them if necessary.
In order to hide headers and footers, just switch Excel from working in page layout mode to any other mode in the status bar. To do this, click the icon in the status bar “Normal” or “Page”.
After this, the headers and footers will be hidden.
Creating different headers and footers for even and odd pages
If you plan to print on both sides or staple a report, you may need different headers and footers for even and odd pages. For example, on even-numbered pages, you can place the file name and page number information and print it on the left side of the page, while the header and footer text on odd-numbered pages appears on the right side of the page.
To create two alternative headers and footers for your report, select the Different footers for odd and even pages check in the Options the Design tab (remember, this tab is displayed when the cursor is in one of the header and footer sections).
After that, create a header and footer on the first page (it will now be marked as an odd page header) and then on the second page (it will now be marked as an even page header). You can use the same template, but align it left on even-numbered pages and right-aligned on odd-numbered pages.
Now you know how to create Header and Footer in Excel .
Removing or hiding headers and footers in Excel
The fields located at the top and bottom of the Excel document outside the table are the headers and footers into which the user adds various auxiliary information, which is end-to-end, in other words, will be shown on all sheets (if there are several of them) in the same place .
Despite their usefulness, in certain situations, previously added headers and footers become unnecessary and need to be removed. Or they were added by accident and there was no need for them in the first place.
Addition
Let us immediately note that the procedure for inserting headers and footers for versions of Excel 2007, 2010 and 2016 will be the same. The location and icons of the buttons may differ only slightly, but the essence is the same. For example, we will use the 2007 editor.
- Go to the Page Layout tab on the Control Panel, in the lower right corner of the parameters block, click the small arrow.
- In the dialog box that appears, look for the Header and Footers shortcut
- At the top is the Header block. You can select a ready-made template from the drop-down list and view it in the field above.
- There is the same block for the footer.
- The editor provides the ability to create custom areas. To do this, there are two corresponding buttons between the viewing fields.
- The window contains three blocks that correspond to the position on the sheet: right, left and center. There is also a toolbar that contains buttons for adding pagination, images, date, time and text information.
For example, if you want your document to display the current time in the bottom right, the compose window would look like this:
And this is how it appears on the worksheet:
Method 1: hide headers and footers
If we decide to hide the headers and footers, they will essentially remain on the sheet, but will not appear on the screen. This is convenient if we then suddenly decide to return them back.
Pay attention to the program status bar. Headers and footers are displayed in the “Page Layout” mode. By switching to any other mode (“Normal” or “Page”), we will hide them. You can do this by simply clicking on the desired option.
As a result, the document will be displayed without headers and footers (in our case, the normal mode is selected).
Method 2: Page Setup Menu
The second option is also suitable for those users who simply do not need to go to the page layout view to create headers and footers, but still need to set their parameters and specify the content. There is a separate tool specifically for this in the “Page Options” menu.
- While in Normal view, switch to the Page Layout tab.
- Next to the “Page Options” line, click on the drop-down arrow icon to open this menu in a new window.
- Go to the “Header and Footer” tab and review the settings presented. At the bottom there is a number of options that can be activated or disabled by checking or unchecking the boxes.
- As soon as you click on the “Create Header” or “Create Footer” button, a new window will appear where you select the location and content of the block. Pay attention to the buttons present: they allow you to add the page number, date, time and other data to this block.
- Go to the Page Layout view to see the result of the created header and footer.
This method is good because it allows you to add automated elements to the footer, which change dynamically as you work with the document, without any difficulties or manual input.
Method 2: manually remove headers and footers
When you hide headers and footers by changing the display mode, they actually remain in the document and will be printed on sheets of paper when it is sent to the printer. You can check this in the preview area (menu “File” - item “Print”).
If the work is carried out only in electronic form and there are no plans to print the document, you can leave everything as is. Otherwise, the headers and footers must be removed.
- While in the “Page Layout” mode, switch to the “Insert” tab.
- In the “Text” tool group, select “Header and Footer”.
You can also, instead of this action, hover your mouse over the area with headers and footers, when a frame appears around them, select one of the three sections and double-click on it to go into editing mode. - We delete all entries in the headers and footers. To exit editing mode, simply left-click anywhere in the table outside the header and footer area (or you can press the Esc key on your keyboard).
- Footers are removed in the same way.
- After deleting headers and footers, they will be permanently erased without the possibility of returning them. Therefore, if necessary, they will have to be added again.
- We switch to normal mode, since it is more convenient to work with the table in it.
Change or remove a header or footer on one page
Change or remove a header or footer on the first page
Double-click the header or footer area of the first page.
Select the checkbox to differentiate headers and footers on the first page
to make sure it is selected. If not:
Select the Custom footer for first page
.
The header or footer content on the first page is removed.
Note:
The "Special First Page Footer" option is a toggle, so make sure it's turned on.
Add new content to your header or footer.
To exit, click the Close footer window
or ESC key.
Change or remove a header or footer from one page
To remove or change headers and footers on individual pages in a document, first insert a section break.
Important:
Section breaks are different from page breaks. If there is already a page break before the page you want to change the header or footer to, remove the page break and replace it with a section break as shown below.
Click or tap where you want to start a new page without a footer.
Go to Layout
>
Breaks
>
next page
to create a section break.
Double-click the header or footer area to open the Header & Footer
running title.
To disable links between sections, click the Link to Previous
.
Select top
Header or
Footer
, and then do one of the following:
Select Remove Header
or
Remove Footer
.
Add or change header or footer content.
(If you want to remove or change both headers and footers, you will need to repeat steps 3-5.)
To return to the main text of the document, click the Close Header and Footer Window
or press ESC key.
Change or remove a header or footer on the first page
Open the Header and Footer
by double-clicking in the header or footer area (at the top or bottom of the page).
Select the checkbox to differentiate headers and footers on the first page
to make sure it is selected. If not:
Select the Custom footer for first page
.
The header or footer content on the first page is removed.
Enter new content in the header or footer.
To return to the main text of the document, click the Close Header and Footer Window
or press ESC key.
Changing the header or footer on another single page
To change headers and footers from individual pages in a document, start by inserting a section break.
Important:
Section breaks are different from page breaks. If there is already a page break before the page you want to change the header or footer to, remove the page break and replace it with a section break as shown below.
Click or tap where you want to start a new page without a footer.
Go to Layout
>
Breaks
>
next page
to create a section break.
Open the Header and Footer
by double-clicking in the header or footer area (at the top or bottom of the page).
To disable links between sections, click the Link to Previous
.
Select top
Header or
Footer
, and then do one of the following:
At the bottom of the menu, select Remove Header
or
Remove Footer
.
Editing or changing the top
or
footer
.
(If you want to change the headers and footers, you will need to repeat steps 2-5.)
To return to the main text of the document, click the Close Header and Footer Window
or press ESC key.
The header and footer change on the first page after a section break.
Change or remove a header or footer on the first page
Select Insert
>
Headers and footers
.
On the right side of the white area that appears at the top of the document, select Options
>
Special header and footer for the first page
.
The header or footer content on the first page is removed.
Enter content in the header or footer on the first page.
Note:
The "Special First Page Footer" option is a toggle, so make sure it's turned on.
To exit, click outside the footer.
Method 3: Remove headers and footers automatically
In addition to the option discussed above, there is another way to remove headers and footers - automated. It is convenient in cases where there are several documents in a book and you need to quickly remove unnecessary information from all sheets at once. Although this method is also applicable when working with one sheet.
- Hold down the Ctrl key on the keyboard and click the left mouse button to mark all the sheets from which you want to remove headers and footers.
- Switch to the “Page Layout” tab, on the program ribbon, click on the small arrow in the lower right corner of the “Page Options” tool group.
- In the page settings window that opens, go to the “Header and Footers” tab. Click on the current footer value (header or footer).
- In the list that appears, select the line “No”. We perform a similar action for the footer, if required. When everything is ready, click OK.
- As a result of these actions, headers and footers will be removed from all selected sheets.
Creating unique headers and footers for the first page
In Excel, you can set a separate header and footer for the first page, different from the rest. To do this, just check the Special header and footer for the first page checkbox in the Options the Design tab .
After checking this box, set the header and footer for the first page and the second page for the header and footer for the rest of the pages. Creating your own headers and footers was discussed in the previous section.
This feature is typically used when the report contains a cover page with a footer. As an example, let's say that in our report, on all pages except the title page, the footer should display the current page and the total number of pages. To do this, you need to select the Special header and footer for the first page , and then define a centered header and footer with a code for the page number and total number of pages on the second page, leaving the header on the first untouched.
Excel will keep the correct numbering without displaying it on the cover page. So, if the report consists of six pages (including the title page), then the second page, from which the factual information begins, will contain the header Page 2 of 6, the next one - Page 3 of 6, etc.
Working with headers and footers in Microsoft Excel
To add a table title, date, numbering, or some other similar information, fill out the headers and footers in Excel. Such objects will be present on every sheet. You can see them only in markup mode. They are often inserted into documents that are intended to be printed.
To add a table title, date, numbering, or some other similar information, fill out the headers and footers in Excel
These are small indents at the bottom and top of the table. You can write text in them, insert a picture, or specify the path to a file.
Excel Headers and Footers
In general, a footer is a component of a page that carries some information about the document itself . Most often, these components can be found in collections of short stories, when each story has an indication of the author and its own title at the top. This example can be considered the simplest and most common. The second common option is pagination .
It should be understood that in Excel, headers and footers work in the “ Page Layout ” mode, so the document will automatically be divided into its component parts.
Types of headers and footers
Conventionally, these elements can be divided into 2 types:
The name varies depending on the position of the element relative to the main text. On the other hand, the types of headers and footers can be classified according to their purpose:
- pagination ;
- an indicator of the date of creation or revision of the document;
- adding service information for the user (for example, attribution);
- book marking indicating sheets.
Data types
The methods described above are also typical for use in Word. Excel has similar rules, but there are also a few key differences that make up minor differences . More specifically, you can look at the program window on the “ Header and Footers ” tab.
It is not difficult to notice that in addition to the location of the element on the sheet, there are also proposed options for placement in the element itself. Buttons allow you to automatically insert a header and footer in Excel:
- Page number. Adds numbering to the specified area. The option works automatically and continues to number pages (not sheets, but pages within a sheet) as soon as content appears on them. If you immediately set the header and footer with the number of pages (before the content appears in the cells), the program will display the “#” symbol until the data is entered.
- Number of pages . In the specified location, displays the total number of pages used in the document. For this element to work correctly, the cells must contain data or formulas. Simply placing the cursor on a blank page will not add it to the total count. If you skip one page and enter data on the next, both will be added to the total.
- The current date . It is exactly the current date for the moment of editing. If you save and transfer a document, the exact moment it was created will be displayed. But if you open a cell with a date and look at the expression, the current moment in time will be automatically rearranged.
- Current time . Works similar to the “Current date”, but concerns the marked point in time. Quite easy to use and ideal in combination with a date to check when changes were last made to a document.
- The path to the file . Displays the location where the document is stored on the computer's hard drive or in a network environment. Useful if you need to make local backups. It is noteworthy that this command is used in conjunction with another data option “File name”. The latter displays only the title, without indicating the path to the document.
- Sheet name . If each sheet has its own names, you can display a mapping of these same names to each print element. It can be useful when printing and for systematizing changes if you need to make corrections to the structure of the sheet itself.
- Drawing . Places an image as a footer. Read more about this opportunity further in the text.
How to enable markup mode?
To ensure all formatting appears exactly as it would appear on paper, turn on Markup mode.
- Open Excel.
- In the status bar (bottom right) there will be small buttons and a scale slider.
- If you hover over them, a tooltip will appear.
- Find "Page Layout". It is located between “Normal” and “Page”.
- After this, the headers and footers will appear.
- To remove them and continue working in standard form, click on the “Normal” button. If it is not active, then one of the notes is highlighted. Click anywhere in the table - then you can change the mode.
To ensure all formatting appears as it would appear on paper, turn on Markup mode
These elements have three editable fields. You can, for example, insert the file name into one of them, the date into another, and a logo or icon into the third.
Method 1: Insert Tool in Normal View
Almost all editing of table contents in Excel is done in the normal view, and not everyone needs advanced options to insert a header and footer, so you can add these elements in the current mode by following a few simple steps.
- On the worksheet, open the Insert tab and expand the Text drop-down menu.
Several tools will appear, among which find and select “Header and Footers”.
This will automatically enter page layout mode, so be sure to exit when you're done.
Start writing the header, choosing the appropriate location for this.
Scroll to the bottom of the sheet to add a footer. Keep in mind that you can easily specify the text position to be centered, left, or right.
This was a standard example of adding a header and footer in a regular view without additional editing and introducing table elements, which is important for users who do not need to fine-tune this component. Please note that added headers and footers are not displayed in Normal view mode.
Adding and editing
Notes in tables can be edited in two ways. Through parameters they can be attached to sheets and diagrams, through markup - only to sheets.
Page settings
To make headers and footers in Excel, follow the instructions.
- Select a chart or worksheet. To “hook” several parts, click on them while holding down the Ctrl key.
- If you need to cover the entire document, right-click on the sheet tab (at the bottom of the window) and select “Select All”.
- Open the "Markup" section in the menu bar at the top.
- In the Page Setup panel at the bottom right there is a small button in the form of a corner with an arrow. Click it.
- Go to "Header and Footer". Their settings are located here.
- Click on the “Top” or “Bottom” drop-down list and select one of the templates. There is a numbering of sheets, their number, the name of the book, used for editing utilities, and the like.
- To add information there that is not in the list, click on “Create top”/“Create bottom”.
- There will be three blocks in the window that opens. They correspond to three header and footer fields.
- Type something in them to make a text note.
- Above these blocks there are buttons responsible for the content. Hover your cursor over them and a tooltip will appear. If you click, for example, “Insert Picture,” you can add a picture.
- Information and links in these objects are displayed as formulas. The path will be indicated as &[Path]&[File], and the current date will be indicated as &[Date]&[Time].
- To remove this, simply erase the formula.
To make headers and footers in Excel, follow the instructions.
If you want to make special data for the first page or different text in even and odd sheets, check the boxes next to the desired options.
- Open Settings - Header and Footer.
- There are settings at the bottom of the window.
- O and “Change scale” so that when editing a document you do not have to change the size of the notes at the same time.
- There is also an item “Different for even and odd pages”. If you enable this function and click on “Create top” (or “Create bottom”), the window that opens will have two tabs - for even and odd.
- To make a “Cover Page,” check the box next to “Special for First Page.” Accordingly, if you activate this setting and click “Create Top”, a window will also appear with two sections - for inserting regular notes and one unique one.
Removal
Here's how to remove headers and footers in Excel:
- Just switch the view from markup to something else. And these elements will not be noticeable.
- If you need to not just hide them, but completely erase them, go to Insert - Header and Footer and manually delete information from each block using the Delete or Backspace key.
This method can be time-consuming. Especially when working with large amounts of data. You don't have to spend hours just trying to get rid of notes. Here's how to remove headers and footers in Excel in the entire document at once, without going through each block:
- Select the sheets or charts in which you want to erase this information.
- "Markup" tab.
- In the Page Setup panel, click on the small icon that looks like a corner with an arrow.
- Section "Header and Footers".
- In the "Top" and "Bottom" drop-down lists, select the "None" option. These items will disappear in all marked areas.
Excel will help you in your daily work
Headers and footers are used to create notes in various Microsoft Office documents. Usually they add company logos, numbers, titles, first and last names of the author, contact information, signature, beginning and ending of letters (for example, “Good day, colleagues!” or “With respect, ...”). Any information that needs to be taken out of the margins is placed there.
We split the MS Excel sheet into printable sheets
By default, Excel sometimes splits the page into sheets in a completely different way than we would like. To take control of the process, the easiest way is to go into page mode
markings.
Your table on the sheet will immediately appear surrounded by a thick blue line. Don’t be alarmed - its vertical borders show the boundaries of the sheet, and the horizontal ones show how the document will be broken when printed. If you are not satisfied with the result, just move the mouse cursor to the border and when it changes shape, hold down the left button and drag the border to where you think it will be more appropriate.
Please note that if you return to normal editing mode from the page, the blue borders will disappear, but the places where they passed will remain visible as thin dotted lines. These lines seem to split our electronic Excel table into imaginary printed ones.
I have always really liked this “feature”, so I usually “set boundaries” as soon as I create a new document. To do this, nothing more is required than simply switching to the “page” view and immediately returning back to the “normal” view.
And here is the final view - how our table will be printed. The title, date and time, as well as the sheet number in the footers and the first line duplicated on all pages with an explanation of the column names have been added to all printed sheets of the document.
Page layout
When working with a file, headers and footers can only be seen when the sheet is displayed in Page Layout mode. You can select this mode on the “View” tab in the “Book viewing modes” block.
Let's add text - the page title. For example, let's indicate the name of the travel company for the report table on hotel orders for the period. To do this, select the “Header and Footer” menu item in Excel in the list of “Text” commands on the “Insert” tab.
The sheet will immediately appear in layout mode, and we will see highlighted text fields at the top and bottom of the page. Here you can insert the necessary information. Both headers and footers are divided into three parts, each with a different text or object added to it. Thus, you can add, for example, a company logo on the top left, the name in the center, and details on the right. Likewise at the bottom of the page.
It should be noted that the ampersand (&) is a special character. Therefore, if the text you want to add contains this character, enter 2 characters in a row. That is, in the text “Horns & hooves” write “Horns && hooves”.
After completing entering and changing headers and footers in Excel, click in any cell to exit editing mode. If you do not want to save your changes, press the Esc key.
How to make different headers and footers in one Word document for any pages
A clarification is necessary here: this problem can only be solved if the pages belong to different sections. To make it completely clear, let me explain: different headers and footers are only possible in different sections. Moreover, the concept of “section” in Word is a technical term that can, but does not have to, repeat the structure of your document. If desired, each page can be marked with a section break mark. And only under this condition in one Word document can you write different headers and footers on different pages.
So, in order to make different headers and footers in separate sections of a Word document, you first need to enable the break mechanism. To do this, perform the following actions: place the cursor at the end of the page or other desired place, then the “Layout” tab - “Page Options”
—
“Insert a break”
—
“Break sections from the next page”
(see Fig. 3).
figure 3
Please note that this is how you need to separate each section, that is, highlight pages intended for some special headers and footers in a similar way. Next in the “Design”
, in the
“Transitions”
, deactivate the
“Same as previous”
, if it was clicked (see Fig. 4). This procedure is used when it comes to headers, footers and, in some cases, side footers.
Figure 4
After this, on each page of the new section in manual entry mode you need to add your own header and footer. This work is painstaking and slow, but, as they say, “hunt is worse than captivity.” The main thing is that there is some logical sense in this.
If the author has the intention of placing a center footer, that is, an insert to highlight any part of the text, only on one page, then in the “Page Breaks”
you need to follow the green arrow. How to insert side and center footers was discussed in the first part of this article (see link above). In Fig. Figure 5 shows an example of such formatting.
Figure 5
How to remove them
By deactivating the “Markup” mode in the “View” menu, the user will no longer see headers and footers when working with a document, but they will remain when printing. If you are interested in how to completely remove headers and footers in Excel, then you need to not just hide them, but erase them.
How to view headers and footers
The answer to how to delete notes is very simple - the same way they were created. Go to page layout mode or select the “Insert” – “Header and Footers” option. The user will again be able to edit footnotes. You should erase the information from the blocks and then return to normal mode in the “View” tab.
If the document is quite large and there is no desire to tinker with each sheet separately, then you can remove headers and footers from all pages at once:
- When you need to delete a header and footer on each page of a document, you need to right-click on the sheets tab and select the “Select All” option.
- In the Layout menu (top panel of Excel), select the small arrow in the lower right corner of the “Page Setup” block.
- In the "Header and Footer" section, select "None" from both drop-down menus.
- By clicking “OK”, the headers and footers will disappear from all selected pages in the document.
This is how you can simply delete headers and footers in Excel if they contain information that is unnecessary for the user.
How to remove headers and footers in Word from one or more pages except the first
This task is the opposite of the one we considered in point 2. You can remove headers and footers in the Word text editor from several pages at once only if they are pages of the same section. If you need to remove the header and footer from only one page, then it will have to be separated into a separate section. Don’t forget, colleagues, to check the “same as previous”
. It has an unpleasant feature of turning on/off spontaneously. After that, you need to go to the “Designer” and delete the header and footer separately.
When it comes to inserts (side, central), the same rule for highlighting sections applies. After which they are deleted by first clicking the right mouse button to open a window with the line “cut”
, and then left-click on the indicated inscription. If the insert already contains text, then first delete it, and then the field itself.
So, friends, today we looked at all the possible cases of creating headers and footers in Word documents. If you still have any questions, ask them in the comments. In the near future, I will most likely record a video on the same topic, and then insert it into the post.
Goodbye. Your guide to ms Word 2016 GALANT.
Excel sheets designed for printing often have elements at the top or bottom of the page. They contain company logos and details, the date and time the document was created, page numbers, etc. These elements are called headers and footers in Excel. Let's learn how to work with them.
Built-in elements
MS Excel offers built-in elements and even entire headers and footers that are already pre-installed and ready to use. They are available for selection in the menu, respectively, of the top header and the bottom “footer” in the menu for working with footers.
The most suitable text is selected from the list, containing the page number, date, name or path to the file. If none of the options is suitable, you can arbitrarily combine the necessary elements using the buttons on the “Header and Footer Elements” panel in Excel (the “Design” tab), adding not only the serial number, but also the number of pages, the date and time the file was created, the name and path to the file, name of the sheet or drawing.
After working with the headings, you can click anywhere on the page to edit the rest of the information on the sheet. At the same time, you will continue to see headings with “footers”. If you need to switch to normal sheet viewing, just turn on normal mode on the “View” tab, “Book View Modes” toolbar.
Editing
To format the header and footer, you need to enter a special Excel workbook display mode. You can do this in two ways:
- Through the View tab on the Toolbar by clicking the Page Layout button.
- Via the bottom panel with a quick button
In this format, customization of the upper or lower area becomes available.
Point at any of the three parts and click. A new tab will appear on the main panel - Designer.
The tab contains ready-made templates, elements to add to the footer area, buttons for transitions between areas, as well as additional settings. The scaling and alignment options are enabled by default. A special footer for the first page is needed for official documents where the title page is not numbered. The options block also allows you to differentiate between the settings of even and odd pages.
How to make different headers and footers in Word for the first and other pages
This operation can be performed in two ways:
1.1 In the first case, we work through the “Designer” panel.
In order to enable it, you need to activate the header and footer fields.
This can be done by double clicking on their area. After this, you need to go to the “Options”
and check the box
“special header for the first page”
. Figure 1 shows the entire chain of actions.
Picture 1
1.2 The same procedure can be carried out in another way: through the “ Layout”
-
“Page Settings”
-
“Paper Source”.
The line
“Differentiate headers and footers on the first page”
must be checked (see Fig. 2).
figure 2
After this, all that remains is to enter one text in the footer of the first page and another in the second; On all subsequent pages, the text from the second page will be duplicated automatically. Different headers and footers in one Word document are ready.
Column headings on each MS Excel page
If the table is large enough and does not want to fit into the size of one printed sheet, the first step would be to duplicate the table column headings on each page of the printed document.
Go to the Page Layout
", and in the "
Page Setup
" group, select the "
Print Headers
" tool.
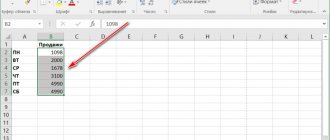
On the “ Sheet
” tab in the window that appears, pay attention to the “End-to-end rows” and “End-to-end columns” fields. The first is suitable for horizontal tables, the second for vertical ones.
Click on the “Through lines” field and select the area on the sheet that you would like to see on all sheets of your document when printed. Ready.
Headers and footers and page numbers in MS Excel
Open “Print Headers” again and go to the “Header and Footer” tab. Click the “Create header” button and fill in the required fields, as our imagination requires. Pay attention to the control buttons:
- Date (automatically inserts the document creation date)
- Time (automatically inserts creation time)
- Page number (the serial number of the page in the document)
- Number of pages (number of pages in the document)
- Text Format (allows you to set the font size and style)
- File path (path to the file on your computer)
- File name (document file name)
- Sheet name
- Picture (inserting a picture in the footer)
Moreover, if everything is clear with the date, time and page number without problems, then the path to the file and the file name at first raise questions. Do not doubt their usefulness - you will need them when you need to find a file on your computer in a month and edit it!
Once the header and footer text is entered, click the “OK” button and apply the changes.