Hi all! Today I will tell you how to remove a page break in Word. Microsoft Word has two types of page breaks. First – built-in or standard, which is created automatically after the end of the sheet. It is impossible to remove it, since it is present in the program by default. But it can be reduced using settings.
The second is a manual break, which is set by the user himself. It is most often placed at the end of a chapter, when it is necessary for the next block of text to begin on a new page. The problem is that when formatting or copying text, the break may incorrectly offset and display all the text.
Let me remind you that in order to see this gap, you need to enable the display of hidden symbols. To do this, find the icon in the “Main section” (subsection “Paragraph”) and turn it on. Or you can use the hotkey combination Ctrl + *.
NOTE! The instructions below apply to all versions of Microsoft Word 2007, 2010, 2016, 2022, 2022, etc. If, while reading the article, you notice an error, or something is not clear to you, write in the comments.
Removing the “From New Page” setting
In Word, you can set a break in other ways, for example, using the paragraph setting. In this case, there will be a gap, but it will not be displayed in hidden symbols.
- Set the slider to the first line at the very beginning of the next line after the page break.
- Go to “Layout”, and in the “Paragraph” section, click on the square with the arrow.
- Uncheck “From new page” and click “OK”. If it is not there, then most likely you installed the slider in the wrong place. There are also two more options “Do not open from next” and “Do not break paragraph”, you can try one of these options.
How to remove page breaks in Excel
To remove breaks, you also first need to switch to page mode, as described in the previous paragraph. Next, you need to select the column to the right of the break or the line below it, go to the “Page Layout” tab and click “Breaks” → “Remove Break”.
The same can be done through the context menu by right-clicking and selecting “Remove page break”.
Setting up headers and footers
It's possible that the settings for the headers are too high. At the same time, you may not have them, but Word has already prepared a place for them. This value can be reduced in the settings so that the margin at the top and bottom becomes slightly smaller.
In the “Layout” section, open “Page Options”.
Go to the “Paper Sources” tab and find the “From Edge” setting. If you want to reduce the indent from below, then select “To the footer”; if you want to reduce the indent from above, then select “To the header”. Let me remind you that by default they are 1.25 cm, but you can reduce this parameter.
Function description
Page break (move to a new sheet) is a command that involves moving all subsequent text in the document to a new sheet. The described function is used when:
- the need to enter text in a new section;
- inserting tables or images that extend to the next sheet;
- the need to start writing information from scratch.
It is impossible to replace the described function by pressing the “Enter” button, since they perform different operations and this will affect the format of the document.
You can add a transition to your document by selecting the “Page Break” function in the “Insert” tab. The function can be executed both at the end and at the beginning of the sheet.
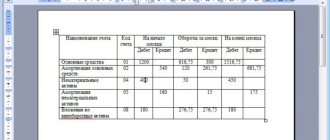
After the table
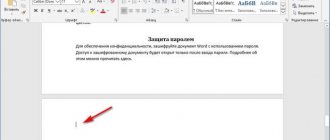
If the table is located right next to the end of the page, then another sheet will be created. In theory, there will be a transfer sign there.
Enable display of hidden characters (Ctrl + *).
Yes, he is here. But the problem is that it is impossible to remove it, no matter how you do it. But we can make it invisible. To do this, select it with the mouse.
Press the Ctrl + D keys. And on the “Font” tab, set the “Hidden” setting.
After you click “OK” nothing will change. Now try turning off the display of symbols. Hurray, the page and the extra gap have been removed.
How to Create a Page Break in Excel
To print a table sheet on a certain number of pages, the breaks function is useful. They can be attached to both columns and rows.
For convenience, it is better to go to the “View” tab and switch to page display mode by clicking the button of the same name. You can simply click the icon next to the zoom slider. Automatic breaks will be shown as dotted lines, while manual breaks will be shown as solid lines.
Select the column to the right of where you want to insert a vertical break, or the row below which you want to place a horizontal break. Go to the Page Layout tab, click the Breaks button, and then click Insert Page Break.
Another option is to simply right-click on a column or row and select Page Break.
Spacing after and before paragraph
There may be unwanted space between paragraphs at the end of the sheet, which theoretically is not a break, but can greatly spoil the appearance on the printed page. However, it is not displayed in any way when displaying hidden characters is enabled.
Let's try to remove this space:
- Highlight the last paragraph of this sheet.
- On “Home” in the “Paragraph” subsection, click on the small square with an arrow to open “Paragraph Options”.
- We are interested in “Interval”, set the required values. In my case I set 0 after the paragraph. In the same way, you can remove the space before the text block.
- There is a second way to quickly remove the spacing after a paragraph - we also find the “Spacing” button there, click on it and then select “Remove spacing after a paragraph.” In the same way, you can remove the spacing between paragraphs.
I advise you to read more about intervals in this article.
Things to consider when using a hard divider
A user-created transition works exactly the same as a normal transition that occurs when a worksheet is filled with data. The only difference is that you decide which paragraph should be moved. In order to do this, left-click in front of the fragment that you want to transfer.
Splitting data using Ctrl + Enter is no different (except for the Breaks feature, which provides more options). This combination is recommended for speed and convenience. Both when pressing Ctrl + Enter, and when dividing sheets in another way, a technical symbol is added to the text, which creates a transition.
If you used a hard delimiter in a Word file, check the document carefully before printing. You can do this in preview mode. It happens that when dividing content into sheets, the file structure changes and there is no need to use the function.
Do not use strict division of text to organize numbering in the file. Word offers enough options to solve this problem - no need to use formatting.
Sheet Layout
If you look, all pages have the same indents on the left, right, top and bottom. But these same indents can be changed, thereby reducing the gap between the sheets. To do this, go to “Layout”, click on “Margins” and select the “Narrow” option. You can also adjust all these paddings manually by clicking on the “Custom Margins” label.
Bottom line
Break in Word is a function that allows you to format text in accordance with the requirements for printing or simply make it more convenient to read. The program has several ways to make a transfer, as well as customize it. Unnecessary divisions can be removed - also using several options. However, it is recommended to keep an eye on the items at once, as it can be difficult to deal with all the transfers at once.
Removing all breaks
But what if we need to remove not just one, but all the breaks. Yes, you can do this by hand, but what if the book is just huge? – this can take quite a lot of time. To do this, we can use search and replace.
- Click on the Ctrl + F buttons to open the search menu. Next, enter the code in the line:
^m
- And press Enter.
- After this you will see the number of all breaks. Using the arrows, you can switch between them and delete them using the selection and the Delete key (as we did in the first chapter).
- If there are a lot of breaks and everything needs to be removed, then we’ll go a different route. Click the arrow to the right of the search bar and select “Replace”. Or press the Ctrl + H buttons.
- Enter in the top line: ^m
- There is no need to insert anything into the bottom line - click “Replace All”.
- After this, a window will pop up, click “No”.
We remove breaks in Word by replacing them from all pages
If you need to remove breaks in a large document in Word, manual removal will take a lot of time. Instead, you can use the built-in replace function, which will make everything faster. To do this you should:
- On the Home tab in the top bar, click Replace in the right corner. You can also use the keyboard shortcut Ctrl + H.
- At the bottom of the window that appears, click “More.”
- In the “Find” field you should set “Page Break”. You can set this value using the “Special” tab.
- The “Replace with” window must be left blank.
- Click Replace All to remove all gaps, or Replace Next if you want to control the process.
- When all the necessary breaks have been removed, click "OK".
The concept of "Section Break"
What properties does the document have? This:
- Print area boundaries
- Header and footer (we learned this in lesson 38)
- Page orientation (portrait or landscape)
- Text Style Set
I do not mention such properties as the author of the document, the number of characters, pages, and so on.
As we create the document, we can create new text styles (of course, without getting carried away), but the boundaries of the printed field, page orientation and footers are set for the WHOLE document.
But what if you need a page in landscape mode, for example, the document has a large table that will be perfectly readable in landscape mode:
To do this, it is possible to create several sections in the document.
| You can figuratively imagine that we cut the document into several parts and each part sets its own parameters for page layout, page orientation, headers and footers with changing information . |
The “Section Break” command is located on the Page Layout ribbon → Page Setup group of commands → Breaks command → drop-down menu → second section of the Section Breaks drop-down menu → 4 types of sections:
- Next page
- Current page
- Even page
- Odd page
Let's take a closer look at the types of section breaks:


