iCloud is a cloud storage available for Apple phones, iPads, iOS or Windows computers. This storage is convenient for storing your files, especially when you need to free up memory on your iPhone. If you need to download an image from iCloud to your iPhone, Mac or computer, then below is a list of ways to do this.
How to get photos from iCloud
In order to save smartphone memory, Apple developers created a special virtual disk, with which all files can be automatically placed on the disk and easily synchronized with other devices.
The application allows the user not only to view his favorite pictures, but also to save them to other storage devices, for example, to PC memory or to an SD card in a smartphone.
Two key questions that Apple product lovers ask:
- How to upload photos from iCloud to your computer?
- How to upload photos from iCloud to iPhone?
In both the first and second cases, the application must be activated on the smartphone and the option “ download my Photo Stream ” must be enabled on it.
To implement the task, you need to take several steps:
- enter settings;
- go to the iCloud section;
- select the “photo” section;
- Find the “ upload photo ” item and activate it.
This setup method will be relevant for all types of Apple products. As for PCs and gadgets running Windows, you will need to use an online service for them.
Before you transfer a photo from iCloud to your computer or view it on your gadget, you need to check whether you have access to the Internet or Wi-Fi.
Method 1 Using PC
How to download photos from iCloud to computer?
This question interests both experienced users of the Apple brand and beginners.
There are several options for completing the task.
Using the web version of the cloud
This is one of the simplest options. It will be relevant for devices running on an operating system that does not belong to this brand. For example, for a PC or tablet on Windows or Android. In this situation, there is no need to install special applications. The main thing is to have access to the Internet.
Before you transfer photos from iCloud to your computer, you need to make sure that they are synchronized and transferred to the cloud.
If this function is not available on your smartphone, you will not be able to copy images.
Next, you need to follow simple rules from iCloud “How to download all photos”:
- Open Internet Explorer and go to the link icloud.com .
- On the page that opens, enter the login and password for your personal account.
- The service will ask you to agree to the terms and conditions of use; to confirm, you must click “accept.” A menu will appear in front of the user.
- In it you need to select “ iCloud Drive ”. This will allow you to go to the storage where the necessary photos are located.
- In the menu you need to find the “ My Photos ” folder and click on it.
- All pictures placed in the cloud will appear in front of the user. To extract them, you need to select the files and click on the “download” icon.
This method of obtaining information from the cloud allows you to download only selected files. In this case, it will not be possible to upload the necessary images in one file.
Using an application on Mac OS linked to one Apple ID.
This option is much simpler, because the cloud is already tied to a specific person and for its subsequent use there is no need to log in to a personal account.
Before you select a photo in iCloud on your computer, you need to go into the device settings, go to the cloud settings section and activate the photo stream function.
A separate folder will be created on the PC where all images from the cloud will be downloaded. They can be moved to another storage medium.
Method 2 Download to iPhone
If for some reason the use of virtual storage is not convenient for the owner of an Apple device, he can transfer the necessary information back to the gadget.
This is quite easy to do:
- Before you upload photos from iCloud to iPhone, you need to transfer the necessary files to your personal iCloud account.
- Then you need to log in to iCloud on another gadget and select synchronization in the settings.
- All images will be automatically downloaded to your device. All images can be transferred from this folder to another.
The method described above will be relevant for those who do not know how to return photos from iCloud to their phone, or want to access images on another smartphone.
How to use the capabilities of Cloud.Mail.Ru
To receive free 8 GB you just need to register a mailbox on Mail.Ru. Directly from the mail interface, go to the Mail.ru Cloud service and use all the capabilities of the cloud service.
So, you have the cloud program installed on your smartphone or you are logged in through the web interface using a browser. Now available to you:
- uploading files and the ability to share a link to download them;
- creating personal folders, changing access settings;
- working with files: renaming, deleting, moving between folders;
- creating new data files directly in the cloud: text documents, presentations and tables similar to those created in Excel;
- convenient storage of backup copies of various data and their comfortable sharing if necessary.
All files uploaded to the cloud will become available on any of your devices, where you only log in to Mail.
How to use the MailRu cloud? In fact, everything is very simple. Using the web interface as an example:
- “Download” button—save files from the device to the cloud.
You can upload files to the cloud by simply dragging and dropping
- “Create” button with a drop-down list - creates folders, documents, tables and presentations.
In the Mail.ru cloud you can create and edit text documents and Excel tables
- “Download” - this button answers the question of how to download a file from the mail ru cloud: select it with a checkmark and click it.
- “Delete”—deletes the selected data.
Removing marked files from the mail ru cloud
- “Get link”—gets the URL to download the file.
You can get a link to a file in three simple steps
- “Set up access” is an option for collaboration. Allows Mail.Ru users you invite to edit files in your storage or create new documents in a public folder.
To use access settings, you need to select the folder to which you want to provide access and click “Configure access”.
Then, in the window that opens, configure access settings.
In this example, settings have been made for collaboration in the Mail.ru cloud
These are the basic capabilities of the web interface; they are duplicated in applications for computers, tablets and smartphones, which also have their own “tricks”.
Possible problems
If you encounter difficulties during synchronization, you need to follow these simple steps:
- re-login to iCloud;
- reboot the device;
- Make sure that all the necessary items are selected in the settings.
As a last resort, you should contact the company’s technical support and find out what could be causing the problem.
Photos on modern smartphones tend to take up a lot of memory. In order to be able to store files and not clog up the phone’s memory, there are cloud storages. For iPhone lovers, you need to know exactly how to download photos from iCloud to iPhone.
Adding photos to iCloud
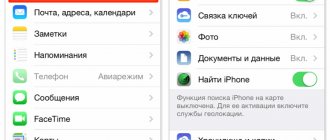
In order for photos to be added to cloud storage, you first need to select the necessary items in “Settings”. If iOS is updated to a version no lower than 8.1, then iCloud can work on this firmware. So, to activate the cloud you need:
- Go to "Settings".
- Next, find the button "iCloud".
- Then click the “Photo” button.
- Activate the button by moving it to the right or press «ON
- Choose your photo storage options. “Optimize storage on iPhone” or “Save originals” buttons
Now all photos will be automatically uploaded to the library when connected to a WiFi network
Method 1. Download photos from iCloud to iPhone
Photos on iPhone can be synced in two ways: optimization and storage of originals. Optimizing photos means that the files are saved in “blurred” quality, but when the Internet appears, they are downloaded again, and only the original is saved in the cloud. This is done to ensure that the phone has as much space as possible.
Conversely, storing originals means that the iPhone will only store original photos and videos in good quality. So, how to transfer photos from iCloud to iPhone:
- Save all the necessary photos and videos to the cloud. How to do this is written above.
- Next, log into your iCloud account on the other iPhone.
- "Synchronization button in "Settings"
- Thus, all files are transferred to another phone within a couple of minutes.
Method 2. Download photos from iCloud to your computer
How to download photos from iCloud to iPhone is already clear, but it’s even easier to download files to your computer. In order to save everything that is on cloud storage, you do not need to download any special applications to your computer.
Even if the computer has the Windows 10 operating system, etc., transferring all the information is not at all difficult.
Important! Before you download photos to your computer, make sure they are transferred to the cloud
- Open a browser on your computer and go to the official iCloud storage website
- Sign in to your account.
- Click on the button "iCloud Drive" This is where all the videos and photos are stored.
- Next click on the folder "My photos"
- Select all the necessary files and click "Download"
Note! It is not possible to download all the photos at once; each file must be pre-selected before downloading.
The only exception to how to download all photos is to find photos and videos in a separate folder. This means you can download the entire folder with all the materials.
Possible difficulties when working with iCloud
If difficulties arise during the process, you must perform the following steps:
- close the tab with the site, then go back and log into your account;
- You may need to restart your computer;
- check that all items in the settings are fulfilled;
- If the above steps do not help, you need to contact technical support on the site.
What is the cloud and how to use it
The cloud is a special platform where you can upload various files and documents. All information is stored on the company’s servers, and to access it you just need to connect to the Internet . In most cases, using the service in the initial stages is free. That is, you are allocated a certain amount of space that you can occupy with different files.
The main advantage of cloud services is the ability to access downloaded information from anywhere in the world. You don’t need to carry a flash drive with you all the time, because you just need to connect to the Internet and log into your own account. All data in the cloud is safe, as it cannot disappear without user intervention. The same cannot be said about a phone, information from which can be deleted as a result of a system error.
Using the cloud service is easy. The first step is to create an account on one of the platforms, most often by providing an email address and creating a password . Subsequently, you will need to install a mobile application on your smartphone, since it is much more convenient to perform all actions through it. But also no one forbids you to use the online version of the service, that is, the website.
Pause uploading photos to iCloud
Uploading photos to storage more often can slow down your Internet traffic or drain your battery faster. This is why the function of uploading photos to iCloud does not work when saving battery power. So, step-by-step instructions for stopping file uploading:
- Open your iPhone's Camera Roll.
- Scroll down to the very bottom.
- The bottom should show how many photos and videos have been uploaded to the library, then click on the “Pause” button.
Please note that after this, photos will no longer be saved to iCloud. How to return or continue uploading files - to do this you need to do the same and click on the “Resume”
So, in order to download, save or pull out all existing files into iCloud storage, it does not require a lot of time and special skills. It is enough to follow the instructions and take into account all the nuances.
iCloud Photos, paired with Photos, lets you securely store all your photos and videos in iCloud and transfer them to your iPhone, iPad, iPod touch, Mac, Apple TV, and iCloud.com.
Popular cloud storages
Cloud storage has become a popular platform for storing many files and documents. That is why today there are several hundred, if not thousands, of such services. We suggest you familiarize yourself with the most popular of them below.
Google Drive
The Google Drive service was discussed a little above. It is on this platform that all documents and other types of files are saved. For the convenience of working on a smartphone, you do not need to use the web version of the storage. All you need to do is launch the Google Drive application, which is installed by default on phones with the Android operating system.
Initially, all users of the service are provided with 15 GB of free space, but this can be expanded by purchasing a paid package. Among the advantages of this cloud storage is the ability to scan documents through the camera . Of course, the option does not always work perfectly, but its presence will not be superfluous.
You can work with documents directly in the application, without having to download them to your device. To upload files to the cloud, use the following instructions:
Google Cloud works with well-known document extensions, and even allows you to download APK files of applications.
Yandex.Disk
Yandex Disk is an equally well-known service from a Russian company. To work with it, you need to register a Yandex email in advance. By default, each user is provided with 10 GB of free space, but this can always be increased by participating in promotions and offers on the platform . We also cannot fail to mention the unlimited photo uploading. That is, images downloaded from the phone will not be counted towards the total amount of occupied space.
An interesting feature of the service is the ability to edit photos. The uploaded photo can be rotated, cropped, or sharpened. There are also special effects, including an automatic option to improve the beauty of the eyes. Background downloading works reliably, but when saving large files, minor interface freezes may occur. So, to upload a photo to the cloud, follow these steps:
Here's how it works
iCloud Photos automatically saves all the photos and videos you send to iCloud, so you can access your library from any device, anytime. All changes to collections on one device are synchronized with other devices. Organize your photos and videos into Moments, Collections, and Years. All Memories and People collections are updated on all devices. This way you can quickly find the moment, family member or friend you need.
Your collection is sent to iCloud every time your device is connected to Wi-Fi and the battery is charged. In iOS 11 or later, your media library also updates over the cellular network. The time it takes to add photos and videos to all devices and iCloud.com may vary depending on your Internet connection speed.
Preparation
- Update your iPhone, iPad, or iPod touch to the latest version of iOS, your Mac to the latest version of macOS, and your Apple TV 4K and Apple TV HD to the latest version of tvOS.
- Set up iCloud on all your devices.
- Sign in to iCloud with the same Apple ID on all of your devices that you want to use with iCloud Photos.
- On a Windows PC, upgrade to Windows 7 or later and download iCloud for Windows.
Turn on iCloud Photos
- On an iPhone, iPad, or iPod touch running iOS 10.3 or later, go to Settings > [your name] > iCloud > Photos, and then turn on iCloud Photos.
- On a Mac running OS X 10.10.3 or later, go to System Preferences > iCloud. Click the Options button next to Photos, then choose iCloud Photos.
- On Apple TV 4K and Apple TV HD with tvOS 9.2 or later, go to Settings > Accounts > iCloud > iCloud Photos.
- On a Windows PC, follow these steps.
In previous versions of iOS, macOS, tvOS, and iCloud for Windows, iCloud Photos was called iCloud Photo Library.
Installing the necessary programs
To work with the Google cloud service we will need the following programs:
On most modern smartphones, these applications are pre-installed, which means you just need to find them on the device. If any of them are missing, then do the following:
Step 1. Open the Play Market application store. The launch shortcut can be located on the main screen or in the menu with installed programs.
Step 2: Type “Google” into the search bar and search for “Google Drive.”
Step 3: Click the Install button. Wait while the program is installed on your smartphone.
Step 4. In the same way, install the Google Docs, Google Sheets and Google Slides applications (if you work with presentations).
Display changes on all devices
When you make changes in Photos on your iOS device or Mac, your photo automatically updates across all devices. So when you crop or fix photos on your iPhone, you see changes when you open your Photo Library on your Mac. If you change your mind, you can return the photo to its original appearance. The original photos and videos are stored in iCloud, so you can return to them at any time.
Even photos and videos deleted on one device are deleted from all devices that use iCloud Photos. And if you need to get your photo back, you can recover it from your Recently Deleted album within 30 days.
You can make changes on your iPhone, iPad, iPod touch, or Mac, and they'll automatically appear on Apple TV. Your entire collection is available on Apple TV, including Memories collections and shared albums.
How to recover or delete files from the cloud – PhotoWho
Cloud services are almost all the same in their operating principle. They download files and synchronize them with other clients connected to them. But accidents still happen and the wrong files are deleted. Fortunately, deleted files are not always lost forever.
Today, cloud services provide opportunities that you would not have even dreamed of a few years ago. For example, if you need to free up space on your local storage device, you can upload data to cloud folders. You can also place photos in the cloud, and they will be synchronized and available on different devices.
However, today we’ll talk about how to recover or permanently delete files from the cloud.
Today there are many cloud services. But the three most famous for the end consumer are: Dropbox, Google Drive, and Microsoft OneDrive. Let's talk about them.
Recovering files from Dropbox
Dropbox handles deleted files differently than Google and Microsoft. Dropbox doesn't have a Recycle Bin. Instead, the files are deleted but not changed in location.
To be more precise, the files simply become hidden. And if you need to restore or permanently delete a file, you need to go to the folder from which the file was deleted and make it visible.
In order to do this, you need to click on the small basket icon in the upper right corner. This is the “recover deleted files” button.
As an option. You can also right-click and select “show deleted files” from the pop-up menu.
In both cases, the deleted files will appear grayed out. And if you right-click on one of them again, you can see further options.
If you need to restore a file, Dropbox will present you with a dialog box. If you are interested in something else, you can select the desired option.
You can store your files in Dropbox for free for 30 days. The extended version of the program provides the opportunity to use the service for one year.
You may never realize the benefit of using the extended version of the program. But in those rare cases when you need to restore a previous version of a file that you overwrote or deleted, this service will help you out.
Google Drive
Google Drive uses a more common method for deleting files: moving them to the trash. You can delete a file from anywhere on the disk, and it will go to the trash.
To restore such a file, you need to click on the trash can icon from the pop-up menu. All files ever deleted are located here.
You can select one or more files and right-click. There are only two options in the menu: “Delete” or “Restore”. The same functions are displayed at the top right of the screen.
The fastest way to permanently delete files from the Recycle Bin is to click “Empty Recycle Bin”.
This way you can restore or delete files in Google Drive. Now let's look at Google Drive's competitor, Microsoft OneDrive.
Microsoft OneDrive
Microsoft's OneDrive also moves deleted files instead of deleting them. Thus, deleted files can be found in the Recycle Bin.
Once you open the OneDrive Recycle Bin, you will be surprised to see all the files you have ever deleted.
If you need to restore them, you can start “Restore everything”. If you delete it, click “Empty Trash”.
And if you need to restore or delete only some of the files, you can mark them, and then the possible program options will change. You can “Restore” or “Delete” files, view their properties, or remove the selection.
Sometimes, even if you try very hard not to mess things up, you can lose important data. That is why it is useful to know that even in such cases it is possible to recover your data, even within the cloud service.
Of course, we realize that there are many other cloud services around that work differently, but after reading this article, know that there are also such cloud functions. If such a function is missing, you can always contact the service support service with a request to solve the problem, since the program will not be able to analyze the disk with files in the cloud.
Well, if such actions did not lead to the recovery of important data, you can remember where, besides the cloud, your files were stored or where your files were downloaded or synchronized with the cloud. And scan this media using one of the data recovery programs. After all, all options are good to solve the problem.
Source: https://hetmanrecovery.com/ru/recovery_news/how-to-recover-file-from-cloud-service.htm
Back up photos and videos
When iCloud Photos is turned on, photos and videos are automatically uploaded to iCloud. They are not duplicated in the iCloud backup, but you should keep backup copies of your library. You can download photos and videos from iCloud.com to your computer and store them in a separate library, transfer them to another computer using Image Capture or the Photos app, or save them to a separate drive.
Devices running iOS 11 or later or macOS High Sierra or later capture photos and videos in HEIF and HEVC formats. Files of these formats take up less storage space with the same quality.
How to recover or delete files from the cloud
Today, cloud services provide opportunities that you would not have even dreamed of a few years ago. For example, if you need to free up space on your local storage device, you can upload data to cloud folders. You can also place photos in the cloud, and they will be synchronized and available on different devices.
However, today we’ll talk about how to recover or permanently delete files from the cloud.
Today there are many cloud services. But the three most famous for the end consumer are: Dropbox, Google Drive, and Microsoft OneDrive. Let's talk about them.
Recovering files from Dropbox
Dropbox handles deleted files differently than Google and Microsoft. Dropbox doesn't have a Recycle Bin. Instead, the files are deleted but not changed in location.
To be more precise, the files simply become hidden. And if you need to restore or permanently delete a file, you need to go to the folder from which the file was deleted and make it visible.
In order to do this, you need to click on the small basket icon in the upper right corner. This is the “recover deleted files” button.
As an option. You can also right-click and select “show deleted files” from the pop-up menu.
In both cases, the deleted files will appear grayed out. And if you right-click on one of them again, you can see further options.
If you need to restore a file, Dropbox will present you with a dialog box. If you are interested in something else, you can select the desired option.
You can store your files in Dropbox for free for 30 days. The extended version of the program provides the opportunity to use the service for one year.
You may never realize the benefit of using the extended version of the program. But in those rare cases when you need to restore a previous version of a file that you overwrote or deleted, this service will help you out.
Google Drive
Google Drive uses a more common method for deleting files: moving them to the trash. You can delete a file from anywhere on the disk, and it will go to the trash.
To restore such a file, you need to click on the trash can icon from the pop-up menu. All files ever deleted are located here.
You can select one or more files and right-click. There are only two options in the menu: “Delete” or “Restore”. The same functions are displayed at the top right of the screen.
The fastest way to permanently delete files from the Recycle Bin is to click “Empty Recycle Bin”.
This way you can restore or delete files in Google Drive. Now let's look at Google Drive's competitor, Microsoft OneDrive.
Microsoft OneDrive
Microsoft's OneDrive also moves deleted files instead of deleting them. Thus, deleted files can be found in the Recycle Bin.
Once you open the OneDrive Recycle Bin, you will be surprised to see all the files you have ever deleted.
If you need to restore them, you can start “Restore everything”. If you delete it, click “Empty Trash”.
And if you need to restore or delete only some of the files, you can mark them, and then the possible program options will change. You can “Restore” or “Delete” files, view their properties, or remove the selection.
Sometimes, even if you try very hard not to mess things up, you can lose important data. That is why it is useful to know that even in such cases it is possible to recover your data, even within the cloud service.
Of course, we realize that there are many other cloud services around that work differently, but after reading this article, know that there are also such cloud functions. If such a function is missing, you can always contact the service support service with a request to solve the problem, since the program will not be able to analyze the disk with files in the cloud.
Well, if such actions did not lead to the recovery of important data, you can remember where, besides the cloud, your files were stored or where your files were downloaded or synchronized with the cloud. And scan this media using one of the data recovery programs. After all, all options are good to solve the problem.
Source: https://hetmanrecovery.com/ru/recovery_news/how-to-recover-file-from-cloud-service.htm
Uploading original photos and videos
You can download copies of your original photos and videos on iCloud.com, iOS devices, and Mac computers.
- On iCloud.com, click Photos and select one or more photos or videos to upload. Click and hold the icon in the upper right corner of the window. To download content as it was originally captured or imported, select Original Unmodified. For JPEG or H.264 files (including edits, and even if they were originally in HEIF or HEVC format), select Most Compatible. Click the "Download" button.
- On your iOS device, tap Photos and select one or more photos or videos. Click the icon and select the device you want to share with. Find out what to do if you need help.
- On your Mac, click Photos. Select one or more photos. Drag the content to your desktop or right-click and select Share > AirDrop.
Create a document, spreadsheet or presentation directly on the cloud
Step 1 : To add a document or spreadsheet to Google Drive , click the “+” button.
Step 2. Select the appropriate item, for example “Document”.
Step 3. If the corresponding application has not been installed, you will be prompted to do so. Click Install.
Step 4: The created file will automatically open in the Google Docs , Google Sheets or Google Slides .
To back up your photos to the cloud, you can use the Google Photos . In this case, your photos will be automatically compressed, and the amount of free space on Google Drive will not change.
Source
Freeing up storage space
Photos and videos used in iCloud Photos take up space in iCloud storage and on your device. As long as you have enough space in iCloud and on your device, you can store as many photos and videos as you want.
When you sign up for iCloud, you automatically get 5GB of free storage. If you need more space, you can purchase additional iCloud storage. You can purchase a subscription starting from 50 GB for $0.99 per month. When you choose a 200 GB or 2 TB plan, you can share storage with members of your Family Sharing group. For more information about plans and pricing for your region, see this article.
Storing data in Mi Cloud - Tips - Mi Community
Hello Mi fans!!!
Currently, cloud services are becoming increasingly popular, allowing you to store information on the Internet and access it anywhere. In this article we will look at the Mi Cloud service (mi cloud) - this is a cloud storage for Xiaomi devices. Thanks to this service, you can store your personal information in the cloud, as well as transfer it between xiaomi phones. With Mi Cloud you will save quite a lot of memory on your phone. Let's look at all the functions in order.
Login to Mi cloud and its functions
To use Mi cloud, you must have a registered Mi account, if you don’t have one yet, register now. In order to log into Mi cloud, follow the link https://i.mi.com Unfortunately, there is no Russian version at the moment, but even with a little knowledge of English you can cope.
Click the “Sign in with Mi Account” button and the browser goes to the Mi account data entry page, enter your E-mail or phone number (depending on how you registered your account) and your password, or you can click on the QR code icon in the upper right corner and scan the phone with a standard scanner.
(Scanning takes you directly to the home screen, as opposed to manually entering.)
After entering the data and pressing the “Sign in” button, you will be taken to the next page where we press the “Send” button and wait for an SMS with a confirmation code.
(the code is valid for one day) When the confirmation code is entered you will be taken to the Mi CLOUD main page
If you see “sign in to upgrade your account” on the screen
Click “Sign in”, after which all functions are activated.
What do we see here? —
At the top right is your nickname. Clicking on it opens a menu in which you can
1.Storage space - change the size of the disk provided by the company (by default, free - 5GB)
2.Account - account details. You can change or just view
3.Forum - link to the Global Forum
4.Sign out - exit
Top center - number of devices on the account, occupied space in Mi cloud
Below are 6 pictograms
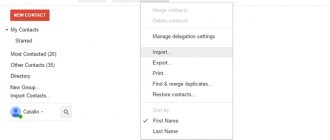
Contacts – Phone book, all your contacts are stored there, it’s very convenient, even if something happens to your smartphone, all the data in the address book will remain with you. Moreover, you can import, export and even restore contacts deleted 2 months ago (Restore contacts).
Messages – Through the cloud, you can also view all your messages and even chat.
Gallery – The gallery contains all your photos and videos, which you can download from there in original quality at any time. It is very comfortable. There is a trash can in the gallery, all the deleted photos are there and take up space.
In the NOTES you can find all your notes, as well as edit or delete them.
Recordings section is used to store audio recordings, provided that synchronization is enabled.
Find device - will help you find your smartphone/tablet
In addition to visible information, there is a lot of other synchronized data in the cloud, this could be backups of your applications, music, data about wi-fi networks, browser history, call history, black list of contacts.
Mi cloud settings can be found - Settings - Mi account - Mi Cloud (if there is no shortcut on the desktop, you can immediately click - “display on desktop”)
Unlinking from mi cloud
Many people have a question: “How to remove a synchronized phone from mi cloud ?”, it’s actually quite simple.
If you need to disconnect a device from your account, you need to click on the number of connected devices on the main page at the top (for example, 1 connected). In the list of devices that opens, select the one you need and then click on the red “Delete Device” button.
I hope this information was useful, if you have any questions, don’t hesitate to ask