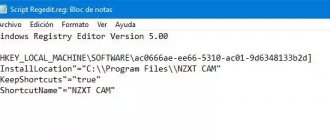
The Windows Registry is a repository of information about a personal computer, its database, which stores records about programs installed on the PC, OS software and hardware settings, and much more.
However, the registry often becomes an extremely cluttered structure, because... newly installed programs create new records about themselves in it, but delete them extremely ineffectively when uninstalled. The growing registry gradually slows down the operating system, which requires cleaning it.
How to clean the registry
How to clean the registry
Programs that clean the registry automatically usually do their job using a special set of instructions. However, this set may not be suitable for the user in a particular case. Fortunately, the registry can be cleaned manually using a special editor built into Windows.
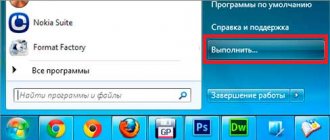
Step 1. Click the “Start” button and find the “Run” program in the menu, launching it with a mouse click.
Click the “Start” button and find the “Run” program
Step 2. Type the command “regedit” in the window that opens and click “OK”.
Type the command “regedit” and click “OK”
The Registry Editor will launch.
Registry Editor
Reference. Before making any modifications to the registry, it is important to create a backup copy of it. If some of the changes you make damage the PC software, this will make it possible to restore the system's functionality.
Step 3. Click “File” and select “Export”.
Click "File" and select "Export"
Step 4. Select “All” in the “Export Area” panel.
Select “All” in the “Export Area” panel
Step 5. Select the folder where the copy of the registry will be saved and enter its name.
Select the folder where the copy of the registry will be saved and enter its name
Step 6. Click “Save”.
Click “Save”
The registry editing program is divided into two windows. The left window is used to display the entire tree of registry keys, and the window on the right is used to display its individual entries.
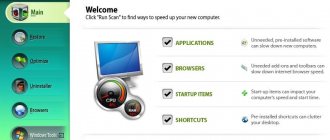
Automatic optimization (Reg Organizer)
- Let's launch the utility.
- We close all running programs, since the computer will restart when the utility finishes.
- In the “Features for everyone” section, select “Registry optimization” and in the window that appears, left-click. Upon completion of the utility, the computer will restart without additional warnings.
Finding and deleting entries associated with deleted programs
Important! The information presented is intended for qualified PC owners. If an error is made at this stage, it may cause the operating system to malfunction.
Step 1. Click on the “>” icon next to the “HKEY_CURRENT_USER” folder or on it itself to open it.
Open the folder “HKEY_CURRENT_USER”
Step 2. Click on the “Software” directory.
Open the “Software” directory
Step 3. Find in the list the name of the required program or the name of the company that produces it.
Find the name of the required program or company name
Reference! If the user knows the name of the software, you can enter its capital letter from the keyboard, and the system will quickly find the folder with the program.
Step 4. Click on the detected entry, highlighting it.
Click on the desired entry and select it
Step 5: Press the "Del" button on your keyboard to delete the entry.
Press the “Del” button on the keyboard to delete the entry
First stage
Well, it’s worth noting right away that any manipulations related to the operating system and its settings can backfire on all users. So our idea today requires some preparation. Which one? Now we'll figure it out.
First, save your personal information. When something goes wrong, the integrity of your files is at risk. Once you have made sure that you don’t have to worry about your documents, you can think about how to clean the registry in Windows 7 manually.
First of all, we need to get into it. The “execute” function will help us with this. You can find it in “Start” or simply press Win + R. In the line that appears, you need to write a command that will open the registry for us. This is "regedit". Press "Enter" and wait a moment. A window will open in front of you, which will be called the system registry. Now you can think about what to do next. Cleaning the Windows 7 registry won't take very long, especially if you know where to click.
Find and delete all entries associated with a deleted program
Step 1. Press “Ctrl” and “F” at the same time to open the registry search menu.
To open the search menu in the registry, simultaneously press “Ctrl” and “F”
Step 2: Enter “keywords” to find software branches by their name, folder name, or the name of their startup file.
Finding the required file
Step 3. Click “Find Next” to start searching. It is necessary that the “Keys”, “Values” and “Data” checkboxes are checked in the search menu.
Click “Find Next”
Step 4. Click on the entry that was saved after uninstalling the program and press “Del” to erase it.
Select the required entry and press “Del”
Step 5. Press the "F3" key to find the next result matching the entered keywords and repeat the procedure, thus deleting all program information.
Defraggler utility
This is exactly what the doctor ordered. You can download the utility from here: https://www.piriform.com/defraggler/download/. And it's very simple to use. Install and launch Defraggler. We go to the menu, as in the picture below:
And check the box next to the “Always” menu item. Now the OS infobase will be defragmented every time you start the computer. And you won’t need, as in the case of cleaning, to remember this every week and manually launch some utilities.
Over time, more and more erroneous entries slow down your computer. Therefore, defragmentation and compression of the data contained in it is necessary. The problem is not solved by applications. Fortunately, this type of redundant data no longer impacts other applications and the performance of one primary database.
It has its advantages, it also has disadvantages. The registry is still available, it still collects settings, but the entries are also aged out. However, the company cannot officially support its cleaning software as it cannot guarantee that it will fix any problems that may arise from using it.
Deleting startup entries
Many, especially well-known programs, write branches to the registry related to their own loading, updating, or other similar actions when the OS starts. The user has the ability to delete such entries.
Step 1. Using the above method, expand the partition to the HKEY_LOCAL_MACHINESOFTWARE Microsoft Windows Current Version Run folder.
Expand the section to the folder HKEY_LOCAL_MACHINESOFTWARE Microsoft Windows Current Version Run
Step 2. Find the required data on the right. These are shortcuts to some startup files.
Find the required data on the right
If the user does not have information about the ownership of records in a particular program, or their specific meaning is unknown, you can search for this data on the Internet, for example, on Google, or use the special Process Library website located at https://www.processlibrary.com/en /.
Step 3. To search for the required value in the Process Library, enter the required value in the search form located on the right and click “Search”. The system will provide the necessary information.
Enter the required value in the search form
Step 4. Select the required values with the mouse and press the “Del” button to delete them.
Reference! If you need to simultaneously select several blocks of information for deletion, you need to hold down the “Shift” or “Ctrl” keys on the keyboard while simultaneously selecting the records to be deleted with the mouse.
Step 5. Open the branch to the folder: HKEY_CURRENT_USERSOFTWAREMicrosoftWindowsCurrentVersionRun, and repeat the necessary steps.
Reference! Shared programs record their information in HKEY_LOCAL_MACHINE, while all others record their information in HKEY_CURRENT_USER.
All other programs write information to HKEY_CURRENT_USER
Step 6. After cleaning is complete, exit the editor by clicking “File” - “Exit”.
Exit the editor by clicking “File” and “Exit”
Manual cleaning
This is a more complex method, and is recommended for relatively experienced Windows 7 users, as well as those seeking to join their ranks. This method is also good in cases where you are interested in cleaning traces of malware that cannot be removed by other methods.
Open Start and search for “regedit”, then launch the application you find. This is a standard Windows 7 program used to edit the registry.
Before cleaning is performed, you must save a copy of the settings that you want to change. From the File menu, select Export, then specify the name you want to save the copy under, the location where you want to store it, and don't forget to include Entire Registry at the bottom. Now you can start cleaning.
Application entries are stored in the SOFTWARE section, which is located in HKEY_LOCAL_MACHINE.
For example, let's delete the remains of one of the applications.
Right-click on the desired name and click “delete”.
To be more confident, we will use the search, since traces of programs (especially malicious ones) may be in other sections. To go to the search, press “CTRL” + “F”, enter the desired name in the search bar and click Find Next. What we find, if it relates to the program we are looking for, delete it and repeat the process until we delete everything we need.
This completes the cleaning. If, after cleaning, problems appear in the operation of the computer or individual applications, restore the registry from a saved backup using regedit, selecting Import from the File menu and specifying the path to the saved copy of the registry.
You can clean up unnecessary records with equal success manually or with special programs. Choose one method or another based on your experience and ultimate goal. Don't forget to save a backup copy before editing.
Manual cleaning is a risk
When deciding to perform manual cleaning, you must remember that a lack of knowledge and experience can, instead of being beneficial, cause irreparable harm to Window's 7 OS. Incorrect actions can cause not only problems with the system, but also serious failures. The consequences are possible system reinstallation and data loss. To avoid such consequences, you need to create a file with a backup copy of the registry. In this case, there is a chance to correct everything if the actions are incorrect.
Troubleshooting registry cleaning errors
If, as a result of editing the registry, problems in the operation of the OS occur, you can use a copy of the registry to restore its operation.
Step 1: Launch Registry Editor using the above method. Click “File” – “Import”.
Click “File” – “Import”
Step 2. An explorer window will open, where you need to find the previously created backup copy, select it with the mouse and click “Open”.
Find the previously created backup copy, select it with the mouse and click “Open”
Step 3. Wait until all the necessary files are copied to the registry.
Waiting for the files to be copied
Making a system backup
A backup copy of the OS is necessary as a preventive measure. In the event of a failure, using a backup copy, you can restore a fully functional system in a matter of minutes, with all previously installed applications and drivers.
To make a backup you need to do the following:
- first, go to the “Control Panel”, select the “System and Security” tab, then select “Backup and Restore”;
- then in the “Backup and Restore” window on the left side, select “Create a system image”;
- then the “Image Creation” window will appear. Here you need to choose where the backup will be stored. This can be an ordinary DVD disc (you may need a lot of them, since a copy can reach 100 gigabytes) or an external hard drive;
- then the window “Which disks should be included in archiving” will appear, in which you need to select the disk where the operating system is located;
- Next, a window will appear to confirm the archiving parameters and at the bottom of the window you need to click on the “Archive” tab;
- Next you can see the process of creating a system image.
Data recovery in case of OS failure
If after editing the registry the system stops booting, it can be restored using the System Restore component. The information contained in the registry, along with other OS data, will be restored for the duration of the creation of the selected data save (restore) point.
To do this, you need to enter Computer Troubleshooting mode (Windows 7).
Step 1. Press the F8 button when the PC starts booting. The More Boot Options menu will appear. Select "Last Known Good Configuration (Advanced)".
Select "Last Known Good Configuration (Advanced)"
Step 2. Select a language, click “Next”.
Select the language and click “Next”
Step 3. Enter your username (preferably Administrator) and (if you have one), password by clicking “OK”.
Enter your username, password and click “OK”
Step 4: The System Recovery Options window will appear, where you need to select System Restore.
In the “System Recovery Options” window, select “System Restore”
Step 5. When the next window appears, click “Next”.
Click “Next”
Step 6. Select a restore point. In the same window, you can select other recovery points and view the list of programs affected by recovery. Click "Next".
Select a restore point and click “Next”
Step 7. Click “Done”.
Click “Finish”
Step 8. Click “Yes”.
Click “Yes”
The computer will automatically restart, fixing the problem.
Before making changes to the registry, it is important to always create a copy of it. If there is uncertainty, it is better not to delete any data manually, but before making a decision to delete, you can search the Internet for information about the record to be deleted.
Rating table
To begin with, I decided to make a table containing my selection of programs designed to clean the computer of accumulated garbage and correct all kinds of errors - a sort of impromptu top of the best. For your convenience, it contains information such as whether the product is paid or free, the presence of a Russian-language package, and its position in the rating, where I rated the range of capabilities and security on a 10-point scale. After viewing this table, you can immediately go to the description of the product that suits the parameters, ignoring other options.
| Name | License | Russian language | Features/Security Rating | Flaws | Download link from the official resource |
| Advanced System Care Free | free | Yes | 10/10 | — | https://advanced-systemcare-free.softok.info/ |
| Computer Accelerator | trial period | Yes | 10/10 | — | https://fast-computer.su/ |
| Auslogics Registry Cleaner | free | Yes | 8/9 | No register defragmentation or ignore list | https://www.auslogics.com/ru/software/registry-cleaner/download/ |
| CCleaner | Free and pro versions | Yes | 9/8 | The public version provides only some of the features and does not provide an ignore list | https://www.ccleaner.com/ru-ru |
| Wise Registry Cleaner | free | Yes | 10/10 | — | https://www.wisecleaner.com/download.html |
| Vit Registry Fix Free | free | Yes | 7/10 | No scan scheduler and no defragmentation option | https://vitsoft.net/ |
| Reg Organizer | Trial period | Yes | 10/10 | — | https://www.chemtable.com/ru/organizer.htm |
As can be seen from the table, most of the programs from the list are distributed free of charge in Russian, that is, you can easily download the product you like for cleaning the registry to your personal computer or laptop from the official website, I have provided links.
Sources
- https://SmartBobr.ru/poleznosti/chistka-reestra-windows/
- https://winda10.com/optimizatsiya/chistka-reestra-windows-10.html
- https://pc-consultant.ru/rabota-na-komp-yutere/kak-pochistit-reestr/
- https://where-money.com/tools/kak-pochistit-reestr-windows-7
- https://ccleaner-windows7.ru/ochistka-reestra-windows-ccleaner/
- https://ITpotok.ru/chistka-reestra-windows-7-vruchnuyu-i-avtomaticheski/
- https://it-increment.ru/windows/kak-pochistit-reestr-na-vindovs-7.html
- https://geekon.media/kak-pochistit-reestr-v-windows-7/
- https://itswat.ru/luchshie-programmy-dlya-chistki-reestra/
[collapse]


