Hi all! Today I will tell you how to clear the C drive of unnecessary files. In this article we will look at deleting:
- Temporary system and application files.
- Large WinSxS folder storage.
- Disable and delete the hibernation file.
- Removing unnecessary programs.
- Clear browser, application and Windows cache.
- Transfer and clean files from the desktop, download folder and other system files.
There is no need to worry, since we will only remove what is cluttering the system, and everything that is needed will remain in place. I tried to describe everything in as much detail as possible, but if you have any difficulties, write in the comments, and I will definitely help you.
SlimComputer
SlimComputer is designed to eliminate unwanted programs that are usually installed secretly: advertising utilities and shortcuts, browser add-ons and others.
One of the features of SlimComputer is the use of cloud technologies, on the basis of which recommendations are given for cleaning and optimizing the system. The program collects user data, transfers it to a cloud server, and, based on real-time computer scanning and community data, selects the best settings for system performance.
SlimComputer has the following sections:
- "Main". To start scanning the system, click the “Run Scan” button. The program will display a list of unnecessary and optional elements in the system: programs, toolbars (toolbars in the browser), startup applications;
On the main page of SlimComputer, click the “Run Scan” button to start scanning the system - "Restore". Stores all changes that were made using the program. If necessary, they can be canceled and the system state returned before using SlimComputer;
- "Optimize". Autorun programs are located here. The larger the list, the slower the system loads. SlimComputer analyzes each one and determines how much the utility slows down the computer;
The indicator next to the program shows the degree of load on the system - "Uninstaller" displays installed programs. Near each of them there is an indicator showing the impact on the system;
To remove an unnecessary utility, click the “Uninstall” button - "Browsers" shows the settings of all browsers installed on the computer. Next to each of them there is also a “usefulness” indicator. Often, most settings are not even used, but still consume resources. Because of them, the browser begins to work slowly, takes a long time to load pages, and produces errors. Therefore, it is advisable to delete or disable the settings marked in red. To do this, check the boxes and click “Remove Selected”;
The program contains popular browsers, but there is no browser from Yandex here, since the utility is not adapted for the Russian market - "Windows Tools". All the tools for managing the system are collected here:
- device Manager;
- system information;
- launching disk defragmentation;
- registry editor;
- hard drive manager and more.
The “Windows Tools” section contains additional utilities for system optimization
Despite the convenience of the program and more than detailed recommendations for optimizing the system, SlimComputer is not very popular, since it has not been translated into Russian. The interface and purpose of the functions will be clear to an advanced user, but for those who are just starting to master the computer, it is better to choose a similar utility that supports the Russian language.
Video: how to use SlimComputer
Memory control
Modern editions of Win 10 have an option that allows you to control the load level of the system drive. It's called Memory Control. You can use it to clean your PC.
How to activate the Memory Sense option in Windows 10:
- go to: “Settings” → “System” → “Device memory”;
- activate the sub-item “Change automatic method. freeing up space";
- tick the temporary files to be deleted;
- “Enable” the “Storage Control” option.
Important! If the local disk runs out of free space, the “Storage Control” option starts automatically. Windows is freed from temporary information and the contents of the Recycle Bin.
Using CCleaner
Many novice users are interested in how to delete unnecessary files from drive C using third-party programs, as well as which of these programs are more effective and safe in this regard. We can recommend CCleaner - a simple, fast, convenient, and most importantly safe Windows disk and registry cleaner. This program allows you to delete temporary data from the Internet and Windows itself, the contents of the thumbnail cache and DNS, Index.dat files, memory dumps, fragments of chkdsk files, various system logs, outdated prefetch files and a lot of other unimportant data.
With CCleaner, you can clear the system registry of incorrect entries, optimize startup, enable, disable or remove browser extensions, analyze the contents of hard drives, search for duplicates and, of course, uninstall unnecessary applications, including universal ones.
CCleaner's interface is very simple, so understanding its simple functionality will not be difficult even for a novice user.
Considering, however, that the main purpose of CCleaner is still cleaning, all its additional tools have limited functionality. If your C drive is full of something unclear, and you want to find out what exactly it is, then for these purposes it is better to use specific utilities, for example, Scanner , JdiskReport or their analogues, which show more accurate information about the file structure of the media with the ability to navigate through subdirectories .
Cleaning junk and temporary files using Windows
First, let's look at how to clear drive C of unnecessary files in Windows 7/10 using the operating system itself. For these purposes, Windows has a built-in utility cleanmgr.exe , which can be launched either through the properties of the partition being cleaned or through the Run dialog box. After the utility scans the disk for outdated files, check the boxes on the “Disk Cleanup” tab and click “OK.”
If you click the “Clean up system files” button, reports, device driver packages, error dumps and, additionally, restore points, with the exception of the most recent one, will become available for deletion.
For a deeper and more thorough cleaning of drive C from garbage, you can use the built-in console utilities Dism and vssadmin . The first allows you to delete temporary data from the WinSxS folder, including backups created before installing Windows updates. To do this, use the following commands executed in the CMD console running as administrator:
- DISM.exe /online /Cleanup-Image /StartComponentCleanup
- DISM.exe /online /Cleanup-Image /SPSuperseded
- vssadmin delete shadows /all /quiet
The first command does the same thing as the cleanmgr.exe utility, only more thoroughly.
The second deletes all backup update packages from the WinSxS folder.
The third command can delete all restore points, including the last one.
However, you should use these tools with caution, since after executing the indicated commands, you will no longer be able to roll back the system to a working state or a previous version.
Note: Before cleaning up the WinSxS folder, it is recommended to set its actual size, thereby making sure that it really needs cleaning. To do this, you need to run the command Dism.exe /Online /Cleanup-Image /AnalyzeComponentStore in the command line and compare the actual size of the component store with the size indicator in the Explorer properties.
After updating Windows to a newer version, a Windows.old , which can take up significant disk space.
The contents of this directory are copies of the system installation files of the previous version of Windows. If you are determined not to return to the old version of the system, the Windows.old folder can be deleted. This is done again either using cleanmgr.exe or using the command line. In the first case, you need to find and select the “Previous Windows installations” item on the “Advanced” tab; in the second case, run the command rd /s /qc:/windows.old in the CMD console running as administrator.
You can get a little extra space on the C drive by removing unused components, the same ones that are accessible through the classic Add/Remove Programs applet.
The standard Dism utility is also used here. To select and uninstall an unused Windows component, run the following two commands in the CMD console running with elevated rights:
- DISM.exe /Online /English /Get-Features /Format:Table
- DISM.exe /Online /Disable-Feature /featurename:NAME /Remove
The first command displays a list of all components in the system, the second deletes the selected element. In this example, its name must be substituted for the NAME line element.
Other ways to free up space on drive C
Clearing the Driver Store
The steps described above are usually enough to free up enough space on the system volume, but what if drive C is still full? What else can you do to get additional space? One option is to clear the contents of the FileRepository , located at C:/Windows/System32/DriverStore.
This directory contains copies of device drivers that were ever connected to the computer, and may also contain outdated versions of drivers. Before deleting driver packages from the FileRepository folder, it is highly advisable to create a complete list of them and find only outdated versions in it, and leave the rest untouched. It also wouldn't hurt to create a complete copy of all drivers installed on the system. To list the DriverStore drivers in a file, run the following command in an elevated command prompt:
pnputil.exe /e > C:/drivers.log
Compare the driver versions in the list and remove only the outdated ones.
To remove the selected driver, immediately run the command pnputil.exe /d oem№.inf in the console, where № is the name of the driver in the list.
If an error appears in the console when uninstalling a driver, it means the driver is being used by the system. There is no need to touch such a component.
As an alternative to the command line, you can use the free utility Driver Store Explorer , which is specifically designed to remove old, unused device drivers.
Disabling hibernation
Thanks to the hibernation mode, the user can quickly return to work in running applications; on the other hand, its use requires the allocation of significant space on the system disk, slightly less than or equal to the amount of RAM. If having free space on your hard drive is a priority for you, you can disable hibernation mode by deleting the hiberfil.sys container file.
Launch the CMD console as an administrator and run the command powercfg -h off. Hibernation will be disabled and the bulky hiberfil.sys file will be removed.
Note: The hibernation file can be compressed to a maximum of two times with the powercfg hibernate size 50 command.
Disabling the page file
In addition to other hidden system objects, there is also a file in the root of drive C that can be deleted under certain conditions. This is the swap file pagefile.sys . This file plays the role of a RAM buffer, and if an application does not have enough RAM to operate, its data is temporarily written to the paging file. Accordingly, if there is no swap file, a heavy application will slow down greatly or simply freeze while waiting for faster RAM to become available. Therefore, disabling and deleting the paging file is not recommended unless the computer has a very large amount of RAM.
If your PC has more than 10 GB of memory or you do not intend to run resource-intensive applications, you can try carefully disabling swap. To do this, open Advanced system settings and on the “Advanced” tab in the “Performance” block, click the “Options” button.
This will open another window. Switch to the “Advanced” tab, and then click the Change button in the “Virtual Memory” block.
Uncheck the “Automatically select paging file size” checkbox, turn on the “No paging file” radio button, save the settings and reboot. The pagefile.sys file will be deleted.
Removing the MSOcache folder
Users who have installed the Microsoft Office package have a hidden MSOcache , which can weigh up to several gigabytes.
This folder is an office suite cache and contains files that may be needed to restore Microsoft Office if it becomes corrupted. The MSOcache folder is not involved in launching Microsoft Office or working with documents, so it can be deleted in the standard way. Just keep in mind that if Microsoft Office is damaged for some reason, you will have to restore the package from the installation disk with its distribution.
Compressing the contents of a system volume
You can free up some free space on drive C without deleting anything from it at all. Instead, all system files can be compressed. To do this, just open the properties of drive C, on the “General” tab, check the box “Shrink this drive to save space” and click “OK”.
To compress system files in Windows 10, you can use the Compact OS by running one of two commands in the CMD console running as administrator:
- compact /CompactOs:query
- compact /CompactOs:always
The second command performs the same actions as the first, but in forced mode. It is used if you really want to shrink the system volume, and the first command rejects the operation, considering it inappropriate. Compression is completely reversible and to return the file system to its normal state, just run the reverse command compact /CompactOs:never.
In addition to NTFS compression, LZX compression is available in Windows 10, but it has a number of disadvantages, which is why it is not widely used. LZX compression is applicable to read-only files and directories, but an entire system volume cannot be compressed with its help due to the risk of an unbootable system.
- 102shared
- 4Facebook
- 80Twitter
- 13VKontakte
- 5Odnoklassniki
Through "Settings" of Windows 10
How to clean drive C through the Settings console:
- click on “Start”;
- open: “Settings” → “System” → “Device memory”;
- go to the sub-item “Free up space now”;
- The “Delete temporary files” window will appear;
- select elements to delete;
- click on “Delete”.
From time to time the user updates Windows. A copy of every update installed on your PC, downloaded from the Center, is stored in Win 10 and does not go anywhere. You can remove old versions of the OS, freeing up space on your drive, through “Settings”. By opening this console, you can empty your Trash, Downloads folder, and Delivery Optimization files.
In older versions of Windows, PC cleaning was performed: through “Options” → “System” → “Delete temporary files” (but you also had to select the desired drive) or through “Options” → “System” → “Storage”.
Manual removal of programs and files
With the exception of Windows 8.1 and 10 universal apps, almost all desktop programs are installed in the Program Files . If a program is no longer needed, it should be deleted so that it does not take up disk space, but this must be done either using a standard uninstaller or using special third-party programs. However, after uninstalling applications, folders with configuration files may remain on the disk, the weight of which can reach several hundred megabytes. Such data must be deleted manually.
Let's say you have removed Microsoft Office or Skype from your computer and you also want to get rid of all their remaining “tails” on the C drive. To do this, carefully check the Program Files and ProgramData directories in the root of drive C, as well as the C:/Users/User_Name/AppData folders. If the folder name matches the name of the deleted application, it can be deleted.
The AppData folder is a little more complicated. This hidden directory contains three subfolders: Local, LocalLow and Roaming. The first stores files created during the operation of various programs. You cannot clear it entirely, as this will most likely lead to the loss of saved application settings, however, half-empty folders of uninstalled programs can be completely safely deleted. Temp folder located in it .
The same applies to the LocalLow and Roaming folders; it is permissible to delete from them only those directories that belonged to previously uninstalled applications.
Note: By clearing the contents of the Local, LocalLow and Roaming folders, you will lose user settings and data stored in their cache. For example, after deleting Skype and its folders in your user profile, you will lose your current messenger settings and part of your message history.
As for removing universal applications, they are uninstalled using the standard tools of the system itself or the CCleaner program, which will be discussed below. You can also move some universal applications from drive C to drive D, if they support this feature.
Transferring desktop programs to another volume is also possible; for this purpose there is a special utility SteamMover , which you can download from the developer’s website www.traynier.com/software/steammover.
Disabling System Restore
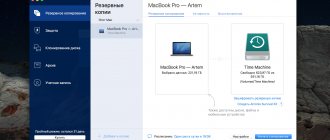
The recovery service makes backup copies of system files and stores them in a special hidden folder, which can take up a lot of disk space. At the same time, the built-in recovery tool does not always work correctly, and viruses like to hide in the backup folder.
To free up disk space, I recommend turning off System Restore and making backups using a third-party program and storing them on another drive, external media, or another computer.
Press the Win+R key combination, type "sysdm.cpl" and press Enter, or use the System Properties shortcut from the Links section.
In the window that opens, go to the “System Protection” tab, select the “C” drive and click the “Configure” button.
Check the “Disable system protection” checkbox and click “OK”.
After this, all backup copies of system files will be deleted and additional disk space will be freed up. This way you can free up 5-10 GB of valuable space on drive “C”.
How to completely clean your computer hard drive
This may be necessary when you sell a computer or laptop and want to permanently erase data without the possibility of recovery. After normal deletion and even formatting, data can be restored in some cases. You need to use the Drive Wiper function in CCleaner.
Well, if you need to delete files from time to time without the possibility of recovery, it is more convenient to use the free Free File Wiper program.