Hi all! Today I will tell you how to update drivers on Windows 10. Many articles recommend using programs like DriverPack Solution or Driver Booster, but I strongly do not recommend using them. I just want to ask these authors: what are you doing, comrades?!
Yes, they greatly simplify the installation of drivers, but there is one big drawback - in addition, they install a ton of garbage into your system (additional programs, applications, utilities). All this will hang in your system, in startup, clog up the RAM and system memory, slow down the OS, and also clog up processes and the Internet channel.
In fact, you can use them, but with one exception and with one additional addition, which I will talk about at the very end. I have prepared for you effective ways to update various drivers. If nothing works out at all, then look at the last chapter, there I presented a list of programs that will help with installation and there I will tell you how to use them correctly.
Why do you need to install drivers?
Contrary to popular misconception, having just a computer and an operating system installed on it is not enough for the device to perform all its functions 100% - drivers are also needed.
They play an intermediary role and are a kind of connecting links between the OS and the hardware. If you don't install a driver for your printer or scanner, you're unlikely to scan or print anything.
We have described additional methods for installing drivers on a laptop and personal computer, you can read the following article “How to properly install drivers on a PC or laptop”
If the latest drivers are not installed on your video card, you can forget about modern computer games. Even the keyboard and mouse need “firewood”, but Windows itself usually provides them.
AMD Driver Autodetect
Before this, we talked about the official utility for downloading drivers on Intel devices. Now let's look at exactly the same application, but for hardware from AMD. Using this tool, you can easily update drivers for Radeon video cards, Ryzen, Athlon processors, and so on.
Pros:
- Apart from the algorithm for automatically installing drivers, there is nothing superfluous here.
- Even a schoolchild can use the program.
- The tool has excellent optimization and good performance.
Minuses:
- As in the previous case, there is no Russian language here.
AMD Driver Autodetect
Manual installation
So, let's talk about how to install drivers manually on Windows 10. There are several options for users to choose from.
The most obvious is to download the latest distribution from the official websites of component manufacturers (required, since a third-party resource may well slip some kind of virus instead of a real installer), compatible with your specific device model.
But there are others, let’s consider them in more detail.
2.1 Device Manager
To get to this menu, you need to follow the following path:
"Start"
–
"Control Panel"
If there is no manager in the panel, you should switch the type of icon display from “category”
to
“small icons”
. Then the required item will appear.
Then, when a list of all computer devices is displayed in front of you, find the one you need and right-click on it. In the expanded list there will be a driver update button.
2.2 Command "hdwwiz"
Going to the Start
and by entering this command in the search bar -
“hdwwiz”
, the user initiates the hardware installation wizard.
The program will immediately offer two options for action - automatic update/installation and manual.
And if in the first case you do not need any additional actions, then in the second you will have to manually select the components that need to be updated.
It is also worth noting that this or that device is not always in the Windows database - if unsuccessful, you will receive the message “no new hardware was found on this computer”
.
Then you will have to manually enter the path to the driver file on an external source (for example, on the disk included with the device).
Note! Regardless of which method you choose to install drivers, it should be done cleanly. That is, if there is already old software for your device on the computer, it will need to be cleaned from the system.
To do this, follow a number of simple steps:
2.3 Proper driver removal
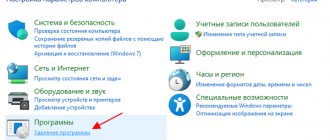
- Remove the driver from the system using the item "Installation and removal of programms"
in the Control Panel, not forgetting to remove additional software.
For example, PhysX, 3D Vision driver and other software are usually installed along with the Nvidia video card driver. It's better to tear it all down.
Restart your computer to complete the driver removal.
When uninstalling some drivers, they warn you about the need to reboot, but when removing others, they do not warn you.
However, it is better to spend a few extra two minutes to insure against possible installation errors. Delete folders containing any remaining device driver files and associated software.
It happens that after the uninstallation procedure several files remain in Program Files or other directories.
If you want a clean installation with standard settings, it’s better to get rid of all this (in the case of drivers for ATI/Nvidia video cards for sure).
Automatic installation
For all those who are already quite tired of having to periodically look for new versions of firewood and manually install them, the developers have provided a convenient way to automatically install drivers on Windows 10 - special utilities.
Among them are those that are provided by the developers of the hardware component themselves, for example, GeForce Experience, which comes bundled with the Nvidia driver and allows you to conveniently update it.
Their disadvantage is their narrow focus. And there are others, with wide functionality and covering the entire list of devices (both internal and external/connected).
The best of them are discussed below.
3.1 DriverPack Solution
This freely distributed program allows you to both install drivers on Windows 10 and replace existing versions with more recent ones, having previously identified them and notified the user of the need to update.
According to the manufacturers, DriverPack Solution has the largest database of drivers for a wide variety of devices.
The matter is not limited to a video card and sound card - you can easily find the optimal software for a TV tuner, printer, modem, various smartphones, card reader, etc.
Moreover, the manufacturing company does not matter - DPS cooperates with Samsung, Sony, MSI and other large companies, so there can be no conflicts between the installed software and their hardware.
3.2 Driver Booster
A good alternative to the previous program. You can download it HERE
It operates on a similar principle - the user launches DB and clicks on the scan button, after which he receives information about new versions of drivers for devices detected on his computer.
All that remains is to select those that need updating.
There are also a number of additional functions: The utility will help fix problems with no sound as a result of incorrect driver loading, calibrate the image to the width and height of the monitor, repair the network connection, etc.
And all fans of computer games will appreciate “Gaming Mode”
– in this mode, all drivers and the system itself are reconfigured to achieve optimal performance in a running game (there will be no significant changes, but you can add a couple of extra FPS).
3.3 Display Driver Uninstaller
Having figured out how to install the necessary drivers on Windows 10, it would be nice to also learn how to effectively remove them.
So that the remnants of outdated software do not negatively affect the installation of new ones.
The manual cleaning method has already been described above in the text, but it is worth considering a more effective and simpler one - automatic.
Display Driver Uninstaller will allow you to erase old drivers from the system onto the video card and install new ones on top. To do this, follow the instructions:
- Run DDU and select your video adapter type (it is usually detected automatically, but it's better to check)
- Enable or disable driver installation using Windows Update
(depending on whether you want to install the drivers automatically or manually). - Choose one of three types of removal - with reboot, without reboot, with PC shutdown.
It is recommended to use the first or third point, since installing new drivers without restarting the system often leads to errors and conflicts.
Installation in compatibility mode
Unfortunately, not every manufacturer is ready to support their device for its entire possible service life.
It often happens that a new driver for a new operating system (which is Windows 10) is simply not released. And the only way out of this situation is to use compatibility mode.
You can use it in one of the following ways:
- By clicking RMB (Right mouse button) on the executable file, then "Properties"
drivers
selecting the “Compatibility”
in the
“Properties”
of this list.
Select the appropriate operating system there and click OK.
If it doesn't work, try another one.
RMB on the executable file – Fixing compatibility issues
Use recommended settings.
An automatic check will occur and the optimal settings will be selected to allow installation.
Method 3
Attention! This option will not work for Windows 10 Home.
- Simultaneously press the " Start " keys and launch the " Run " window. In the “Open” line, type gpedit.msc. Press (or ).
- In the editor (on the right), enter the “ User Configuration ” folder.
- Then " Administrative Templates ".
- Next is “ System ”.
- Select the “ Driver Installation ” section.
- After "Digitally signing device drivers».
- Check the box for “Disabled”
or o, and in the options under “ If Windows detects a driver file that is not digitally signed, ” select “Skip.”
Press. - Restart your computer.
- Now programs without a digital signature can be installed.
How to fix error 28
This error draws the user’s attention to the fact that the required driver is not installed on the device used by the system, or the installed driver is not detected for some reason.
Finding the component that needs software installation is quite easy - in the device manager (how to enter it is described in paragraph 2.1) a yellow indicator with an exclamation mark will be displayed next to it.
Try right-clicking on this item and searching for the latest version of the driver, and if it doesn’t look for it, perform a manual installation from a distribution downloaded on the Internet. The problem should be resolved.
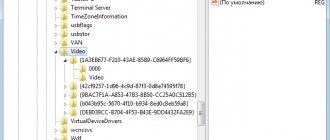
6.Search for a driver by device instance code
It often happens that the user cannot find the required driver for a specific device model.
Searching by ID will help you solve the problem effectively. Go to the device manager, look for the desired name and, right-clicking on it, select the information tab.
Additional methods for installing the driver on a laptop and computer “here”
We are interested in the VEN and DEV codes - the first identifies the manufacturer, and the second - the hardware itself.
The copied line of code should be run through the databases to obtain information about the optimal driver and load it.
Here are the most popular:
- Devid.info is a database with more than 124 million titles.
By pasting the copied ID into the line, the user will immediately receive several options for fresh drivers for operating systems of different versions and bit depths.
The service also has an installable application that automatically detects the identifiers of all components and connected devices.
Driverslab.ru is one of the largest Russian-language catalogs with the ability to quickly download drivers from their repository.
The principle of operation is similar to the previous one. You can find old drivers on it if suddenly the device’s performance has decreased due to a lack of optimization in the new version (this often happens with old hardware that the developers have stopped supporting), and they have already been removed on the official website.
Now that you have learned how to install missing drivers on Windows 10 manually or automatically, be sure to try the above recommendations in action.
After all, timely updated drivers often allow you to achieve higher performance, eliminate vulnerabilities, and even unlock additional functionality.
And don’t forget to share the link to the article on social networks if you found the material useful!
Source
Driver Genius
Judging by the name, this application for automatically installing drivers must be at least ingenious. But in practice, not everything is so smooth. This is an ordinary tool that has approximately the same capabilities that you can find in the rest of our TOP nominees.
Pros:
- Wide base of drivers.
- Ability to rollback all changes made.
- Completely free.
- Guarantees from the creators.
- Complete Russification of the user interface.
Minuses:
- We were not able to find any particular shortcomings, but the appearance of the software does not evoke any positive feelings.
Driver Genius
How to force install a driver on Windows?
This is not such a common situation, but when servicing a large fleet of user computers, sometimes it happens that for some device the manufacturer has not released drivers for the required OS version. This could be an old version of the OS, or an old device. All in all. Sometimes you need to install drivers manually. They are usually supplied in the form of several files. Most often they have the extension inf or sys, but they can also be different.
The procedure for installing a driver in Windows 10 depends on how you install it. Each method has its pros and cons. The most important advantage is that any user, from beginner to expert, can choose the most convenient one for themselves, avoiding system errors and program crashes in the future. We will look at each method in detail separately. Remember that the most important thing is to use drivers from reliable sources so as not to damage the operating system or accidentally launch a virus, the elimination of which will take much more time and effort than installing any driver.
DriverHub
The following application can also automatically detect and update drivers for all devices that are missing from your system or are hopelessly outdated. A positive feature of this tool is that it is 100% free.
Pros:
- There is a Russian-language interface.
- You don't have to pay a penny for the program.
- The appearance is at a fairly high level.
- Excellent operating speed.
- The program is simple and does not contain anything superfluous.
Minuses:
- For older or rare devices, the driver may not be found.
DriverHub
Manual installation - instructions
Installing the driver manually using Device Manager
1. Open the Windows 10 Control Panel by pressing the Win + X key at the same time (Windows key and X key) and left-click on “Control Panel”
2. For convenience, it is advisable to set up small icons.
3. Click on “Device Manager”.
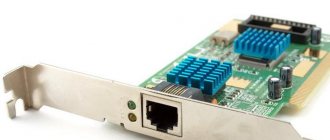
In the Device Manager window, expand the categories and find the device you need. Then right-click on the device name and select Update Driver Software. The photo shows an example of installing the Realtek PCIe GBE Family Controller network adapter driver.
It is highly recommended that you back up your data before updating the driver. This will prevent the device from malfunctioning if the installation fails.
Installing the driver manually using Driver Easy
1. In the main window of the Driver Easy program, click on the driver of the device that needs to be updated. After this, you will see the standard task manager window, which was described above. Select the device to update.
2. You will see two options in the pop-up window. Click Browse My Computer to install the driver software.
3. Click Browse to locate the downloaded driver file.
Click the Down Triangle button in Driver Easy, then select Open File Location to open the driver folder.
For convenience, you can copy and paste the location of the downloaded files into the field.
4. Click Next to install the driver.
As you already understood, the update takes a lot of time and requires basic knowledge of working with a personal computer. In addition to updating manually, Driver Easy can automatically search, download and install all drivers that need updating. But, as we already said, this is not safe, since this function works in automatic mode, and in this case it is impossible to make a backup copy in case of a serious failure.
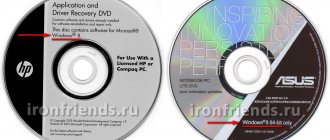
Installing the driver from a CD or DVD
Almost all computer and hardware manufacturers provide a set of drivers for various hardware devices. For example, the driver CD that comes with your printer contains drivers for many different printers, not just the one you purchased. When installing drivers, make sure that you are installing drivers for your printer model and not for another one. Also, make sure that you are installing it for the version of Windows that is installed on your computer. The process of installing a driver from a CD is no different from the standard installation process of any other program. Be sure to follow all instructions in the installer the first time you run it. In some cases, you need to remove the old driver before installing the new one.
If you have a driver CD but your computer doesn't have a drive or it doesn't work, you can also load the drivers from a USB drive.
Installing drivers from a USB drive
After copying the drivers to a USB drive, you can install the necessary software on your computer. Make sure the drive is connected to your computer, open Windows Explorer and find your device name in it. For example, if you have a USB drive that is assigned to the E: drive when connected, then you need to click on the icon named E: in order for the contents to open.
Once the drivers are found on the disk, you must determine exactly how they will be installed on your computer. If the directory contains executable files or an installation file (extension *.exe), then you can install the driver using this file. If the drivers are compressed into a ZIP file, you will need to extract the file using archivers such as 7-Zip and WinZip.
Method 2
Attention! This option is only suitable for PCs with Basic Input/Output System (BIOS).
If your computer is equipped with a Unified Extensible Firmware Interface (UEFI), you must first disable the Secure Boot option.
- Hover over "Start", press the right mouse button. Choose " Command Line (Administrator)».
- Type bcdedit.exe -set loadoptions DISABLE_INTEGRITY_CHECKS, then bcdedit.exe -set TESTSIGNING ON Press .
- After some time, information about the successful completion of operations will appear in the window. Close the command prompt.
- Reboot the device. Now the OS will function in test mode.
- Install the necessary drivers with a missing digital signature.
To return to the previous settings, enter bcdedit.exe -set TESTSIGNING OFF into the command line and confirm (). When the specified operation is completed, restart the PC.
Installing inf file
If the above recommendations did not help you, then all instructions for installing drivers and hardware devices are always contained in a file with the .inf extension, which is located in the C: Windowsinf folder. The folder containing the information files is protected and hidden. To make it appear, in the folder view settings, check the “Hidden items” checkbox. To find the information file for the device you need, follow these instructions:
• open device manager;
• right-click on the selected device and select “Properties” from the menu
• After that, go to the “Details” tab. Expand the list and select “INF Name”. The file name will be displayed in the "Value" field.
Once you know the file name, go back to the Task Manager, select the device, click "Update Driver" and specify the path to the *.inf file (in this example it will be C:Windowsinfoem3.inf)
Method 1
- Click on the icon "Start" (in the lower left corner), select "Shutdown».
- Press the button on the keyboard, hold it and at the same time select “ Reboot ”.
- As a result of the reboot, the following menu will appear on the screen containing additional parameters. Enter the folder " Diagnostics».
- Choose "Extra options».
- Go to "Boot Options».
- Click (bottom right).
- The Windows 10 boot options menu will appear on the screen of the rebooted computer.
- To change the Windows 10 startup configuration, you need to click the desired button (—). Press.
- After the system starts again, unsigned drivers may be installed.
- Reboot again to restore OS settings.