Photos and videos are part of our lives. They allow you to quickly fill in memory gaps and reproduce certain moments with a few touches on the display. Therefore, their storage is of paramount importance. There are quite a few ways to transfer photos and videos from one iOS device to another, and in this article we will talk about some of them.
Of course, the simplest option would be to back up to iTunes, but at the same time, other data, such as music, contacts, and so on, will be transferred along with photos and videos. But what if you only need to move photos and videos? As always, there are many solutions.
ON TOPIC: How to get photos from an iPhone or iPad backup created in iTunes.
Upload to iCloud Photo Library
Setting up automatic upload of gallery files to iCloud “storage” will solve the problem of moving and storing your photos and videos. Thanks to the automation of the process, every captured moment of life is immediately transferred to its own storage located on a remote Apple server. All devices linked to an Apple ID have access to it.
There is nothing complicated in the procedure for setting up the unloading system. On an iPad, MacBook or iPhone, open Settings - Apple ID (section at the top) - iCloud - Photos. Next to iCloud Photo Library, turn on the switch.
Please note that you will not be able to use the service for long. As soon as the free 5 gigabytes of Apple cloud storage are used, you will have to purchase additional space. The cost of the service is not high. The service can store documents, device backups and other data.
If you don't want to pay for additional memory, you can perform content optimization as a temporary measure. The original file size will be optimized for the display of iOS devices. Due to the large number of photos and videos, this option often turns out to be useless.
Use third-party cloud storage, such as Google Photo or Yandex.Disk
As an option, use third-party cloud storage like Google Photo (unlimited space for free + the program allows you to delete photos and videos uploaded to the cloud from the device), Yandex.Disk and so on, which often have a more loyal policy and provide more free space on free of charge.
You can also post photos forever on social networks, for example, Instagram (you can create albums), Facebook, VKontakte, Odnoklassniki, etc.
ON TOPIC: How to use Google Photos and how is it beneficial for an iPhone owner?
AirDrop
You can transfer photos from one iPhone to another using the AirDrop function. You will be able to transfer multimedia content between Apple devices. This feature has been implemented in iOS for a long time, but not all owners of Apple gadgets use it.
This is the best option for transferring photos between devices, since the procedure does not require access to the Internet.
How to transfer photos from iPhone using AirDrop:
- Bluetooth and Wi-Fi must be turned on on both devices at the same time. This is done in the iOS control center. To do this, swipe your finger across the screen from bottom to top.
- In the control center, the AirDrop function is activated. If necessary, you can limit access by activating AirDrop exclusively for your contacts.
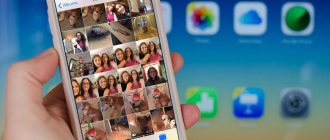
- Launch the Photos app and mark the pictures you want to transfer.
- Open the Share menu and select the desired contact to transfer from AirDrop.
- Confirm the file transfer on the second device.
File transfer occurs quite quickly with a maximum distance between devices of up to 9 meters.
Option 4 - plug-in drives
In addition to all of the above, a variety of storage accessories can solve the issue of how to transfer photos from iPhone to iPhone. There are quite a lot of similar devices on the market. In most cases, they differ only in the appearance and size of the drive, and require an additional application to operate.
Interesting options that can be purchased in Russian stores include products from SanDisk and Leef. On average, for a 16 GB drive, compatible with iPhone and iPad, with a Lightning connector, sellers ask about 4,500 - 5,000 rubles. As internal storage capacity increases, so does the price. Today there are 128 GB models on the market. However, the price of such “flash drives for iPhone and iPad” can reach 15-16 thousand rubles.
How to transfer photos to a new iPhone
Starting with iOS 11 and newer versions, it is possible to transfer photos from iPhone to iPhone. In this case, the devices must be nearby.
- Turn on your new iPad or iPhone and place it near your old device.
- The "Quick Start" window will appear on your new phone. Here you will need to enter your Apple ID details.
- An image will appear on the screen of the new phone that needs to be scanned with the old phone.
- You will be asked for the password for your old phone, enter it on your new device.
- Set up Touch ID on your new iPad or iPhone.
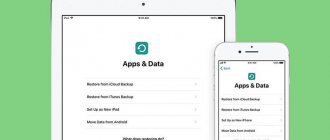
- At this stage, you will be asked to restore old data on your new iPhone from a backup of the latest compatibility.
- Select the files you want to transfer from your old phone to your new one from iTunes or iCloud.
- Agree to all terms.
After this, the file transfer process will be completed and completed automatically.
Cable via Android File Transfer
Android File Transfer - One to One Finder
- How it works: via cable - ideally USB-C to USB-C
- Which directions: from Android to Mac, from Mac to Android
You can transfer files from Android to Mac and from Mac to Android via cable. This is necessary in the case when the first place is not the convenience of connection, but the speed of information transfer: photos, videos, capacious files.
I'm working on a 2022 MacBook Air, which charges with a USB-C to USB-C cable. Most new Android smartphones have the same connection, so you can use the included cable. But I more often connected with a short “cord” with Type-C on both ends that came with the ZMI 10 charging jar.
Without additional software, Mac does not see Android connected in external storage mode. To do this, you will need a special universal Android File Transfer application. It starts as soon as you plug the cable into your Mac and smartphone.
The program is similar to a separate Finder window and supports macOS 10.7 and above. It does not always work 100% correctly, but most often it copes with its responsibilities.
(for free)
How to transfer photos from iPhone to MacBook
- Use a USB cable to connect your phone to your computer.
- Launch the Photos app (flower icon). The program may open automatically.
- On the left side of the window, click on “iPhone”.
- Select the photos or videos you want to copy. To copy all photos, select nothing.
- To transfer photos from iPhone to computer, click on “Import selected”. To transfer all photos, select "Import all new photos."
After copying is complete, click on “My Albums” and look at the copied photos.
In addition to the above methods, you can transfer photos and videos from your iPhone using storage accessories. There are many flash drives for iPhones on sale. They differ only in appearance. For them to work, you will need to install a special application.
Other ways to send photos
In order to send a great photo to another iPhone, you don’t have to use the unique functions of your Apple device. You can use one of the universal methods suitable for any OS.
Mail app and send photos without activating your Apple ID or worrying about security. You can transfer a photo in a few simple steps:
Step 1 . Find the photo you want in your Camera Roll and open it.
Step 2 . Click the Share button, then click Next.
Step 3 . In the menu that appears, select the “Mail” option.
Step 4 . Enter the recipient's email address and click "Send".
After some time, the photo will appear in the recipient’s mailbox, from where he can easily download it to the smartphone’s memory.
Cloud storage
An iPhone user has the opportunity to post photos not only in iCloud , but also in other cloud storages - in particular, in Google Drive , Yandex.Disk , Dropbox , Box , Mail.ru cloud . The first three services impose strict requirements on the device’s OS - the gadget must have iOS 8 or a later version. Box and the Mail.ru cloud are also installed on iOS 7.
Let's look at how to share photos using the latest cloud service. The choice of this “cloud” is justified not only by the liberal attitude of the application to the iPhone OS, but also by the ease of data exchange - you can open access to the storage to other people in just a couple of clicks. The user is given 25 GB - compared to 5 “free” GB in iCloud , this is a whole abyss of information!
After downloading Cloud Mail.ru , proceed as follows:
Step 1 . Open the application and enter your email address and password. Attention: only Mail box will work .
Step 2 . Next, go to the “Cloud” section. There are initially several pictures and one video, but obviously this is not what you are going to send.
Step 3 . Post the photo to cloud storage. To do this, click on the plus in the upper right corner.
A menu will appear where you have to choose whether you want to upload the photo you have on your iPhone or take a new photo right now. We already have a photo to send - click on “All photos and videos”.
Step 4 . The program will ask for access to the Photos - click Allow.
Step 5 . Cloud Mail will take you to the Camera Roll section. Select the photo you want and click “Done” to start uploading.
The process of placing a photo in the “cloud” can be tracked - the progress of the process is displayed by a blue stripe around the “Cancel” icon.
Step 6. Once the upload is complete, click on the “i” icon - you will go to the “Properties” of the image.
Step 7 . In the “Properties” section, find the “Sharing” block and click on the item that says the following: “Access via link is closed.”
You will see a window offering several ways to share a link to a photo with another iPhone owner: Mail.ru mail , another email , SMS message . Considering that not everyone uses email on a mobile device, SMS is the most suitable option.
Step 8 . By clicking on the “Messages” icon, you will find yourself in the application of the same name. The body of the letter will already contain a link to a specific image in the Mail - you just need to enter the recipient’s phone number and send an SMS.
The recipient of the message just needs to open the link and save the image to their iPhone.
MMS
This way of sharing photos has long gone out of fashion. The reason for the cool attitude of users towards MMS is the high cost of messages. One MMS costs about 7 rubles (the exact price depends on the operator) - it’s much more profitable to spend 5 rubles to activate iMessage and exchange photos as much as you like. Nowadays, MMS is more often used by those users who want to send pictures from iPhone to Android or a smartphone with another OS.
Comprehensive instructions on how to set up and send MMS are presented here. In general, you need to proceed in the same way as when using iMessage .
You can try FTP via ShareMe
You can manage files directly through Finder
- How it works: via connection to the same Wi-Fi network
- What directions: between Android, Mac and even iPhone
You can transfer files wirelessly via FTP. I tried many Android applications that create a server for transferring files, but ShareMe turned out to be the most convenient.
ShareMe is a standard application for Xiaomi smartphones, which was previously called MiDrop. Today it can be installed on any smartphone running the Android operating system, regardless of the manufacturer.
After installation, open it, go to the side menu, select “Connect to a computer” and click on the “Run” button. After this, the program will show you the FTP server address. You need to enter it into Safari, and the browser will offer to open a folder in Finder with all the files from your smartphone.
The process of creating an FTP server on Android
The same address can be used on iPhone without any problems. The mobile version of Safari from iOS 13 now has a download manager, so downloading something from here will not be a problem. The only caveat is that it works within the same Wi-Fi network.
If you're not on Wi-Fi, you can create a wireless network directly from the ShareMe app. To do this, select the “Direct transfer” option in the side menu. After connection, the algorithm for working with the system will be exactly the same.
(for free)
Upload videos to social media platforms
If you want to share your iPhone videos with all your friends, family and followers, then social media and video sharing platforms are the best choice. Just download your favorite app, log in and download the video using the app itself.
Here are some of the best apps to download videos from your iPhone:
- YouTube: Public, private or unlisted videos with virtually no size restrictions.
- Vimeo: Public and private high quality videos are limited to 500MB/week.
- Instagram: Public videos up to one minute or more from IGTV.
- Facebook: Public or private videos with a limit of 240 minutes or 10 GB.
- Twitter: Public videos limited to two minutes and 20 seconds or 512 MB in size.
- Flickr: Public or private videos limited to three minutes or 1 GB.
All these video hostings
offer several different ways to download videos from your iPhone. Most of these are available from the Share page in the Photos app, but you can also select Upload, Publish, or Share Video from within the apps themselves.
Which platform should you choose? Unless your videos are very long, use the service that most of your friends and family already use. Just keep in mind that many social media apps use pretty aggressive video compression.
How to transfer video via Bluetooth
Bluetooth wireless technology was actively used by people in the mid-2000s. Now this method is not in demand. Moreover, iPhones do not support data transfer via Bluetooth. But you can bypass this limitation using the Cydia application:
- Activate bluetooth in settings.
- Go to Cydia.
- Go to the Airblue sharing section to install the add-on.
- Select the file to transfer and the recipient's device.
To work with Cydia, you must jailbreak your iPhone, after which the warranty on the device will be lost. If you don't want to risk your security, choose one of the methods presented earlier.
4.6/5 — (33 votes)
Author
Hermann
Expert in the field of digital technologies and the activities of mobile operators. I am engaged in constant monitoring of industry changes in Russia and abroad.
How to transfer video via USB connection
Very few iPhone owners know about the existence of this method of sharing videos. Our experts answered questions related to sending video via USB so that everyone can understand whether this file transfer option is right for them.
Hermann
Expert in the field of digital technologies and the activities of mobile operators. I am engaged in constant monitoring of industry changes in Russia and abroad.
Ask a Question
Question to the expert
In what situations do you need to transfer video via USB?
The method in question is intended for people who are going to transfer files from an old iPhone to a new one. If you only need to send 1 video, it is recommended to use another exchange option.
What will be needed for the transfer?
The iPhone itself does not have a USB connector. Therefore, you need to get a Lightning-USB 3 adapter and a Lightning-USB cable.
How to send a video?
Launch the new iPhone, start the migration process. Insert the Lightning-USB 3 adapter into the connector of the old iPhone. Connect both devices with a Lightning-USB cable. Continue with migration.
Xender special service
Xender interface in browser
- How it works: via connection to the same Wi-Fi network
- What directions: between Android, Mac and even iPhone
Enough third-party applications and services have been invented for multi-platform file transfer. I tried a dozen and chose Xender, which most closely resembles AirDrop. It works relatively stably and does not fail 100% of the time.
To transfer files to a Mac, open the app, press the ⊕ button and select Connect to PC. After that, go to the web version of the service through your computer browser. Press the SCAN button on your smartphone and scan the QR code from the screen.
An interface will appear on it for working with all the contents of the smartphone’s file system.
This is what this service looks like on Android
You can also transfer files to your iPhone via Xender, but to do this, the service application must be installed on it as well. To do this, open the programs here and here. Press ⊕ on iPhone and select Connect Android. On Android, select Send and scan the QR code on its screen via iPhone.
This way you can transfer not only photos, but also documents from the Files application.
- (for free)
- (for free)
- Web access to Xender on Mac (free)