Operating systems iOS
11.05.201911275
The owner of a device from Apple Inc., who knows how to use an iPhone and has already learned how to use a file manager, without a doubt, knows how to shoot video with a camera - and, quite possibly, does it no worse than professionals. Then a new task arises: to prevent the iPhone's memory from becoming full, transfer files to the computer from time to time. We will talk about the simplest ways to solve the issue.
A universal method for all operating systems - “iCloud Photos”
Let's start our review with the fastest and most convenient way to transfer photos - cloud storage. For iPhone, the most convenient way is to use the iCloud Photos app. By installing this program, all your photos and videos will be automatically copied to your account, and access to them will be open to all your devices, including iPad, Mac and Windows.
To transfer photos to Mac, follow this path: “System Preferences” - “iCloud” - “Options” - “iCloud Photos”. Then manage your media files as you wish.
To manage your photos on Windows, download and install iCloud for Windows. To do this, you will have to go through the Apple ID identification, which must match the iPhone ID. In the program interface, open the “Options” section Select “iCloud Photo Library”. There you will have access to media files of connected devices of your Apple ID account.
How to transfer photos from iPhone to Mac
To do this, we need to install the Photos and iTunes programs on your computer, at least version 12.5.1. Then connect your smartphone via USB cable to the desktop. If the files are on a memory card, then remove it and install it in the SD slot using an adapter. Next, you will need to go through identification procedures: enter a password, and also give permission to establish a connection with the PC - to do this, click the “Trust” button. Your Mac will then automatically launch the Photos app. If this does not happen, open it manually. On the top line of the interface in the right corner you will see the “Import selected” and “Import all new photos” buttons. If your interface displays these buttons as inactive, then you may have the wrong device selected in the left column. Make sure the correct gadget is open. Next, the system itself will save the necessary files, and all you have to do is remove the SD card or disconnect the iPhone.
Synchronization is quite simple and even inexperienced users can handle it easily, but hiccups still happen. The problem may be that there is no physical connection via the USB cable. Check it, maybe it is bent somewhere or does not fit tightly into the socket. The second most likely reason is outdated software. Update it to the latest version. And try connecting again. If this is not your first time connecting to this desktop, then you may have added it to the “not trusted” list. Reconnect and select “Trust”.
Transferring video via flash drive and Leef iBridge
Before transferring a video file, the Leef iBridge application must be installed on your iPhone using the appropriate version. It can be downloaded from the next page. After this, you need to carry out the file transfer procedure, which will require the following steps:
- The video file selected for transfer is copied to a flash drive, which is first inserted into the USB connector of the computer. After downloading, the flash drive will need to be connected to the phone.
- To continue working, you must launch the application.
- After it starts working, it will detect the connected flash drive. Next, select the “Information Transfer” section.
- The user will be able to select the file on the flash drive that needs to be transferred.
- You need to choose between copying and moving. After issuing a command to transfer a file, it will occur in the selected mode.
After the transfer is completed, the video file will be available for viewing.
How to transfer photos from iPhone to Windows
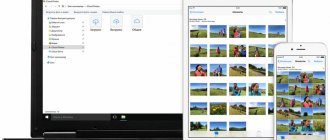
You can copy photos and videos even in the Windows operating system using a regular Explorer. Despite the fact that we do not touch iTunes in this method, it must be installed and updated to the latest version. Next, connect the device via USB, enter the password and select the computer as “trusted”.
For Windows 7 , you open “Computer” - “Your Device” - “Internal Storage” and the “DCIM” folder, where your multimedia files are located. Next, copy the desired photos and videos to any location on your desktop. If your device is not highlighted in the Computer window, try turning on the camera on your iPhone. As a rule, this works the same as with other photographic equipment.
For Windows 8, photo and video synchronization is done by the Photos application. Open it and pull from the bottom edge towards the center to reveal the available functions. Click on the “Import” option and the program itself will select all files that have not been downloaded previously.
For Windows 10, click on “Start” and select the “Photos” program. In the application interface, click on the “Import” button, and then “From a USB device”. The system will begin copying files. All photos and videos will be saved in the “Pictures” folder.
Please note that if you have already set up synchronization with iCloud, you will not be able to copy photos and videos to your PC.
There are often problems with video orientation. If you view them through iTunes, the default orientation will be selected correctly.
Conclusion:
You must understand how to send large videos from iPhone to PC and Mac. First of all, a USB cable is the easiest way to get the job done. The downside is that this method only supports videos you took with your iPhone camera.
If you purchased movies or TV shows from the iTunes Store, you can transfer them from iPhone to computer using iTunes. And iCloud is another way to get iPhone videos over the Internet. The problem is that these methods only send video from iPhone to computer, but do not transcode. On the other hand, Apeaksoft iPhone Transfer is a professional video transfer app for iPhone. Not only is it easier to use, but you can also download iPhone videos in original quality. Now you can choose the right path depending on your situations and follow our instructions to complete the task.
Sync iPhone with Mac or Windows via iTunes interface
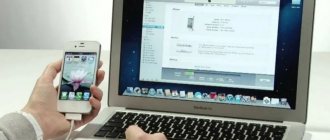
The iTunes application provides more options for copying different types of files. Connect your iOS gadget via USB, enter the password, indicate that you “Trust” this desktop. On your computer screen, launch iTunes, and in its interface in the upper left corner, click on the icon with your iPhone. The side menu in the Settings section will indicate the types of files available for copying. We select the ones we need, for example, “Photos” or “Books”. You can also select specific files. On the right side of the window, check the “Synchronization” checkbox, after which the files will begin to be copied.
Be careful and read on-screen notifications carefully. If your iPhone has previously been synced with another library, then clicking on the “Erase and Sync.” you will delete all files of the same format from the smartphone, and in return files from the desktop will be written to it.
How to convert video to a suitable format
The choice of the desired format depends on the video player used. Some of them can work with a large number of formats, others only with a few. If you convert a video to an MP4 file, it is suitable for any specialized application.
One way to carry out this procedure is to use the iWisoft Free Video Converter program. It is available for download on the page.
To use the program, you need to launch it. The file that needs to be converted must be dragged with the mouse onto the main page of the application.
Next you need to do the following:
- You need to determine what format the resulting file should have. To do this, select the appropriate parameter from the drop-down list in the Profile line.
- In the list that opens, selection is made at the user's discretion as follows.
- Next, select a folder to save the output file. This is done in the Output line, which is located at the bottom of the page.
- After this, in order to start the conversion, click on the Start button.
After a few seconds, the conversion process will be completed. The ready-to-use file will be placed in the user-selected folder.
Sync iPhone with computer via Wi-Fi
To avoid messing around with wires that like to get lost and get crushed, you can establish a connection using Wi-Fi direct.
But for the first synchronization you will still need a USB cable. We connect the gadget via a cable, go through identification and open the iTunes application. In the interface, we need to select our device in the left menu, and on the “Overview” tab, go to the “Settings” section. Here we need to enable the “Sync this iPhone over Wi-Fi” feature.
You can also connect synchronization through the iPhone itself. Open “Settings”, then the “General” section, and then the “Sync with iTunes over Wi-Fi” subsection.
From now on, files will be automatically copied to your PC every time both devices (desktop and smartphone) are connected to the same Wi-Fi network. A message about this will appear in the notification line of your smartphone.
Copying and syncing media files for iPhone is not difficult. But to avoid losing important photos, choose one type of copying: either via cloud storage or via iTunes. One type of synchronization excludes the other. So, if you first copied files through iTunes and then activated iCloud Photos, the system will prompt you to delete the data synchronized with iTunes. Each type has its own negative sides. When using iCloud, remember that you can only use 5 GB of cloud storage for free. But copying through iTunes ties you to one desktop. The choice, as always, is yours.
Why transfer files
There may be several reasons for this, and here are some of them:
- Importing audio files from iPhone to PC can be useful if all your favorite music is saved on your phone. Typing one track at a time, looking for a suitable one (not a remix, not a cover or a remade track), and then waiting for it to load will take a lot of time. It’s easier to transfer ready-made files to your computer than to bother with a tedious procedure;
- The need to move photos or videos from an Apple gadget to Windows or Mac may arise if you need to send a lot of files via your computer, but there is no Internet on your smartphone (neither mobile, nor Wi-Fi, but the PC is connected to a local network). And also - if the user is afraid of losing important captured moments, not having memory to save a backup copy (not everyone is able to pay for space in iCloud);
- Transferring documents to a computer can be useful if you need to show a presentation, diagrams, tables, through a projector, or print a text document. You don’t always have a flash drive at hand, and the methods listed below will help you avoid the situation when you only have an iPhone, a cable, a PC, and the desire to transfer important information to the hard drive of the carrier.
And the most common thing is the lack of internal memory of the smartphone. If there are too many photos, music, documents, videos, then you can transfer all or some of them to your computer to free up memory for new files.
