In this tutorial, I'll show you how to turn off visual effects in Windows 10 to speed up your slow laptop or give your desktop PC a little performance boost.
The default settings in Windows 10 include most visual effects and various animations for ease of use and a beautiful appearance of the OS. It manifests itself in the gradual appearance and disappearance of certain elements (for example, scroll bars), shadow overlays, pop-up lists, etc.
They make working with the operating system smoother and more enjoyable, but at the cost of increased consumption of your computer's resources. And if there are not enough of them anyway, then this leads to an even greater slowdown of your computer device.
In such a situation, it is better to disable almost all visual effects. This can be done in various ways, which I have detailed below.
Adjusting power settings to improve performance
You can improve the performance of your device by changing power settings. First you need to activate the option by executing the console command:
- Right-click (RMB) on the Start button and select the “Windows PowerShell (Administrator)” option.
- Confirm launch in the dialog box.
- Enter the command powercfg -duplicatescheme e9a42b02-d5df-448d-aa00-03f14749eb61 and press Enter.
To change the power plan you need:
- Using the search bar, find and launch “Control Panel”.
- Set the display of elements to “Large icons”, open the “Power Options” section.
- If necessary, expand the list with additional schemes and install o.
Note! The method is not recommended for use on weak personal computers (PCs) and laptops.
Lock screen
"Windows 10"
is a universal operating system designed for any device – mobile and desktop.
For this reason, it has a “Lock Screen”
(displays beautiful wallpapers, time or messages) and
a “Login Screen”
(displays a password form).
You can disable the lock screen and go straight to the login screen, but to do this you will need to use one of two suggested methods: through the Local Group Policy Editor
or through
the Registry Editor
.
Method 1
: Using the keyboard shortcut
“Windows + R”,
open the
“Run”
“gpedit.msc”
in the command line field and confirm the entry with the
“OK”
.
In the “Local Group Policy Editor”
in the left pane of Explorer, go to
“Computer Configuration”
-
“Administrative Templates”
-
“Control Panel”
-
“Personalization”
.
In the right pane, find the option “Prohibit display of the lock screen”
.
Double-click on it or right-click on it and select Edit
.
In the "Prevent lock screen display"
Check the
Enabled
to enable the Turn Off
Lock Screen
.
Confirm your choice by clicking the "Apply"
and
"OK"
. The changes made will be saved.
Then restart your computer. Now you will see that "Lock Screen"
is no longer displayed and you are immediately taken to the
"Login Screen"
.
Method 2
: For those for whom the first method is not available due to lack of access to the
“Local Group Policy Editor”
, you can disable
the “Lock Screen”
through the
“Registry Editor”
.
To access the registry, you must have administrator rights or be logged in under an account that has such rights.
Important to remember
: You must perform all actions with the registry very carefully.
If changes are made incorrectly, the operating system may fail, and problems may arise with starting the computer or with the correct operation of some of its services. And restoring the registry to its original state will be quite difficult. We recommend that you back up your registry before making any changes to it. “Registry Editor”
window, in the main menu ribbon, select the
“File”
and click the
“Export”
.
Select the location where you want to save the existing registry source file, give it a "File Name"
and click the
"Save"
. Now you can always return to the original registry settings from the saved file.
Press the keyboard shortcut "Windows + R"
, In the
Run
, in the Command Prompt box, type
"regedit"
and click
OK
to open the
Registry Editor
.
In the Registry Editor
In the left pane of Explorer, go to the following address:
HLEY_LOCAL_MACHINE SOFTWARE Policies Microsoft Windows Personalization
Or enter it in the line under the main menu ribbon.
If the "Personalization"
is missing, then create it yourself: right-click on the
“Windows”
, open the
“Create”
and select
“Partition”
.
In the right pane of the Registry Editor
right-click in any empty space, open the
“Create”
and select
“DWORD Value (32-bit)”
, including for a 64-bit system.
Name the parameter "NoLockScreen"
.
Double-click on the selected parameter or right-click on it, and in the menu that opens, select the “Edit”
.
In the "Value"
Enter the number
“1”
and click
“OK”
to save your changes.
Restart your computer for all changes to take effect. Now "Lock Screen"
will no longer be displayed, you are immediately taken to
the “Login Screen”
.
Disabling reporting
When errors occur within the system, a special service organizes the collection of data to be sent to Microsoft servers. This consumes computer resources, which negatively affects performance. To disable the function you need:
- Through a system search, find and open “Change Group Policy”.
- Using the directory tree structure, go to Computer Configuration → Administrative Templates → Windows Components → Windows Error Reports.
- Double-click to open the "Turn off Windows Error Reporting" option.
- Set the switch to the “Enabled” position, click Apply, OK.
Important! The method works in Windows 10 Pro and Enterprise editions.
Option 3
- Open the classic “ Control Panel ”, open again “ Ease of Access ”.
- Here we need the “ Design and Personalization ” section, in it we click on the “ Ease of Access Center ” item.
- Open the item “ Optimize images on the screen ”.
- Scroll down and look for “ Disable all unnecessary animation (if possible) ”;
- Place a checkmark next to it and click “ Apply ”.
Now you can definitely turn off unnecessary Windows 10 animations that affect performance.
If you have any questions, write in the comments, we’ll sort it out. Sometimes we may notice that our computer is not as agile as it should be, especially if we have old or not very powerful hardware. The lack of smoothness can be blamed on Windows 10, as well as the animations and visual effects that the Microsoft operating system includes to give it a better look. These effects can be turned off, and today we will tell you how to do this.
By default, Windows has a number of animations and visual effects activated to give it a more attractive and modern appearance. But this may cause performance issues on some computers, especially those with a limited graphics card. While we can't really improve team performance, we can save resources. So while we'll lose a bit of flash, we'll notice more of a real feeling that the entire operating system is running more smoothly .
Deactivating Windows Defender
You can speed up your PC by disabling the built-in antivirus. It will not be possible to completely stop the component, but deactivating real-time protection will improve performance.
Step by step guide:
- Open system settings by pressing Win + I, go to the “Update and Security” section.
- Go to the “Windows Security” tab, click “Virus and Threat Protection”.
- Click on the “Manage settings” hyperlink in the “Protection settings against viruses and other threats” block.
- Set the “Real-time protection” slider to inactive.
Data Execution Prevention
Data Execution Prevention (DEP) helps protect your computer from viruses and other security threats. The operating system uses DEP to mark all memory locations used by applications as non-executable "data-only" if the location does not explicitly contain executable code.
If an application attempts to execute code from a memory page that is marked as not executable, the processor can throw an exception and prevent the code from executing.
In the Performance Options window, in the Data Execution Prevention , the user has the option to Enable DEP only for essential Windows programs and services or Enable DEP for all programs and services except the programs selected below .
In the current window you can find out whether your computer's processor has hardware support for DEP.
To increase the performance of your computer on Windows 10, you need to configure visual effects, virtual memory, and data execution prevention. All current tools are available on any version of the Windows 10 operating system and previous versions of the Windows operating system.
It is also worth considering the best third-party programs for optimizing your Windows 10 computer. Optimization programs can improve system performance by removing tails from programs, temporary files and the registry.
Whatever version of Windows is installed on the computer, the user will want to configure it in such a way as to get maximum performance. This issue is especially acute for owners of weak hardware, which requires maximum free resources for stable operation.
Therefore, tuning Windows 10 for maximum performance is an excellent priority for them when purchasing new components such as a processor or video card.
Setting your privacy options
By changing your privacy settings, you can disable services that are burdening your system. Required:
- Open system settings using the Win + I combination.
- Go to the "Confidentiality" section.
- Disable options in all tabs.
Note! It is recommended that you read the accompanying information before disabling the option.
Option 2
Disable element animation in Windows Settings.
- Go to the Accessibility :
- Move the slider to disable animation in Windows:
Ready! This option can be re-enabled at any time to activate the animation.
Disable Windows 10 visual effects
Visual effects perform an aesthetic function and place a large load on the computer's central processor.
Disable unnecessary elements:
- Right-click on the “This PC” shortcut and select the “Properties” option.
- In the sidebar, go to the “Advanced system settings” section.
- Click on the Settings button in the “Performance” block.
- On the “Visual Effects” tab, set the radio button to “Ensure the best performance.”
- Click Apply.
Manually fixing the Windows registry
This method is also suitable for users 7, 8 and 10, using her example I will show how easy it is to do this.
- We need the registry editor Regedit , press Win+R or use the search and launch the editor.
In Registry Editor, use the left sidebar to navigate to the following section:
| HKEY_CURRENT_USERControl PanelDesktop |
Next, in the right pane, find the MenuShowDelay and double-click to open it.
You can set the value from 0 to 4000 milliseconds, but a value of 150-200 preserves the animation effect and makes it fast, but it's up to you.
Terminating unnecessary processes
To quickly normalize computer performance, it is recommended to analyze the CPU load, which is carried out by running applications and services. To do this you will need:
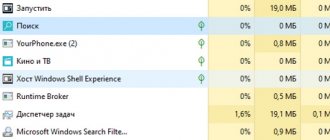
- Press the combination Ctrl + Shift + Esc to launch the “Task Manager”.
- If necessary, expand the full menu by clicking on the “Details” item.
- In the “Processes” tab, sort applications by the “CPU” column.
- Identify the program that consumes the most resources and click the End task button.
Turn off notifications
The system continuously checks all running services for new events. When they appear, a pop-up notification appears with information. Disabling this option will improve the performance of your computer. You need to do the following:
- Open system settings using the Win + I keys.
- Go to the “System” section.
- On the Notifications & Actions tab, deactivate the Receive notifications from apps and other senders option.
"Mini blog" of the system administrator
This “Mini Blog” contains a collection of small but practical tips that have helped me more than once in solving various computer problems. These tips or instructions that I have collected from the vastness of the World Wide Web are more like small “cheat sheets” that can be useful not only to a system administrator, but also to someone who wants to solve their computer problems on their own.
Receive new notes by e-mail.
Disable visual effects in Windows 10 to improve system performance.
This advice applies exclusively to Windows 10.
Often, those who installed Windows 10 on weak hardware and notice the system slowing down, in search of a solution to this problem, receive standard advice - reinstall the system on “seven” and you will be happy)). Often, one of the arguments that some users give in defense of this idea is the fact that the Windows 10 OS is a more resource-intensive system in terms of “stuffing” the system interface with graphical “goodies”. To some extent, they are right. The graphical interface of Windows 10 is designed primarily for modern hardware. However, you can disable some visual effects in Windows 10 and thereby slightly improve system performance. On powerful hardware, this will not give a noticeable increase in performance, but on weak or old hardware it will be a small plus to increase productivity.
pc103help.blogspot.com
Optimizing startup programs
To speed up system startup, it is recommended to clear the startup list, which contains applications that start when you turn on the computer. To do this you need:
- Open Task Manager by pressing Ctrl + Shift + Esc.
- Go to the "Startup" tab.
- Select the program that you want to exclude from the list and click the Disable button.
The application is not removed from the list, so if necessary, you can return everything back.
Start Menu Ads
"Microsoft"
regularly develops new applications and offers them to its users for download and installation from
the Windows Store
.
Start
menu presents a panel (tile) that displays applications, even if you have not installed them.
Clicking on these “apps”
opens a store where you can purchase and download them.
These “suggested apps”
are basically just advertisements. They add additional load to your system and can be disabled if desired. Thus, you free up system resources to solve other tasks.
If you decide to disable ads, then open the “Options”
and go to the
"Personalization"
.
In the left pane of the window, select the “Start”
and in the right pane, move the indicator in the “Occasionally show suggestions in the
Start menu”
to the
“Off” position.
.
Driver Update
Drivers are software that connects computer components with components. It is necessary to monitor version updates in order to achieve an increase in the operating speed of the OS.
You can update drivers using standard Windows 10 tools - through the Device Manager. To do this you need:
- Go to the “Start” menu, open the “Accessories - Windows” folder in the list of applications.
- Launch "Administration Tools".
- Select and open “Computer Management” from the list.
- In the window that appears in the sidebar, go to the “Device Manager” section.
- In the list of connected equipment, expand the required branch and right-click on the component.
- Select "Update driver", then "Automatically search for driver updates"
If new software versions are detected, the system will install it, after which you will need to restart the computer.
As an alternative, you can use special developments to update drivers:
- Driver Booster;
- DriverPack Solution;
- Driver Hub;
- Snappy Driver Installer;
- Driver Genius.
These developments have an intuitive interface and do not require the user to have extensive computer experience.
How to disable Windows animation?
- Change performance settings
- Use ease of access options
How to stop Windows animation? .
This is a question that many Windows users have in mind. For those of you who have Windows 10, Windows 8.1 and want to disable the animation feature, it can be done very easily. Animations are nice to have, for example, when you let your kids play on the computer. If you want to really get some work done, animations in Windows 10, Windows 8.1 can be very distracting. In fact, it may take longer to complete your work than you want. Animations in Windows 10, Windows 8.1 basically make your operating system more colorful by adding several additional features to the system. However, for a user who wants to use Windows 10, Windows 8.1 PC only for work purposes, it is not very useful. Animations increase the response time of your operating system. We will see exactly how to disable UI animation in Windows 10, Windows 8.1 in a couple of steps below.
Turning off OneDrive
OneDrive is cloud storage from Microsoft, which is pre-installed in the tenth version of the OS. In the background, the program still consumes computer resources, so it is recommended to disable it.
Step by step guide:
- On the taskbar on the left, right-click on the OneDrive icon and select “Settings”.
- In the new window, on the “Options” tab, remove o.
- Click on the Remove link from OneDrive button and confirm the action.
- Click OK and restart the computer.
Deactivating unnecessary services
By default, the system has active services that are responsible for functions that are of no use to the user. It is recommended to disable them to reduce the load on the central processor. To do this you will need:
- Expand the search bar, enter “Services”, launch the program of the same name.
- In the window that appears, select the components that need to be deactivated. Double click the mouse.
- In the new window, click on the Stop button and select “Disabled” from the drop-down list.
- Click Apply, OK.
Important! Before disabling a service, you need to read the description in detail, otherwise you can delete the desired process.
Cleaning your hard drive from debris
A clogged system disk is the reason for the slow operation of the hard drive, which results in a decrease in the computer’s data processing speed. To automatically clean the drive, use the preinstalled Disk Cleanup program.
Management:
- Go to “Start”, open the “Disk Cleanup” function in the “Administration Tools” folder.
- In the program window, select drive C and click OK.
- Wait until the drive is scanned, then select all the items in the “Delete the following files” block.
- Click OK. Confirm the action by clicking the Delete files button.
Additionally, it is recommended to manually open the partition and remove objects that are not needed.
Important! The files placed in the Recycle Bin are still on the C drive, so you should systematically empty the storage.
Using third-party programs to improve your computer's performance
There are tools from third-party developers to automatically speed up your computer. Optimizer programs scan the system and allow you to quickly change the PC configuration to a more advantageous one in terms of performance.
CCleaner
CCleaner is a free program that allows you to clean your system of junk files and optimize the registry, which helps improve the performance of your computer.
Application features:
- Optimizing the system registry.
- Removing junk files.
- Uninstalling programs.
- Editing startup.
- Browser cleaning.
Auslogics BoostSpeed
Auslogics BoostSpeed is an application aimed at interacting with OS system components. Allows you to change service settings and adjust registry data.
Application features:
- Disabling and configuring system services.
- Defragmentation of the drive.
- Cleaning the registry and system disk from junk data.
- Optimizing your Internet connection.
- Editing startup.
- Hard drive analysis followed by error correction.
- Monitoring RAM performance.
Improving performance through disk defragmentation
Over time, data on a hard drive becomes cluttered, increasing read time and slowing down your computer. To defragment you will need:
- Open the file manager and go to the page with a list of sections.
- Right-click on the C drive and select the “Properties” option.
- On the “Tools” tab, click the Optimize button, located in the “Optimization and disk defragmentation” block.
- In the window that appears, select a section and click Analyze.
- Wait for the scanning process to complete. Start defragmentation by clicking the button of the same name.
The operation takes a long time, so it is recommended to leave the computer turned on overnight.
Note! This method is not suitable for devices with a solid-state drive (SSD) installed.
Page file optimization
For devices with insufficient RAM, it is recommended to optimize the paging file, which will allow you to offload some data to the hard drive, thereby speeding up the computer. To configure, you will need:
- Right-click on the “This PC” icon on the desktop and select the “Properties” option.
- In the sidebar on the left, click on the “Advanced system settings” hyperlink.
- In the menu that appears, click on the Settings button located in the “Performance” block.
- Go to the “Advanced” tab and click Change in the “Virtual Memory” section.
- Uncheck the box “Automatically select paging file size” and check the box next to the line “Specify size”.
- Enter in the “Original size” field a number corresponding to the amount of installed RAM. Maximum 2 GB more.
- Click Set, OK.
Disabling hibernation
Hibernation mode has a negative effect on weak computers, so it is recommended to disable this feature. You will need to use the console launched with superuser rights:
- In the search bar, enter “Command Prompt”, right-click in the results and select “Run as administrator”.
- Confirm the action in the dialog box.
- Enter the powercfg -h off attribute and press Enter.

