Good day to all! Today, a colleague saw the resume from hibernation message when turning on the computer and asked me what it was? In general, sit down comfortably. It's time to talk about how to disable hibernation in Windows 10 and why you should do it.
This time the note will be relatively short, without discussions on related topics. It won’t cause any difficulties and we’ll show you how to remove the hiberfil.sys file from the root of the system disk (as a rule, people think about hibernation precisely at the moment when they discover that this nonsense weighs a lot).
What is hibernation
Hibernation is a process in which the system completely shuts down, but remembers the last operating state. Everything is saved - open windows, their contents, running background processes. In fact, a user who wakes up from hibernation in Windows 10 returns to the same point in using the OS from which he left.
Interesting! Hibernating on a laptop will not only save time, but also battery life.
To wake up your computer or laptop from hibernation, just press the power button.
Is there a difference between hibernation and system sleep
People who are far from the field of computer technology may have the idea that hibernation mode is identical to sleeping. This association has nothing to do with the real state of affairs. Hibernation involves almost completely shutting down all components and rewriting all stored data from RAM to a hidden file on the hard drive. When the computer exits hibernation, this file is overwritten into RAM, which ensures almost instantaneous loading while preserving all active programs. The state of the computer is “photographed” and when it exits this state, Windows 10 continues to work, restoring its state in the last activity mode. After the “ten” exits hibernation mode, the user can easily continue his work exactly where he left off. Sleep works more primitively than hibernation. The computer does not turn off completely, but consumes much less electricity.
How to enable or disable hibernation mode in Windows 10
In earlier versions of Windows OS, it was clearer how to enable or disable hibernation - the necessary functionality was built into the OS interface. You could always open the computer shutdown menu and find the desired key there.
Today, it has become more difficult to tame hibernation mode. But until now, Windows OS offers several ways to solve the problem.
Via control panel
To initiate or disable hibernation without lines of code, you will have to look into the control panel. For this:
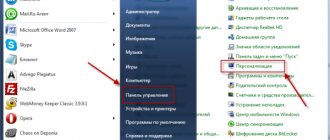
- Click on the search area or the magnifying glass icon. These items are located to the right of the Start menu button in the lower left corner of the screen.
- Type "control" and press Enter. The case of the entered text does not matter.
- Scroll down the page and open the Power Options section.
- Start setting up power plans.
- Click on the "Change advanced power settings" hyperlink.
- Expand the Sleep section.
- Select Hibernation.
- Edit the settings to launch the function when the device is operating via the network and via a battery.
About
Method 2: Through the Registry Editor
- We hold down the auxiliary key on the keyboard, and then immediately press the English letter R.
- Enter the command in the window:
regedit
- Open the main section “HKEY_LOCAL_MACHINE”. Next, open “SYSTEM” and the current OS settings – “CurrentControlSet”. Next, open “Control” – “Power”. On the right we find the “HibernateEnabled” or “HibernateEnabledDefault” setting. Open it by double-clicking with the left mouse button and set the value:
0 – turn off. 1 – enable.
- Click “OK” and restart the computer.
How to add a hibernation button to Start
For simplicity, you can add hibernation mode directly to the power off menu, which any computer owner uses every time they turn off. For this:
- Right-click on the Start menu button.
- Select "Power Management".
- Scroll the window that opens all the way down.
- Select Advanced Power Options under Related Options.
- Click on "Power Button Action".
- If the Shutdown Options section is grayed out, click Change settings that are currently unavailable.
- Check the box next to Hibernation Mode in Windows, under Shutdown Options.
- Click "Save Changes".
About
Automatic transition from sleep to hibernation mode
During sleep, the computer does not turn off completely, and hibernation mode can be considered the next step in turning off the device. It is logical to configure the system so that after a while the computer goes from sleep to shutdown mode. Let's put this into practice:
- Click in the search field or on the magnifying glass icon. These items are located to the right of the Start menu button.
- Type "Control" and press enter.
- Find "Power Options".
- Open the "Configure power plan" link.
- Select Change advanced power settings.
- Find and expand the “Sleep” directory in the list.
- Find and expand the “Hibernation After” directory in the drop-down list.
- Specify the hibernation parameters, namely the timing of the function when the device is running on mains power and on battery power.
- Click "Ok" to apply your changes.
If necessary, you can completely disable hibernation for a specific power mode or for both.
Important! The specified algorithm only works if the mode was enabled previously through the registry editor or command line. If this is not the case, the “Hibernate After” item will disappear from the “Sleep” directory.
As a result of the correct settings, we will receive a rational response of the computer to the user’s inaction - first the device will slow down its vital activity and go into a sleep state, and after some time it will switch off completely.
About
Run via command line
Enabling hibernation is possible not only through the “parameters”. CMD lovers will appreciate this launch alternative. Here you have the option to enable or disable the option. The method is suitable for those who cannot use the standard method due to the features of the BIOS.
First, launch the command line as “administrator”. To do this, go to “Start”, enter “cmd” in the field and in the output window, right-click on the program, selecting the desired item.
There are two commands:
- powercfg –h on – enable;
- powercfg –h off – shutdown.
(the space between powercfg and “-h” is required).
Details about the hiberfil.sys file
Hibernation mode involves saving the current state of the computer before shutting down. The system will remember which programs were opened and what happened in them.
The OS stores all the information necessary to restore the state in the Windows 10 hibernation file hiberfil.sys. The only problem with this data element is its size. Hiberfil is located in RAM and can occupy up to 70% of its volume. If this is critical and your computer is slow, cut down on hiberfil.sys:
- Press Win+R.
- Type "cmd" and press enter.
- Type "powercfg /h /type reduced" and press enter.
The specified algorithm will reduce the load on the computer. If you want to return the file size to its previous limits, simply repeat the above algorithm and enter “full”.
You can try to remove the hiberfil.sys file in Windows 10 so that it does not interfere with the device's normal functioning. This approach will not lead to the desired result - the system will recreate its image anew. This action helped get rid of the unnecessary mode on earlier versions of Windows.
The topic of hibernation in Windows 10 cannot be called complex or painful. If you need it, launch it and use it. If not, just as easily disable it and don’t waste your computer resources.
Surface Pro
In Windows 10, powercfg is a handy command line tool that has been around for many years and allows you to manage many aspects of power plans (or power "schemes").
So, power plans can be created, edited and deleted, and you can configure or disable certain features, including hibernation and the power button. The tool is also suitable for troubleshooting battery energy and performance issues. Finally, although not all, you can use powercfg to determine which devices wake your computer during sleep or hibernation and disable them as needed.
In this Windows 10 guide, we'll show you how to use the powercfg command line tool to manage your power settings.
How to export or import meal plans using powercfg
You can use the Command Prompt to export and import meal plans on the same or a different computer.
Export meal plan
To export a meal plan using the command line, do the following:
- Open Start.
- Find Command Prompt, right-click the top result and select Run as administrator.
- Type the following command to get a list of available power plans and press Enter: powercfg /list
- Type the following command to export the diagram to a ".pow" file and press Enter: powercfg /export PATH\TO\FILENAME PLAN-GUID
- In the command, provide the schema export path and GUID as shown in the output of step #3. For example, this command exports the Balanced Performance plan to the file balance-performance.pow on the C drive: powercfg /export C:\balance-performance.pow 381b4222 -f694-41f0-9685-ff5bb260df2e
After completing these steps, the plan will be exported to the .pow file you specified in the command.
Import a meal plan
To import a meal plan using the command line, do the following:
- Open Start.
- Find Command Prompt, right-click the top result and select Run as administrator.
- Type the following command to import the schema into the ".pow" file and press Enter: powercfg /import PATH\TO\FILENAME
- In the command, specify the path to the exported file. For example, this command imports the Balanced Performance plan into the file balance-performance.pow on drive C: powercfg /import C:\balance-performance.pow
After completing these steps, the power plan will be imported into the device.
How to enable or disable hibernation using powercfg
Hibernation is a power-saving feature that saves what you've loaded into memory onto your hard drive, allowing your computer to shut down without losing your current session. So, when you turn on the device, you can continue from the same place where you left off.
The powercfg tool allows you to enable, disable and manage this feature with a few simple commands.
Enable hibernation
To enable hibernation, follow these steps:
- Open Start.
- Find Command Prompt, right-click the top result and select Run as administrator.
- Type the following command to confirm that hibernation is supported in your configuration and press Enter: powercfg /availablesleepstates If Hibernate appears in available states on your computer, the feature can be enabled.
- Type the following command to enable hibernation on Windows 10 and press Enter: powercfg /hibernate on
- (Optional) Type the following command to reduce the size of the hibernate file (hiberfil.sys) and press Enter: powercfg /hibernate /type reduced The "reduced" type provides a "fast startup" without the need to enter hibernation. This option reduces the hibernation file to approximately half its normal size. When you use this option, the Hibernate option in the Power menu will no longer be available. Note: If you are using a custom size for the hibernation file, you must first run powercfg /hibernate /size 0 to avoid errors when running the "reduced" command.
- (Optional) Type the following command to change the size of the hibernation file as a percentage (50% or greater) of memory and press Enter: powercfg /hibernate /size 100 In the command, replace 100 with any percentage greater than 50.
After completing these steps, sleep mode will be enabled according to your configuration.
Disable hibernation
To disable hibernation, do the following:
- Open Start.
- Find Command Prompt, right-click the top result and select Run as administrator.
- Type the following command to enable hibernation on Windows 10 and press Enter: powercfg /hibernate off
After completing these steps, the option to go to sleep will no longer be available in Windows 10.
How to create a meal plan using powercfg
You can also create power plans with custom configurations using the tool. You cannot create a new plan from scratch. Instead, you need to duplicate the existing plan and modify it according to your requirements.
To create a power plan in Windows 10 using the powercfg tool, do the following:
- Open Start.
- Find Command Prompt, right-click the top result and select Run as administrator.
- Type the following command to get a list of available power plans and press Enter: powercfg /list
- Type the following command to create a new power plan and press Enter: powercfg /duplicatescheme GUID In the command, replace GUID with the power scheme GUID. For example, this command creates a copy of the Balanced Performance plan: powercfg /duplicatescheme 381b4222-f694-41f0-9685-ff5bb260df2e Note: Pay attention to the GUID for the power plan.
- Type the following command to rename the power plan and press Enter: powercfg /changename GUID "NEW-PLAN-NAME" In the command, replace the GUID with the new GUID of the power plan you want to rename and "NEW-PLAN-NAME" with the name new plan. For example, this command names the new power plan "Super performance": powercfg /changename ac093644-6503-4314-b3b6-0b601924e3e9 "My power settings"
- (Optional) Type the following command to confirm that the new plan was successfully created and press Enter: powercfg /list
- (Optional) Type the following command to set the new power plan as the system default and press Enter: powercfg /setactive GUID In the command, replace GUID with the GUID of the new power plan. For example, this command will set the "Balance performance" scheme as the new default: powercfg /setactive 381b4222-f694-41f0-9685-ff5bb260df2e
After completing these steps, the power plan will be created and available.
How to change power plan using powercfg
If you need to customize an existing meal plan, there are several customization methods you can use.
Change meal plan settings
To change settings using commands, follow these steps:
- Open Start.
- Find Command Prompt, right-click the top result and select Run as administrator.
- Type the following command to change the power plan settings and press Enter: powercfg /change OPTION TIME In the command, replace OPTION with the power setting you want to change and TIME with the new time in minutes. For example, this command turns off the display after 15 minutes of inactivity if the computer is online: powercfg /change monitor-timeout-ac 15
Here are the options for the /change option: standby-timeout-ac standby-timeout-dc disk-timeout-ac disk-timeout-dc hibernate-timeout-ac hibernate-timeout-dc monitor-timeout-ac monitor-timeout-dc
After completing these steps, the settings will be applied to your current power plan.
Changing Power Button Settings
In addition to customizing plan settings, you can change other power settings, such as what the default power button does.
To change what the power button does using powercfg, follow these steps:
- Open Start.
- Find Command Prompt, right-click the top result and select Run as administrator.
- Type the following command to change the default action of the power button when the laptop is plugged in and press Enter: powercfg /setacvalueindex SCHEME_CURRENT 4f971e89-eebd-4455-a8de-9e59040e7347 7648efa3-dd9c-4e3e-b566-50f929386280 0
- The command ends with “0” - this is the index value that will determine the action you need. Here are the available values that you can use: 0 – Do nothing. 1 – Sleep. 2 – Sleep mode. 3 – Shutdown. 4 – Turn off the display.
- Type the following command to change the default action for the power button when the laptop is running on battery and press Enter: powercfg /setdcvalueindex SCHEME_CURRENT 4f971e89-eebd-4455-a8de-9e59040e7347 7648efa3-dd9c-4e3e-b566-50f929386280 0
- Type the following command to apply the changes and press Enter: powercfg -setactive SCHEME_CURRENT
After completing these steps, the next time you press the Power button, the specified action will be performed.
Delete plan settings
- Open Start.
- Find Command Prompt, right-click the top result and select Run as administrator.
- To get a list of all available settings, type the following command and press Enter: powercfg /query
- Type the following command to delete a specific power setting and press Enter: powercfg /deletesetting SUB-GUID SETTING-GUID In the command, replace SUB-GUID with the subgroup GUID number and SETTING-GUID with the GUID of the power setting you want to delete. For example, this command removes the "Turn off hard drive after" option from the Super Performance plan: powercfg /deletesetting 0012ee47-9041-4b5d-9b77-535fba8b1442 6738e2c4-e8a5-4a42-b16a-e040e769756e
- To remove additional settings, you must repeat step No. 4.
How to remove a power plan using powercfg
To remove a power plan in Windows 10 using powercfg, do the following:
- Open Start.
- Find Command Prompt, right-click the top result and select Run as administrator.
- Type the following command to get a list of available power plans and press Enter: powercfg /list
- Type the following command to create a new power plan and press Enter: powercfg /delete GUID In the command, replace the GUID with the power plan GUID as specified in step #3. For example, this command deletes the My Power Settings plan: powercfg /delete ac093644-6503 -4314-b3b6-0b601924e3e9 Note: If the plan you are trying to delete is active, it cannot be deleted until you set a different default power plan (see steps below).
After completing these steps, the meal plan will no longer be available.
How to change power plan using powercfg
To set another power plan as the new default, do the following:
- Open Start.
- Find Command Prompt, right-click the top result and select Run as administrator.
- Type the following command to get a list of available power plans and press Enter: powercfg /list
- Type the following command to change the current power plan and press Enter: powercfg /setactive GUID In the command, replace the GUID with the power plan GUID as specified in step #3. For example, this command sets the "Balanced" plan: powercfg /setactive 381b4222-f694 -41f0-9685-ff5bb260df2e
- (Optional) Type the following command to confirm the active power scheme and press Enter: powercfg /getactivescheme
After completing these steps, Windows 10 will start using the new power plan configuration.
How to determine the device that woke up the system
To see what woke up the computer during the last sleep mode, do the following:
- Open Start.
- Find Command Prompt, right-click the top result and select Run as administrator.
- To understand why the system woke up during the last hibernation, type the following command and press Enter: powercfg /lastwake
After completing these steps, if a device woke up the system, it will be listed in the output.
How to define wake timers using powercfg
To find out which devices can wake up the system, do the following:
- Open Start.
- Find Command Prompt, right-click the top result and select Run as administrator.
- To view active wake timers in Windows 10, type the following command and press Enter: powercfg /waketimers
- Type the following command to view application and driver power requests and press Enter: powercfg /requests
After completing these steps, it will become much clearer which devices, applications, and drivers wake the system from sleep mode.
How to create a battery health report using powercfg
If you have a laptop and notice problems with battery performance, you can create a battery performance report. This will identify all the information such as brand, capacity, number of cycles, recent use, battery life estimates, and so on, all of which will help you decide if it's time to replace your battery.
To generate a battery report using the command line, follow these steps:
- Open Start.
- Find Command Prompt, right-click the top result and select Run as administrator.
- Type the following command to generate a battery report and press Enter: powercfg /batteryreport
- Use the Windows + Run combination to open the Run command.
- Enter the following location and press Enter: C:\battery-report.html
After completing these steps, you can view the battery report in your default browser.
How to create an energy report using powercfg
You can also create an energy report that collects data on energy behavior over a certain period of time. These can then be analyzed to understand what the power and battery issue is.
To create an energy report, do the following:
- Open Start.
- Find Command Prompt, right-click the top result and select Run as administrator.
- Type the following command to generate the energy report and press Enter: powercfg /energy Note: The command will run for 60 seconds by default, but you can use the /duration SECONDS option to specify how long the tool will monitor power behavior to generate the report. For example, you can use powercfg /energy /duration 120 to run the command for two minutes.
- Use the Windows + Run combination to open the Run command.
- Type the following location and press Enter: C:\energy-report.html
After completing these steps, the report can be reviewed to understand power and battery efficiency and detect and resolve power issues.
How to view available sleep states using powercfg
To view the supported sleep states available on your computer, follow these steps:
- Open Start.
- Find Command Prompt, right-click the top result and select Run as administrator.
- Type the following command and press Enter: powercfg /availablesleepstates Here is a list of all available sleep states: Standby (S3). Standby (S2). Standby (S1). Hibernate. Hybrid Sleep. Fast Startup.
After completing these steps, you will get a list of supported and unsupported features.
How to enable or disable devices that can wake up the system using powercfg
Some devices, such as network adapters, can wake the system from sleep or hibernation to perform a specific task. If you need to control this process, powercfg allows you to configure whether to enable or disable the device's ability to automatically start the system.
This is usually useful for keeping the computer from waking up in the middle of the night, or when you need to configure the device to start remotely using wake-on-LAN (WOL).
Enable device wake-up feature
To allow your device to wake the system during sleep or hibernation, do the following:
- Open Start.
- Find Command Prompt, right-click the top result and select Run as administrator.
- To view devices that are not currently configured to wake the computer, type the following command and press Enter: powercfg /devicequery wake_programmable
- Type the following command to disable the wake feature and press Enter: powercfg /deviceenableawake “DEVICE-NAME” In the command, replace “DEVICE-NAME” with the name of the device you want to enable. For example, the following command allows the Ethernet adapter to wake the system: powercfg /deviceenablewake "Intel(R) 82574L Gigabit Network Connection"
- (Optional) Type the following command to confirm that the device is turned on and press Enter: powercfg /devicequery wake_armed
- Make sure the device name appears in the list.
After completing these steps, your device will be able to wake up your computer when it is in sleep or hibernation mode.
Disable device wake-up feature
To prevent your device from waking up the system during sleep or hibernation, do the following:
- Open Start.
- Find Command Prompt, right-click the top result and select Run as administrator.
- To view the devices that can currently wake your computer, type the following command and press Enter: powercfg /devicequery wake_armed
- Type the following command to disable the wake feature and press Enter: powercfg /devicedisablewake “DEVICE-NAME” In the command, replace “DEVICE-NAME” with the name of the device you want to turn off. For example, the following command will revoke the Ethernet adapter's wake permission: powercfg /devicedisablewake "Intel(R) 82574L Gigabit Network Connection"
- (Optional) Type the following command to confirm the device is turned off and press Enter: powercfg /devicequery wake_armed
- Make sure that the name of the device you disabled no longer appears in the output.
After completing these steps, the device will no longer be able to take the system out of any power mode.