Read instructions on how to turn off notifications in Windows 10, remove the Action Center icon from the notification area, or customize how your operating system receives notifications. Windows 10 has a built-in function for displaying notifications from installed applications and system components.
Notifications are displayed on the computer's Desktop after clicking on the Notification Center icon, which is located in the notification area in the lower right part of the Desktop. Display of notifications in the operating system is implemented through the Windows 10 Notification Center.
Windows Action Center displays notifications and actions from installed programs, applications, and Windows components from the operating system. Any important message coming from an application or system is displayed in the Action Center, reminding the user to perform a certain action, or showing information about the completed operation.
For example, the operating system downloaded a Windows update in the background (read about how to disable Windows 10 updates here), a message about this will appear in the Action Center and a suggestion to restart the computer to apply the update in the operating system.
The antivirus has blocked the transition to a dangerous link; information about this will appear in the Notification Center.
The program has performed some operation; a notification about this will be added to the Notification Center. Not all programs interact with the Notification Center; from there you can remove notifications from unnecessary applications and set up so-called “Quick Actions”.
I think receiving notifications is a useful feature of Windows, but some users find receiving such messages annoying. Therefore, I will talk about how to customize receiving notifications and how to disable the Notification Center in the operating system.
Setting up Windows Action Center
It is preferable to configure the settings to receive notifications rather than disabling the Action Center in Windows 10 altogether.
To open and configure Action Center settings in Windows 10, follow these steps:
- Go to the Start menu, click on Settings.
- In the "Options" window, select the "System" section.
- In the list of options, click on "Notifications and actions".
Select the required settings.
Here you can organize the banners for quick actions that appear at the bottom of the Action Center sidebar that opens on the Desktop. Quick actions help the user get quick access to certain system parameters.
If necessary, swap banners for certain quick actions by dragging them from place to place using the left mouse button.
Click the Add/Remove Quick Actions link, then turn off the options you don't need.
In the “Notifications” section, you can fine-tune the receipt of messages in the operating system.
If necessary, disable unnecessary parameters:
- Receive notifications from apps and other senders.
- Show notifications on the lock screen.
- Show reminders and incoming VoIP calls on the screen.
- Hide notifications when mirroring my screen.
- Show the Windows Welcome screen after updates and sometimes when logging in to announce new features and offers.
- Get tips, tricks and tricks when using Windows.
In the “Receive notifications from these senders” section, the user can flexibly configure the receipt of notifications from specific applications.
To disable receiving notifications, move the switch to the “Disable” position next to the desired application.
In order, on the contrary, to receive notifications from certain programs, the switch must be in the “On” position.
To fine-tune a specific application, left-click on it, and then change the necessary parameters in the window that opens.
How to quickly turn off notifications for a while to focus your attention?
- Go to the notification center on the right side of the taskbar.
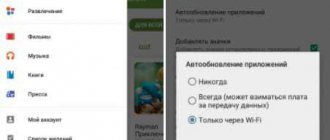
- “Focus” quick action button . If such a button is not visible, click on the “Expand” .
- Click on the “Focus Attention” to activate the setting: “Alarms only” . Press the button again to activate the “Priority Only” . In this case, the color of the quick action button will change to the system color of your operating system. This will indicate that Attention Focus is working and notifications will be filtered according to your setting.
If the “Alarms only” , then notifications from applications will not appear. Notifications will only work for active alarms. If you haven’t set alarms, then notifications won’t bother you.
Selecting Priority Only will show notifications from apps that have the highest priority. You'll be able to filter out most apps, but notifications from your favorite programs will still appear. We'll talk about how to assign the highest priority to some notifications below.
How to disable Windows 10 Action Center
You can disable receiving notifications from the Windows Action Center directly from the notification area on your computer's desktop. To do this, you need to right-click on the Notification Center icon, which is located in the system tray.
Select the desired option or several suitable options:
- Enable Do Not Disturb mode.
- Don't show application icons.
- Do not show the number of new notifications.
Mute notification sound
Some users need notifications, but the sound of incoming messages is annoying. We'll tell you how to turn it off.
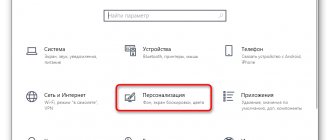
Open the desktop context menu: right-click on an empty area. Select the option as shown in the screenshot below.
Item “Personalization”
Go to the “Themes” tab, “Sounds” option
Sounds section
A new working window will open. Switch to the “Notifications” item in the list of sounds.
Find a sound alert
At the bottom of the menu is the “Sounds” item. Activate it using the arrow next to it and select “No”.
Turn off the sound
Click OK and close the settings.
An alternative option is to change the sound scheme. In the same menu, select the item as in the screenshot below.
Selecting “Sound Scheme”
Switch to the “Silent” mode. Now notifications arrive without sound, but other user actions will no longer be accompanied by sounds.
How to remove Windows 10 Action Center from the notification area
You can quite easily remove the Action Center icon from the notification area by changing the operating system settings. If there is no icon, notifications from the Notification Center will not appear.
- Go to the Start menu, then Settings.
- In the Windows Settings window, open the Personalization section.
- Click on the “Taskbar” section.
- In the Notification Area setting, select Turn system icons on or off.
- In the Turn system icons on or off window, slide the switch to the Off position. opposite "Notification Center".
After this, the Windows Action Center icon will disappear from the notification area.
To enable the display of the Windows 10 Action Center icon in the notification area, perform a similar operation, and finally slide the switch to the “On” position.
How to disable notifications for a specific application?
- Open Windows Settings (press and hold the Windows + I ).
- Go to the “System” .
- On the left side of the System Settings window, click on the “Notifications and Actions” .
- On the right side of the window, find the setting: “Receive notifications from these applications” with a list of all applications that send notifications.
- Select the application for which you want to turn off notifications and move the slider from the “On” position. to the “Off” . For example, we will disable notifications for the Mail application.
- Repeat for all apps for which you want to turn off notifications.
How to disable Windows 10 Action Center permanently in Command Prompt
Using the command line, the user can disable notifications in the operating system and remove the Windows 10 Action Center icon.
You may also be interested in:
- How to uninstall the latest Windows 10 update - 3 ways
- How to open the Local Group Policy Editor - 7 ways
Follow these sequential steps:
- Press the keyboard shortcut “Win” + “R”.
- In the “Run” window, in the “Open” field, enter the expression: “regedit” (without quotes), and then click on the “OK” button. After this, the Registry Editor window will open.
- In the Registry Editor window, follow the path:
HKEY_CURRENT_USER\Software\Policies\Microsoft\Windows\Explorer
The “Explorer” section may not exist in this registry hive. Therefore, create this section. To do this, right-click on an empty space in the Registry Editor window. In the context menu, select “Create” => “Section”. Name the section "Explorer" (without quotes).
- In the “Explorer” section, right-click on the free space, select “New” => “DWORD Value (32-bit)”.
- Name the parameter "DisableNotificationCenter" (without quotes).
- Right-click on the created “DisableNotificationCenter” parameter and select “Edit...” from the context menu.
- In the "Edit DWORD (32-bit) Value" window, in the "Value" field, enter "1" (without quotes), and then click the "OK" button.
- Restart your computer.
After this, the Action Center icon will disappear from the notification area.
Disable notifications in Windows 10
As is the case with solving most problems in Windows 10, there are at least two ways to turn off notifications. This can be done for individual applications and operating system components, or for all of them at once. There is also the possibility of completely disabling the Notification Center, but due to the complexity of implementation and potential risk, we will not consider it. So let's get started.
Method 1: Notifications and Actions
Not everyone knows that the work of the Notification Center can be adapted to your needs by disabling the ability to send messages at once for all or only certain elements of the OS and/or programs. This is done as follows:
- Call the “Start” menu and left-click (LMB) on the gear icon located on its right panel to open the system “Settings”. Instead, you can simply press the “WIN+I” keys.
In the window that opens, go to the first section from the list of available ones – “System”.
Next, in the side menu, select the “Notifications and Actions” tab.
Scroll through the list of available options all the way down to the “Notifications” block and, using the switches available there, determine where and what notifications you want (or don’t want) to see. Details regarding the purpose of each of the presented items can be seen in the screenshot below.
If you turn off the last switch in the list (“Receive notifications from applications”...), this will disable notifications for all applications that have the right to send them. The full list is shown in the image below, and their behavior can be configured separately if desired.
Note: If your task is to completely disable notifications, at this stage you can consider it solved; the remaining steps are not necessary. However, we still recommend that you read the second part of this article – Method 2.
Opposite the name of each program there is a toggle switch, similar to that in the general list of parameters above. It is logical that by disabling it, you prohibit a specific element from sending you notifications to the “Center”.
If you click on the application name, you can determine its behavior more precisely and, if necessary, set priority. All available options are shown in the screenshot below.
That is, here you can either completely disable notifications for the application, or simply prevent it from “getting” with your messages into the “Notification Center”. Additionally, you can turn off the sound signal.
Important: Regarding “Priority”, only one thing is worth noting - if you set it to “Highest”, notifications from such applications will be sent to “Center” even when “Focus Attention” , which we will talk about later. In all other cases, it would be better to select the “Normal” (in fact, it is set by default).
So, by turning to the “Settings” of the operating system, you and I can both perform detailed settings for notifications for each individual application (both system and third-party) that supports working with the “Center”, and completely deactivate the ability to send them. Decide for yourself which option you personally prefer, but we will consider another method that is faster to implement.
Method 2: “Focusing Attention”
If you don’t want to customize notifications for yourself, but also don’t plan to turn them off forever, you can pause “Center,” which is responsible for sending them, by switching it to the state that was previously called “Do Not Disturb.” In the future, notifications can be turned on again if such a need arises, especially since this is all done in just a few clicks.
- Hover your cursor over the Notification Center icon at the end of the taskbar and click on it with LMB.
Click on the tile called “Focus” once,
if you want to receive notifications only from the alarm clock,
or two if you want to allow only priority OS components and programs to disturb you.
If you didn't set any apps to the highest priority in the previous method, and you haven't done so before, you won't be bothered by notifications anymore.
Note: To disable the “Focus Attention” , you need to click on the corresponding tile in the “Notification Center” once or twice (depending on the set value) so that it ceases to be active.
And yet, in order not to act at random, you should additionally check the priorities of the programs. This is done in the “Parameters” already familiar to us.
- Repeat steps 1-2 described in the previous method in this article, and then go to the “Focus” tab.
- Having made the necessary changes to the functioning of the “Focus Attention” mode, you can close the “Parameters” window, or you can go back a step and, if necessary, set “Automatic rules” for it. The following options are available in this block:
- “At this time” - when you move the switch to the active position, it becomes possible to set the time for automatically turning on and then turning off the focus mode.
“When mirroring the screen” - if you are working with two or more monitors, when you switch them to mirroring mode, focus will be activated automatically. That is, no notifications will disturb you.
- “When I play” - in games, of course, the system will not bother you with notifications either.
Click the “Customize priority list” link located under “Priority only”.
Make the necessary settings by allowing (leave a checkmark to the left of the name) or prohibiting (uncheck) the applications and OS components presented in the list to disturb you.
If you want to add some third-party program to this list, assigning it the highest priority, click on the “Add application” button and select it from the list of available ones.
Additionally:
- By checking the box next to “Show summary data...”, when you exit Focus mode, you will be able to view all the notifications received while using it.
By clicking on the name of any of the three available rules, you can configure it by determining the level of focus (“Priority only” or “Alarms only”), which we briefly reviewed above.
To summarize this method, we note that switching to the “Focus Attention” mode is a temporary measure to get rid of notifications, but if desired, it can become permanent. All that is required of you in this case is to customize its functioning, turn it on and, if necessary, never turn it off.
How to enable Action Center in Windows 10 in Registry Editor
To enable Windows Action Center in Registry Editor, follow these steps:
- Enter the Registry Editor, follow the path:
HKEY_CURRENT_USER\Software\Policies\Microsof\tWindows\Explorer
- Right-click on the “DisableNotificationCenter” parameter and select “Change...” from the context menu.
- In the "Edit DWORD (32-bit) Value" window, in the "Value" field, enter "0" (without quotes), and then click on the "OK" button.
- Restart your computer.
Windows 10 Action Center will reappear in the notification area.
Disabling Action Center in Local Group Policy Editor
Keep in mind that in Windows 10, only older editions of the operating system have access to the Local Group Policy Editor: Professional (Pro) and Enterprise (Enterprise). Therefore, users of younger versions of the operating system will have to use the command line or OS settings to disable alerts.
To turn off Windows 10 Action Center in the Local Group Policy Editor, follow these steps:
- Press the "Win" + "R" keyboard keys.
- In the “Run” window, in the “Open” field, enter the expression: “gpedit.msc” (without quotes), and then click on the “OK” button.
- In the “Local Computer Policy”, go to the “User Configuration” section, then “Administrative Templates”.
- Double-click with the left mouse button on the “Start Menu and Notification Area” element.
- Find the item “Delete notifications and notification icon”, double-click on it with the left mouse button.
- In the “Delete notifications and action center icon” window that opens, activate the “Enabled” value, and then click on the “OK” button.
- Restart your computer.
The Windows 10 Action Center icon will disappear from the notification area.
If you need to re-enable the Action Center icon to appear in the notification area, follow the same steps in the Local Group Policy Editor window. Select the value “Not configured”, click on the “OK” button, restart the computer.
Disable notifications in Windows 10
As is the case with solving most problems in Windows 10, there are at least two ways to turn off notifications. This can be done for individual applications and operating system components, or for all of them at once. There is also the possibility of completely disabling the Notification Center, but due to the complexity of implementation and potential risk, we will not consider it. So let's get started.
Method 1: Notifications and Actions
Not everyone knows that the work of the Notification Center can be adapted to your needs by disabling the ability to send messages at once for all or only certain elements of the OS and/or programs. This is done as follows:
- Call the “Start” menu and left-click (LMB) on the gear icon located on its right panel to open the system “Settings”. Instead, you can simply press the “WIN+I” keys.
In the window that opens, go to the first section from the list of available ones – “System”.
Next, in the side menu, select the “Notifications and Actions” tab.
Scroll through the list of available options all the way down to the “Notifications” block and, using the switches available there, determine where and what notifications you want (or don’t want) to see. Details regarding the purpose of each of the presented items can be seen in the screenshot below.
If you turn off the last switch in the list (“Receive notifications from applications”...), this will disable notifications for all applications that have the right to send them. The full list is shown in the image below, and their behavior can be configured separately if desired.
Note: If your task is to completely disable notifications, at this stage you can consider it solved; the remaining steps are not necessary. However, we still recommend that you read the second part of this article – Method 2.
Opposite the name of each program there is a toggle switch, similar to that in the general list of parameters above. It is logical that by disabling it, you prohibit a specific element from sending you notifications to the “Center”.
If you click on the application name, you can determine its behavior more precisely and, if necessary, set priority. All available options are shown in the screenshot below.
That is, here you can either completely disable notifications for the application, or simply prevent it from “getting” with your messages into the “Notification Center”. Additionally, you can turn off the sound signal.
Important: Regarding “Priority”, only one thing is worth noting - if you set it to “Highest”, notifications from such applications will be sent to “Center” even when “Focus Attention” , which we will talk about later. In all other cases, it would be better to select the “Normal” (in fact, it is set by default).
So, by turning to the “Settings” of the operating system, you and I can both perform detailed settings for notifications for each individual application (both system and third-party) that supports working with the “Center”, and completely deactivate the ability to send them. Decide for yourself which option you personally prefer, but we will consider another method that is faster to implement.
Method 2: “Focusing Attention”
If you don’t want to customize notifications for yourself, but also don’t plan to turn them off forever, you can pause “Center,” which is responsible for sending them, by switching it to the state that was previously called “Do Not Disturb.” In the future, notifications can be turned on again if such a need arises, especially since this is all done in just a few clicks.
- Hover your cursor over the Notification Center icon at the end of the taskbar and click on it with LMB.
Click on the tile called “Focus” once,
if you want to receive notifications only from the alarm clock,
or two if you want to allow only priority OS components and programs to disturb you.
If you didn't set any apps to the highest priority in the previous method, and you haven't done so before, you won't be bothered by notifications anymore.
Note: To disable the “Focus Attention” , you need to click on the corresponding tile in the “Notification Center” once or twice (depending on the set value) so that it ceases to be active.
And yet, in order not to act at random, you should additionally check the priorities of the programs. This is done in the “Parameters” already familiar to us.
- Repeat steps 1-2 described in the previous method in this article, and then go to the “Focus” tab.
- Having made the necessary changes to the functioning of the “Focus Attention” mode, you can close the “Parameters” window, or you can go back a step and, if necessary, set “Automatic rules” for it. The following options are available in this block:
- “At this time” - when you move the switch to the active position, it becomes possible to set the time for automatically turning on and then turning off the focus mode.
“When mirroring the screen” - if you are working with two or more monitors, when you switch them to mirroring mode, focus will be activated automatically. That is, no notifications will disturb you.
- “When I play” - in games, of course, the system will not bother you with notifications either.
Click the “Customize priority list” link located under “Priority only”.
Make the necessary settings by allowing (leave a checkmark to the left of the name) or prohibiting (uncheck) the applications and OS components presented in the list to disturb you.
If you want to add some third-party program to this list, assigning it the highest priority, click on the “Add application” button and select it from the list of available ones.
Additionally:
- By checking the box next to “Show summary data...”, when you exit Focus mode, you will be able to view all the notifications received while using it.
By clicking on the name of any of the three available rules, you can configure it by determining the level of focus (“Priority only” or “Alarms only”), which we briefly reviewed above.
To summarize this method, we note that switching to the “Focus Attention” mode is a temporary measure to get rid of notifications, but if desired, it can become permanent. All that is required of you in this case is to customize its functioning, turn it on and, if necessary, never turn it off.