Why does the Google Play Services error appear?
It is still unknown exactly what causes the “Google Play Services app has stopped” error to appear.
Android OS developers do not offer options to fix the problem. Therefore, users search for solutions by discussing possible options on forums. One of the main reasons for the error is considered to be incorrect synchronization of the smartphone and update servers. The symptoms are:
- When updating applications, the phone first downloads the necessary files to local storage, after which it unpacks and installs the new version.
- The problem arises at the stage of information synchronization - new data has already been uploaded on the servers and is available for download, but the phone is still trying to find updates in the internal memory.
Ways to fix the bug
Enabling Download Manager
First, check if you have an Internet connection. Open your browser and try to navigate to any page. If everything is fine and the sites open, move on to other ways to solve the problem.
Regularly rebooting the smartphone, in some cases, also helps fix the problem.
The next step is activation in the settings of the “Download Manager” system application:
1. Go to Android Settings.
2. Go to the "Applications" section.
3. Find the “Download Manager” line there and open it (if you can’t find the application, use the search in settings).
4. Make sure the application is running - the Stop button should be active. If the “Enable” option is available, select it and activate the application.
Clear local data and cache
Deleting the update files stored on your phone can help you fix the Google Play Services app has stopped error without affecting your personal data.
- Go to "Settings - Applications"
- In the list that opens, find the standard application “Google Play Services”
- Now open the menu item "Memory"
- Select “Memory management” and click “Delete all data” in the menu that opens
- Go back a step to the “Memory” section and press the bottom button, “Clear cache”
Google account reactivation
In some cases, reconnecting your Google account on Android may help. Please note that deleting your account means that all unsynced personal data (contacts, files, etc.) will also be deleted. Therefore, it is recommended to make a backup copy of all necessary information, and only after that proceed to troubleshooting the problem.
So, the process of reconnecting a Google user account is as follows:
- Open your device's Settings.
- Find the menu item “Accounts”, “Accounts and Backup”, or simply “Accounts” (the name depends on the version of Android).
- In the list that opens, select the Google account associated with your phone.
- Before deleting your account, you can synchronize the data that is saved on the device (menu item “Account synchronization”).
- When all the necessary information is synchronized, select “Delete account” in the same menu. record" and confirm the action.
- Return to the list of accounts and click “Add account” - Google.
- A Google account login form will open, enter your username and password.
- Accept the terms of the user agreement and follow further instructions.
Done, the account has been reactivated. Now you can check if the “google play store stopped working” error appears again. If this method does not help, continue further in the text.
Reinstalling Android updates
Another way to overcome a bug associated with Google Play is to update the current version of the Google Play application or return to the standard version and then update to the latest one.
- Open the general settings of the device, find the “Applications” section.
- Select the line "Google Play Store". Important: do not confuse the Market with the Google Play Services application - they have similar icons and names.
- Open the menu (three vertical dots in the upper right corner) and click on the only available option - “Uninstall updates”.
- Confirm the action and return to the home screen of your smartphone.
- Now launch the Play Store and agree to Google's user agreement.
- Open the menu (three horizontal bars in the upper left corner of the screen) and select Settings.
- Click on the line “Play Store Version”. The application update process will begin.
- Wait until the application is downloaded and updated.
Google Play Services app update
If none of the presented error resolution options work, you can try reinstalling the problematic application using the APKMirror file archive.
On the website apkmirror.com you can download a signed installation file for the Google Play application if for some reason your phone blocks downloading updates using standard methods:
- Go to the Google Play Services page on apkmirror.com.
- Open the page with the latest version of the application - usually this is the top item in the “All versions” list.
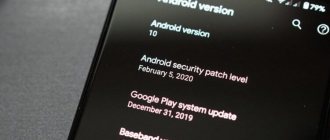
- Find your version of Android (you can check the version in Settings > Phone info > Software info > Android version) and download the version of Google Play that matches your phone's settings.
- If you find it difficult to choose, try different versions of the files until you find the right one. Or use the Droid Hardware Info app to find out all the information you need.
- Go to the page of the selected file and click “Download APK” (the button will become active within a few seconds after the transition).
- Run the downloaded file and follow the Android OS instructions.
Restoring factory settings (hard reset)
To resolve the error, you can reset your phone to factory settings. At the same time - attention! — you will lose all information stored in the memory of your mobile device.
Important ! Save everything you need in advance in cloud storage or on a memory card. Read how to do this here: https://softdroid.net/kak-sozdat-rezervnuyu-kopiyu-android-foto-i-video-v-oblake.
Resetting to factory settings is performed as follows:
- Open “Settings” - “General settings”.
- Find "Backup and reset" (or "Reset"). If your phone is running Android 8 or higher, go to System > Reset.
- Next, select “Reset settings” and confirm your intentions. If your phone has a PIN or pattern, you will need to enter it to apply the changes.
Additional solutions to the problem
There are several ways to stabilize your smartphone. In addition to checking the time and date settings, you can reinstall or remove updates, clear the cache, and put the utility in the background.
Checking the date and time settings
How to Update Google Play Services on Android
Incorrectly set values can cause dysfunction of services. Debugging is done:
- From the main menu go to the “time and date” subsection.
- It disables the “automatic time detection” or “network time zone” functionality.
- Set the correct time, date and time zone settings.
Important! After making the settings, you need to reboot the devices.
Changing the date and time
Reinstalling updates, uninstalling updates
If all previous methods are ineffective, then you can try to return the application to the previous version. The scheme of changes is simple:
- In the main menu, they move to the “application manager”, and from there to the “all” block.
- There they look for the “Google Play” section and go to the “about the application” page.
- In the upper right corner, click on the 3 dots and select the “uninstall updates” subsection.
- After confirming the action, reboot the device and check the functionality of the application.
Important! On some operating systems, the “uninstall updates” button may be displayed separately. After the process is completed, you can try to reinstall the add-ons again or leave the utility at the previous level.
Uninstalling updates
Setting background permissions
To enable the functionality, the following algorithm is used:
- From the main menu go to the “application manager”.
- Select the current program from the list and go to the “permissions” block.
- Connect all non-functioning runners.
Important! Immediately after the changes are completed, reboot the smartphone and check its functionality.
Reset application settings, clear cache
You can clear memory using the following scheme:
- From “settings” go to “application manager”, select the “all” block.
- In the window that pops up, find the service of the same name and move to “memory”.
- Click on the “clear cache” subsection.
Clearing cache
If none of the above methods worked, then the problem can be solved by resetting the information to factory settings. The user should not forget that all information will be erased after the procedure. To perform the following steps:
- From the main menu they move to “backup and reset”.
- Go to “data reset” (the name of the item depends on the type of operating system).
- Confirm the action in response to a system request.
If any of the above techniques are performed correctly, the functionality of the services is restored and the constant failure stops. If the methods do not lead to the expected result, then you need to contact technical support or the nearest service center.
An error began to appear: “The Google application has stopped.” What to do?
Question from a user
About a couple of weeks ago, an error began to appear on my tablet: “The Google application has stopped.” I didn’t do anything with the tablet (didn’t update it, didn’t drop it, didn’t delete it, etc.).
In general, I don't care about it (the tablet works with it too), but it is very distracting at times (appears several times in an hour). Is there anything that can be done?
The longer you use your Android device, the more the system accumulates various “garbage” in it: application cache, some residual data from remote software, temporary files, etc.
All this, over time (if you do not clean and update the software), can lead to various kinds of errors (the current problem is no exception). Below are a few recommendations that in most cases help eliminate such errors.
What to do with the application stopping error “XXX”
STEP 1
The first advice is banal (and is often given in most instructions of this kind) - just reboot the device!
The fact is that after the system is restarted, all applications will be reinitialized and loaded into memory, which often helps eliminate many errors.
STEP 2
Next, I recommend going to the Android settings, opening the “Applications” tab and finding “Google” among them. See example below.


