In this article, we will look at how to disable Windows 10 Firewall through Security, Control Panel, Windows Defender Firewall Monitor with Advanced Security, Command Prompt, and Registry. We’ll also learn how to remove the notification about disabling the firewall in the Windows 10 taskbar.
A firewall is a firewall built into the OS that prevents unregistered users from accessing system files and resources on your PC or laptop. It checks all incoming and outgoing traffic on your network and, depending on the settings, blocks or allows access to it. When configured correctly, it helps well in protecting against hacker attacks.
With default settings, it denies access to insecure external connections and allows all connections originating from you.
The firewall built into the Windows OS is necessary if you are concerned about the security of your data on your computer. DO NOT disable your firewall unless you are having problems with it. If you are not satisfied with it, then replace it. There are many programs and utilities that perform the same functions. For example, antiviruses Kaspersky, Eset Nod32, Dr. Web and others with a built-in firewall or specialized software Comodo Firewall, TinyWall.
When using both a built-in and third-party firewall, it can lead to conflicts in work and slow it down.
The Windows 10 firewall is far from perfect and in some problematic cases it is better to disable it. Examples of such cases include problems launching games or applications. The steps to disable it in Win 10 and earlier versions are essentially identical and usually take no more than two minutes.
You can turn off the Windows 10 firewall permanently, temporarily, or only for certain programs and applications included in exceptions.
How to disable the firewall on Windows 10 through the Windows Security option
This is the fastest and easiest way temporarily disable the firewall in Windows 10. To do this, we need to change the settings in the Windows Security Center ⇒
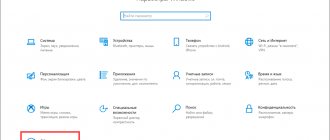
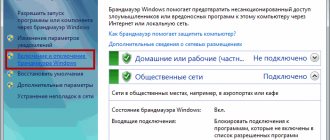
- To get into it, double-click on the hidden shield icon on the taskbar or go to Start ⇒ Settings ⇒ Update and Security ⇒ Windows Security.
- Find and click on “Firewall and network protection” and select the active network profile to disable. This is quite enough, but if you wish, you can turn it off at all points.
- Move the switch to the Off position.
That's it, now the firewall for the network profile you selected will be disabled. After this, on the right side of the taskbar, a notification will constantly pop up asking you to turn the firewall back on. Find out how to remove it here.
Disabling the firewall in this way is only temporary and after restarting the computer it will work again, since the corresponding Windows 10 service will continue to work and start automatically. How to disable this service, read this section of this article.
Adding a program to exceptions
Naturally, without good reason, it is not recommended to disable those options that are aimed at protecting your PC from network attacks. Therefore, deactivating all functionality is not always more profitable than adding a program that requires this deactivation to the exclusion list. To do this:
- Enter the command: firewall.cpl
- Click "Allow".
- Click "Change settings".
- Place both checkboxes after the software name. This allows the program on the PC to work on the network without problems. Click "OK".
- When the desired program is not included in the list, click “Allow another application” at the bottom.
- Specify the path to it (executable exe file) and click “Add”.
- Afterwards, reactivate the “permissions” and add the required software to the exceptions.
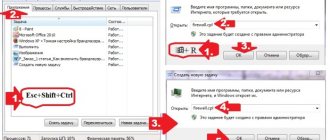
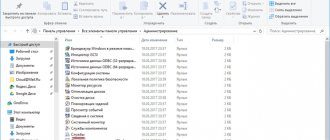
How to turn off the Windows 10 firewall through Control Panel
- To open it, click