12/25/2018 Category: Errors and problems Author: alexeish4tohin
Lack of sound in headphones is one of the most common problems in Windows 10. The audio output signal may disappear either after a system update or for no apparent reason in a Windows 10 that was working normally before.
- Check for mechanical damage
- Diagnostics and automatic troubleshooting
- Checking audio playback device settings
- Installing and updating drivers
Video: how to roll back sound drivers
- User reviews
Checking the device's functionality
A person who is faced with a problem first needs to diagnose the device. Performing the operation does not require any special skills. The main thing is to show the proper level of attention.
Among the main causes of malfunction are the following:
- mechanical damage;
- deformation of connectors;
- speaker failure;
- lack of necessary drivers.
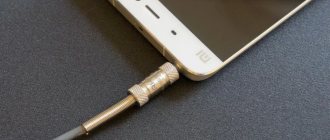
First, it is recommended to inspect the 3.5 mm jack of the computer, because it is through this that the headphones are connected. After prolonged use, the contacts may come loose, causing a malfunction. If the audio device works correctly in combination with other gadgets like a smartphone and TV, then the problem clearly lies in the computer connector.
It is also important to inspect the headphones themselves. The most common cause of failure is the cable.
In cases where a person often bends it, for example, by leaning the plug against the body, the cord quickly loses its shape and becomes unusable. Take a closer look at the cable, both from the plug side and from the speaker side. Usually it is in these places that deformation occurs.
Finally, the cause of the problem may lie in the dynamics. After physical impact or contact with water, it will easily fail, and the sound will simply stop playing. But if you are sure that the problem was not due to a physical breakdown, it is worth considering options for getting rid of the error using software.
Advice. To avoid problems with cable breakage, it is recommended to buy headphones with an L-shaped plug.
Front Panel Configuration Using Realtek HD Manager
If all the steps done did not produce results and the front panel for headphones and microphone still does not work, try playing with the Realtek HD settings. If the drivers are installed correctly, this sound configurator must be present on your computer. We launch it using the icon on the taskbar or, if there is none, by following the path Control Panel - Realtek HD Manager.
In the program window, select the “Speakers” section and click on the yellow folder in the upper right corner.
Make sure that the checkbox next to “Disable detection of front panel sockets” is checked; if it is not there, be sure to check it.
Save the settings and check if the sound on the front panel is now working. In most cases the problem should be resolved.
Here in the Realtek HD manager you can make additional device settings. Follow the corresponding link in the upper right corner of the window.
Automatic troubleshooting
A useful feature of Windows 10 is the function of automatically fixing any software problems. The system itself searches for the cause of the problem and eliminates it. Therefore, you must try this method using the following instructions:
- Go to the Start menu to launch Settings.
- Select Update & Security.
- Open the Troubleshooting tab.
- Click on the "Play Sound" heading.
- In the list that opens, select the model of the connected headphones.
- Click the Diagnose Problems button.
If everything is done correctly, Windows 10 will search for the cause of the problem within 1-2 minutes and then offer a solution. So, if problems arise due to incorrect software, the system will provide the opportunity to install the missing drivers. At the same time, remember that checking does not help in case of mechanical damage.
Connection via bluetooth
If your Windows 10 computer does not see Bluetooth headphones, then you need to help it with this. To do this you need:
- Open Windows Settings and go to Devices;
- In the “Bluetooth and other devices” tab, check if the necessary equipment is available;
- If it is not there, then click on the add a new device button;
- Select search via Bluetooth.
If the search does not produce results, then try searching through the control panel, sometimes it may reveal more hardware.
- On the “Bluetooth” tab at the end of the page, click on “Devices and Printers”;
- This window will display the connected equipment. Click on the “Add device” button;
- Try adding headphones if they appear in a new window.
But if after all the steps you have completed, Windows 10 headphones are still not displayed, try other quick steps.
Windows drivers for headphones
If the headset is not recognized by the computer or does not produce sound, and no signs of mechanical damage are visible, the problem most likely lies in a software malfunction. It is possible that the current version of Windows 10 has old drivers installed or no drivers at all.
Follow the instructions:
- Open Device Manager in any convenient way (for example, through Search).
- In the menu of connected devices, open the “Sound, game and video devices” tab.
- Right-click on the sound driver name.
- Select “Update” and wait for the operation to complete.
If a notification appears on the screen that there are no updates, they can be downloaded from the developer’s official website. The address of a specific resource depends on the type of sound driver.
What to do if headphones stop working on a computer with Windows 10
If Windows 10 doesn't find your connected device or you can't hear anything in your headphones after playing audio, you need to do the following:
Important! The effectiveness of each method directly depends on the cause of the problem. It is recommended to use each listed method in turn until the desired result is achieved.
Incorrect connection
The sound card on the motherboard is equipped with several connectors for connecting audio devices. If you use headphones, you need to focus on the color or symbolic designation of the input (often used in laptops).
The line output for pairing with a headset is green. If all the connectors are the same color, you need to pay attention to the headphone icon shown next to it.
Important! If there are no identification marks, you will need to use the manual that comes with the motherboard.
Mechanical damage
There may be no sound due to mechanical damage to the device. You should carefully inspect each element of the headphones: the base at the plug, the wires next to the input to the speakers. For reliability, it is recommended to connect the headset to another computer or smartphone.
Turning on the device
If the reason that there is no sound in the headphones on a computer with Windows 10 is due to an incorrectly configured system configuration, the first thing you need to do is enable the device in the settings.
Note! If the headset does not appear in the list, it means that the connection was made incorrectly or there is mechanical damage to the equipment.
Troubleshoot audio problems
The developers have provided a special troubleshooting tool in the system that can help solve sound problems. To use it, you must:
Setting sound options
The problem may be caused by incorrectly set sound parameters. You need to go to the appropriate menu and check the configuration:
Note! All settings changes take effect immediately; there is no need to restart the computer.
Restarting the Windows Audio Service
While using the computer, the Windows Audio service, which is responsible for sound, may fail. A restart is required. Step by step guide:
Sound card in BIOS
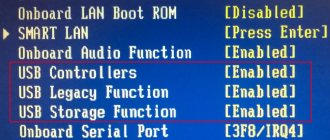
The problem may lie not only in the drivers, but also in the sound card settings. If the headphones do not produce sound, you need to enable the card through the BIOS menu.
The type of basic input system depends on the motherboard model, so the algorithm of actions may differ. Below are instructions for the most common BIOS menus.
AMI BIOS:
- Open the “Advanced” tab.
- Select “OnBoard Devices Configuration”.
- In the “Onboard Audio” or “Onboard HD Audio” parameter, enter the value “Enabled” or “Auto”.
- Save the settings by pressing the “F10” button.
AWARD BIOS:
- Select the menu item “Integrated Peripherals”.
- Go to the “Onchip Device Function” section.
- In the “Onboard AC97 Audio Device” parameter set the value to “Auto” or “Enable”, then save the changes with the F key
UEFI BIOS:
- Go to the “Advanced Mode” section.
- Open the “Advanced” tab, and then “Onboard Device Configutarion”.
- Opposite the “HD Audio Controller” item, set the value to “Enable” or “Auto” and save the changes.
To find out the BIOS version, use the key combination “Win + R”, type the command “msinfo32”, and then study the “System Information” section.
Why don't my headphones transmit sound through the front panel?
There may be several reasons why there is no sound in the headphones.
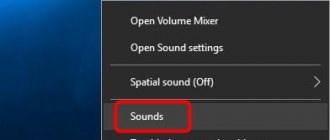
- The device was detected incorrectly. To resolve the situation, you need to select the required device in the “Sound” section;
- The sound is reproduced in HD standard when the AC-97 connectors are used. You can fix the problem by switching the sound output method in the BIOS or deactivating the recognition of connectors on the front audio device in the settings;
- no connection of front connectors;
- missing or installed incorrect drivers.
No connection
To activate, you need to connect the connectors to the motherboard. The problem can be resolved by purchasing a headphone extension cord. The cable is connected from the back. Any audio device with a suitable connector can be connected to the extension cord. It is recommended to place the output behind the monitor for ease of use. Buying wireless headphones will allow you not to think about the issue of front-facing audio device operation.
Missing or incorrect drivers
For audio devices to function on both Windows 10 and Windows 7, the installation of Realtek Manager is required.
If the icon is not visible, you can find it in the main menu. If it is missing, you need to run the RtHDVCpl.exe file through the search bar.
