07/18/2019 windows | for beginners | Internet
In Windows 10, there are two profiles (also known as network location or network type) for Ethernet and Wi-Fi networks—private network and public network—which differ in default settings for things like network discovery and file and printer sharing.
In some cases, you may need to change a public network to a private one or a private one to a public one - ways to do this in Windows 10 will be discussed in this manual. Also at the end of the article you will find some additional information about the difference between the two types of network and which is better to choose in different situations.
Note: Some users also ask about how to change a private network to a home network. In fact, the private network in Windows 10 is the same as the home network in previous versions of the OS, the name has just changed. In turn, the public network is now called public.
You can see what type of network is currently selected in Windows 10 by opening the Network and Sharing Center (see How to open the Network and Sharing Center in Windows 10).
In the "view active networks" section, you will see a list of connections and what network location they are using. (You may also be interested in: How to change the network name in Windows 10).
Network types (profiles) in Windows
Network profiles appeared in Vista/Windows Server 2008. In Windows 10 (Windows Server 2016), you can assign one of three network profiles to a network interface (whether Ethernet or Wi-Fi).
- Private or home network ( Private ) – a profile for a trusted network (home or work network in the office). In such a network, the computer will be discoverable by other devices, and you can use network file and printer sharing services;
- Public network ( Public ) – profile for an untrusted network (cafe, public Wi-Fi network in the metro, airport). You do not trust other devices on such a network, your computer will be hidden from other devices, you cannot gain remote access to network folders and printers published on your network;
- Domain network ( Domain ) is a network profile for computers that are members of an Active Directory domain. Applies automatically after Windows is added to the domain. For this profile, you can apply domain-specific firewall policies.
As stated earlier, based on the network profile applied to the network interface, different Windows Firewall rules are applied to it.
In Windows 10, you can check the current profile that is assigned to the network connection in the Settings -> Network and Internet . In my screenshot you can see that the Ethernet0 Public profile .
In Classic Control Panel, the network type for active network connections is displayed here: Control Panel\All Control Panel Items\Network and Sharing Center.
However, you cannot change the type of network profile assigned from the classic Control Panel. For example, in Windows Server 2012 R2/Windows 8.1, you can only change the network profile through PowerShell, the registry, or local security policy.
How to set up a wireless network between two laptops?
How to create a Wi-Fi network between Windows 10 laptops:
- We turn on one PC.
- Through Start properties, open “Command Prompt”.
- Paste netsh wlan set hostednetwork mode=allow ssid=”name” key=”login key” keyUsage=persistent and click on Enter. Creation is complete.
- Turn on the visibility of netsh wlan start hostednetwork.
21 Apr
2022 Interesting materials:
Who can certify a copy of the sick leave? Who can certify with their signature the work record book? Who's number one on Instagram? Who really is Darth Vader? Who accrues sick leave to the Social Insurance Fund? Who punishes for an administrative offense? Who imposes disciplinary sanctions for violating sanitary legislation? Who wrote Alyosha Popovich and Tugarin Zmeevich? Who wrote the book Carlson Who Lives on the Roof? Who wrote the music for the intro of the program in the animal world?
How is a network profile assigned in Windows 10?
The network profile in Windows 10 is selected by the user the first time they connect to a new network.
The prompt appears: Network_name You want to allow other computers and devices on this network to discover your PC.
It is recommended to do this on your home or work network rather than on a public network. If you select “Yes”, the network is assigned the profile Private (home), if “No” - public (public). The next time you connect to the same LAN or WiFi network, the previously selected profile is automatically assigned.
In Windows 10, you can reset all settings and profiles for all saved networks by going to Settings -> Network & Internet -> Status -> Reset Network. Restart your computer.
Now, when you connect to the network, you will again be asked to enable network discovery.
Methods for changing NAT type on PC
Here are the easy ways to change the NAT type on your PC device:
– Port forward
This is the most common way to change the NAT type without any extra hassle. You just need to check your router model and ports of the game you want to play.
- You need to go to your router's home page and find the port forwarding option from the list.
- Enter your game ports in the first section and enter your IP address in the next column.
- You will be asked to select the device you want to point to. After that, select the UDP and TCP option.
- Now you can save your settings and reload them for immediate results.
– Through network discovery
If you are a Windows user, you can enable network discovery on your operating system.
Follow these steps to enable network discovery:
- Open the start menu
- Look for settings
- Network and Internet search
- Look for "Sharing Options" in Network and Settings
- Turn on the network discovery option and check the box for connected devices too.
You can now save your settings and enable network discovery of your Windows device.
How to change the network connection profile in Windows 10?
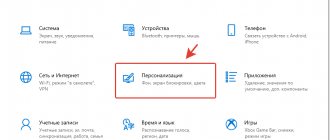
You can change the network type from the Windows 10 GUI. If you are using the new Settings panel, go to Network and Internet -> Status -> Change connection properties.
Here you can switch the applied network profile from Public to Private and vice versa.
You cannot change the type of network interface profile from the classic Windows 10 Control Panel.
Also, you cannot change the profile on a computer in a domain; the Domain profile will always be used for network connection to the domain.
Changing a private network to a public network and back for a local Ethernet connection
If your computer or laptop is connected to the network by cable, to change the network location from “Private Network” to “Public Network” or vice versa, follow these steps:
- Click on the connection icon in the notification area (normal, left mouse button) and select “Network and Internet settings”.
- In the window that opens, in the left panel, click on the “Ethernet” item, and then click on the name of the active network (to change the network type, it must be active).
- In the next window with network connection settings, in the “Make this computer discoverable” section, set it to “Off” (if you want to enable the “Public Network” profile or “On” if you want to select “Private Network”).
The parameters should be applied immediately and, accordingly, the network type will change after they are applied.
Change Network Profile from Public to Private in Windows 10 via PowerShell
In Windows 10 / Windows Server 2016/2019, you can manage network connection profiles from PowerShell. Launch the PowerShell console with administrator rights.
Now, using the Get-NetConnectionProfile , we will get a list of network interfaces and the network profiles applied to them.
In my example, there are 4 network connections on the computer, with different types of network profiles (NetworkCategory: Public, Private and DomainAuthenticated.
Let's try changing the network profile for one network connection. In this case, we are interested in the index assigned to this network card. In this example InterfaceIndex = 19.
Name : Unidentified network InterfaceAlias : Ethernet 3 InterfaceIndex : 19 NetworkCategory : Public IPv4Connectivity : NoTraffic IPv6Connectivity : NoTraffic
Knowing the network interface index, you can change the network type to Private:
Set-NetConnectionProfile -InterfaceIndex 19 -NetworkCategory Private
Let's check that the network profile has changed:
Get-NetConnectionProfile -InterfaceIndex 19
The new firewall rules will be applied to the interface according to the assigned profile without rebooting.
You can also change the network profile for all network adapters on your computer at once:
Get-NetConnectionProfile | Set-NetConnectionProfile -NetworkCategory Private
Change sharing
When installing a particular mode, in fact, only one parameter changes in Windows. It either gives access to shared resources of a computer or laptop, or denies it. You can set this parameter directly.
- Click on the connection in the lower right corner and select options;
- Go to the second tab from the top and click on your connection. If your connection is via wire, then click “Ethernet”. If you are connected via Wi-Fi, then select the section called “WiFi”.
- Then everything is simple: you either enable detection of your PC or disable it - if you are in a work or home group that you trust.
Change network type in Windows 10 via Registry Editor
You can change the network type through the Registry Editor. To do this, you need to run regedit.exe and go to the HKEY_LOCAL_MACHINE\SOFTWARE\Microsoft\Windows NT\CurrentVersion\NetworkList\Profiles , which stores the profiles of all network connections.
You can find the desired network profile by name in the Network Sharing Center. The network name is specified in the ProfileName . The network type is specified in the Category . The following values for this key are available:
- 0 — Public Network
- 1 — Private Network
- 2 — Domain Network
Change the key value to the desired one and restart the computer.
How to change public and home network settings
You can change the private and public network settings. To do this, open the “Control Panel”, go to the “Network and Internet – Network and Sharing Center” section and click on the “Change advanced sharing settings” link.
As a result, a window will open in which you can change the settings for private, public, and all networks. Please note that the active settings profile is labeled “Current Profile” here.
In addition, depending on the selected profile, different Windows Firewall settings are applied. To access it, go to “Control Panel - System and Security - Windows Defender Firewall” or use the search in the Start menu.
In the “Firewall” window, basic settings are available via the “Allow interaction with the application” and “Advanced settings” links.
In Firewall, for each network profile, you can specify the applications that can use the connection, as well as change other settings.
Change network profile via security policy
Another way to change the network type is the Local Security Policy editor.
Launch the secpol.msc and go to the Network List Manager Policies . In the list of networks on the right, find the network by its name in the Network Sharing Center. Open the network properties and go to the Network Location tab, change the network type to Private and save the changes. To prevent users from changing the network profile, additionally select the “User cannot change location” option.
Note : If the server or computer is included in a domain, you cannot change the network type to another; when you reboot, the type will still change to Domain Network.
Through the HomeGroup configuration
- Go to Start again and enter “Homegroup” in the search bar, after which you will see this section at the top. Click on it to go;
- Just below you should see a link to change the location of your grid;
Reset
This method is also quite correct. We simply forget connections and settings. And the computer starts connecting again and asks you: what type of network protection to install.
Again, go to the parameters, and then to the network settings. We enter the state and then press the reset button. You will be asked if you are sure of this; we simply confirm the procedure. If after this the type settings window does not appear, then simply restart your laptop or computer. You can also make and set the access level through the console or registry. But these are such clumsy methods, and they take much more time.
Change when connected wirelessly
The algorithm of actions in this case does not differ much from the previous paragraph. First of all, you need to get into the connection settings . This can be done by right-clicking on the Wi-Fi icon and selecting the desired item.
Ways to reset Windows 10 password
In the menu that opens, you should also select Wi-Fi, and then click on the active connection.
In the window that appears, you can make the connection private, or, conversely, make it available to all users.