The Android file system structure is normally hidden from the user. Access to various data is provided through the corresponding applications: multimedia gallery, contacts, text editors and others. To make changes to system settings and work directly with files, you need to use a file manager. Before making changes, you need to understand the intricacies of the Android file system.
What is necessary
- Installed Root rights on an Android device
- File manager with write access to overwrite the SYSTEM and DATA sections (for example Root Browser)
- Apktool – (for beginners)
- SmartApkTool – (for beginners)
- Notepad++ – (for beginners)
What does it mean for beginners? If you have just started learning about Android and are taking your first steps in this direction, it is better to use these tools to understand the meaning of “how everything works.”
Should I or should I not remove the system application?
They remove the system application only to replace it with a similar, more convenient option. If you are deleting in order to increase memory in order to expand memory for installation, then you are very mistaken! The memory and partition for installation can be:
/data/app or /storage/sdcard1
While system applications are located in the /system section
If you updated a system application, say Google Maps, then the update will be installed in /data/app, and the old version will remain in /system/app.
Therefore, think carefully, maybe you don’t need to delete the system application, maybe you need to manually embed it?
Theoretical information
System applications and services are located in the SYSTEM section:
/system/app/
name.apk
If the firmware is ODEX or its individual parts, then next to the system application there may be a file similar in name, but with a different resolution:
/system /app/
name.odex
Some files contain additional libraries which are:
system/ lib/
name.so
Various caches and databases of system applications and services are located:
data/ data/
papka_prilogenia
If the firmware is DEODEX or its individual parts, then the files are located:
/data/dalwik-cache/name.dex
Or
/cache/dalvik-cache/name.dex
Also, Samsung smartphones and tablets usually have a Preload section, which can contain applications and their odex files.
/preload/system/
name.apk
/preload/system/
name.odex
Plus, again, Samsung has so-called regional non-deletable applications, which are installed every time if you do a complete data reset (wipe).
system/ usr/ csc/
name-region
Where under name-region there can be the code name of your region, for Russia and the CIS - SER, for Ukraine and the CIS - SEK.
Initial manual cleaning
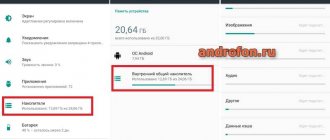
How much available disk space remains for applications can be seen in “Settings” - “memory”:
As you can see from the image, I have 27 MB of available internal memory left (do not confuse this with the built-in memory).
So we are interested in cleaning the internal memory, namely the “/data/” folder.
First of all, I would recommend moving all possible applications to the SD card.
Do not transfer to the SD card only:
- system applications and services
- applications you need without an installed SD card
- applications whose widgets you use, as widgets may stop working.
Which applications have not been transferred to the SD card can be seen in “Settings” - “Applications” - “SD card” tab:
Applications that are not ticked have not yet been transferred to the SD card. In order to transfer them to the SD card, click on the application and in the window that appears, click on the “move to SD card” button.
When you move an application to a card, not all application files are still moved. Some files remain in the internal memory in any case:
- Application - located in the /data/dalvik-cache/ folder - cache for quickly launching applications
- Data - located in the /data/data/application/databases/ folder - all your settings and saves in this application
- Cache - located in the /data/data/application/cache/ folder - such data as downloaded ad units, images and other temporary information that can be safely deleted
From this non-movable data on the card, we can “wipe data” and “clear cache”, as can be seen in the image above. That is, using the image as an example, we can free up an additional 11.80 MB + 4.67 MB in the investing application. BUT! It is worth understanding that clicking on the “Erase data” button erases all your settings and saves in this application, keep this in mind. Clearing the cache doesn't do anything like that.
So the next step to clear free space is to go through all installed applications and clear the cache, and where settings and saves are not important, clear the data.
The work is, of course, monotonous, but it will have to be done if you are unable to install any applications due to lack of free space. If you already have enough free space to install the application, then you may need an application that automatically clears the cache and other files that you can get rid of.
Understanding the File System
Which folder contains contacts and other data on Android? The Android file system format is not similar to the Windows shell. Here's how the internal memory is organized here:
- Device memory is the memory you will work with. Here you can use and change any files. Like Windows or Mac Explorer. Data from some applications is stored here - photos, videos, game cache or Internet browser, etc.
- SD Card – Many Android devices also have SD card slots. You can connect the SD card to your computer or other device, download files to it, and then insert it into your smartphone. If you are using a Marshmallow device and an SD card formatted for use as internal storage, it will not appear separately in the file manager, but will instead become part of your device.
- Root – Android has a special root folder that stores operating system data, confidential information, etc. Most file managers cannot make changes here for security reasons. Unless you have root access and a file manager capable of using it. Obtaining root and accessing system data requires knowledge about the structure of the system and the purpose of its components, so it is better for beginners not to take risks.
The device memory will contain several folders created by Android. Some of them are generated and used by applications to store cache files and should not be modified or deleted. But if you delete only their contents, you can free up a lot of space. How to find download or Bluetooth directories? Here they are:
- All photos from your phone camera are saved in this folder, just like on other digital cameras. They appear in the Gallery or Photos utilities, but are physically located here. This also applies to storing video files.
- Bluetooth – speaks for itself;
- Download. Browser downloads are located here. They can be freely changed, deleted or moved. Downloaded files can be exported to any drive.
- Movies, Music, Pictures, Ringtones, Video. These are folders designed to store your personal media files. Necessary for quick access and synchronization of an Android smartphone with a PC.
- The System folder stores all system settings and data from all smartphone applications.
You can view these folders from any file manager. One click on the file will display a list of installed applications that support it. You can work with the data stored here directly, opening it just like on a PC.
Components
The file system of Android devices is organized somewhat differently than the usual Windows one. You can get to the root directory from the file manager (usually called “Explorer”, “File Commander”, “Total Commander”). Next, the available memory sections will appear, the data in them is organized as follows:
- Device memory . The folders in it look the same as in Windows: they contain files of different formats, they can be changed, deleted and created at the request of the owner.
- SD card . External drives are not required, but are in great demand. In memory, they are allocated to a separate section; if desired, you can make it a place to install new applications or move already downloaded ones.
- Root . The root folder in which information about system settings and their changes is saved. To open it, you must have root rights; not every manager program can access it.
If there is not enough space, the question arises of removing garbage from the smartphone’s memory. Usually special applications are used for this, but they are not always effective. To clean up correctly, you need to understand which folders can be deleted on Android and which cannot be touched.
Working and editing pdf on Android
You can work with the format by simply opening files for reading or editing them and saving them.
For normal viewing of information, it is enough to use one of the many “readers”, such as PocketBook Reader, Foxit MobilePDF or AnDoc PDF and DjVu Reader.
The same applications can also be used to read books and documents in .djvu format.
The EbookDroid, SmartQ Reader and Universal Book Reader applications work only with pdf files.
Some of them allow the user not only to open documents, but also to leave bookmarks and even annotations on what they have read.
Fig. 10. PocketBook Reader
If you need to format a file in .pdf format, you should use one of the software packages for working with doc and xls extensions – OfficeSuite Pro.
The application will not only open the desired document, but also allow you to make changes to it and save it.
In addition, information from the file can be printed directly from the phone - for this you will have to set up printing via Bluetooth, WiFi or USB.
Fig. 11. Editing a pdf document in OfficeSuite Pro
Data folder structure
As noted above, this memory section contains all files created or downloaded by the user. You can perform various actions on them: delete, copy, change or move. For ease of finding, they are divided into several folders:
Documents. Contains documents created in the smartphone editor.
- Downloads. All downloaded information is saved here by default.
- Bluetooth. All files transferred via Bluetooth are copied to this folder.
- Podcasts. The folder is created when listening to podcasts.
- Video, Music, Movies. Multimedia storage is automatically displayed in the lists of programs suitable for reading them.
Ringtones, Alarms, Notifications and others. Designed to save alarm sounds, ringtones and notifications.
Many users are concerned about DCIM - what kind of folder is it and why does it weigh so much. The answer is simple - all pictures and videos taken are saved in it. Therefore, its contents can be easily reduced by transferring elements to a PC or external drive.
Suspicious folders
Some smartphone owners are faced with the presence of an element with an unclear name in the root directory. If you come across the Dianxin folder on Android, it’s not difficult to figure out what it is. This is a product of Chinese firmware, or rather, its custom shell. The system places all files related to processors and smartphone operating data into it. Its size can be large due to the abundance of information; deleting it in the usual way is pointless - it will be restored again.
Many people mistake it for a virus, because this folder is most often discovered by accident. To completely remove Dianxin from the catalog, you need to go, for example, to the EU Explorer settings and uncheck the “Notify about application permissions” option. After that, delete the folder itself and reboot the device.
It is also rare, but you can find the chartboost folder on Android, but what it is is more difficult to explain. It is the result of advertising being displayed on a device. Usually it accompanies games for children, these are banner displays - this is the method of monetization chosen by the developers. This item is not easy to detect; it is usually hidden in the SD card. There is no harm from it, but a lot of memory space can be taken up - up to several gigabytes!
There are two ways to try to solve the problem:
- Disable writing to the file, keep it read-only, or delete it. This is done in the settings of the folder itself.
- Create an empty file without an extension (duplicate) by deleting the folder with the old data.
If you cannot remove Chartboost this way, you can install file managers and use them. In any case, there is no benefit from this folder, it only wastes traffic (advertising appears when you connect to the Internet) and takes up space.
Where is the root folder
We found out what it is - a root folder. Now you need to figure out how to find it and why it is needed. Where can I look for the root directory?
This can be done in:
- computer;
- telephone;
- memory card;
- website/blog.
On a flash drive
You can’t even imagine how easy it is to search for the root on a flash drive. By connecting the memory card to the computer and opening it, you are immediately taken to the root folder of the flash drive. If you do not create additional personal folders on the flash drive, everything that is loaded onto the flash drive is loaded into the root folder. Like this. Everything is extremely simple.
On the phone
How to search for the root folder on your phone? An Android phone can give you access to the root folder using 2 methods:
- using a file manager when connecting the phone to a computer;
- using the Total Commander program.
The first method is the simplest. By connecting your phone to your computer using a USB cable, you will see a file manager on the screen that will offer to open a folder to view files. The folder that you open will be the very root one, which contains many useful system files and the SD mini folder (memory card).
It is strictly not recommended to delete anything from the root folder of the phone. The system files contained in it ensure the proper operation of the phone, and deleting them can cause a breakdown.
The second method is also quite simple. If you have an Android phone, download the Total Commander program from the Play market. Once installed on your phone, open the application. You will see many folders with different names, among them will be the “File System Root” folder. That's what you need. The application performs a useful role as a file sorter and file deleter. With its help, you can normalize the operation of your phone and clear its memory.
On the site
It is much more difficult to find the root directory of the site. As a rule, the first time we encounter the need to find the root of a site is when we want to upload something to our own resource and we are asked to upload a file to the root folder to confirm the right to publish.
You can use FTP to connect and log into the root of the directory. For example, we work either through FileZilla or Total Commander. You can also use the control panel on your hosting.
Most often, the web resource directory is located in folders with the following names “HTDOCS”, “www”, “domains”. Depending on the hosting you choose, the folder names may differ. If you yourself cannot find the root of the site, then you can write to the hoster’s support service.
The file manager for opening the root folder of the site looks like this:
When I enter the “www” folder, the following folders will open: wp-admin, wp-content, maybe robots.txt, .htaccess.
If you are working on the WordPress platform, then you will find the same files in the root directory.
On the computer
How to find the root on a computer? Everything here is extremely simple. We all know that there are drives C and D on the computer. Each drive is the root folder. That is, drive C has a root folder with the same name. As a rule, it contains other folders called Documents, Videos, Music, etc. To get to the root folder of drive C, you need:
- press the “Start” button;
- open “Computer”;
- open drive C.
As already mentioned, drive C is the very root folder where all system files and other computer wisdom are stored. This is how the tree turns out
***
Friends, I hope you have learned something new from this article that will certainly be useful to you, and I have given you a comprehensive answer to the question “What is the root folder?”
Would you be interested in watching the “Comprehensive Blog Promotion” experiment? If yes, then join us. After all, during this experiment you will learn: what methods we will use to promote the blog, which of them will be effective and what results they will bring; what kind of increase in traffic we will have monthly; how much we will earn and much more.
Online experiment in blogging!
Watch the blogging show take place in real time before your eyes. Here and now.
Don’t forget to subscribe to receive announcements of articles from the blog, as well as to our pages on social networks and Youtube channel.
We are waiting for you!
Ekaterina Kalmykova was with you,
bye bye!
Deleting content using a PC
This is the first method by which you can delete the Thumbnails folder or its contents. In principle, there is no point in deleting the directory itself, because the system will immediately create another one. But demolishing its contents is more effective. So, first you need to connect the gadget to your computer in media device mode. This will show not only the contents of the SD card (if you have one), but also the file system of your phone. However, the folder you are looking for cannot be found so easily. In Windows Explorer you need to enable the display of hidden files. Then she will become visible.
Now you need to open the folder, select all its contents and delete it in the usual way. If the system complains that the “file is read-only,” then you need to go back a step, right-click on the folder, open the “Properties” item and carefully review the file attributes. Uncheck “Read Only” and click “Apply to all files in directory”. After this, repeat the removal procedure.
Where are downloads stored on my phone?
All files downloaded from the Internet are stored
in the "Download" folder. To open it, you need to open the file manager, then find this folder in the directories. After this, you will be able to open any previously downloaded file, including the installation *. apk, *.
Interesting materials:
How to connect an additional SMS package to MTS? How to connect Drops on Twitch? How to connect another controller to Xbox One? How to connect the oven to an outlet? How to connect two monitors to one HDMI? How to connect two TVs to one home ru set-top box? How to connect two TVs to tricolor? How to connect DVD BBK to Samsung TV? How to connect a DVD player to a laptop? How to connect two pairs of headphones to Samsung?
Android folders
The list of folders may vary depending on the Android version. Some applications can create their own directories in memory - for example, instant messengers. However, in general, the list of folders will be the same on all versions of Android, so you just need to know what is stored in them.
- Cache - folder with temporary update files. If you are not going to update the system, you can delete it.
- data/app - installation files of all third-party applications. If you don't use them, you can delete them.
- data/data - settings, saves and other service information necessary for the operation of applications. If you do not use installed programs, delete the directory.
- data/clipboard - data clipboard with the latest screenshots. It is not recommended to delete.
- data/dalvik-cache - cache memory area for the Java virtual machine, which allows the phone to run APK files. Files must be cleaned regularly, but cannot be deleted. (read)
The Documents folder stores a variety of documents. If they are not interested in the content, feel free to delete the directory. The same applies to the Bluetooth directory, which contains files received via this wireless technology.
Increase
The DCIM folder stores photos taken with the camera. If you don’t have the photos you need, you can safely delete the catalog. Deleting the Images, Pictures, Musi, Audio, etc. folders will not affect Android operation.
Peculiarities:
- Application management (installation, uninstallation and backup)
- Application icons and their metadata in columns
- Logs, error reports, kernel logs, Shell
- Reboot from the menu (Shutdown, reboot, recovery)
- Screenshots (Simple copying from the .screenshot folder).
- Connect multiple devices with the ability to rename
- Suitable for devices with and without root
- Full Unicode support
- Support x32 and x64 systems
- TC command line integration
- Executing copy and move commands in the background
- Custom file data columns
- Full file system management
- Copy between two devices
- Changing file permissions
- ADB USB
and wireless
ADB
(no need to install Android SDK) - Device auto-mount support
- Debug logs
- Miscellaneous Settings
Removal methods
To delete system folders, you need superuser rights - root. If you don't have them, then you definitely won't be able to break Android. If you have one, you need to be extremely careful - deleting important system files will result in you having to flash the device again.
If you figure out which folders can be safely deleted, then proceed to clearing memory using standard functions:
- Open the Android main menu and launch the file browser (file manager).
- , which can be deleted. Press it and hold your finger.
- When the menu appears, select Delete.
A manager option with multiple selection support is presented. The delete button is located in this case at the top right in the form of a trash can icon.
The standard file manager does not display all Android files and folders. To clean your device's memory well, use ES Explorer or another third-party file manager.
- Launch ES Explorer.
- Choose what you will clean - internal storage (Internal Storage) or memory card.
- Hold your finger on the folder you want to delete. Once it's checked, start highlighting other files and folders.
- After selecting all the items to delete, click on the “Delete” button in the bottom menu.
You can not use file managers on Android, but simply connect your phone to your computer by selecting the media device mode, in which you can view and change the contents of the memory.
All users of mobile devices on the Android platform are well aware of how power-hungry this operating system is. At the moment, we are not talking about RAM (although Android eats it well), but about the memory of the device available to the user. As a rule, there is already catastrophically little of it. And if the owner of the gadget does not have a MicroSD memory card, this becomes a problem. And over time, the situation becomes simply catastrophic. And this is even in the case when the poor user does not download anything. And gigabytes are still evaporating. What to do? One of the reasons for this behavior of Android may be the Thumbnails folder. What is this folder and what is it used for? We will try to answer this question.
Sections of internal memory ROM Android - let's clarify the painful part about the layout of system memory
In the vastness of the Runet, it is difficult to find constructive and well-presented information about the design of the Android operating system.
For the most part, the information is fragmented and incomplete; there is no introductory part with basic concepts, which makes it difficult for beginners to perceive and understand. Without basic knowledge of the device and operating algorithm of the Android operating system, it is impossible to debug or customize firmware or develop for the Android OS. This is what prompted me to write this article, in which I will try, in ordinary and understandable language, to convey “complex” things. The material is aimed primarily at study by ordinary users and is presented as an introductory excursion into the world of Android operating systems. Therefore, concise and superficial information will be presented here without technical depths and nuances. This material will be useful to everyone who is involved in flashing and customizing firmware, developing for the Android OS, repairing mobile computer systems, and the average user for a better understanding of the operating principles and capabilities of their Android.
how to create a hidden folder on Android
As a piece of advice: it may be advisable to create a separate folder with some discreet name (preferably in Latin) - for example and for simplicity, I will have the “Audiobooks” folder. ...then place in this created folder all the secret subfolders and files that need to be hidden - in order to simultaneously hide some data on Android from the eyes of curious comrades, so to speak...
why a separate folder? we find out from the article...
So: in order to study the issue of hiding file information on Android, we will need a File Manager - any one: either the one that is present by default among the Android extensions, or a third-party one that was downloaded, for example, from the Play Market - Google Play.
...this is approximately what the average user's mobile phone screen might look like: (I took a simple Android as an example - the brand of the phone does not play a significant role: the main thing is the principle of operation!
As you can see, the My Files application is displayed on the desktop. This application is a file manager.
...or you can find this application in the “My Applications” section, if it is not displayed on the desktop: tap on the blue field with white squares inside and... open “My Files”.
As soon as you open the application, all the folders and files on your phone will appear before your eyes.
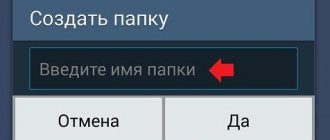
As mentioned earlier, we will need to create some new folder in which we will place all the files and folders that need to be hidden: I created the “Audiobooks” folder:
Once the folder has been created, move on to the next step:
Searching for files and folders using program shortcuts
In the case of installed applications, when a quick launch shortcut is created on the “Desktop” when installing programs, the search is simplified even more. You can find out where the root folder of the program is located through the properties section of the shortcut itself, called up in the RMB menu. Pay attention to the “Object” field!
The directory preceding the name of the application launch executable file (for example, EXE format) is the root directory for a particular program. To be completely sure, you can click the file location button, which is located in the same window just below, after which the root directory will automatically be opened in Explorer (which, in fact, is no different from the one that you have already defined in the object field).
Embedding applications in Android in the standard way
1. An Android application has a name and file extension. For example: Name.apk where Name is the name and apk is the extension.
2. Android applications can be easily opened using an archiver (WinRar or 7zip)
3. Some applications have lib folders (if you open the application with an archiver)
This folder may contain sub-folders with the name
- Aremeabi – this folder is for the Arm architecture as a whole, if it is missing Aremeabi-v7a if this folder is present, then only for Arm V6
- Aremeabi-v7a – this folder is only for Arm V7 architecture
- Mips - MIPS architecture only
- Mips64 - only for MIPS64 architecture
- X86 – for x86 architecture only
- X64 – only for x64 architecture
(the author does not know what architecture your Android device is based on, unfortunately he is not a psychic, check on the Internet)
These folders contain files with the extension *.SO
Instructions on how to embed an application in Android
For Android versions from 1.5 to 4.4.4
Before embedding the application into Android, download and install the application - Root Browser file manager
1. Open Root Browser
Applications that are built into the Android system are along the way
/system/app/application.apk
Applications installed by the user on Android are located along the path:
/data/app/application.apk
If you don't see the application
If you don’t see the application, then go to menu -> settings -> applications -> application -> move to phone
Copy the required application from /data/app/ and move it to /system/app/, but do not forget that many applications contain *.SO files and which must be embedded in the path: /system/lib/
The first option to get the necessary *.SO file is to copy the application to your PC and extract what you need.
The second option is to go to the path /data/data/folder_application_name/lib/file.so and move the required file(s) to /system/lib/
After these simple procedures, reboot your Android smartphone or tablet and the application is built in! At the end of the article, there will be even more information on embedding applications more cost-effectively.
For Android versions from 5.0 and later
With Android 5.0 Lolipop, Google has made significant changes to app installation. If previously APK applications were placed in one folder /XXX/APP, then from version Android 5.0 each separately installed application is placed in its own folder with the libs it needs (*.SO) if the application has these libs, of course.
Android 1.5 - 4.4.4 on the left, Android 5.0 on the right
Now, compared to Android versions 1.5 - 4.4.4, in Android 5.0 there is no need to embed libs (*.SO) along the /system/lib/ path; just move the folder from /data/app/Nazvanie_Prilogenia to /system/app/Nazvanie_Prilogenia (applications that built into the Android system are located at /system/app).
Go to /data/app
Find the folder with the required application
copy the folder with the contents to the /system/app section
Restart Android for all changes to take effect!
Internet and modern technology news
Sometimes the user of a device with a Google system has to face non-trivial tasks, the solution of which requires first finding the data and system folders , where important files are located. We will tell you how to do this on Android in the article.
First of all, the user will need a file manager that shows not a breakdown of multimedia data, but the actual contents of the disk. Sometimes such managers are built into the firmware, otherwise you can contact the Play Store, where there are free options.
Next, using it, we go to the root of the system, designated as “/”. In a number of managers, for quick access to it there is a separate item in the Action Bar, and somewhere you just need to click on the “..” sign or select “File system root”. This is where you can find the data and system folders on Android; their names, by the way, also begin with a slash.
Please note that these sections, especially the second, contain critical information. If a user has root access and deletes files in the data and system folders , this may cause problems with the device.
Warnings
Articles and Lifehacks
A modern smartphone running a mobile platform is a real portable mini-computer in which files are distributed into folders and organized in the most convenient way. This article will tell you how to access folders in Android
and where they are located.
Where are the folders in Android and how to access them?
If we use a desktop computer with Windows, we are probably accustomed to the fact that everything in this system is distributed across disks. For example, the system is installed on drive C, and drive D is used to store personal files. The remaining drives can be used, for example, for removable flash drives and external hard drives (for example, Z or E).
The Android system, based on the Linux kernel, is organized in a different way. A tree structure of files is provided here, the starting point of which is the root. In addition, the mobile operating system itself is very case sensitive. So, if in Windows we cannot create ALBUM and Album folders in one place at the same time, then in Android this is quite possible.
The data section on Linux contains the user’s data, as well as personal settings, and the cache section contains temporary files, including system updates. Information about devices is stored in dev, and files that are responsible for the IMEI identifier are stored in efs (although the last section is not always found). System folders are located in system. As for information about the kernel and its configuration, they are contained in proc. Let us add that in order to see the root partitions under these names, we will need root rights, as well as a special file manager.
If we are interested in how to access folders in Android, and we do not have root rights, we should not take risks just to see the partitions as they were originally presented on the Linux kernel. It is best to use one of the most common file managers like Total Commander. Through such a dispatcher we will be able to clearly see what is located and where exactly.
How to go to the game cache folder on Android?
For the game to work correctly, we cannot do without a set of additional files, that is, without a cache. This is especially true for large games with 3D graphics. Immediately after installing and opening the game, the cache begins to download via the Internet. In addition, we can download and upload to our mobile device in advance by connecting it via USB. Unpack the cache using an archiver like WinRar.
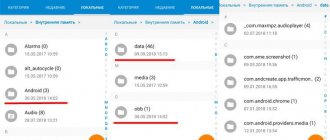
We would like to add that it is highly recommended to download the cache via Wi-Fi. If right now we do not have access to a Wi-Fi point, but there is a stable and unlimited mobile Internet, as a last resort, we can use it, as well as an application called Reverse Tethering for Android. We recommend that you separately read the instructions for installing an obb cache. You can usually access it at the following address: sdcard/Android/obb.
If we cannot find the obb folder due to its absence, we should create it ourselves. A cache of another type can be found in sdcard/Android/data.
How to add your own ringtones and notification sounds
Android's flexible operating system allows for plenty of customization, and one of the most popular methods for personalizing your smartphone is by setting your own ringtones and notification sounds. To do this, you first need to understand the file structure and correctly determine the location where the ringtones are stored.
Step 1: Download audio to device
First, you need to download the ringtone or notification sound directly to your Android device or transfer it from your computer to internal storage. Android supports MP3, M4A, WAV and OGG formats, so almost any audio file you can download will work.
HTML files on Android
When saving web pages in html format or creating documents with this extension, it is almost impossible to open them on an Android smartphone - as a rule, the system displays a message about the impossibility of opening the file.
Several applications with similar operating principles can allow a smartphone to work with an HTML document – HTML Viewer and HTML Reader/Viewer.
Using them, you can easily read information saved from the network. And, if it is saved as an .mhtml archive, it is worth downloading the Mht Viewer application.
Fig. 12. HTML Viewer
The latest versions of UC Browser and Firefox also allow you to open mhtml and html files in reading mode.
And to edit this information, you should open it in an editor (which will not show the saved page itself, but only its code) such as QuickHTML or WebMaster's HTML Editor Lite.
How to access Android system files without root?
so without rooting you have 2 options:
- If the application is being debugged, you can use the run-as command in adb shell adb shell run-as com. your. packagename cp /data/data/com. your. pacakagename/
- Android
backup feature . adb backup -noapk com. your. packagename.
Interesting materials:
Lenovo tablet freezes when turned on, what should I do? The tablet started to slow down, what should I do? The tablet touch screen does not work, what should I do? The tablet does not see the memory card, what should I do? The tablet does not see the SD card, what should I do? The tablet does not see the network, what should I do? The tablet does not see the SIM card, what should I do? The tablet is very slow, what should I do? The tablet has stopped responding to touch, what should I do? The tablet does not receive Wifi well, what should I do?
Screenshots:
Download ADBplugin_v7.3.zip 7247
Editing Android system applications is most often carried out when the user of a smartphone, tablet or other device controlled by this operating system is no longer satisfied with the current appearance of the programs installed on the device by the manufacturer or seller. Another reason may be the need to make not only changes regarding the graphic design of Android applications, but also affecting the location of various elements and the performance of basic functions.
In order to make changes to the code, basic programming skills are required in almost any language (preferably Java and C++). To replace graphics, straight hands and the ability to work in a graphics editor will do.
First of all, you need to decide whether you just need to replace the graphics in Android applications or whether you need to change the arrangement of elements in the system and make deeper changes in the code. Further steps depend on this, which involve either working with the application as an archive, or completely disassembling and editing it.
Changing graphics in Android system applications
In order to simply replace or modify the original graphics (change the colors of buttons, redraw pictures, etc.), it is enough to have a standard WinRAR archiver on your computer. On the device, the user must have “root” rights (analogous to an administrator account on Windows), and it is also advisable to have an alternative recovery (CWM) and a root explorer (to access the Android file system directly in the device itself).
First of all, you need to enable “USB Debugging” in the device, then connect it to the computer using a USB cable and install the necessary drivers. They are usually located on a virtual disk that appears when you connect to your computer.
Then you also need to download the ADB plugin for the file manager from the Internet. This plugin allows you to see the entire Android system as a connected disk with folders. All system applications are located at /system/app, as well as /system/framework. Having found the application you need, simply copy it to your computer. If the plugin is not installed, you can use root explorer to copy the application with the apk extension to a removable SD card, and then from it to the computer.
What is this folder
The folder with the intriguing name “Thumbnails” is a system folder. It is used by the operating system to store a cache of thumbnail images and video files. This is done to speed up the process of displaying them in applications such as Gallery. This program is known to many. Some other applications can also use this folder. If there are an indecent number of images on the device, then the cache size is also quite large. And it eats up precious space.
What is useful to know for those who want to put an end to this disgrace, delete the entire cache and everything that can be deleted? The Thumbnails folder is a system folder. This means that it is hidden and cannot be easily reached. In addition, deleting the cache at first will help. But then the folder will be full of thumbnails again. You'll have to delete everything again. But we’ll talk about how to force the system not to fill this folder a little lower. In the meantime, let's figure out how to remove thumbnails.
Website root directories
When building websites, the exact same tree-like hierarchical structure is usually used as in the case of the standard Explorer. In other words, pages or objects that can be navigated to are subdirectories, and the main page acts as the root directory.
So, if you first went to the main page of the resource, and then began to navigate through other links, using the “Back” button will be equivalent to moving up one level. If you create web pages yourself and view their content, moving through the levels is carried out in the same way as in file managers (one level up and as long as possible). When the transition becomes impossible and the transition button is no longer active, consider that you have reached the root directory.
If we take the example of logging into the root directories of FTP resources, when you use some public (open) management system like UCOZ to view the contents of the account itself, when you open the file manager you will automatically be taken to the root of the site. At the same time, it is especially worth considering the fact that the settings of any of the well-known sites simply will not allow you to rise above the root object, so the most recent and accessible folder in this case will be the root.
Applications that can hide or change desktop icons
So, there are a number of applications that were originally designed to protect personal data - messages, contacts, folders with certain content, etc. For example, ZERO Communication, KeepSafe, AppLock, Hide It Pro and others.
Their functionality varies, but almost all of them can hide certain folders or replace their icon with any other one - for example, similar to a regular application like a calculator or planner. If you try to open an application from the desktop, under which a folder is hidden, the system will most likely ask for a PIN code, which, if entered incorrectly, will display an empty folder on the screen. The most advanced applications allow you not to ask for a password, but simply launch the desired program - so the user will not even realize that if you perform additional actions, the same icon can open a protected folder.
All these features can be extremely useful in a situation where the phone is lost and is not protected by a PIN code or pattern key - the person who finds your device simply will not be able to access personal data, even if they try. But this functionality also has a downside - as a rule, such applications are used for their own purposes by teenagers, who are watched too closely by their parents to be able to store secret (from their point of view) information practically in plain sight, but in fact there will be no access to it access.
AndroidManifest
The heart of any Android application is the AndroidManifest file. It is located in the root folder of every application and contains important information about the application that is required by the Android system. Only after receiving this information can the system execute any application code. The manifest also contains:
- A description of the application components that make up the application. It contains the names of the classes that implement each component and publishes their capabilities. Based on these declarations, the Android system can determine which components the application consists of and under what conditions they can be run.
- Permissions that must be granted to an application so that it can access protected parts of the API and interact with other applications.
