Windows 10's Game Mode is designed to improve your PC's performance while gaming by prioritizing your PC's resources for the game you're running. Game mode in Windows appeared after the release of the Windows 10 Creators Update.
Game Mode in Windows 10 optimizes the operating system while running a computer game. In game mode, the performance of the game increases; the work of other applications running at this time is slowed down so that they do not take up computer resources.
Due to the correct distribution of resources, it is possible that the fps in games will increase. By reducing the load on the processor, there will be free power used in game processing.
Keep in mind that improving the performance and optimal operation of a computer game is primarily influenced by completely different factors: the gaming video card, the amount of RAM, and processor power. Optimal gaming performance depends mainly on powerful hardware, not software.
Therefore, enabling game mode in Windows 10, without having hardware that supports demanding games, will lead to an increase in performance in a computer game, but only by a small amount. In any case, you need to try everything experimentally on a specific computer with a specific computer hardware configuration.
The author of these lines does not play games at all (although I had to install quite a lot of games on my computer in my time), there are a large number of gamers in the world (people who love to play computer games). They should definitely try Microsoft's Gaming Mode to be able to play games with maximum comfort.
Game mode in Windows can be enabled in a specific game if it improves PC performance while playing that game (testing required).
How to enable Game Mode on Windows 10
Now let's look at how to activate game mode in Windows 10. Game mode is enabled in the operating system settings by default.
In order to launch Game Mode in Windows 10, you need to do the following:
- Go to the Start menu, click on Settings.
- In the Settings window, click on the Games section.
- In the "Games" section, enter the "Game Mode" setting.
- In the “Use Game Mode” option, move the switch to the “On” position.
In the “Game Menu” setting, you change the parameters for interacting with the game: displaying the game menu in full screen mode, keyboard shortcuts in “Game Mode,” etc.
Checking Creators Update on a computer or laptop
Before we talk about activating game mode, you need to check if your system has received the latest updates. Moreover, the Creators Update may not be installed automatically: in order to apply it, you need to take a few simple steps.
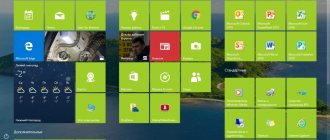
- Open Windows 10 settings using the hotkey combination + and select the tile indicated in the picture.
- We check if there are updates for our operating system.
- If there are updates, the system will automatically start downloading them. We just have to wait a little.
- When the process is completed, reboot the PC, not forgetting to save all data and close running programs.
After Windows 10 starts again, we will see that the computer is up to date. Now you can move on to working with game mode.
It is not always possible to install the Creators Update this way, but the chance of doing so is much higher than simply waiting for the patch to be automatically installed.
Game mode in Windows 10: how to enable Game Mode in a game
Game mode must be enabled in a computer game running on Windows 10 if this mode helps improve system performance while using the game on a computer.
To launch Windows 10 Game Mode in a game, follow these steps:
- Press the "Win" + "G" keyboard keys.
- In the game panel that opens, click on the “Settings” icon (gear).
- In the settings window, in the “General” tab, in the “Game Mode” section, activate the “Use Game Mode for this game” option.
Restart the game for the game mode to take effect.
You may also be interested in:
- Windows hibernation: how to enable or disable
- Fresh start - automatic clean installation of Windows 10
How to disable Nvidia Surround?
With just three displays and no secondary display, Nvidia Surround can be enabled/disabled fairly easily using Windows + P to change the projector settings (Extend is the normal mode, and Computer Only is the surround mode).
Interesting materials:
What is a 500 error? What is a 503 error on a website? What is a 503 error? What is error 651 and how to fix it? What is error 651? What is an authentication error and how can I fix it? What is an authentication error on a tablet? What is an authentication error? What is a DNS server error? What is a dns error?
Reviews about Game Mode in Windows 10
According to research conducted by PC World, using Game Mode showed a slight increase in gaming performance. If other applications were running in parallel on the computer during game mode, there was a significant increase in gaming performance.
In my opinion, it makes sense to use game mode on weak computer hardware, or on computers with an average configuration. Perhaps in this case, you will feel the return. During game mode, the load on the processor is reduced, which has a beneficial effect on the overall performance of the computer, especially in resource-intensive games.
On a powerful gaming computer, with maximum quality settings in the game, the increase will obviously be insignificant, although different options are possible.
Keep in mind that many older games are not optimized for Windows Game Mode, so using this mode in older games may not have any effect. In new games, developers take into account the presence of this technology.
Keyboard problems
We have sorted out the setup, but there is one more important point left - correcting possible problems. Most often, users encounter the following problems:
- The system does not recognize the hardware or the input device simply does not work.
- When typing, the wrong characters are printed.
- Individual keys or their functional combinations do not work.
This is the most general description of the problems, but it covers the vast majority of special cases, so you can definitely find a solution for yourself here.
Hardware and system problems
The system does not respond to button presses, the indicator lights on the keyboard do not light up - these are signs that the device is not connected correctly.
- Make sure that the connection is made into a known working connector. Try installing another device into it.
- Make sure that the equipment plug is fully inserted into the socket. Also check the cable itself - it may be damaged.
Try connecting the keyboard to a TV or, for example, a tablet - if the device is detected and works normally, then the problem lies in the computer.
If the keyboard worked for a while, and then the system stopped detecting it, try simply restarting the computer. The next step is to reinstall the drivers.
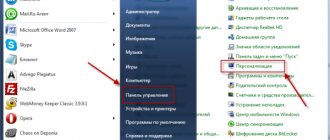
- Open Control Panel, set the display type to Large Icons, and go to Device Manager.
- Find the keyboard in the list, right-click on it and select “Delete”.
- Restart your computer.
The next time you start, the system should automatically detect the presence of a new connected device and install it. Don't forget to install the drivers if they are supplied on disk or distributed through the manufacturer's official website.
Sometimes the cause of incorrect operation of connected equipment is a virus infection of the computer. Scan the system for threats and neutralize them.
Problems with keys and their combinations
If, when typing, you see on the screen characters that are not the same as those you are typing, then most likely the keyboard is dirty or there is liquid inside its case. To clean the input device, you can use a special small vacuum cleaner or a can of compressed air.
An economical option is to turn the keyboard over with the buttons facing down and gently tap one corner on the table. If you have never done this before, you will be unpleasantly surprised by the amount of various garbage that ends up on the table.
The functionality of the keys can be checked using special online tests - for example, Key Test.
If the keyboard shortcuts that you have set in the keyboard settings do not work correctly, make sure that applications for controlling input devices are not installed or correctly uninstalled on your computer.
Often, users install such applications to assign convenient combinations, and then forget about them or simply uninstall them incorrectly, thus confusing the hardware configuration.
To make sure that it is a third-party application that is affecting the functionality of the shortcuts, boot your computer in safe mode and check the keys.
Purpose of the article
Why do I need it?
You will be able to enhance your gaming experience with smooth and precise controls.
Audience Affected
All BlueStacks 4 users.
Affected BlueStacks versions
All versions of BlueStacks 4.
Affected regions
Article. How to set up keyboard controls?
You can customize the controls for the game using advanced settings, following the recommendations:
1) Open advanced controls in the game.
To customize the controls in the game, you need to open advanced controls by clicking on the keyboard icon in the lower right corner of the program.
ATTENTION. If the game already has controls configured, you need to click on Edit > Advanced Settings in this window.
2) Set up controls
Use the advanced control settings that will appear on the right side of the screen.
You can use different controllers. Please click on each controller to find out detailed information about it:
3) Save control settings
Click on the “Save” button in the “Advanced Game Controls” window to save and apply the control settings.
Click “Clear” to remove the current settings.
Click “Return” to return to BlueStacks default settings, if any.
Examples of settings for various controllers
Tap
You can click on the desired area to adjust the tap or drag this controller onto the playing field using the mouse.
Once you place the controller, you will see its icon and can use the desired key on the keyboard. Right-clicking on the tap icon will open the tap settings window, where you can configure the exact location of the tap and specify what it is responsible for.
Below you see the tap setting using the example of the Mobile Legends game.
If you want to add hints for a tap, right-click on its icon. In the window that appears, you can edit the tap parameters.
In this example, the action in the game belongs to the “Attack” category and the “A” key is responsible for it.
| Field | «> Description |
| X | "> X coordinate. Appears automatically after placing the tap controller on the playing field. |
| Y | "> X coordinate. Appears automatically after placing the tap controller on the playing field. |
| Key | "> Key assigned to tap. |
| Hint Category | "> Hints that will be displayed in the "Game Controls" window. |
D-pad
You can customize the D-pad by dragging it onto the playing field with your mouse.
The default keys for the D-pad are W, S, A, D. You can customize other keys for up, down, right, or left movements. You can also change the size of the D-pad to match the controller in the game.
Right-clicking on the D-pad opens the settings window. For example, in this window, the WSAD keys are responsible for the movements up, down, left and right.
| «> Field | «> Description |
| ">X | "> X coordinate. Appears automatically after placing the D-pad on the playing field. |
| ">Y | "> Y coordinate. Appears automatically after placing the D-pad on the playing field. |
| ">Radius | "> D-pad radius. |
| ">Up | "> Key assigned to move up. |
| ">Down | "> Key assigned to downward movement. |
| ">Left | "> Key assigned to moving left. |
| ">Right | "> Key assigned to move to the right. |
| ">Speed modifier 1 | "> Speed modification key. If a character can move faster by sliding the D-pad beyond the outer radius and slower by limiting the swipe radius, you can customize these actions by adding a Speed Modifier 1 key. |
| ">Radius 1 | "> Changes the D-pad radius for Speed Modifier 1. |
| ">Speed modifier 2 | ">Another controller for speed modification. Same as Speed Modifier 1. |
| ">Radius 2 | "> Changes the D-pad radius for Speed Modifier 2. |
| ">Speed | "> Default is 200. This controller controls how fast the D-pad moves from the center to the edges of the area. You can adjust the speed depending on your gameplay. |
| ">Activation time | «> |
Default is 0. This controller controls how long the D-pad should be held down to start moving in the desired direction.
Please check out this article: MOBA Mode on BlueStacks 4.
Scale
You can adjust the zoom by dragging the appropriate controller onto the playfield using your mouse.
In the zoom settings, you can assign keys for zooming in and out.
Setting up scaling in the game Boom Beach
| ">Activation speed | ">Default 0. |
| "> MOBA control mode | «> |
| «> Field | «> Description |
| ">X | "> X coordinate for scaling. |
| ">Y | "> Y coordinate for scaling. |
| ">Zoom in | "> Key assigned to zoom. |
| "> Zoom out | "> Key assigned to zoom out. |
| ">Reassign | Reassigning keys for the combinations Ctrl+ or Ctrl- and Ctrl+ and Ctrl= (can be True/False). |
| ">Hint Category | "> Hints that will be displayed in the "Game Controls" window. |
| ">Radius | "> Defines the radius of the playing field where scaling is applied. |
| ">Button | “> An additional key that must be pressed together with the assigned key to zoom in/out. If this key is Alt, then to change the scale you should use the Alt+ or Alt- key combination. |
| ">Speed | "> Determines the rate at which the scaling changes. |
Default keys
Attention. The default keys for zooming are Ctrl+ to zoom in and Ctrl- to zoom out. If you want to change the assigned keys to others, for example, to arrow keys, then select the “Reassign” field in the scaling settings and specify the status False.
Swipes
You can customize swipes by dragging the controller onto the playing field using your mouse. You can assign any keys to move up, down, right, left.
| «> Field | «> Description |
| ">X | “> X coordinate for swipe. Sets automatically after placing the controller on the playing field. |
| ">Y | "> Y coordinate for swipe. Sets automatically after placing the controller on the playing field. |
| ">Swipe and hold | "> Prevent the character from returning to the original position after swiping. Can be in True/False state. |
| ">Swipe up | "> Key assigned to swipe up. |
| ">Swipe down | "> Key assigned to swipe down. |
| ">Swipe left | "> Key assigned to swipe left. |
| ">Swipe right | "> Key assigned to swipe right. |
| ">Hint Category | "> Hints that will be displayed in the "Game Controls" window. |
Tilts
You can customize swipes by dragging the controller onto the playing field.
You can assign any keys to tilt or rotate up, down, left, right. The arrow keys on your keyboard are the default keys for these actions.
| «> Field | «> Description |
| ">Up | "> Key assigned to tilt or rotate up. |
| ">Down | "> Key assigned to tilt or rotate down. |
| ">Left | "> Key assigned to tilt or turn left. |
| ">Right | "> Key assigned to tilt or turn right. |
| ">Hint Category | "> Hints that will be displayed in the "Game Controls" window. |
| ">Maximum inclination angle | "> Angle of inclination or rotation of the character/scenery. Calculated in degrees. |
| ">Speed | "> Tilt or pan speed. Calculated in angles per second. |
| ">Auto reset | "> Prevent the character from returning to the original position after tilting or turning. Can be in True/False state. |
Repeat stage
Tap and hold inside the game to re-tap. YOU can hold down the button or press once to repeat the tap a certain number of times.
You can assign the number of times you press this button, and the delay between presses.
| Description |
| X coordinate of the repeated tap. Automatically selected depending on the location of the button. |
| Y coordinate of the repeated tap. Automatically selected depending on the location of the button. |
| The key specified for repeat tapping. |
| Number of recorded presses of the assigned button on “press and hold” |
| Delay between registered clicks. |
In this video you can see how it works in the example of the game Tap Titans 2
We appreciate you being with us. We hope you enjoy your BlueStacks experience. For any questions, write to us at support (dog) bluestacks (dot) com. Thank you very much!
Hi all. Not all smartphone users know how to set up a keyboard on Android, and this is the main tool for transmitting and receiving data. A lot depends on the choice of keyboard and settings: ease of use, typing speed, advanced functionality and other amenities.
The settings interface may look different on different devices, but the algorithm itself does not change.
Game bar
You can show the Game Bar while playing a game on Windows by using the Win + G key combination. However, it will disappear when you start playing the game, so when you want to see it again, you will have to repeat this key combination. If you want to explore the Game Bar now, open the Windows game before continuing.
You can open the Game Bar using the Win + G key combination even if you're not playing the game yet or don't have it yet. All you need is an open program such as Microsoft Word or the Edge web browser. When prompted, check the box indicating that what you have open is indeed a game, and the game bar will appear.
The Game Bar offers access to settings and functions. One notable feature is the ability to record the game as you play it. Game Bar also offers the ability to stream your game. You can also take screenshots.
Settings include, but are not limited to, audio options, broadcast options, and general options such as microphone settings or whether to use the game bar for a specific game (or not). The settings in the Game Bar include many of the same things you'll find in Options → Games.
Virtual keyboard
To control the built-in keyboard, you need to go: Settings → System → Language and input . By default, you will have access to the Gboard keyboard from Google.
What can you say about her? If not the best, then an excellent combination of features:
- speed
- reliability
- voice dialing
- built-in search
Therefore, many people use this set and are satisfied with everything. There are also some disadvantages, we will not list them, as opinions will be divided.
If you want to change something in your life, start by changing your keyboard.
The Play Market has a huge selection of different keyboards and you are sure to find the best one for yourself.
Any assembly of keyboards has its own settings, including the default ones. Find the gear icon and go to “Settings” or through system settings.
In the stock keyboard settings you can change:
- input languages
- Topics
- word hint
- emoji
- autocorrect
- spell check
- input types
- dictionary
- voice input
- layout
- sound
An interesting feature recently appeared in Gboard. Create your own mini-smileys. Check if you have a plus sign (Add), then you are lucky and can create your own sticker based on your selfie.
For older users who find this Gboard assembly extremely inconvenient (size, font), I recommend paying attention to the 1C Keyboard, they will appreciate it.
To change one keyboard to another, also go to settings (shown above).
Select “Virtual Keyboard”
Next, Manage Keyboards
Place a switch or mark the one you will use.
Then you customize the keyboard for yourself.