After using your computer for a long time, the problem of lack of hard disk space may appear, which causes the operating system to run slowly. To avoid this, you need to clean up debris manually or automatically using programs. This will speed up your computer and free up disk space.
The presented methods will help to compress the amount of data on the media or completely remove information that is useless to the user. Applications leave “garbage” that accumulates until the amount of memory becomes critically small.
Cleaning up your disk using Disk Cleanup
To clean up your Windows 10 disk using Disk Cleanup, a special utility included with the system, click the Start button and look for Administrative Tools. In the menu that appears, click the Disk Cleanup icon.
Next, select the block with the operating system (usually C:) from the drop-down menu and click OK. Then wait a few seconds for the disk to scan and check the box corresponding to the items to be deleted.
We recommend deleting temporary files (that is, temporary data created by applications installed on your computer but not yet removed from your hard drive), image and video preview files, files in the Recycle Bin, and temporary Internet files (those created by Internet Explorer or Microsoft Edge). You can also uncheck “Downloaded programs” if you do not want to delete applications in the downloads folder.
Then click the "OK" button, confirm that you are ready to perform the cleaning operation by clicking "Delete files", and wait until the entire procedure is completed (this may take some time, it all depends on the total number of files to be cleaned).
If desired, you can also enable the removal of certain system files, such as device driver packages (older drivers are replaced by those downloaded through Windows Update) and Windows Defender files (the antivirus software included by default on the system) by simply clicking the " Clean up system files" attached to the Disk Cleanup window.
Eliminating unnecessary files
To eliminate unnecessary files stored on your computer's hard drive, you can use another standard feature available only on the latest OS: the one that allows you to delete temporary files, operating from Windows 10 settings.
First, click the Start button and the gear icon located on the left side of the menu that opens.
In the window that will now be displayed on your desktop, click the System icon, select Memory in the left sidebar, and then select Temporary Files.
Finally, select the items you want to delete by selecting Temporary Files, Downloads, Empty Recycle Bin, and Previous Version of Windows (if any) and checking the box next to the items of interest, then click Delete File.
What to do if the application does not start
The program may not open using any of the above methods only because the file responsible for launching the application is not in the default path. Try to find this file manually, it may be located in the following path: C:\WINDOWS\ServicePackFiles\i386. If it is not there either, or the folder itself does not exist, then there is only one thing left to do - use third-party programs to clean up the disk.
We follow the indicated path
Cleaning with CCleaner
As an alternative to the above tools and to remove other temporary files on your computer, you can use CCleaner. An excellent third-party application that allows you to optimize your computer's performance by deleting various unnecessary files (temporary application data, Internet browsing history). Cleans the registry by removing duplicate files and more.
To download to your computer, connect to the official website and click on the link located under the Free inscription. Then run the file and click “Yes” in the window that opens. Select your language and complete the installation of the program by first clicking on Install and then on Start CCleaner.
Once the installation is complete, launch CCleaner, select the Cleaning tab on the left sidebar, and check the items you want to remove. Then click the "Analyze" button, and begin the actual removal from the disk by clicking the "Start Cleaning" button.
You can free up disk space by deleting all duplicate files on it using a special CCleaner function. To use, select “Tools” in the left sidebar of the program window, click “Search for Duplicates”, specify the drives or folders that you want to analyze, configure the search parameters for duplicates (for example, ignore hidden files).
How to enable automatic junk cleaning in Windows 10?
When performing the cleaning from the previous instructions, you probably noticed in “step 4” the “Memory control function” checkbox... If the user activates it, then everything that we did before will be done automatically.
Click on the “Set up memory control or run it” button. In this window, you can set the storage period for certain data that suits you, and so on. If absolutely necessary, the user can force a cleanup by clicking on the corresponding “Clean up now” button.
Remove heavy files with third-party tools
Unfortunately, Windows 10 does not have a built-in special function for deleting heavy files, but this operation can be performed by using special third-party tools.
WinDirStat
It's a zero-cost, open-source application that, once used, allows you to view all the files on your drive, organize them by weight, and display a special graph that makes it easier to find all the data.
To download WinDirStat on a computer connected to its official website, first click on the word “Downloads”, then “Download WinDirStat xx from FossHub” and finish downloading the WinDirStat Windows installer.
Once the download is complete, open the resulting file and click the “Yes” button. Then accept the terms of use of the program by checking the box next to “I accept the terms of the license agreement” and complete the setup by double-clicking first “Next”, then “Install”, then “Next” and “Close windirstat_xx_setup.exe”
At this point, launch WinDirStat, select the units for analysis, and click OK. Then wait until the completion line reaches 100%, review the list of all the heaviest files stored on your hard drive and delete them or move them to an external drive. If the files are not organized by size, click the Size tab to fix it.
Uninstalling useless and unnecessary programs
The simplest and at the same time effective way to quickly free up memory on your hard drive. You can uninstall unnecessary software through the control panel (Control Panel -> Programs -> Uninstall Programs)
Or in the following way:
- Press “Win+X”.
- Select “Applications and Features”.
- In the window that appears, select programs that are no longer needed and delete them.
Both methods work and allow you to completely uninstall the application.
Changing storage location
When the system has two hard drives installed or one is divided into several partitions, it is possible to define a new storage location for user files.
In the OS settings section discussed above, scroll through “Storage Control” and find the “Other Storage Settings” item. Click on the hyperlink marked in the screenshot.
Using the drop-down menus located here, you can assign a new location for each folder included in the user profile (music, photos, documents, movies). Information that takes up space but does not require constant access will be stored on the second drive. As a result of these actions, a folder with a user name and access rights similar to the main one will appear on drive D.
In order for the created data transfer scheme to start working, you need to specify a new location of the selected directories in Explorer. Select a folder in the quick access area and call the context menu. Open the “Properties” item.
Go to the “Location” tab. This shows the existing path to the selected folder. Click the “Move” button.
Go to drive D, open the directory with the user name and specify the folder to be combined in it. We complete the operation by clicking on the button marked with a three.
Having set the path for saving musical compositions, we apply the changes made.
Windows will prompt you to finish combining the directories and move the existing files to the new location. We agree by clicking “Yes”. Once the transfer is complete, all new music tracks will be saved to drive D.
Moving data to cloud storage
Now most users have fast home Internet with speed settings from 50 Mbit/sec above. This is quite enough to store not very large files, but in large quantities, in the cloud with subsequent quick access to them. Photos and music at the very least deserve to be stored in the cloud.
At the same time, there is no need to spend money on a monthly subscription, since the basic volumes of various cloud storages together provide a good supply of free space. For example, OneDrive pre-installed in Windows offers 5 GB of space free of charge, Google Drive up to 15 GB, Yandex Disk 10 GB (if you use Mail 360, then +20 GB of space), Mail.ru cloud gives 8 GB forever. Total from 38 to 58 GB for free - why not use them, especially since each of the virtual disks can be displayed in Explorer as regular local disks.
Changing the cart size
Files deleted in Windows are sent to the Recycle Bin by default. At the same time, not everyone regularly cleans it. For this category of users, Microsoft has provided, as part of the Memory Control function, a mode for automatically emptying the Recycle Bin after a certain period of time. However, a more effective option may be to manually limit its size.
Right-click to open the recycle bin context menu. Select the “Properties” item in it.
By default, Windows allocates 10% of disk space to store deleted files. In order not to turn the basket into a “storage room” for unnecessary “garbage”, let’s give it a more suitable size. We select drive C and set in numbers the value that we consider acceptable. For example, we will choose 1 GB, reducing the space taken up by three times.
After the manipulations have been completed, when deleting a file whose size exceeds the value set for the recycle bin, the system will ask for confirmation.
Refusal of hibernation mode
Hibernation mode is convenient because it allows you to put the PC into sleep mode, while maintaining the user's state (open programs, window layout, etc.). When you exit the computer from this mode, it starts working from the place where it was paused, and this all happens very quickly. An extremely convenient thing, but if you do not need such a function, you can disable it, because the hibernation file can take up to 5-10 GB of free space, which for some may be critical.
Disabling hibernation mode:
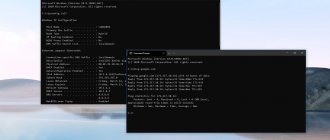
- Open “Command Prompt” as administrator (Search - command line - right mouse button - run as administrator);
- In the window that opens, enter the command “powercfg /hibernate off” (without quotes) and press Enter;
- Great! The hibernation file data is disabled and will no longer take up space.
Reducing the space occupied by recovery points
In addition to completely deleting recovery points, you can reduce the space they occupy on the drive. By default, 5% of the total capacity is allocated for these purposes, but not more than 10 GB.
Call the “Run” dialog box using the keyboard shortcut “Win + R”. Type “control system” in the text field. We launch the command for execution by pressing the Enter key or the “OK” button.
The classic system properties panel will open. In the quick navigation area, select the section marked with a frame.
Go to the “System Protection” tab. Click the “Configure” button.
Using the slider shown by the arrow, we reduce the size of the disk space allocated for saving recovery checkpoints. Above the regulator the actual occupied volume is shown, and below the volume allocated for the future. The latter is taken into account as a percentage of the total disk capacity. When changing by each unit, the allocated size is counted in gigabytes and, as it decreases, in megabytes. The button marked “2” allows you to erase all previously created points. After completing the adjustments, click “Apply”.
Removing the Windows.old folder
If we installed an operating system on top of the previous one, this folder will appear on our system partition. It can weigh several tens of gigabytes and contain the previous OS. If you do not plan to return to this system, let's remove old updates:
- Go to Windows Explorer and find the Windows.old folder on the C: drive.
- Open the folder and find in it a directory called “SoftwareDistribution”. Let's go into it.
- Next, open the “Download” folder, select all its contents and delete it.
If the system asks for confirmation, set this action for all file types and confirm your intention.