Over the past month, I have encountered several times the problem of setting up a network on computers with Windows 10. I don’t remember the last time I had to read so many forums and articles as this time. Typically, the process of setting up a network in small offices and organizations was fairly quick.
The main problem is displaying work computers in a network environment. But even after the computers saw each other, the following error “0x80070035 - Network path not found” when connecting to this computer.
We will try to figure out all these problems further.
Introduction
How did it all start? The fact is that in Windows 10 1803 (Spring Creators Update), the developers removed the ability to create a home group of computers; in addition, computers with Windows 10 no longer appear in the network environment of Explorer when viewing network devices.
Many users began to encounter problems displaying neighboring computers on the local workgroup network starting with Windows 10 1703 (Creators Update) . After installing this (or a newer version of Windows 10), your computer may no longer see nearby computers when viewing devices in Network Neighborhood.
The fact is that, from Microsoft’s point of view, workgroups are an outdated functionality for organizing a local network for access to shared resources and printers. Instead of using a workgroup, Microsoft suggests using its cloud services (OneDrive, access through Microsoft Accounts). In my opinion, this is unjustified.
In some cases, Windows 10 can see a neighboring device in the Network Neighborhood, but cannot display a list of network folders on it. Most often this is accompanied by the error “0x80070035 - Network path not found” .
Windows 10 does not see computers on the network: reasons and solutions
The first sign was update 1703. When it was installed, the computer “blinded” itself and stopped correctly displaying other machines - they simply disappeared from the network environment. It was also possible to detect the error by standard viewing neighbors from the command line, using net view. Instead of a list of available PCs, only a message about missing elements was displayed.
If this situation occurs, first review your system accessibility settings. In Windows 10, they are often the reason why the OS does not see computers on the network.
Launch Control Panel.
In it, open network management. This element is also responsible for the correct operation of access functions. An alternative way to go to it is to right-click on the connection icon of the menu and click on the item of the same name.
Next, open advanced options.
Important! The connection profile must be set to private network, otherwise Windows 10 will not see other computers and vice versa (see instructions below).
Next, check the following parameters and, if necessary, switch them to the enabled state (check the boxes):
- Network discovery and automatic configuration mode;
- External access permission (allows the OS to communicate with printers and shared files);
- Rights to manage the group have been transferred to the OS.
You need to adjust the profile designed to work with any networks by correcting its parameters as follows:
- Enable access mode. This is necessary so that users from other PCs can not only see open folders, but also read/write data to them.
- Only for those networks that you are 100% sure are secure (in real life, it is not recommended to be under the illusion that any network is): disable password protection so that anonymous users can also perform any operations with network folders.
The next point will come in handy if another user (or you from another computer on the local network) does not see your machine running Windows 10. You will need to work with Windows Settings.
Next, go to the Networks and Internet sub-item.
Finally, select Ethernet for a computer with a wired connection, or WiFi if it does not see Windows 10 on the wireless network. Enable the setting that makes your PC discoverable.
The basic part is complete. Further actions will be useful if this was not enough to correct the problem.
Setting up a firewall
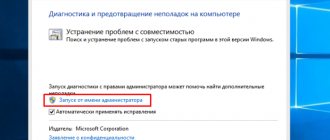
Sometimes you need to additionally carry out operations from the command line, and run it under an administrator account in Win-X.
In the terminal, you need to run a command to set a rule for the system firewall that allows detection.
Working group
First of all, we check that all computers on the network are in the same workgroup. To do this, go to the computer properties:
If the workgroup of all computers is the same, but one of the computers still does not want to be displayed correctly, try adding this computer to the workgroup again.
To do this, perform the following steps:
- Go to the old “Control Panel”,
- Go to "System"
- On the left select “Advanced system settings”
- Switch to the “Computer name” tab
- Click on the “Identification” button.
In the setup wizard window that opens, select:
- Select “The computer is part of the corporate network”
- Select “My organization uses a network without domains”
- Next, enter the name of your workgroup,
- Click “Finish.”
It is advisable to reboot after this.
Mapped network drives do not work
Before we continue with the workarounds, you should know that some workouts work in certain scenarios. One may need network access when logging in, while others may need access to Group Policy settings. So choose what works for you.
If your mapped network drives aren't showing up, connecting, or working in Windows 10 after you sign in, you can try these workarounds that use scripts to make sure you're connected to them as soon as you start using the computer.
Creating Scripts
There are two scenarios here. MapDrives.ps1, which is executed by MapDrives.cmd, and is executed in a normal (non-elevated) command prompt.
Create a script file named MapDrives.cmd and save it somewhere safe.
Similarly, create a script file named MapDrives.ps1 with the following content. Keep both scripts in the same folder.
Possible ways to execute a script to connect to a mapped network drive
1] Create a startup item
This only works for devices that have network access when logged in. If it is not there, the script will not be able to automatically reconnect network drivers.
- Open the Startup folder located at %ProgramData%\Microsoft\Windows\Start Menu\Programs\StartUp and paste a copy of MapDrives.cmd into it.
- Open the Scripts folder in %SystemDrive%\Scripts\ and copy and paste MapDrives.ps1 into that folder.
This will create a log file named StartupLog.txt in the %TEMP% folder. Then log out of the machine and then log in again. This will ensure that the connected drives open.
2] Create a scheduled task
You can create a scheduled task that runs immediately after the user logs on. First, copy the MapDrives.ps1 script file to your Windows Scripts folder at %SystemDrive%\Scripts\. Then launch Task Scheduler. You can search in the search box and it will appear.
- Select Action > New Task and on the General tab, enter a name and description for the task.
- Then click the Edit User or Group and select a local user or group. Then select OK .
- the Run with highest privileges checkbox
- Go to the Triggers tab and create a new trigger with the On Login option in the Start Task dropdown. Click OK
- Next, go to the Actions tab Create a new action and select “Run a program.”
- In the Program/Script field, enter Powershell.exe.
- In the Add arguments (optional) , enter the following: -windowsstyle hidden -command. \MapDrives.ps1 >>%TEMP%\StartupLog.txt 2>&1
- In the Start from (optional) , enter the location ( %SystemDrive%\Scripts\ ) of the script file.
Reboot or log out of your account and log in again to complete the task.
3] Group Policy Settings
This is required if the mapped drives are defined through Group Policy settings. You will need to update the drive maps action to Replace .
In turn, it will delete the existing mapped drive and create the mapping again every time you log in. However, any mapped drive settings that are changed from Group Policy settings will be lost each time you log on. If the changes don't work, run the gpupdate with the /force to immediately update the Group Policy setting.
One of these solutions suggested by Microsoft should help you resolve the problem of mapped network drives not working in Windows 10. Let us know which one works for you.
SMB protocol v.1.0
It often happens that problems are associated with the SMB v1.0 protocol being disabled by default. This applies to computers running Windows 10 version 1709 and higher. It is this service that is responsible for compiling a list of computers on the network and displaying them.
Enable SMB v.1.0 protocol:
- Go to the old “Control Panel”,
- Find "Programs and Features"
- On the left, select “Turn Windows features on or off”
- In the list we find “SMB 1.0/CIFS File Sharing Support”,
- Check the box next to this item or select all internal sub-items.
But keep in mind that this is an old and insecure protocol , which is full of vulnerabilities. Several years ago, vulnerabilities in SMB v.1.0 were the cause of major virus attacks.
It is advisable to reboot after this.
Ways to solve the problem
The reasons why Windows 10 does not see the network are always different, so there is no universal solution. Below are several methods. Each of them can be useful, but without identifying the cause, it is impossible to choose an effective method. If one doesn't help, try the next one.
First, you should look at the list of connected devices if Windows 10 does not see other computers:
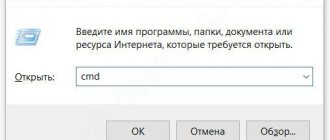
- Use the Win + R combination to open a window and enter “cmd” without quotes.
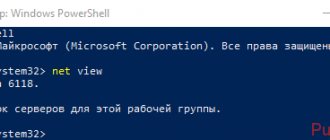
- At the command line, type “net view” also without quotes.
- A list of connected devices will appear in the window. If they are not there, the problem really exists.
Access to files and folders
Check if your file and folder access service is enabled.
- To do this, go to the old “Control Panel”,
- Go to “Network and Sharing Center”
- On the left, select “Change advanced sharing settings”
- Next, open the lists of profiles and activate the necessary options.
Activate the following options in profiles:
- Enable network discovery
- Enable access to files and printers,
- Enable sharing to allow network users to read and write files in shared folders,
- Disable password protected sharing.
It is advisable to reboot after this.
Connecting a shared folder as a network drive
Go to This PC. Click on “Computer” – “Map network drive”.
Click on the “Browse” button, select the required shared folder from the network environment and click “Ok”.
You can leave the drive letter as default, or choose any other.
If you need to specify a different login/password to access this folder, check the box next to “Use other credentials.” But as a rule, this is not necessary.
Please note that depending on the sharing settings on the device you want to connect to, you may need to provide a username and password.
I showed this using the example of connecting a USB drive, which is connected to the USB port of the router, as a network drive.
You can connect another computer on the local network in the same way.
All connected drives will appear in Windows 10 Explorer under the “This PC” tab.
To unmount a drive from a network location, simply right-click on it and select Unmount.
After this, the drive will disappear from Windows Explorer.
You can also create a shortcut if necessary.
It will be placed on your desktop. And you will have access to a shared folder on another computer or network drive directly from your desktop.
I hope you found my little guide helpful. I look forward to your comments and questions.
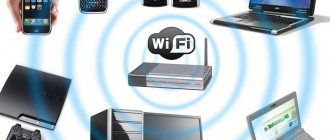
Hello! For those who are not in the know, I’ll start from afar. On computers and laptops with Windows installed, there is a separate “Network” tab in Explorer. This tab displays devices from the network environment. That is, by opening the “Network” tab, we can see there computers, network storage (NAS), multimedia devices (DLNA), flash drives and external drives that are connected to the router and to which shared access is configured. Simply put, those devices that are connected through the same router (located on the same network) and on which the network discovery function is enabled (devices that can be discovered on the local network). Our router (section “Network infrastructure”) and other devices can also be displayed there.
Now I’ll explain what and how, and why I decided to write this article. I have an ASUS router, to which I connected a USB flash drive, and configured shared access to this flash drive for all devices on the network. And what do you think, in the “Network” section this network drive appeared on all computers (it is displayed there as “Computer”), but it was not displayed on my computer. That is, my computer did not see the flash drive connected to the router, nor other computers on this network. But the DLNA server was displayed running on the same router. But this does not change anything, since I need regular network access to the drive.
Link Layer Topology Discovery Responder
We check the network card settings on the computer:
- Go to the old “Control Panel”,
- Go to “Network and Sharing Center”
- On the left, select “Change adapter settings”
- Go to the properties of your network adapter,
- Find “Link Layer Topology Discovery Responder”
- Check the box if it is not checked
- Click "OK".
It is this component that allows you to see your computer in a network environment.
It is advisable to reboot after this.
Network services
Discovering computers on a network in Windows 10 is the responsibility of the Resource Discovery Feature Publishing , which does not start by default after installing update 1803. The startup type is changed from “Automatic” to “Disabled”. When this service is disabled, the computer is not discoverable by other computers on the network.
To make your computer visible, you need to enable this service:
- Go to the old “Control Panel”,
- Find "Administration"
- Go to "Services"
- In the list we find “Publish function discovery resources”. It should be turned off
- Change the startup type to “Automatic”
To be sure, check out a few other services. They should all be running and their startup mode should be “Automatic”:
- Detection provider host,
- DNS client,
- SSDP detection
- Server
It is advisable to reboot after this.
First version of SMB and Network Explorer
Builds 1703 and 1709 are also responsible for two important changes:
- Installing the first one leads to the fact that the standard Network Explorer (a special service thanks to which a PC with Win 10, as the oldest, can find neighbors, and the rest turn to it for this information) begins to fail and does not see the computers in the environment. Therefore, it is recommended to turn it off and transfer the role of the main browser to a machine with “seven”;
- After upgrading to the second, the SMB protocol of the first version is disabled, which automatically leads to a complete shutdown of the browser. This is because in version 1.0 this protocol has a vulnerability through which extremely nasty viruses spread.
As a half measure and the opportunity to work with other machines, you can return it back. To do this, you need to install an outdated protocol on one of the PCs with “ten” through Programs and Features, ticking it off.
Let us repeat once again that this measure reduces the level of protection of your network.
Remote Desktop
It was this method that helped me several times when I had problems connecting to another computer to access a network folder. Most often, this was accompanied by the error “0x80070035 - Network path not found .
How to enable this feature:
- Go to “Start” and open “Settings”
- Go to "System"
- On the left select “Remote Desktop”
- We switch the function to “On” mode,
It is advisable to reboot after this.
Guest login without authentication
In one update, namely from October 17, 2022 - “Fall Creator”. Microsoft has significantly strengthened security and passwordless connections via a local network to other computers no longer work, as it did before.
Windows 10 Fall Creators Update continues to evolve the Windows platform to make Windows a home for all developers. Allowing developers to not only work as efficiently as possible, but also improve intelligent and connected interactions between devices.
Procedure to disable authentication:
- In the “Run (Win+R)” field, enter “gpedit.msc”,
- On the left select “Computer Configuration”
- Next, “Administrative Templates”,
- "Net",
- "Lanmann Workstation"
- Go to the “Enable insecure guest logins” option
- Set it to “Enabled”
- Click "OK".
It was found that this method does not help in the latest versions of Windows 10. When you change a value in the Group Policy Editor, the same value does not change in the registry. Therefore, it’s worth checking it yourself in the registry and changing it there too. You need to change the value of “AllowInsecureGuestAuth” to one in the registry branch:
Computer\HKEY_LOCAL_MACHINE\SYSTEM\CurrentControlSet\Services\LanmanWorkstation\Parameters
It is advisable to reboot after this.
Checking the connection address
First, check that all devices connected to the router have the same IP address:
- Hold down the Win+R keys to open the “Run” window;
- Enter the command ncpa.cpl and click “OK”;
- Hover over the desired adapter and right-click;
- Select the “Properties” menu item;
- In the “Network” tab, find the line “IP version 4” and click “Properties” again;
- In the General section, specify the required IP address and DNS values.
Have you done everything correctly, but Windows 10 does not see the local network? Let's try to dig into other device settings.
Local security policies
For many users, editing local security policies also helps.
Procedure for editing local policies:
- In the “Run (Win+R)” field, enter “secpol.msc” to enter the local policy,
- Next, go to “Local Policies”,
- Select "Security Settings"
- In the field on the right we find “Network security: LAN Manager authentication level”,
- Click on it twice to open it,
- In the properties, select “Send LM and NTLM - use session security.”
- Click "OK".
It is advisable to reboot after this.
Additionally
Since there are many reasons for this problem, the methods described above may not be effective. Therefore, it is worth trying other troubleshooting methods. If one computer does not see another computer on Windows 10, then a failure may occur in the antivirus or service.
Reset
If, after using the methods described above, the system does not work correctly with the workgroup or Windows 10 does not see the local network, you should reset it yourself. An error may have occurred during use. This is easy to do:
- Open Windows Settings and go to the “Network and Internet” settings;
- In the Status tab, scroll to the very bottom of the page and click on “Network reset”.
After the reset, the computer will restart.
This method resets equipment, connection settings, VPN, etc. If you connect to the Internet by dialing a number and password (for example, some 3G and 4G modems have such settings), you will have to create this connection again.
This method is not always useful, since the problem when the computer does not appear on the Windows 10 network rarely occurs due to a failure. But, if the previous methods did not help, you should try this one.
Share files
If your problem still hasn't been resolved, you can try sharing the files. In this way, you can get around the problem when Windows 10 does not see network computers. This is done easily:
- Open the properties of the folder you are going to share;
- Go to the “Access” category, and then “Sharing”;
- Specify the account you will grant access to and accept the new properties.
You can also try the OneDrive solution. Microsoft offers it as a workgroup replacement. The storage is included in the basic set of Windows 10, so all that remains is to launch it and configure it. This method also bypasses the situation when the computer does not see the local network on Windows 10.
Check Function Discovery Resource Publication
After updating the operating system, it may happen that the system does not see the PC on the Windows 10 network. The developer company believes that this is an outdated function and proposes to replace it with its cloud services. In order for another system to connect, it needs to know their names or IP addresses, but the computer cannot receive this information.
A separate Function Discovery Resource Publication service is responsible for identifying devices on the local area. If a Windows 10 computer is not visible on the local network after update 1803, then this function was disabled as a standard, which is why problems occur. Resuming the service is simple:
- Open the Run menu (Win + R), run services.msc.
- You need to find the service "Function Discovery Resource Publication" or "Function Discovery Resource Publication". It will be deactivated as standard.
- Open the characteristics and set the startup type to “Automatic with delayed start” and accept the changes.
After turning on the system again, the error with Windows 10 not displaying computers on the network should be corrected.
Disable antivirus
Anti-virus systems may not allow the transfer of information over a local area due to the possible danger to the computer: in the process, viruses may get onto it. In this case, the version of the operating system is of little importance; for example, it may be that Windows 10 does not see the network with Windows 7. The most accessible and effective solution in this situation is to turn off the antivirus.
Firewall
While trying to configure the network, temporarily disable the network firewall. So that nothing interferes with us or blocks the connection.
How to disable the firewall in Windows 10:
- Go to the old “Control Panel”,
- Find "Windows Defender Firewall"
- On the left, select “Turn Windows Defender Firewall on or off”
- Select “Disable” everywhere
- Click "OK".
It is advisable to reboot after this.
An antivirus or firewall may be blocking network devices
To check, this must be done on all computers that will participate in the local network.
It is quite possible that you have some other programs installed that can monitor the network and manage network connections.
If it turns out that the problem is in the antivirus, then you need to add your network to the exceptions. Prevent the firewall from blocking the network itself or network devices.
If you don’t have an antivirus, you can experiment with disabling/enabling the firewall built into Windows.
Resetting network settings
If all the tips listed do not help, and the computers in the workgroup are still not displayed, reset the network settings in the settings. Very often this solves all problems.
How to reset network settings:
- Go to “Start” and open “Settings”
- Select “Network and Internet”
- On the left we find “Status”,
- On the right, scroll down and click on “Network Reset”
- Ready.
A similar action can be performed via the command line. To do this we write there:
- netsh int ip reset
- netsh winsock reset
After a successful reset, do not forget to restart your computer.
Selecting a Static IP Address
The first step to setting up a network is to set a permanent (static) IP address for each computer that will be connected to it. In principle, most applications and devices work with a dynamic address, but there is no guarantee of a stable connection. Moreover, choosing “static” only takes a couple of minutes.
Sequencing:
- Using the built-in search, find and open the “Settings” utility.
- Select “Network and Internet”, go to the Ethernet or Wi-Fi section.
- Click on the name of the current network connection.
- Scroll down the window to the “IP Settings” section.
- Change the value from Automatic (DHCP) to Manual.
- Enable IPv4 or IPv6 mode depending on the task.
- Enter the IP address, subnet prefix length and gateway.
Here you can also specify a DNS server (preferred and additional). After clicking the “Save” button, it is recommended to restart your computer. One value from the range 192.168.0.1-192.168.255.255 is selected as the IP address. The main thing is that each device acquires a unique address (starting with the router, which often “hangs” at 192.168.0.1 or 192.168.1.1).
In the “Subnet Prefix Length” field you need to enter the value 24, and as the DNS address of the service host or public server from Google - 8.8.8.8 and 8.8.8.4. The same is indicated when choosing IPv6, although the “legacy” IPv4 protocol remains practically a de facto standard. It is guaranteed to be supported by equipment purchased even 5-10 years ago.