Good afternoon. Why doesn’t the computer see the external hard drive in Windows 7 10, what should I do? Nowadays, people quite often began to use external hard drives, or flash drives, as they are easy to use. But, when connecting new External Disks, or due to system errors, sometimes a situation arises when the computer simply does not notice such a disk.
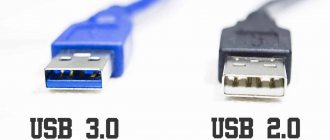
This happens especially often if the VD is connected to the PC via a USB port (and it is mainly via USB that the VD is connected). This happened to me when the disk was formatted incorrectly by a certain program. It's just that the system letter on the disk has been erased. In addition, the disk may not be displayed if you have problems with the drivers, or if you connected a faulty hard drive. But, in any case, the problem needs to be solved, which is what we will do now.
Is the removable disk visible in Disk Management?
So, we connect the disk to the system unit (laptop). To do this, do not forget to press the “On” button. on disk. Next, activate the Disk Management utility. Launch “Run” using the Win + R hotkeys. Enter the combination “diskmgmt.msc” into the window that opens. Then, click OK.
In addition, you can enter “Disk Management” by clicking on the “Computer” icon on the desktop and selecting “Management” through the context menu.
The “Computer Management” window opens. Here we see the main elements for controlling and setting up our PC. In the left column we select the “Disk Management” command.
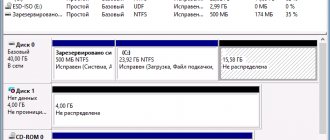
So, a window appears with all our disks, even those that are not visible in Explorer. So, let's carefully look at all the cells of this window. There can only be two options here:
- Windows sees the required disk, but it is not given a letter and the disk will say “Not allocated”, as in our screenshot. This means that you need to format it and assign a letter to it, the disk will become working. I described in detail how to assign a letter to a partition in the article: - The computer does not notice the SSD.
- The system does not notice the VD even through this program. There may be several options here. The simplest of them is that the USB cable just came off. The worst case scenario is that the drive is broken.
Initializing and Formatting the Disk
Let's consider the first option, when the OS sees the drive, but it is not allocated. Turn on the Disk Management utility. Next, right-click on “Unallocated disk space” and select “Create a simple volume”.
The “Volume Creation Wizard” will launch. In it, the program will offer to create a volume on an external drive. So, click “Next”.
So, you need to set the drive size. There is no need to change anything here. If the system advises you to install 476 GB, we leave it as is, since in fact the disk is 500 GB. weighs less than stated on the box.
Then, we assign the drive letter we need. You can take the letter that the system gives you. If you need another letter, click on the triangle above the proposed letter and take the one you like. I decided to name the drive with the letter H.
Please note that the program has changed the volume letter to N.
Next, Windows advises us to format the disk. You must agree, although formatting will delete all data from the disk. If you really need this data, you can recover it using the R-Studio program.
After this, Windows asks which file system is best to format the disk in? I recommend choosing NTFS (if you are formatting a flash drive, it is better to choose FAT32).
Our task is completed. The system has initialized the disk and should now notice it. In addition, you can see exactly which options you have selected from the next window.
Mechanical damage
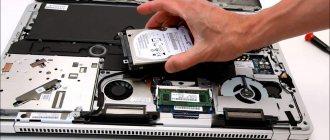
First of all, when asking the question “Why doesn’t it work?” It is necessary to inspect the hard drive for chips and impact marks. This is often the root cause of a device malfunction.
Sometimes you can tell by the sound about problems with the disk when connecting to a computer or laptop:
- If you hear a crackling sound, intermittent blows, or knocking, this indicates a malfunction of the device.
- If the power indicators are on, but there is no sound of movement of the spindle and magnetic head, then this also indicates a breakdown.
In such cases, it is necessary to replace the device or send it to a specialist for repair.
How to assign a drive letter?
If for some reason you were unable to assign a letter to the drive, or you decided to change it, this is done simply. You need to re-enter Disk Management using the method I described earlier.
Select the drive whose letter you want to change, right-click on it, and select “Change drive letter” in the context menu.
A window appears where we need to click “Change”.
Click on the down arrow above the proposed symbol and look for the one you need from the set.
If you did everything correctly, the system should see the external drive.
SMART TV does not recognize the hard drive
It is possible that you need to access the external hard drive from another device. For example, a SMART TV, player or game console. In this case, most likely you have the wrong file system on your disk. As we discussed above, Windows requires NTFS. But, for flash cards you need FAT32. Also, FAT32 is needed for TVs and other devices. Therefore, there is nothing complicated here. We connect the disk to the computer and reformat the disk to FAT32. After this, the TV should begin to see the hard drive. Don't forget: - formatting erases data from the disk. Therefore, if you need to format a disk for a TV and there are important data on it, you need to copy it to another device. You can apply quick formatting.
Motherboard failure
If the hard drive is detected by the system, but does not open, perhaps the reason lies in a malfunction of the motherboard, namely in the “south bridge”. It is he who is responsible for the correct operation of IDE/SATA devices.
To check this, connect the hard drive to a laptop or any other device, if it starts working, then we have found the “culprit”.
Unfortunately, you won't be able to fix the problem yourself. It is necessary to replace the motherboard or take it in for repair.
If the computer does not see the disk at all
All this related to the first point, when the computer still sees the disk through certain software. But what to do when the external drive is not visible through any software?
In this case, most likely, as I said above, your cable connected to the external drive is not tightly seated in the slot. In other words, it goes away. In this case, the first thing you need to do is turn off your computer and check all cables and ports. Check if they are all tightly connected to the system unit (laptop). They all must be connected perfectly.
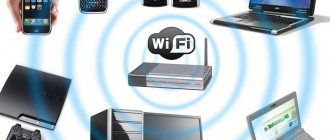
If the disk is connected to the computer via USB, in this case it is recommended to disconnect the disk from the port where it was located and connect it to the adjacent one. If the disk starts working from a different port, it means that the previous port is faulty.
Also, many users connect a USB hub to the PC (this is something like a tee in a socket, namely, a device that increases the number of USB inputs). In this case, it is necessary to connect the HP directly. Also, some concentrators have low power for VD.
But, even after such a procedure, it is impossible to accurately determine that your disk is non-working. It is advisable to connect it to another computer and find out if the other PC sees it. Of course, if after connecting the drive to another computer the system does not see it either, it is most likely broken and it is better to change it.
If the VD functions perfectly on another computer, then most likely your OS has problems with the drivers installed for your external drive. You can find out this in the following way. Through “Start”, right-click and select “Device Manager” (for Windows 10).
You can also enter “Computer Management” using the method described at the beginning. Next, select “Utilities” and “Device Manager”.
The dispatcher will appear. We need to find the "Disk Devices" menu.
In this section, we need to find the device that has an exclamation mark above it. If you find it, it means that there is a driver problem with the device it is located above. You need to click on this device and study the error message. Then, select the “Driver” menu, then you can either roll back the driver to its previous settings or update it.
You can also use special programs to update drivers. For example, the free program DriverHub, which updates drivers no worse than paid analogues. In addition, if the disk has recently stopped being recognized, you can simply roll back the system using the free AOMEI program (of course, if you have a “System Backup”). You can use a restore point if problems started after it was created.
Alternatively, you can simply remove the driver and disconnect the external drive. Then, reconnect and update the drivers.
Conclusion: - you now have an idea why the computer does not see the external hard drive of Windows 7 10. These recommendations should help you configure it correctly. If none of my advice helped you, it is better for you to take the External Disk to a specialist, or replace it with another one. Good luck!
Sincerely, Andrey Zimin 07/06/2019
BIOS Settings
If you connected a hard drive, but the computer does not see it, then the problem may be related to the BIOS settings. There are several possible causes of problems. Let's take a closer look at each of them and find an effective solution.
Download priority
If you connected a hard drive, but the computer does not see it, then it is possible that the device boot priority is incorrectly set in the BIOS settings. That is, we need to put the new hard drive in first place, so that when the computer starts, it boots first from it.
Let's take a closer look at how to do this:
- When loading the OS, press the DEL or F2 key to open the BIOS. Sometimes other combinations are used.
- Next, go to the Advanced BIOS Features section.
- We find the option with the word “Boot”, in this example it is called “First Boot Device” and put the HDD we need in first place.
- Press F10 to save the changes and exit the settings.
Thus, after the system boots, the drive will be available for normal operation, and the problem when a new hard drive is connected, but the computer does not see it, will be solved.
Menu items may differ in different BIOS versions. Therefore, if the specified parameters are missing, you should look for the most suitable ones by name.
SATA operating mode
It is possible that my computer does not see the HDD due to the fact that the IDE-compatible operating mode is not specified in the BIOS. To fix this you need to:
- Go to BIOS.
- Find the Main, Integrated Peripherals or Advanced menu, depending on the BIOS interface.
- Next, find the settings Configure SATA As, SATA Operation or Onboard Sata Mode.
- Among the available options, select IDE or Native IDE, save the changes with the F10 button and confirm your actions with the letter Y.
Afterwards, the system will boot in normal mode and will be able to recognize and open the hard drive.
Resetting BIOS settings
If you installed a hard drive, but even the BIOS does not see the connected hard drive, then most likely the reason for this is a settings failure. This reason can arise either as a result of incorrect user actions, or due to viruses in the system and power outages. This type of problem is indicated by the system date - if it is not accurate, then it is a failure. To correct the situation, you will have to perform a reset and return to factory settings.
There are two ways to do this. Let's look at the first one first:
- Turn off the computer and unplug it.
- Open the case and find the motherboard.
- Find the Clear CMOS jumper on it, located near the battery.
- Move the jumper from one pin to the other.
- After 30 seconds, return it to its original position.
This way, the BIOS settings will be reset and the system will be able to detect the hard drive and start working with it.
The second option takes a little longer:
- Turn off the computer and turn off the power.
- We find the motherboard and remove the round silver battery
- After 30 minutes we insert it back.
After this, the problem where Explorer does not see the hard drive should be resolved. I would also like to add that both options may require changing the download priority, as described in the instructions above.