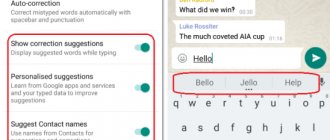
MS Word has a useful feature that can help you no longer spend a lot of time checking a text document. After writing an abstract or scientific article, you have to carefully re-read the text from edge to edge, looking for typos or errors and making changes. Now autocorrect in Word will do this for you. Setting up this function is quite simple. By the way, you can set up automatic replacement not only for punctuation marks, but also for words in which typos most often occur.
AutoCorrect
This feature allows you to replace letters or symbols as you enter text. With its help, you can significantly speed up the time of working with Word documents:
- replace a word entered in one language with its version in another, so as not to switch the keyboard layout - for example, Word to Microsoft Word
- change an abbreviation or abbreviation to a full word or phrase - for example, MSO to Microsoft Office Word
- automatically change words that you often make mistakes when writing, to the correct ones - for example, if Word does not correct them or the keyboard buttons are stuck
- quickly enter characters that are supported by Word documents, but are not available on the keyboard - for example, so that when entering (c) the © icon is substituted
AutoCorrect and AutoText in Word (Microsoft Word) | Step-by-step instruction
To save time when creating documents in Word, use AutoText or AutoCorrect. With their help, you can quickly replace words and symbols, as well as insert entire text fragments so as not to type them again each time.
The instructions in the screenshots are for working with Microsoft Word, but when working with other versions, the steps will be similar.
Instructions
- If you use the Microsoft Office Word text editor for your work (buy a licensed version), then you need to make sure that the AutoCorrect function is disabled in the program itself. To do this, open the "File" menu and select the "Options" command. After this, an additional window with program settings will be loaded.
- Open the “Spelling” settings tab, in the “AutoCorrect Options” subsection, click on the button of the same name. Another additional window will load. Initially, the window should load on the “AutoCorrect” tab; if this is not the case, then go to this tab yourself. Uncheck the box next to “Correct keyboard layout.” To save changes, click OK on all open windows. Automatic language change in the program will be disabled.
Disable automatic language change - Automatic language change may occur due to the operation of the corresponding utility. One of the most common utilities of this kind is Punto Switcher. To temporarily disable autocorrect in this program, find its icon in the tray and right-click on it. The icon of this program should look like the flag of the country that corresponds to the current text input language.
- In the auxiliary menu, uncheck the Auto Switch option. After completing these steps, changing the input language will be performed using the corresponding “hot keys”. To completely disable the Punto Switcher auxiliary utility, select the “Exit” command in the context menu.
- If you have difficulties managing this utility and its icon does not appear on the taskbar, then you need to set the necessary settings for the application. To do this, open the folder with the Punto Switcher program in Explorer and launch the additional punto.exe application. The settings window will load, in which go to the “General” section and on the “Basic” page put o. In the same settings window, you can configure the parameters for changing the language; this can be done on the “Switching Rules” page.
How to activate
To set up the AutoCorrect feature:
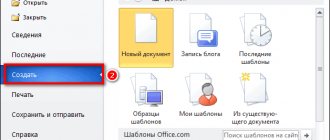
1
Click File (or MS Office icon) in the top left corner.
2
Then click Options.
3
Open the Proofing tab and click AutoCorrect Options.
4
In the window that opens, make sure that the Replace as you type checkbox is checked. Then go to the replace field - enter the word you want to replace there. In the on field, accordingly, enter the one you want to substitute instead. Then click Add - the function is activated.
The entered word or phrase will be replaced with the specified one after pressing the spacebar or the Enter key.
Please note that the function is case sensitive. If, when setting up, you enter the word to be replaced with a capital (capital) letter, autocorrect will not work when you enter it with a lowercase letter. But if you enter it with a lowercase (small) letter, then autocorrect will work regardless of what letter you write it with.
Remember that the function will be active for all your Word documents, not just the current one.
How to disable
To remove autocorrect:
1
Go through the above steps to the setup window.
2
Enter the word whose replacement you want to disable in the “replace” field to find it among all autocorrects saved in Word’s memory.
3
Select the required line and click Delete.
Alternative: Find and Replace
Autocorrect is activated only when you enter text yourself; it will not work on text that has already been typed. Therefore, if you need, for example, to make corrections to text that was copied from another source, use the alternative - the Replace function (for earlier versions of MS Office Word - Find and Replace).
How to change word formatting
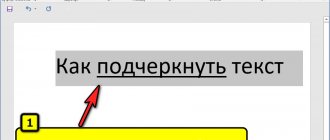
Another useful function of this tool is not to replace, but to change the formatting of a word in the entire document. For example, if you need to highlight some words in a document in bold, then this is done as follows:
- Also press the keyboard shortcut Ctrl + H in the document.
- In the window that opens, leave the Find field empty, and in Replace with enter the search word.
- Click the Format button at the bottom of the window and select Font from the list that appears.
4. In the font settings, select bold style and click OK.
5. In the main Find and Replace window, click Replace All.
6. Once the replacement is complete, all occurrences of the searched words will be highlighted in bold and a report will also be displayed.
You should replace all occurrences of a certain word in the text with great care, always remembering that the word being replaced can also appear in various phrases. Therefore, always carefully proofread the text after such substitutions for possible errors.
All versions of the MS Word word processor have two main text input modes. These are insert mode and replace mode. In most cases, insert mode is enabled by default. This means that when you enter text from the keyboard, characters already to the right of the cursor will not be deleted, but the text you enter will be inserted in front of them.
Differences between text editing modes in Word
When you activate the replacement mode, which is activated by pressing the Insert key on the keyboard once, when you enter new characters, the existing characters to the right of the cursor will be replaced with the newly entered ones.
Location of the Insert button on a standard computer keyboard
This mode is very useful when editing and correcting existing text, when some words and phrases in it need to be replaced with new ones.
But Microsoft Word does not always include the function of switching replacement/insertion modes with the Insert button, which many users are so accustomed to. Because of this, some people mistakenly believe that this same Insert button does not work for them.
Actually the problem is that the MS Word settings have disabled the option to use the insert button to switch between insert and replace modes.
You will learn how to enable it in this article.
Autotext
The function is useful when, when working with a document, you often need to insert typical, repeating fragments. For example, when drawing up contracts, statements, instructions, letters and other documents where text templates are used.
It works like a clipboard and its associated Copy-Paste function. But the contents of the buffer are reset when you exit the application or restart your computer. And the saved AutoText fragments will be available in the memory of the Microsoft Office package until you delete them.
You need to create the template once and then save it as an express block. After which you can paste the saved fragments into any Word document.
The template can include not only text, but also graphic elements.
You can manage AutoText elements using the Express Blocks button. It is located on the toolbar, Insert tab, Text menu field.
How to add
1
Type a piece of text that you want to save as a quick block. Format it, insert additional elements - pictures, icons, graphic symbols. Select the finished block with the mouse pointer. Open the AutoText management menu, select Save selection to AutoText collection.
2
Enter the parameters of the fragment to be saved. For simplicity, you can leave everything as default except the Name field. The name of each block should be unique and memorable - this will allow you to avoid confusion and also quickly insert saved fragments as you type.
3
To insert the desired fragment, you can also use the AutoText control menu on the toolbar. When you click on the icon, a list of all the fragments you have created opens.
4
You can also start entering the name of the block that you specified earlier in the Name field - a note will be displayed where Word will offer to insert it automatically by pressing Enter.
You can manage a block by right-clicking on it and then selecting the desired item from the context menu.
To open a list of all the fragments that you have saved, click Building Blocks Organizer. A full list will open - there will be both Word autotext blocks available by default, and those created by you.
How to delete
1
Open the Building Blocks Organizer. This can be done not only using the corresponding button. You can also right-click on any AutoText element that you saved earlier and select Arrange and Delete from the context menu.
2
The organizer window will open. Find the desired text fragment in the list, select it with the mouse pointer and click Delete.
Alternative: special software
If standard built-in Microsoft Office tools are not enough, use third-party programs. They insert stored elements into text using commands entered from the keyboard. The commands and insertion parameters themselves are flexibly configured, which allows you to completely adapt the program to the user.
As a rule, they also contain additional functions. For example, quickly switching the input language or layout, changing the case of characters, etc.
A significant advantage of such programs is that they work not only with text editors, but also with other applications, including browsers.
For Windows OS you can use:
How to enable Insert on a laptop?
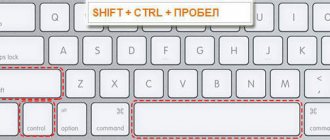
Note that the Shift key can act as a temporary Num Lock toggle when you press one of the keyboard keys (just like the Shift key acts as a toggle for capital letters). Therefore, when Num Lock is enabled, pressing Shift + Numpad-0 will act as the Insert key.
Interesting materials:
When is the best time to store carrots? When is it better to eat cottage cheese in the morning or evening? When is it better to eat cottage cheese in the morning or? When is the best time to go on holiday to Israel? When is the best time to go on holiday to Goa? When is the best time to go to Eilat? When is the best time to go to Jerusalem? When is the best time to travel to India? When is the best time to go to Goa? When is the best time to replant trees?
Editing AutoCorrect
If at the time of writing in the “On” field you didn’t notice an error and added it to autocorrect, it’s not difficult to fix it. These steps will help in this situation:
- Open “AutoCorrect” through “File” - select “Options” - then open “Spelling”. Finally “AutoCorrect Options”;
- Now you need to find that word or phrase in the list of all replaceable ones;
- Find and click on this word;
- Enter the missing letter or retype the word, click on “Replace” and save by clicking on the “OK” button.
Automatic search and correction of errors and typos
The “autocorrect” function will save the text from typos and replacing some characters with others. For example, “vremeya” instead of “time”, “vt text” instead of “in the text”.
When typing text, the editor will automatically substitute the correct option, and you will not need to stop and look for errors in the text.
The most common errors can be systematized, which is what the application developers did. The “autocorrect” function is based on selecting the correct spelling of a word or phrase from a similar list of typical errors and inserts it into the text. The same thing happens if a space is required.
AutoCorrect settings
To set up autocorrect in Word, you need to go to the Microsoft Word program settings
In the upper left corner of the document, in the control panel, there is “ File ”. If you select it, a menu will open in which you need to click on “ Options ”.
What settings are there?
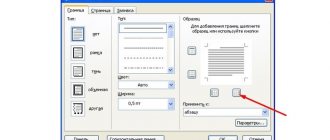
In Word 2007, 2010, 2013, you can change several AutoCorrect parameters. You must select " Spelling ". The autocorrect parameters themselves are highlighted in the photo with a turquoise rectangle. But there are also additional settings that regulate the text checking process:
- Conditions under which it is necessary skip words or characters (highlighted in yellow rectangle):
- capital letters at the beginning of a word;
- expressions with numbers;
- phrases not from the dictionary;
- file names.
- Check Features spelling (green area on the screenshot):
- checking while writing text or after (by pressing a button);
- checking grammar along with spelling;
- determining the style by which the check will be carried out (business, communication, user).
After clicking the “ AutoCorrect Options… ” button (turquoise rectangle), a window opens in which you can configure the function.
The AutoCorrect settings window contains the following items:
- Autocorrect . In this section, you can configure the entries that the program will correct: two capital letters, accidentally pressed Caps Lock, or a changed keyboard layout.
- In the second tab you can configure automatic replacing phrases or commands to mathematical symbols. For example, "Delta" will be replaced with "Δ". You can also add your own symbols.
- The “ AutoFormat ” and “ AutoFormat as you type ” parameters do not differ, except that the second is responsible for correcting errors while writing text, and “AutoFormat” for replacing it after checking the text. In these tabs you can customize the appearance of punctuation marks: quotation marks, dashes, hyphens.
- The last tab defines what functions will be shown in the AutoReplace context menu.
Adding an entry
To add new entries to the dictionary, you need to go to the “AutoCorrect” tab. Automatically correct spelling errors checkbox is checked . To add a new word to the replacement list, you need to follow 5 simple steps:
- Find the columns located after the phrase “ Replace as you type... ”.
- Enter in the left column (under “Replace”) the entry you want to change.
- In the right column (under the pretext “On”) enter the word to which the previous one will be changed.
- Click " Add ".
- Click "OK».
Changing and renaming entries
You can not only add new records, but also change existing ones. The operation is performed in the same window as the addition. You can change the entry as follows:
- Select the pair you want to replace from the list.
- Change the original or replacement words.
- Click " Replace ".
- Click "OK».
Setting up the AutoReplace tool in Word
Using the automatic replacement of characters and words feature in Word, you can quickly correct various typos and add words. This will speed up the speed and quality of text printing. The Word autocorrect library already contains an extensive list of popular words, which can be changed at your discretion - add new words, delete existing ones. However, by default this tool is disabled, so during the article we will look at how to enable it and configure it to suit your needs.
Add a phrase to the autocorrect list
- Right-click the Punto Switcher icon (on the taskbar).
- Go to Settings → AutoCorrect menu and click the Add .
- In field What to replace indicate abbreviation.
In the What to replace with - the text with which the abbreviation should be replaced.
- Enable the option Remember cursor position if you want to specify where in the phrase the cursor should be located after autocorrect.
- Click OK .
To make autocorrect work when typing an abbreviation in another language, in the Settings → Autocorrect menu, enable the option Replace when typing in another layout .
By default, the AutoCorrect option appears as a hint when you type a shortened word. Another way to open the AutoCorrect list is to enable the Show list option in the Punto Switcher menu on the taskbar in the Settings → AutoCorrect menu. Then the list can be called up by clicking the program icon with the left mouse button.
You can disable the display of hints and not use the autocorrect list every time, but substitute the desired value using the hotkey Space , Enter or Tab . To do this, in the Settings → AutoCorrect menu, enable the Replace by . Or assign your own hotkey.
Adding entries to the autocorrect list
1. In a Word text document, go to the “File” or click the “MS Word” if you are using an older version of the program.
2. Open the “Settings” .
3. In the window that appears, find the “Spelling” and select it.
4. Click on the “AutoCorrect Options” .
5. In the “AutoCorrect” , check the box next to “Replace as you type” located at the bottom of the list.
6. Enter in the “Replace” the word or phrase that you often misspell. For example, this could be the word “feelings” .
7. In the “On” , enter the same word, but this time correctly. In the case of our example, this will be the word “feelings” .
8. Click “Add” .
9. Click “OK” .
Changing entries in the AutoCorrect list
1. Open the “Options” located in the “File” .
2. Open the “Spelling” and click the “AutoCorrect Options” .
3. In the “AutoCorrect” , check the box next to . ”
4. Click on an entry in the list so that it appears in the “Replace” .
5. In the To , enter the word, symbol, or phrase that you want to replace the entry with as you type.
6. Click “Replace” .
Rename entries in the AutoCorrect list
1. Follow steps 1 - 4 described in the previous section of the article.
2. Click on the “Delete” .
3. In the “Replace” , enter a new name.
4. Click on the “Add” .
Removing items from the AutoCorrect list
- Open the AutoCorrect tab.
- In field replace
Enter the word you want to remove from the list.
- Select an entry from the list.
- Click the button Delete
.
How to enable or disable AutoCorrect as you type in Word?
Edinburgh Library
How to remove, cancel, disable automatic correction of words and auto-replacement of letters in Word.
Let's talk about the AutoCorrect function and settings to make it easier for us to write text in a document.
For example, if you write in an editor, but Word automatically substitutes words or letters you don’t need. Changes lowercase to capital letters, automatically changes large letters to small ones, changes last name, changes first name, etc. And you don’t like it, then you can turn it off forcibly. Use the change in Word's autocorrect settings to remove automatic correction.
First way:
Microsoft Word 2007 . To do this, click on the round button "Office" - "Options" - "Spelling" - "AutoCorrect Options" - "AutoCorrect" .
Other versions of Microsoft Office . Click on the top menu “File” - “Options” - “Spelling” - “AutoCorrect Options” - “AutoCorrect”
“Correct two capital letters at the beginning of a word” : for example, you wrote the word “Tower”, if you do not disable the function, the word will change its appearance to “Tower”.
“Make the first letters of sentences capitalized” , “Make the first two letters of cells capitalized”: this setting is responsible for automatically capitalizing letters in sentences, changing large letters to small ones, after a period or setting a paragraph. Also changes the first word in a sentence automatically, it becomes capitalized.
“Write the name of the days with a capital letter” : you can uncheck the box; in Russian, the days of the week are written in lowercase letters, small ones. In English, the names of the days of the week are written with a capital letter.
“Eliminate the consequences of accidentally pressing cAPS LOCK” : if you turn on “Caps Lock”. Type “tower”, as it should be with a capital letter, hold “SHIFT” on the letter “v”, release, then “yshka”, press space or “Enter”, then the typed word “tower” will automatically be converted into the word “tower” ", "Caps Lock" will then turn off.
“Correct keyboard layout” : changes the keyboard layout in a sentence, “ENG” to “RUS” for example. If you suddenly switch to English, it changes Latin letters to Cyrillic or Russian. When moving the cursor between paragraphs and sentences.
“Replace as you type” : we already talked about this in the previous article . Changes symbols or signs from the dictionary to the selected values.
“ Automatically correct spelling errors ”: I think about this function, it’s not worth writing in detail, since the words speak for themselves.
If you want to cancel the selected changes, simply check the boxes in reverse order.
Second way:
When automatic correction occurred and Word replaced the word. To do this, simply point or click on the replaced word or letter , a blue rectangle , swipe a little lower , a yellow lightning bolt , click “Disable.” " . Now, when you enter the desired text content, you will not have words and meanings automatically substituted. To return this setting back, use the first method that we discussed earlier.
(Word) Microsoft Office. Word 2003, 2007, 2010, 2013, 2016, 2019, 365
AutoCorrect Features
Above we talked about how to make autocorrect in Word 2007 - 2016, but this instruction is also applicable for earlier versions of the program. However, the capabilities of the autocorrect function are much broader, so let's look at them in detail.
Automatic search and correction of errors and typos
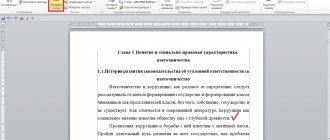
For example, if you enter the word “which” and put a space after it, this word will automatically be replaced with the correct one - “which” . If you accidentally write “which will go away” and then put a space, the erroneous phrase will be replaced with the correct one - “which will be” .
Quickly add an entry
You can quickly add an entry to the AutoCorrect list, change or delete it if you know the functionality of Word:
- Open the AutoCorrect tab.
- In the Replace , enter a word or phrase that you often misspell, such as custom.
- In the On , enter the correct spelling of the word, for example usually.
- Click the Add button.
For beginners, we have written detailed instructions with step-by-step photos on how and where to make changes.
Replacing individual words and characters
If you did not create the document yourself and find a recurring error in it, you should not waste time correcting it manually. The program will do this for you.
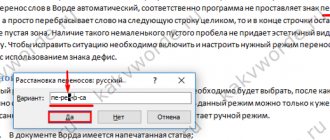
- Press Ctrl + H on your keyboard and a dialog box will pop up.
- If you just want to find some kind of error first, open the “Find” tab and enter it in the designated field. By the way, below you can indicate where to search: in the entire text or in a selected fragment. There is also a “More” button nearby that allows you to set additional search filters.
- To correct, switch to the “Replace” tab. Write the misspelled word or sign on the top line, and the correct option on the bottom line. The principle is the same here: if you need to replace one word with another throughout the text, click the “replace all” button, and if only once, click “replace”.
I have described the main points regarding autocorrect. I think you shouldn't have any problems setting it up.
Therefore, I say goodbye to you until new joyful meetings on other pages of this blog.
How to set it up?
The AutoCorrect menu opens as follows:
1. Click “ Home ”.
2. Click on “ Settings ” in the window that opens.
3. Now in the menu that appears, click on “ Spelling ”.
4. Click " AutoCorrect Options ".
5. Check the box next to “ Automatically correct spelling errors ”.
6. In the element input field, enter the text that is convenient for you, then in the field located on the right side, enter the full phrase or word that will be automatically replaced. Thus, in the process of entering text that is convenient for you, just press ENTER, and the program will completely automatically add this phrase for you.
7. Click the “ Add ” button.
8. After you have configured all the automatic replacement options that are convenient for you, you can click the “ Ok ” button.
To make use of the AutoComplete tool even more thoroughly, you can also use the special AutoText toolbar.
Among other things, there is also another option for using autocorrect after the text has been completely written. To do this, you just need to click on “ Page ” at the bottom left of the screen, go to the “ Replace ” tab, enter the text you need there and click the “ Replace ” or “ Replace All ” button if you want the program to automatically find all relevant phrases and replaced them with the option you need.
So, depending on your needs, you can choose the automatic replacement method that suits you best.
Automatic replacement of mathematical symbols in versions 2007, 2010
In the 2007 version of Word, a new feature appeared in AutoCorrect - replacing special mathematical symbols with text commands when composing formulas. The settings for this editor function are located in the second tab of the AutoCorrect window.
It turns off in the same way as normal autocorrect. To be able to use unusual characters when writing text (for example, ˚ or ÷), you need to check the box next to the line “Use autocorrect rules outside of mathematical formulas.”
Adding new and removing unnecessary characters is done in the same way as when changing word pairs in text autocorrect
Transferring a file with AutoCorrect settings
When replacing a hard drive or reinstalling the operating system, you can irretrievably lose your collection of combinations on how to autocorrect in Word. To prevent this from happening, it is recommended to periodically backup the settings file for this function.
It is stored in the Office folder called MSxxxx.aci. xxxx means the digital language code:
- Russian: 1049.
- Ukrainian: 1058.
- Belarusian: 1059.
- Kazakh: 1087.
- English: 1033, 3081 or 2058.
- French: 1036.
- German: 1031.
The location of the folder depends on the operating system you are using:
- Windows XP: C > Documents and Settings > Username > Application Data > Microsoft.
- Windows 7: C > Users > Username > Application Data > Microsoft.
- Windows 8: From > Users > Username > AppData > Roaming > Microsoft.
Note: The Application Data/AppData folder is hidden from the user by default. To make it visible, you need to go to Control Panel > Folder Options > View tab. At the end of the list that opens, put Fr.
There is only one way to do autocorrect in Word, regardless of the version. But it is more than enough to perform everyday tasks when working with this text editor.