Not every person uses the Word program from the Microsoft Office suite to its fullest. The Word text editor is a feature-rich program, and I think you underestimate its capabilities.
Any text document must not only be correctly written, but also well-designed.
An attractive and structured appearance of the file content will give the document a deliberate businesslike appearance or, conversely, make it simple and easy to read.
You can work on the design by making tables in Word, changing the text style, etc. The Microsoft Word interface is very convenient, even a beginner can understand it, especially if the user is accompanied by written instructions for a particular process.
So, in today's episode I will tell you how to draw a line in Word. Why is it needed? For example, in order to separate part of an important text.
How to make horizontal and vertical lines?
All options for installing a horizontal line are described in the first section of the article.
To set a vertical line, use Method No. 1 with some amendments:
- After selecting the "Borders and Shading" function, pay attention to the right column "Sample".
- On the left side of the column, find the buttons for controlling the location of the strip - horizontal or vertical - and click on the desired one.
Select the position of the strip horizontal or vertical
Type the text.
Method No. 2 is also suitable for installing a vertical stripe:
- After selecting the “Paragraph” column, pay attention to the “Borders” button.
- Click the arrow to the right of the key and select the border location - bottom/top or left/right.
Type the text.
Word Software
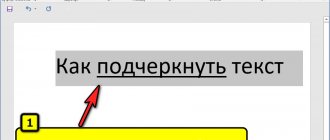
To get a line over which you can later type the required text, you should activate the “Underline” formatting function by pressing the corresponding key or the hot combination “CTRL + U”.
“Underline” option
Then you should press:
- "TAB" to immediately get a visible line. One click will create a line whose length is equal to the value set for the tab size in the paragraph options.
- “SPACE” (space) the required number of times. However, this underline will be invisible. If at the end of it (behind the last space) you turn off the “Underline” function and start typing (at least put a dot), then an underline will appear.
By clicking anywhere on such a line, you can print text that will be displayed on top of it.
Text over underline
The line will increase as the printing process progresses. You can remove extra underscores, like regular characters, by pressing “DEL” or “BACKSPACE”.
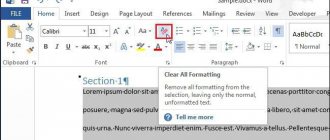
Important! In newer versions of Word, the Underline formatting icon is located on the Home tab of the taskbar.
How to make a lot of underlined lines?
To underline an unlimited number of lines in the text, Method No. 3 is suitable for installing a stripe under the text.
To make several lines below or above the text at once, use Method No. 4, but instead of the “-” symbol, use “=” or “#”.
Lines below or above text
By typing
The combination of holding down the "Shift" key and the "-" key on the upper number row will allow you to enter the underscore character "_". A certain number of characters will allow you to create a long underline. When printing a document, this method is relevant, since you can enter the necessary information into a blank line with an underline.
Underline without the ability to type over it
However, it is impossible to print over such a line in the document itself. There is the following method for this.
Using the advanced parameters of the “Font” group
In addition to the “Underline text” section, the design of the selected text fragment can also be configured through the advanced “Font” parameters: just use the Ctrl + D and use the central panel with settings in the menu that appears.
Word will offer to change the text color, set a formatting option, and at the same time change the shade of the added underline.
If the listed elements are not enough to make graphic changes to the design of the document, then the “Text Effects” button is additionally available below.
Create an underline style to work permanently (default) in Word
The selected underline settings apply only to a specific document in the office editor: the next time you will have to add the settings again. The problem is solved by preparing a default design style through additional font parameters (Ctrl + D keybinding).
After the transition, you will again select the text color and underline, select the line style (double), and then click on the “Default” button at the bottom of the interface on the left.
The selected settings are pinned in Word to the dat template, which opens with new documents.
If problems arise, the developers recommend resetting the design (including fonts), and then going back to the menu and setting “clean” default settings. In the latter case, the risk of encountering strange behavior of formatting parameters approaches zero.
Create a handwritten signature
To add a handwritten signature to a document, you must first create one. To do this, you will need a white sheet of paper, a pen and a scanner connected to your computer and configured.
Inserting a handwritten signature
1. Take a pen and sign on a piece of paper.
2. Scan the page with your signature using a scanner and save it to your computer in one of the common graphic formats (JPG, BMP, PNG).
Note: If you have difficulty using your scanner, refer to the manual that came with it or visit the manufacturer's website for detailed instructions on setting up and using the equipment.
3. Add an image with a signature to the document. If you don't know how to do this, use our instructions.
Lesson: Inserting an Image in Word
4. Most likely, the scanned image needs to be cropped, leaving only the area in which the signature is located. Also, you can change the image size. Our instructions will help you with this.
Lesson: How to crop a picture in Word
5. Move the scanned, cropped and sized image with signature to the desired location in the document.
If you need to add typescript to your handwritten signature, read the next section of this article.
Adding text to a signature
Quite often, in documents that require a signature, in addition to the signature itself, you need to indicate your position, contact details or some other information. To do this, you must save the text information along with the scanned signature as AutoText.
1. Below or to the left of the inserted image, enter the text you want.
2. Using the mouse, select the entered text along with the signature image.
3. Go to the “Insert” and click the “Express Blocks” located in the “Text” .
4. In the drop-down menu, select “Save the selected fragment to the collection of express blocks” .
5. In the dialog box that opens, enter the required information:
- Name;
- Collection - select “AutoText” .
- Leave the remaining points unchanged.
6. Click “OK” to close the dialog box.
7. The handwritten signature you create with accompanying text will be saved as AutoText, ready for further use and insertion into a document.
Inserting a handwritten signature with typewritten text
“AutoText” express block you saved to the document .
1. Click in the place in the document where the signature should be located and go to the “Insert” .
2. Click the “Express Blocks” .
3. Select “Autotext” .
4. Select the desired block from the list that appears and insert it into the document.
5. A handwritten signature with accompanying text will appear in the location you specified in the document.
Graphical tools
Finally, the problem of how to make a line in Word for a signature can be solved using the drawing tools that are available in any version of the editor. To do this, use the appropriate section in which you select the straight line drawing tool.
In the text, it is enough to place the cursor at the starting point, then move it while holding down the left mouse button to the final position and release the button. You can change the length of the line by highlighting the element you are looking for, with a four-arrow icon appearing, and placing the pointer on one of the dots until a double arrow appears. The change is then made by stretching or compressing.
Using the keyboard
The easiest way to draw a horizontal line is to use hot keys - hold down “minus + Ctrl” on the keyboard on the additional section or in the block of numbers “minus + Shift” as shown in the picture.
Moreover, in the first case you get the bottom line, and in the second - a straight line in the middle of the line. This method is simple and fast, and removing the line is not difficult.
Method two
This method is even more functional. It will come in handy in situations when you want to draw one or more lines in any area of the sheet, and it doesn’t matter whether it’s horizontal, vertical, crosswise, or something else. Do this:
- There is an "Insert" tab in the toolbar, open it.
- There is an “Illustrations” block, which has a “Shapes” button.
- By clicking on it, find a straight line among the proposed ones. Click on it the moment you need to insert a line into the text. Note that you will have to specify two points: where it will start and where it will end.


