Windows 10 brings with it many innovations, and one of them is the new “Control Panel”. Microsoft is gradually transferring more and more functionality from the old control panel to the new one, but many functions are still either present only in the old one or duplicated. We’ve already written about how to return the old control panel in Windows 10, but now let’s talk about how you can quickly open system properties in Windows 10.
Methods for current versions of Windows 10 (from version 20H2)
Properties in Computer
A fairly simple way - open “This Computer” (“My Computer”) and right-click on any empty space. In the context menu that appears, select “Properties”.
After this, the “old” system properties will open.
Using the Run command
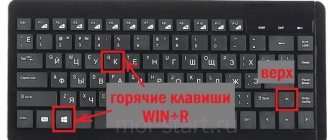
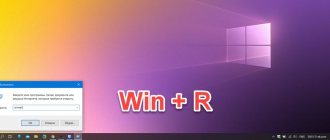
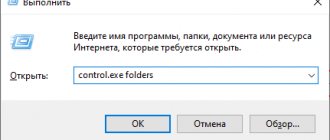
Press the Win + R keys alternately and enter the shell command. , and click “OK”. The “old” system properties will open.
Command line
The command line is becoming more and more like an execute tool. The only difference is in the calling method:
- Command line via Win + X.
- Run – Win + R.
Both instruments can be called cross-functionally. Command line from Run via cmd, and Run from command line via C:\Windows\system32\rundll32.exe shell32.dll,#61. You must understand that both instruments are very similar to each other. Let's find out the characteristics of the OS:
- Win + R.
- Enter winver.
- We get profit.
What did we learn from this screen? A lot of things:
- The professional version of tens is used.
- Anniversary update 1607 has been installed.
- Assembly – 14393.693.
But this data is still scarce. Why Billy Gates did not indicate the bit depth remains a mystery. Generally speaking, Microsoft has set a course to get rid of 32-bit equipment, so in 5 years no one will have the same questions as we do.
Methods for older versions of Windows 10 (before version 20H2)
Hotkeys for system properties
One of the old hotkey combinations that can easily open System Properties using only the keyboard is the Win + Pause Break buttons.
System properties via the “Computer” context menu
If you have a “This PC” icon on your desktop, then you need to right-click on it and select “Properties”. This will open System Properties.
System properties via run
Press the Win + R buttons, enter the command sysdm.cpl, and click OK.
System Properties in the Start menu
If you type “System” in the search or in the Start menu, the results will contain system properties called “System”.
System Properties in Control Panel
As in older versions of Windows, you can open System Properties through the Control Panel. To do this, it's quite simple:
- In the “classic” view of the control panel, select “System”.
- In the “category” view, you need to select “System and Security” - “System”.
You can access the Control Panel using any of the methods described in this article.
Was this article helpful to you?
How to open system properties
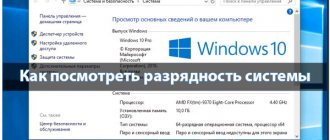
The "System Properties" section provides some information about the configuration of your PC (information about the CPU and RAM), indicates the version of the operating system, the system bit depth and some other information. What does he look like:
Section "System Properties"
There are several ways to open System Properties:
- By simultaneously pressing the “Win” + “Pause” keys.
- You need to go through a certain path in the system settings.
Step 1: Use Start by clicking on the icon at the bottom left edge of the screen.
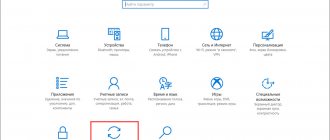
Step 2. Click on “Options” located immediately above the “Shutdown” column.
Click on “Options”
Step 3: In the Settings app, go to the tile called System.
Go to the tile called “System”
Step 4. We are interested in the “About the system” tab at the end of the list, click on it.
Click on the “About System” tab
Step 5. Finally, the last step is to click on the “System Information” text.
Click on the text “System Information”
Comments on the article (5)
- Guest
This is all about the old Windows, it doesn’t work on the latest 10.
A couple of new methods have been added to the article. However, judging by what is observed in the Insider Preview builds, these methods will no longer work in the next Windows 10 update.
In the latest version of Windows 10 (version 2010), this no longer works. There is a transition to the new control panel “Settings”, section “System”. You can open the “System Properties” window in this way: Control Panel (added to the desktop from the new control panel “Settings” - “Personalization” - “Themes” - “Related settings” - “Desktop icon settings”) - Recovery - Recovery settings systems. The System Properties window is very important. You can change many settings, including the size of the part of the disk for recording recovery points and the size of the paging file.
It can be simpler - go to This PC and right-click on an empty space => properties
Hello to all blog visitors! This article begins a series of articles about the new Windows 10 operating system, its capabilities and settings, as well as much more.
Windows 10 has a new application consisting of several pages called “Settings” that can replace the familiar Control Panel.
Made specifically for ease of control on touch screens, and regular ones too. Personally, I don’t have a touch screen, so I can’t say how it might work, everything is fine in simple terms.
Personally, I will say that it is a very successful application. It has the same thing as a regular control panel, as well as its own very useful and convenient innovations that everyone should definitely know about.
Using this tool, you can make some of your own settings or change parameters. I think you should know about this tool so that you can quickly use it when needed, which always inevitably arises from time to time.
Well, from this article you will learn where these Windows 10 system parameters are located and how to get there in three ways - ways.
Extended system information via the Run command
To find out more information about the system, you should use the information "System Information" .
To obtain this information, right-click on the “Start” , select “Run” and enter msinfo32 , then confirm the action “OK” .
In the window that opens, detailed information about various system parameters is available. For example, here you can find out the size of the paging file , system bit depth , processor model , OS version and other data.
Computer (Explorer)
Find the “Computer” icon on the desktop and double-click on it with LMB.
Here, click on the “Computer” button and then “Open Settings”.
This option is suitable if the Start menu does not work.
Setting up devices on Windows 10
You can configure each connected equipment in the “Device Manager”.
Step 1. As always, open “Start”. In the “All Programs” column we find “Windows System Tools”, we need the “Control Panel” sub-item.
In the “System Tools - Windows” subsection, click on “Control Panel”
Step 2. Click on “Hardware and Sound”.
Click on “Hardware and Sound”
Step 3. The last step is to click on the text “Device Manager”. A list of all devices connected to the PC will open.
Click on the text “Device Manager”
List of devices connected to PC
The fastest way
All you need to do is press the Win+i keys on your keyboard.
And the “Options” menu will be launched.
Dear users! If our site helped you or there was something you didn’t like about it, we will be glad if you leave a comment. Thank you very much in advance.
Detailed information about a Windows computer may be needed in various situations: when installing games to comply with system requirements, replacing a particular hardware component, installing drivers, and also when comparing configurations of different PCs. You can view the information both in the windows of the Windows 10 system itself and in the interface of special utilities.
Open additional launch options
The system section “Advanced startup options” will help you configure boot options, as well as obtain information about system recovery. There are several ways to open this menu in the OS:
- Hold “Shift” and click on “Restart” in “Start”.
- Open the “Settings” section using any of the methods given at the beginning of the guide, and find “Updates and Security” there. Then, on the left, find the “Recovery” column, then under the text “Special boot options,” select “Restart now.” In “Settings”, in “Updates and Security”, select “Recovery”, and under the text “Special boot options” select “Restart now”
- Due to the subsequent reboot of the system, a screen called “Select Action” will appear. See the Troubleshooting section. Open the “Troubleshooting” section
- The last step is to click on “Advanced options”. Click on “Advanced options”
- When you turn on the PC, the OS login window opens, click on the shutdown icon and, while holding down the “Shift” key, click on “Restart”. From now on, you will have to repeat the last two steps described in the previous opening method.
Click on the shutdown icon and, while holding down the “Shift” key, click on “Restart”
How to view your computer's settings using built-in tools
You can obtain information about your computer and operating system using the built-in Windows tools. The choice of service depends on what information you need: compressed or expanded.
Via "Control Panel"
All versions of the OS have a special window that contains basic information about the current PC. If you don't need detailed information, open it as follows and read the information:
- Just hold down two keys on your keyboard: Win and Pause/Break. The desired system window should immediately appear on the display. If the combination of buttons does not work, right-click on the “This PC” icon, which is located on the “Desktop”, and select the last line “Properties”. In the context menu of the “This PC” shortcut, click on the “Properties” line
- You can take a longer route - launch the window through the “Control Panel”. Hold down Win and R, and in the small “Run” window type the English word control. Immediately click on OK, you can also press Enter to start executing the command.
Type the command control and press Enter - Set the section view to Large Icons in the top right corner. Find the "System" link and follow it. In the Control Panel, find the System block and open it
- The information window contains information about the processor, RAM, system bit depth, Windows edition, and more.
In the window you will see compressed information about the system and PC
In "Device Manager"
If you need more detailed information about the hardware components of your PC (for example, the name of the video card), go to the “Device Manager” system window. The data will be provided that you have installed drivers for the processor, video card, network card and other “spare parts” of the device. If you do not have drivers installed on certain parts of your PC, they will appear as unknown devices. We'll tell you how to open the dispatcher in the instructions:
- The dispatcher is launched in many ways. The link to it is already in the “System” block, which we opened in the previous section through the “Control Panel”. By the way, there is also a link to it on the panel. For the “ten”, a faster method is also available: right-click on the “Start” menu, and then select the manager from the list.
Click on "Device Manager" in the Start context menu - The last method we'll talk about is the devmgmt.msc code in the Run panel. Click on Win and R and enter the command in the “Open” line, and then execute it.
Paste the command devmgmt.msc into the empty line and click OK - In the list of hardware components, select the section that interests you and double-click to expand it. Look at the names of the component models, which indicate the main characteristics and company - class=”aligncenter” width=”600″ height=”319″[/img] Look at the model names of the hardware parts of your PC
Through the "Options" window
A new “Windows Settings” window has appeared in the “ten”, in which, just like in the “Control Panel”, you can configure the “OS”. This window contains a block with the same brief information about the OS and the PC itself:
- Press two buttons Win and I at once - this is the fastest way to open the window with parameters. If nothing appears on the screen, open the Start menu and click on the gear icon located directly above the icon to turn off the PC.
Click on the gear icon in the Start menu - In the options panel, open the first tile called “System”.
In "Settings" expand the first section "System" - Scroll the left column with the names of the tabs to the very bottom - click on the “About the system” block. First you will see information about how PC protection works, and then information about the computer itself.
Switch directly to the “About the system” section - Go down a little more and read the information about the “OS”.
At the end of the page you can see basic information about your OS
In DirectX Diagnostic Tools
DirectX is an important system component that is required for games and other 3D applications to run. The built-in DirectX Diagnostic Tool program allows you to identify problems with the component, as well as familiarize yourself with the main characteristics of PC “spare parts”:
- Open the “Run” panel on the display using the Win + R combination. Copy and then paste the dxdiag code - press “Enter” or click OK in the window.
Paste the dxdiag command into the empty field and run it - The diagnostic tool window will appear on the screen. The first tab contains information about the Windows version, processor, PC manufacturer, paging file, amount of memory on the hard drive, BIOS firmware version, DirectX version and other useful information. Using the “Save all information” button, you can create a separate file with all data about the system and PC.
The “System” tab contains basic information about the PC and OS. - Go to the second tab at the top or click on the “Next Page” button at the bottom of the window. In the “Screen” section, in the “Device” menu, the characteristics of the video card are shown.
In the “Screen” tab you will find the characteristics of the video card - The “Converter” block may also contain information about the video adapter, but about something else if you have two hardware components installed for displaying video.
If you have another video card, you can see information about it in the “Converter” section - In the “Sound” tab, read the characteristics of your sound card.
In the “Sound” section, information about the sound card is available
Video: open the “System” or “DirectX Diagnostic Tool” section
Using "Task Manager"
In the “Task Manager” you can not only disable unnecessary program processes, but also find out the characteristics of the main hardware components of your PC: processor, RAM, hard drive, video card. To open the system information window, follow the steps:
- In Windows 10, you can launch the “Task Manager” through the “Taskbar” - right-click on it (just select a place free from program icons) and select the desired item from the menu. Call the context menu of the “Taskbar” with the right mouse button and select “Task Manager”
- If it doesn’t work through the “Taskbar”, use the classic method: hold down Ctrl + Alt + Delete and click on the manager in the blue menu. In the service window, go directly to the second tab “Performance”.
- Another method is the taskmgr command in the already familiar “Run” window - we call it through Win and R and execute the command there.
You can call the Task Manager using the taskmgr command in the Run window - In the first tab you will see indicators of the base speed of the processor, the number of cores and logical processors, and the cache size. You will also be able to see your current CPU usage.
The “CPU” section indicates the number of cores, speed and other information about the processor - The second tab “Memory” contains information about the “RAM” (RAM): its volume, speed, memory capacity for the hardware, number of slots, how many megabytes are in the cache, etc. The "Memory" section contains information about RAM
- The “Disk” section shows the capacity of hard drives on your PC.
“Disk” provides information about the size of the hard drive and its current load - In the “Graphics Processor” tab, check out the characteristics of the graphics processor (video card): total memory, RAM, version of the current driver and DirectX.
The GPU tab will show you the graphics card details
msinfo32 command
In any version of Windows, including Windows 10, you can open a separate window with detailed information about the operating system and components. The window is called "System Information". It may be needed by those users who do not have enough information displayed, for example, through the “Control Panel”. You can open System Information as follows:
- Press Win and R again - in the “Open” field write the command msinfo32, and then execute it.
Enter the code msinfo32 in the “Run” window - In the first section, you receive detailed information on the main components and the “OS” itself: PC and mainboard manufacturers, BIOS and SMBIOS versions, processor, bit depth, OS build version and much more.
The System Information window displays detailed information about various PC components - If you need to get detailed information about video cards, open the “Components” menu and go to the “Display” section.
The “Display” tab shows the characteristics of all video cards installed in the PC - If you need information about the sound card, switch to the “Sound Device” block.
Open the Sound Devices menu if you want detailed information about your sound card - If you are interested in the characteristics of network adapters, go to the “Network” tab, and then to the first section “Adapter”.
The “Adapter” tab contains information about all network adapters running on the PC.
PowerShell Console
You can get detailed information about your PC in the PowerShell console - the “ten” system editor, similar to the “Command Line”:
- Call the console window through the Start context menu - right-click on the button and select the corresponding line in the menu (you can also open it using the Win + X key combination).
- If that doesn't work, just enter a PowerShell query in the Search service.
in "Search" enter a PowerShell query and open the console through the results - Type it yourself or paste the systeminfo code - immediately press Enter. It will take some time for the console to gather system and PC information, so please wait.
In the PowerShell console, run the systeminfo command - Check out the data that appears in the blue editor: PC manufacturer and model, physical memory, processor, system type, network adapters, installed OS updates, and more.
As a result, the console will show you important information about your PC and OS
Third party programs
Third-party utilities will help you study the technical characteristics of your computer in detail. Let's take a closer look at the most common of them.
AIDA64
The multifunctional utility is available for a fee, but there is also a trial period. Using the program, you can conduct stress tests, useful for installing “heavy” applications and games. The utility also allows you to view the main characteristics of the gadget. To do this you will need:
- Download the product from the official source.
- Unpack the archive.
- Launch the AIDA64 application.
After starting the program, the user will see the main menu with categories. By entering each of them, the user can become more familiar with the corresponding characteristics of the subcategory.
CPU-Z
The application has a simple interface and is free. Shows the performance of the PC and its components, as well as system characteristics.
To use the service, just do the following:
- Download the software from the official website of the developer.
- Place a marker next to the user terms agreement clause.
- Click on the “Next” button.
- Select the installation folder and click “Install”.
- Launch the software by double-clicking LMB.
After launch, the user will see a window with tabs where you can view information about the processor, cache, motherboard and other PC components.
What are system requirements
Minimum system requirements are a list of characteristics that provide information about the minimum power of each element of the computer required to run a particular application. The operating system also works due to the power of the video card, processor and other components. Therefore, Microsoft checks that it meets the minimum requirements before allowing Windows 10 to be installed on your computer.
Of course, Windows 10 is more demanding than version 7 or 8. But at the same time, it is more optimized, and for weak video cards and processors too. Therefore, there is a possibility that it will work more stable and faster than its predecessors using the same components.
Minimum requirements for Windows 10 are higher than previous versions 7 and 8
What is the difference between a 32- and 64-bit system?
The number of system bits affects multithreading - the computer's ability to solve several problems simultaneously. 32-bit Windows is designed for single-core processors, while 64-bit is designed for dual-core processors. Of course, if you have a dual-core processor, install a system that can run two threads at once. This will speed up your PC several times. If you only have a single-core processor, then use a 32-bit system.
Settings Menu Overview
Most Windows 10 settings are configured in a window that opens in any way. All options here are sorted into categories for ease of configuration and finding the required parameter.
System
This section allows you to configure the most important system parameters:
- resolution, brightness, screen position;
- fine-tuning the new notification application - you can specify which programs are allowed to display alerts, disable them and display shortcuts for several so-called quick actions (rotate the display, connect to a network, create a note);
- setting up virtual desktops and organizing multiple windows for multitasking;
- tablet mode configuration;
- the “Storage” subsection allows you to distribute downloaded files, assigning each category (audio, video, documents, programs) its own download directory;
- here, as in the control panel, files are associated with applications that will open them in Windows 10 by default.
Devices
The section contains a list of peripheral devices connected to the PC, where you can change their parameters. So, here you can add a new device, configure input devices, a printer, and automatically launch portable storage devices.
See also: How to remove password when logging in Windows 10
Networks, Internet
It is analogous to the Network Control Center and contains all the parameters necessary to configure any network supported by your edition of Windows 10. In the window, you can create a new VPN connection and configure the network adapter in accordance with the requirements of the created connection. Oddly enough, the developers also included a firewall in the section, which, as practice shows, is used by an insignificant number of users.
A separate point, in addition to creating a VPN, in Windows 10 is the creation of an Ethernet connection and its subsequent configuration.
Personalization
Perhaps the most interesting point among all the “ten” parameters. It’s not for nothing that the developers prohibited editing the appearance of an unlicensed operating system.
By the way, after turning off the network and restarting the computer, this opportunity appears.
As in the "seven", you can change the background image or color, theme and Start menu. For the latter, a wider range of settings is available. Also in Windows 10, you can change the background image of the lock screen and display the status of applications that support this function.
Confidentiality
The second, after personalization, is the settings section that users love. It allows you to change numerous privacy settings, and if configured correctly, even prevent Windows 10 from tracking you and sending personal data to Microsoft servers.
By disabling as many functions as possible, you can better protect yourself from surveillance. But even here there are reasonable limits that should be observed. For beginners, there are a lot of instructions on how to get rid of surveillance in the “top ten”.
The last difference in Windows 10 settings is the ability to pin a graphic element (shortcut to a directory or program, settings, control panel applets) to the Start screen.
(Visited 5,295 times, 1 visits today) Published in Windows 10 Sources used:
- https://pc-consultant.ru/operatsionny-e-sistemy/dopolnitelnye-parametry-sistemy-windows-10/
- https://moikomputer.ru/kak-otkryit-parametryi-windows-10
- https://windowsprofi.ru/win10/nastrojki-parametrov-windows-10.html
What is MSConfig and what is this module for?
What can be disabled in Windows to significantly speed up the system
This is a configuration utility designed to manage automatically launched programs and loading of the user-selected OS. Other names: “MSConfig Windows 10”, “System Settings”, “System Configuration” or “System Configuration”. This service is located in the installation directory.
The user can open the module in several ways (via Run, PowerShell, and other tools). You will not be able to add an automatically launched program to the utility window, but you can disable autorun for any application in its list.
Thanks to the presence of System Configuration on the computer, you can choose the OS boot option (normal, custom, diagnostic). You can edit (disable) services and drivers loaded through the configuration file. By opening the module console, you can disable unnecessary programs. Using the msconfig configuration utility (win + R), it is convenient to configure services to optimize Win 10 OS.
Are common. Contains startup options (normal, custom, diagnostic). There may be a "System Restore" option here.
Loading. Contains a list of OS installed on the PC. You can adjust the Boot Options, activate “Safe Mode”, set the OS that will boot by default, and set the timeout (time) to switch to another version of Windows.
Services. Contains a list of services and shows their status (“running”, “stopped”). You can uncheck the box next to the name of a specific service and stop running the program (only Microsoft security services are not disabled).
Autoload. Contains startup items and indicates the location of each one. In some versions of Win 10, instead of a list of items, the option “Open Task Manager” is displayed (to go to the window for managing programs that automatically start when Windows starts).
Service. Contains a set of basic OS utility tools. Allows you to select and launch any service directly from the console.
Creating a new user
Like all UWP apps, the Settings tool is tightly bound to the user account, and corrupted files cause the component itself to malfunction. As a result, the administrator cannot enter Windows 10 settings, applications installed for the current account do not launch, personalization settings do not work, etc. In such cases, it makes sense to create a new user with the same admin rights and work under him. The main thing is that a new working copy of “Parameters” will be created in the system.
To create a new user, we use your choice of the local user and group management snap-in or the command line, depending on who you like. Let's briefly consider both options. Having launched the snap-in with the command lusrmgr.msc, select the “Users” item in the left column, right-click on the empty area of the middle column and select “New User” from the menu. Fill out the fields in the window that opens, indicating the name and password of the new account, click “Create”, and then log out and log in under the new account.
To create a user using the command line, run it as an administrator and run the command net user Name Pass /add, where Name is the user name and Pass is the password. If you want to immediately assign a new user as an administrator, run the command net localgroup Administrators Name /add, where Name is the name of the user created by the previous command. The following steps are no different from the way to create an account in lusrmgr.
How to optimize Windows and tune the OS for maximum performance
Note! First you need to understand optimization. The Windows operating system has a sufficient number of functions, services and parameters, the need for which is very ambiguous. Many of them simply use computer resources most of the time and once again load the system rather than bring any visible benefit.
Now we will talk about how to increase performance using a few simple actions and settings.
Step 1. Disable indexing of files on the disk. It is used to quickly search for files in the “Explorer” section, however, as practice shows, file search is used infrequently, and the consumption of resources when enabled is very noticeable. First, open File Explorer, then go to This PC.
Open "Explorer" and go to "This PC"
Right-click on Disk C, and go to “Properties”, we need the “General” tab. Uncheck the “Allow indexing...” checkbox and then apply the changes. Do the same steps with all other disks.
Uncheck the box “Allow indexing...”
Step 2. Go to “Settings” (at the beginning of the article it is written how to do this), then to the “Confidentiality” tab. Disable all functions related to the transfer of your data anywhere in the “General” column.
We disable all functions related to data transfer anywhere in the “General” column
In the “Diagnostics and reviews” column, also disable everything possible, since everything that is listed there is mostly useless and only loads the PC in the background.
In the “Diagnostics and reviews” column we also turn off everything
Step 3. Disabling visual effects in the form of various animations and transitions will also improve the performance of the Windows 10 operating system. To do this, go to system properties (instructions above), select “Advanced system settings”, then next to “Performance” click on “Options” .
Select “Advanced system settings”, then next to “Performance” click on “Settings”
We need the Visual Effects tab. Next, turn off everything that you consider unnecessary. The more parameters are disabled, the faster the system will work, so if you want to speed up the system to the maximum, turn off absolutely everything by using “Ensure the best performance.” Then apply all the changes you made.
On the “Visual Effects” tab, select “Ensure the best performance”
Step 4: If your work platform is a laptop, you should turn off hard drive disconnection. To do this, go to “Power Options” using the notification center panel by clicking on the battery icon.
Go to “Power Options” using the notification center panel by clicking on the battery icon
Select "Customize power plan" and find "Change advanced power settings." Set any higher value in the “Online” field, or simply “Never”.
Select “Setting the power plan” Open “Change additional power settings” Set any higher value in the “From network” field, or simply “Never”
Step 5. Many applications in Windows 10 always start running in the background by default; we don’t need this. Go to “Settings”, “Privacy”, and then to the “Background applications” column. Disable all applications that you do not consider necessary to constantly run in the background.
Disable unnecessary applications
Step 6. It's time to disable unnecessary services and startup.
- To do this, enter the “msconfig” command in the “Run” command line, called by the keyboard shortcut “Win” + “R”. We write the command “msconfig” in the “Run” command line, called by the keyboard shortcut “Win” + “R”
- The “System Configuration” window will open. The tabs we need are “Services” and “Startup”. System Configuration Window
- The first tab lists all the services that are enabled and running on the computer; study them in detail, and if there are any unnecessary ones, you can safely disable them. Disable unnecessary services
- In the “Startup” tab, click on “Open task manager”, then in the task manager select the tab of the same name. Very often, after installation, some programs begin to automatically load every time you turn on the PC, even if they do not require this at all. Click on “Open Task Manager”
- If you find such a program, click on it, and then click disable at the bottom. Disable programs in Startup