Folders are one of the most important elements of a computer’s file system, designed for organizing and storing information in operating systems of the Windows family. Groups of files are combined into folders by the software or by the users themselves according to some criteria.
The system has capabilities to control folder functionality using Windows folder options. Use Folder Options to customize the appearance, properties, and functionality of folders in Windows Explorer.
Some folders are created by the operating system itself, others are created by application programs installed on the computer, and the rest are created by the user himself for convenient data storage and distribution of files on disks in the OS. Some folders are created automatically by the system or programs, others are created by the user for his own needs.
Folder is a container for storing files. In addition to files, one folder may contain several other folders. In this case, this folder is called the parent (encompassing) folder, and the folders inside are called subfolders. Proper organization of folders helps you conveniently distribute data on your computer and quickly access the files you need.
How to open folder options in Windows 10 - 1 way
In this guide, I show ways to enter folder settings using Windows 10 as an example. Most of the methods in this article can be used in other operating systems: Windows 7, Windows 8, Windows 8.1.
Go through the steps:
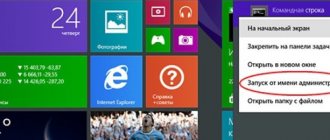
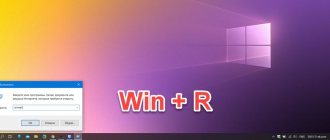
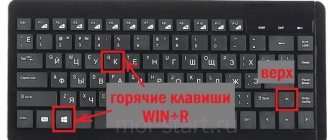
- Press the "Win" + "R" keys.
- The “Run” dialog box will open, into which you need to enter the command: “control.exe folders” or “control folders” (enter without quotes).
- Click on the "OK" button.
- The “Explorer Options” window will open, in which open the “View” tab.
- In particular, in the “Advanced options:” section there are many options for changing the settings of folders and files.
Folder properties settings in Windows OS
Folder properties allow you to change the basic parameters of both the current directory and all folders in the system. The basic settings are no different in Windows 7 and 10. But launching the settings themselves has some features in each version of the system.
In Windows 7 , you need to open any directory and select the Arrange . In the context menu, look for and click on “ folder and search options ”. You can make it simpler and just press the Alt key.
After this, a panel will appear at the top of the window, where you need to click on Folder Options.
In version 10 of the system, everything is a little simpler. Here the menu is not hidden and just go to “ View ” and find the Options .
After clicking on this button, the menu of interest to us will open with folder settings.
How to change properties and basic settings
Let's look at the basic folder options and what they mean. After we have completed the above steps in front of us, a settings window will open.
The General section does not need to be particularly described. Everything is clear here. It is possible to open each directory in a new window, as well as change the click action. As a standard, you can select an object with one click and launch it with a double click. By changing these settings, you can launch files with a single click.
The next tab “ View ” allows you to make more detailed settings.
Let's look at some of them in more detail.
Folder and search options in Windows 7
In this article we will tell you where the folder and search settings are located in Windows 7, and at the same time we will look at the capabilities of this interface.
In previous Russian-language versions of Windows, the folder settings interface was called “Folder Options”. In the Russian localization of Windows 7, this interface received an unusual, but more accurate name - Folder Options , which is why users who installed Windows 7 for the first time are a little confused at first.
Where are Folder Options in Windows 7
There are several ways to open Folder Options in Windows 7:
1) Open Control Panel (Large Icons view), then click Folder Options;
2) Open any folder, click Arrange and select Folder and Search Options in the menu that appears;
3) Open the Start menu and type the phrase folder options , then press Enter.
Setting folder options
- General tab
1. In the Browse Folders , the user can choose how subfolders will be opened on the computer - each new folder in the same window as the previous one (by default in all versions of Windows) or each in a new window.
2. In the Mouse Clicks , you can configure the opening of all files and folders with one mouse click instead of the standard two. If you choose to open in one click, then folders will be highlighted when you hover the mouse pointer, and open when you click on the left mouse button.
3. In the Navigation Pane , you can configure the display of the folder tree in Windows Explorer. If you check the Show all folders checkbox, all desktop folders will be displayed in the Navigation Pane, including the Recycle Bin, Control Panel, and your account folder. If you check the Automatically expand to current folder checkbox, the Navigation Pane will display all the folders that contain the folder you are viewing. The Navigation Pane is a special panel that is located on the left side of each folder. The Navigation Pane functions as a command shell, providing quick access to folders and quick execution of various operations, such as copying, deleting, archiving files and folders, etc.
- View tab
Here you can adjust the display options for all folders on your computer.
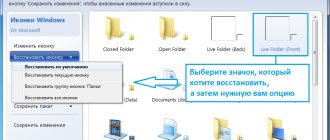
1. In the Folder View , you can apply the icon display style for a specific folder to all folders of the same type. For example, if you open a folder with mp3 files that the system has identified as a folder with music, and configure the display of shortcuts in it in the form of a table, then thanks to the View tab you can apply the style of its presentation to all folders with music. To do this, click the Apply to Folders button. In the future, you can always cancel this operation by clicking the Reset folder view button.
2. There are several options available in the Advanced Options . To enable a particular parameter, check the box or select the desired value from the options provided.
2.1. Always display icons rather than thumbnails . If you enable this setting, Windows Explorer will only display icons and never display thumbnails (for example, in photo and video folders).
2.2. Always show menu . If this option is enabled, a standard menu (File, Edit, View, Tools) will appear at the top of all folders on your computer. If this option is disabled, the standard menu in folders will not be displayed, but you can always call it up if you press the Alt key.
2.3. Display the full path in the title bar . This option only works in the Classic theme and replaces the display of the open folder path in the address bar with the classic one: C:/Program Files/Common Files/
2.4. Launch windows with folders in a separate process . If you enable this option, each folder opened in a new window will be launched in a separate process.
2.5. Use the Sharing Wizard . This option allows you to securely share files and folders over a network. If you have never shared files and folders and do not have a clear idea of how to do this without compromising security, we strongly recommend leaving this option enabled.
2.6. Use checkboxes to select items . If you enable this option, then when you select files and folders, check marks will appear on their icons. Checkboxes are included to make it easier to select multiple files using just the mouse.
2.7. Display drive letters . If the option is enabled, drive letters and labels are displayed in the Computer folder. If the option is disabled, only disc labels (names) are displayed.
2.8. Show file icons in thumbnails . If this option is enabled, then if 2.1 is disabled, each image and video file will display an icon in the right corner of the thumbnail.
2.9. Display view handlers in the view panel . If the option is enabled, then the viewing area displays not only thumbnails of graphic files, but also the contents of other files - for example, text documents. The Preview Pane in Windows 7 is disabled by default, and if you want to enable it, then open any folder and click the Show Preview Pane button.
2.10. Display descriptions for folders and desktop items . If this option is enabled, then when you hover the mouse over a file or folder, a tooltip appears with information about that file or folder.
2.11. Display file size information in folder suggestions . If this option is enabled, then when you hover the mouse over a folder, information about the size of the files attached to it will be displayed. If you disable this option, tooltips will only display the folder creation date, which reduces the load on your hard drive. This parameter becomes meaningless if parameter 2.10 is enabled.
2.12. Display compressed or encrypted NTFS files in a different color . If this option is enabled, the names of compressed and encrypted files will be displayed in blue.
2.13. When entering text in List mode . If this parameter is set to Highlight the entered item in the list (default) , then when opening a folder you can simply type the name of the item on the keyboard, and if an item with the same name is in the folder, it will be highlighted. A very convenient function when you need to find a file in a folder where several dozen or hundreds of items are stored. The function works not only in the “List” mode, but in all modes of displaying elements. You can also configure this function so that when you type the name of an element, the text is immediately entered into the search bar of Windows Explorer - to do this, select the value Automatically enter text in the search field .
2.14. Hide protected system files (recommended) . If this option is enabled, then service files and folders necessary for the operation of Windows 7 will not be displayed even if you enable the display of hidden files and folders on the computer (option 2.16).
2.15. Hide extensions for registered file types . If this option is disabled, its extension will be displayed at the end of each file name. The extension indicates whether the file belongs to a particular file type (for example, MP3 files have the extension .mp3). Most file types are automatically detected by the operating system as corresponding to certain programs. These types of files are called registered and their extensions are hidden by default for ease of display.
2.16. Hidden files and folders . If you select the value Do not show hidden files, folders and drives , then all items in the properties of which the “Hidden” attribute is activated will not be displayed.
2.17. Hide empty drives in the Computer folder . If this option is enabled, then empty (new) drives will not appear in the Computer folder.
- Search tab
Here you can configure search parameters for all folders on your computer.
1. The What to search needs to be configured based on how search indexing is configured on your computer. You can choose one of two values:
1.1. Indexed Locations . If this value is selected, then in non-indexed locations the search will be carried out only by file names, in indexed locations - by names and contents. Searching by file content is important when you need to find a word or fragment of text, but you don’t remember or don’t know the name of the text document. Do not select this value if you always want to perform full-text searches.
1.2. Always search by file names and content . We recommend that you select this option if you have disabled search indexing. However, if you have a large number of files on your computer, full-text searches of non-indexed locations and files can take several hours.
2. In the How to Search , you can enable or disable four options.
2.1. Include subfolders in search results when searching within folders . If this option is enabled, the search will be carried out not only in the folder that is currently open, but also in all folders that it contains.
2.2. Search for partial matches . If this option is disabled, the search will be carried out only for complete matches of the query. For example, if there is a file on your computer called “Windows 7 – Impressions and facts.txt”, then with the Search for partial matches option turned off, you can find it using the queries “Windows”, “7″, “impressions”, “facts” and even for queries such as “Windows 7 facts”. If partial matches are enabled, you will be able to find this file even with queries such as "Win".
2.3. Use language search . If this setting is enabled, Windows 7 will try to use the morphological features of the language when you enter a search query. Judging by our small tests, Windows 7 still has problems with the Russian language. For example, it is not possible to find a file called “Dubovy.txt” if you enter the query “oak”. Therefore, language search can be disabled for now in order to save system resources.
2.4. Do not use the index when searching for system files in folders . If this option is enabled, then the search for system files will be carried out every time as if it were the first time, which slows down the search process. If indexing of system files is disabled, it is better to enable the option.
3. Section When searching in non-indexed locations - two options are available:
3.1. Include system files . If this option is disabled, system files will not be searched.
3.2. Include compressed files . If this option is enabled, the search will be carried out not only through regular files and folders, but also through the contents of those archives that Windows 7 is able to open using its own means.
How to open folder options - method 2
Now we will execute another command to enter the folder options in Windows in a similar way.
When using this method, you will need to do the following:
- Press the keyboard keys “Win” + “R”.
- In the Run window, enter the command and then press Enter:
rundll32.exe shell32.dll,Options_RunDLL 0
- As a result of executing this command, the “Explorer Options” window will open, from which you can access the necessary settings located in the tabs of this dialog box.
How to enable folder properties
Sometimes there is a situation that folder parameters on Windows 7, 8 cannot be opened using the methods listed above. This is due to the fact that the virus blocked the ability to open, or the administrator limited your access to this component.
To fix the problem, check your computer with an antivirus program. Gain administrative access and perform the following enable methods:
1. Press Win + R, copy gpedit.msc into the “Run” window and click Enter (does not work in all editions of Windows). In the Group Policy Editor window, go to “User Configuration”, then to “Administrative Templates”, then to the “Windows Components” section, and to the “Windows Explorer” subsection.
On the right side, find the item responsible for folder parameters (shown in the image), double-click on it with the left button. In the new window, select “disable” or “not configured” and click OK. Folder properties in Windows 7, 8 will again become available in Explorer.
2. Open Registry Editor. Follow the link shown in the screenshot. Select the NoFolderOptions parameter, right-click on it and select “delete”. Click "yes" and restart your computer.
Those who do not want to change the registry can download ready-made reg files here. The archive contains 2 files Vkluch.reg (enables) and Otkl.reg (disables). Extract and run Vkluch.reg to enable folder properties in Windows 7, 8, click “yes” everywhere. Restart your PC for the changes to take effect.
Now you know what folder properties are in Windows 7, 8, how to open them and enable them in the event of a virus attack. Experiment with configuration options and find the one that works best.
Folder options in Windows 10: how to enter - method 3
There are several ways to enter settings for folders and files directly from the built-in file manager - Windows Explorer.
Follow these steps:
- Open an Explorer window.
- Click on the "File" menu.
- In the drop-down menu, click on “Options”.
- This will open the Explorer Options window, from which you can configure folder, file, and search options.
How to Backup and Restore Your Files
Windows 10 includes File History, a tool for backing up and restoring files. It's not just for creating and restoring huge backups—File History can automatically back up different versions of your files, and you can use File Explorer to easily restore those previous versions. First, you should set up File History in Settings > Update & Security > Backup. Turn on "Automatically back up my files."
Once configured, you can select a file or folder, click Home on the ribbon, and click the History button to view and restore older versions of that file or folder.
Windows 10 File Explorer contains many other useful features. You can star any file, use a dark theme, or re-enable the library feature. Microsoft is working with a tabbed interface for File Explorer, but you can get File Explorer Tabs today.
Opening folder options from Windows Explorer - method 4
In another method using Windows Explorer, we will use two similar methods of action to solve our problem.
Option 1:
- Open the “View” tab in the Explorer window.
- Click on the "Options" button.
- The Windows Explorer Options window will open on your computer.
Option 2:
- In Explorer, go to the “View” tab.
- Click the arrow located at the bottom of the Options button.
- A menu will open in which you need to click on “Change folder and search options.”
- The “Explorer Options” window will appear on the Desktop.
How to create your own column stack
If the column options from the general list are not enough for you, then in Windows 10 you can add special types. To do this, scroll to the bottom of the list of available options and click on the “Select Columns” line.
You will see a list of column types that can be used in the folder table. In the same window you can adjust the column width by specifying the number of pixels. Confirm your actions with the “OK” button.
Now you know how to change folder settings in Windows 10. If you still have questions about how to solve this or that problem, write them to us in the comments. Share this article with your friends to make it easier for them to use folders on their computer.
Logging in from Explorer using the keyboard - method 5
In Windows, there is an interesting method used to open folder settings from Explorer using the keyboard.
Follow these steps:
- Press the "Win" + "E" keys.
- If the keyboard layout is currently in English, press the “Shift” + “Alt” keys to switch to Russian. If your keyboard currently uses Russian, skip this step.
- Press the "Alt" key.
- Letters will appear next to the File menu.
- Press the "F" key in the Russian keyboard layout.
- You will see the option “Change folder and search options” in the File menu in Explorer.
- Press the "I" key.
- The Folder Options window will open on your desktop.
Interface
Now, let's look at the main elements of the program interface:
Explorer interface
- Open folder icon
- A quick access toolbar that lets you add buttons for frequently performed actions
- Name of the open folder (Or full path, subject to using a separate option)
- The so-called “ribbon”, which groups some of the available functions into categories
- Navigation buttons coming directly from Internet Explorer:
- Back (Alt + ←)
- Forward (Alt + →)
- Recent Locations (Storing browsing history)
- One level up (Alt + ↑)
- Address (path) input line, button for displaying a list of the last entered paths, and button for updating directory data
- Search string (Working with search is described in detail below)
- Navigation area. Tree of directories, block storage devices, network environment, quick access library and favorite directories
- Catalog content display area, with the ability to sort and group content
- Status bar
- Buttons for displaying elements in table view and large thumbnails
Sorting content
Often, when working with different types of files, you need to change the sorting and grouping parameters for subsequent interaction with them.
Changing the view
Explorer has 8 options for displaying the contents of a folder, each of which can be convenient in certain cases. You can change the appearance of elements either using the “View” context menu or using hotkeys. It is also possible to change the view with a large number of steps - using (Ctrl + Mouse Wheel up or down).
- “Huge icons” are convenient for working with photographs when you need to distinguish details in the pictures. Keyboard shortcut (Ctrl + Shift + 1).
- “Large icons” is something intermediate between “Huge icons” and “Regular icons”, a golden gray when working with photographs. Keyboard shortcut (Ctrl + Shift + 2).
- “Regular icons” is the standard option for displaying the contents of a folder. File thumbnails are supported, making this option convenient for working with media content. Keyboard shortcut (Ctrl + Shift + 3).
- “Small Icons” – displays content in several columns – the most compact display method. Keyboard shortcut (Ctrl + Shift + 4).
- “List” is the same compact method as “Small Icons”, but displays content in several rows rather than columns, which provides side-scrolling that is unusual for a desktop. Keyboard shortcut (Ctrl + Shift + 5)
- “Table” is in most cases the most convenient method of displaying content, especially with a large number of files and directories. Files are displayed in the form of a table, in one column, with the ability to sort by columns specified by file properties. It is possible to add columns with any file properties through the context menu in the table header “More details...”. Keyboard shortcut (Ctrl + Shift + 6)
- “Tile” – similar to “Regular icons”, only the file title is displayed to the right of the icon. Looks more aesthetically pleasing than “Regular icons”. Keyboard shortcut (Ctrl + Shift + 7)
- “Content” – the icons are slightly smaller than with “Regular icons”, support for thumbnails is also retained, files are displayed in a list in 1 column, with properties displayed. Keyboard shortcut (Ctrl + Shift +
Sorting
“Sorting”, like the “View” menu, is accessible from the context menu, but does not have hotkeys. Sorting allows you to organize the order in which files are displayed based on any of the properties. You can sort in either descending or ascending order. You can select additional properties for sorting files in the submenu “Sorting” → “Details”.
Grouping
“Grouping”, like “Sorting”, allows you to organize the order in which files are displayed, forming groups based on specified properties
How to find folder options in Windows - 6th method
Now let's try another way to navigate to the necessary settings from File Explorer in Windows.
You will need to do the following:
- In any open Windows Explorer window, left-click on an empty space in the address bar.
- Type “control folders” (without quotes), and then press the Enter key.
Going to folder options from the Settings app - method 8
To access the necessary options, you can use the Settings system application from the Windows 10 operating system.
Follow this procedure:
- Right-click on the Start menu, and in the context menu, click on Settings.
- In the Settings app window, enter “File Explorer” in the search field.
- “Explorer Options” will appear among the results.
- Click on this tooltip.
Description of useful parameters
The “general” tab (picture above) displays a limited set of configurations. Here you can set the folder to open in the same or separate window. You can choose to open files and folders with one or double click.
The View tab contains many options. The user decides which options to use individually. I recommend paying special attention to the following folder properties settings:
- Always display icons rather than thumbnails - this option is useful when you work with large volumes of files and folders. If your computer loads thumbnails slowly, enable this option.
- Hide empty drives in a folder - If you insert an empty flash drive or other removable drive, it will not appear in Explorer, which can cause confusion. It is strongly recommended that you uncheck this option.
- Hide extensions for registered file types – disabling this property shows file extensions. It will help distinguish normal files from virus ones. There is malware that specifies two extensions, for example filename.doc.exe. If the parameter is enabled, you will only see file_name.doc and treat it as a regular text file. Uncheck this option.
- Use checkboxes to select elements – allows you to select elements with the mouse. The setting is equivalent to holding Ctrl and then clicking the mouse button on the selected elements. This property is useful when you need to select a group of files and folders for subsequent actions.
- Hidden Files and Folders – Contains two options that show or hide items with matching attributes.
The “search” tab contains options for searching for files and folders. The default configuration works very well. If you are not satisfied, then experiment with the available options to improve the result.
Don't forget after making any changes to the folder properties, click OK to save.
Login to the Control Panel - Method 9
Another way is to use another system tool - the Control Panel application.
Go through the following steps:
- Launch Windows 10 Control Panel.
- In the Computer Settings window, set the view type to Small Icons.
- Click on the "File Explorer Options" option.
Using the properties of a separate folder - method 10
There is an option in which the user gains access to the settings of a separate folder. These settings do not apply to global settings for all folders in the operating system. This way you can change some parameters only for a specific folder.
To access individual folder options, follow these steps:
- Right-click on the desired folder.
- In the context menu that opens, select “Properties”.
- In the folder properties window, settings specific to this folder will become available.
How to view hidden directories
Why Windows 10 settings won't open - how to solve the problem
Hidden system files are located in the shadow partition of the local volume. The system cannot show them to the user, since they ensure the correct functioning of Windows. Editing them is also prohibited. To see what files are stored in hidden directories, you need to:
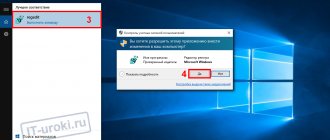
- Go to the start menu and enter the query “PowerShell” in the search bar.
- In the dialog menu, select “Run with extended permissions”.
- In the debugging console window, write the executable code “Control folders”.
Now, in the “View” item, check the “View hidden directories on the local volume” checkbox.
Directory options help you access hidden system directories. You can also configure the display of files and documents inside the folder. You can open the settings using the control panel, the automated system debugging console, and through the OS settings. To open folder settings through the Run utility, you must have an account with administrator rights.