The Windows 10 operating system can use an unlimited network connection, upload and download information in any volume. Therefore, installing a metered connection is extremely important. It allows the user to control these processes. This is especially true if the device owner uses a limited data connection, mobile hotspot, satellite Internet connection, or modem. Windows 10's metered connection prevents unnecessary consumption of the data received/transmitted by the provider.
What is a “Limited Connection” and in what cases is it useful?
How to activate the limit in Windows 10 OS
A metered connection means a connection where the operating system reduces the amount of traffic consumed by limiting the behavior of not only third-party programs, but also standard applications of the system itself, as well as blocking auto-updates.
Note! Once you set up a metered connection, Windows 10 won't be able to automatically use your network bandwidth.
As soon as the user installs this method of accessing the Internet:
- The system will disable auto-downloading of almost all updates. A special notification will appear to complete this procedure, where the user must confirm the action.
- Autoloading of all downloaded applications will be disabled, except desktop ones, such as browsers.
- Microsoft tiles will stop updating.
Volume of traffic used
How to enable or disable metered internet connection on Windows 10
Windows 10 automatically connects to the Internet when you turn it on
When you buy a modern gadget, the size of the information it displays and downloads is already set, so you don’t need to connect it yourself. If the user wants to limit the connection for Wi-Fi or Ethernet, then this is done like this:
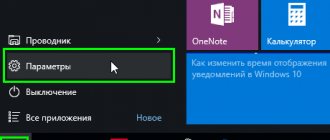
- Click on the start button.
- Go to system parameters.
- Open the Network and Internet item, familiarize yourself with each connection option and select the appropriate one.
Note! To avoid using large amounts of information, it is necessary to limit the download and upload of data using a metered connection, especially if the user uses limited monthly traffic.
A metered connection helps control the amount of information transferred. If traffic is limited and reaches the maximum, the system will warn you about it. However, if this function is not active, then you will have to pay separately for GB spent in excess of the norm. There are applications that do not update with limited traffic and consume less data.
Limit connection on Windows 10
How to disable metered connection Windows 10:
- Find the network and internet section in system parameters.
- Open the data usage section.
- Click to display the parameters of the required network. Data about the spent limit will be displayed.
- Remove the limit and confirm your actions.
If the user has an operating system installed without the latest updates, for which a metered connection has been configured, then you need to turn it off like this:
- Open the registry editor window, then go to the “DefaultMediaCost” folder.
- Find your network and double-click on it.
- A window for changing parameters will appear, in which you need to enter the number 1, and then save the changes.
- Reboot your device.
Disabling the limit on Windows 10
Instructions for OS with the latest update
- Go to “Start” and then click on the gear to go to settings;
- Go to the “Wi-Fi” or “Ethernet” tab. In the first case, you need to limit traffic over a wireless network, and in the second, when connecting directly via cable. There is no difference, in the picture above I show using WiFi as an example. It doesn’t matter which connection you have chosen, then click on it.
- Now you need to set the slider to the “On” state. under the inscription “Set as metered connection”.
NOTE! If there is no such section, then most likely you do not have an update for the operating system installed. In this case, you can update the system if possible. Or go to the next chapter, where I will tell you how to do similar actions through the registry and system settings;
- After that, click on the inscription below to set the traffic limit;
- You will be taken to a separate page. If you click “Show options for”, then you can select the connection you want to work with. Next, click “Set limit”.
- Now we set the limit type and start date. You can choose today's moment. You will also need to select the size of the limited traffic. At the very end, click “Save”.
How to set up a metered connection in Windows 10
When a mobile network is used on a gadget, laptop or PC, they already have a maximum amount of uploaded and downloaded information provided by the network provider. You can also enable the limit if you log into the network via Wi-Fi or the Internet.
Limited Wi-Fi connection
How to create an Internet connection on Windows 7
If the device owner uses Windows 10 with the latest updates, then to set the limit you need to:
- Enter the data usage tab.
- Find the parameter demonstration field, select the network to which the device is connected from the list that appears.
- In the “Traffic limit” item, click on setting a limit.
- Decide on the type, counting date, indicate the value of the limit, its units of measurement. Save the entered data.
Note! When using GB and MB, a window will appear in the tray area with a notification about the traffic spent, days until the counter is reset and the total amount of downloaded information.
Limit when connecting to Ethernet via Wi-Fi
Ethernet limit
When setting a limit for this connection method, you first need to go to “Settings” and find out the number of days and the size of data used. However, if you activate such a limited mode for a cable Internet connection, you will have to perform a number of other actions. You will have to activate the connection by editing the registry, removing it, changing the directory name. Procedure:
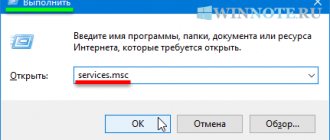
- Call the registry editor by pressing the Win + R keys simultaneously.
- In the run window that opens, enter regedit in the command line.
- Click on “yes”, confirming the changes to the Windows OS.
- Open the HKEY_LOCAL_MACHINE branch on the left.
- Double-click the directory SOFTWARE - Microsoft - Windows NT - CurrentVersion - NetworkList - DefaultMediaCost.
- You will need to change the owner of the DefaultMediaCost destination folder. To do this, you need to right-click on it, and then confirm your manipulations.
- Go to the “Advanced” line, window 3.
- Review the owner's parameters. There is also a link to change them, and you need to click on it.
- In the appropriate field, enter the name of your account and save the new name.
- Next to the line to replace the owner of subcontainers and objects, you need to put a checkmark in your name. Next, click on “Apply changes” and then click on “Ok”.
- Open the security section and select administrators or users with the left mouse button.
- Check the Full Access box and confirm your actions. Apply changes and click “Ok”.
- Change the parameter itself. In the editor window on the right, find the “Internet” entry and double-click on it.
- In the gray window, enter 2 and save changes.
- Reboot your device.
Limit connection for Ethernet
Note! In the settings window, “Data Usage” item, you need to set a limit. To disable it and return to previous settings, it will be enough to replace 2 with 1 in the registry editor.
How to enable automatic downloading of updates via a metered connection in group policies
To do this you will need:
- Open the Local Group Policy Editor log by simultaneously pressing Win+R and run the command gpedit.msc.
- Configure automatic updates in device configurations, administrative templates section, Windows components, system update.
How to add a printer to Windows 10 - connection and setup
All basic settings can be specified only in the “Automatic Update Settings” policy. Before activating it, you need to select an update option:
- display notifications about downloading and installing updates;
- auto-download and scheduled installation;
- startup and installation notification;
- Allowing the local admin to select auto-update settings.
Note! When this policy is activated, the computer may not always restart automatically; sometimes a notification appears indicating that the installation is complete and the user is waiting for the user to reconnect.
You can also determine the time for issuing a second request to reboot the system, if this is not possible at the moment. If the user has not set the display time for such a notification, it will appear every 10 minutes.
Automatic download of updates
If the device was turned off, and therefore the updates were not installed at a clearly established time, then it will start immediately the next time you turn on the personal computer. This policy allows the user to specify the exact time interval that should pass from the moment the operating system is loaded until the installation of updates begins.
You can also install on a PC or remove the ban on installing devices that are not described in other parameters. This allows you to turn off driver auto-update. This functionality is located in the computer configuration, template administration folder. You need to go to the system, the item for installing devices and restrictions on their installation.
Group policies in Windows 10
Setting up a metered connection in Windows 10 allows a PC user to save Internet traffic, this is especially true if connected using a mobile package that is limited to a certain size. This will also improve the performance of the device, since many updates will not be constantly downloaded. However, there are software products that will still be downloaded; the system will not be able to work without them.
IP parameters of a specific Wi-Fi network
For a separate Wi-Fi network, you can manually set the IP and DNS parameters. By default, the computer automatically receives these addresses when connected. But, if necessary, you can enter them manually.
Click on the “Edit” button.
Next, select “Manual” and enable the protocol for which we will set addresses: IPv4 or IPv6.
We enter the necessary addresses and save the settings. For example, I registered static DNS from Google.
Be careful. If you enter the addresses incorrectly, the computer will not be able to connect to Wi-Fi. If necessary, change back to "Automatic (DHCP)".
