- 5shared
- 0Facebook
- 5Twitter
- 0VKontakte
- 0Odnoklassniki
To work with hard drives, Windows provides a special Disk Management utility. It allows you to create new volumes, split and merge existing partitions, and format media. There are several ways to open Disk Management in Windows 10, which we will outline in this article.
Calling Disk Management in Windows 10
The diskmgmt application allows you to do the following in a convenient graphical interface:
- Format hard drives. In this case, you can change the file system of the drive and specify the cluster size.
- Change the letter for each drive.
- Increase or decrease the volume size.
- Combine several sections into one.
- Redistribute free space between several drive partitions.
The standard “diskmgmt” utility does not only allow you to convert the file system, nor change the cluster size without deleting data, as, for example, Acronis Disk Manager can do. But for most everyday tasks of the average user, this utility is more than enough.
There are 7 ways to start disk management using the diskmgmt utility, all of them are described below in the article.
What is a partition on a hard drive
For people who may not be aware of this concept, partitions are dedicated spaces on a hard drive dedicated to storing data. For convenience, multiple partitions can be created, for example, you can install the OS on one partition and store multimedia files such as photos, videos, movies on another partition.
This is a great way to store files in a specific location and keep your system clean and organized.
Just a few sections can help you a lot:
- To improve productivity, you can store frequently used programs and accessible data in the first partition.
- Install more than one OS, depending on your requirements you can create partitions for each OS on your PC.
- Separate valuable files to minimize the risk of damage.
- Allocating specific system space to applications and data for specific purposes.
You have to be a tech geek to know how to expand or shrink partitions, but with the help of the best disk partition manager, you can easily resize your hard drive as per your choice without much hassle.
Open Disk Management via System Search
- Click on start and enter the command diskmgmt.msc.
- The Disk Management utility will open. You must run it as an administrator.
What to do if there is no “Search” icon on the taskbar? This means that it was hidden by the user himself. To restore it, you need to right-click on the panel, select “Search”, select “Show icon”.
PowerShell
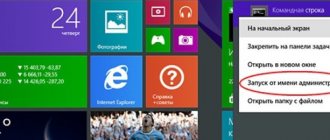
The above methods are quite sufficient, but if desired, the user can use the PowerShell , which is an analogue of the traditional command line. It is launched from the same quick links menu, which is called up by pressing Win+X .
In the utility window you need to run the command diskmgmt.msc .
Open Disk Management using the Run window
This method will help you quickly launch Disk Management in Windows 7, where there is no such “advanced” system search as in Windows 10. All that is required from the user:
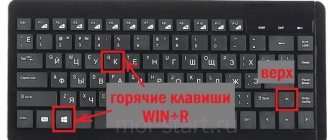
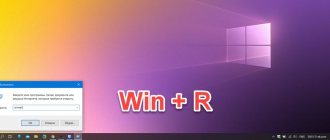
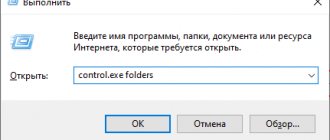
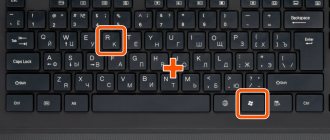
- On your keyboard, press the Win+R combination.
- In the Run window that opens, enter the command diskmgmt.msc and click OK.
If an error message appears after this, it means that the user is denied access to system settings. That is, he needs to log in under an administrator account.
Extend a basic volume
Applies To: Windows 10, Windows 8.1, Windows Server (Semi-Annual Channel), Windows Server 2022, Windows Server 2016, Windows Server 2012 R2, Windows Server 2012 Applies To: Windows 10, Windows 8.1, Windows Server (Semi-Annual Channel ), Windows Server 2022, Windows Server 2016, Windows Server 2012 R2, Windows Server 2012
Using Disk Management, you can add additional space to an existing volume using empty disk space, but only if the empty space contains no volumes (that is, is not allocated) and is located immediately behind the volume being expanded with no other intermediate volumes, as shown in the following image . You can use Disk Management to add space to an existing volume, extending it into empty space on the drive, but only if the empty space doesn't have a volume on it (it's unallocated) and comes immediately after the volume you want to extend , with no other volumes in-between, as shown in the following image. To expand, the base volume must be formatted with the NTFS or ReFS file system. The volume to extend also must be formatted with the NTFS or ReFS file systems.
Open Disk Management in Windows 10 using the Address Bar in Explorer
If previously the address bar of Explorer could only be used to specify an address, then, starting with Windows 7, you can enter commands directly into it, as in the Run window. That is, to go to drive management you need to:
- Open Explorer in any convenient way.
- Click on the address bar to display a pointer for entering commands.
- Type diskmgmt.msc and press Enter.
The operating system automatically recognizes that the user has entered not an address, but a command, and it will launch Windows 10 disk management. And this is also the same “modernization” of the system search function first added in Windows 10. When the OS searches not only files, but and installed programs.
Creating a new volume on free space
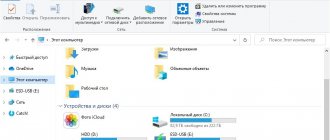
The screenshot shows the open program window and the list of sections available for modification. To create a new one, you need to click on the disk icon and select “Shrink Volume” from the drop-down list. In our case, it is only possible to compress the “drive D:” volume - there is more space on it, and it is not recommended to perform such manipulations with the system partition.
Why Shrink Volume? Disk space is limited; you won’t be able to take it out of thin air. Since our hard drive is completely divided between existing disks, the only option is to divide the memory for the partition. Another method suggests using the free space in the unallocated area (it is also displayed in this list), or formatting one of the partitions, deleting it and using the resulting unallocated area to create two new ones of an acceptable size for you. It is worth noting that in the latter case, all data stored on this volume will be lost, so the method presented in the screenshot in this regard is the most convenient and fastest.
After activating the “Shrink Volume” option, a window will open in which the system will ask you to be patient and wait a few minutes. After this time, information about the maximum volume for the new volume will be displayed on the screen - in our case it is slightly less than 77 GB. The user will be asked to independently select the size of the new partition, which will be within the previously specified 77 GB. We choose 51200 MB - that's exactly 50 GB.
The space can be used for convenient cataloging of your data or for parallel installation of another operating system.
After setting the value, click the “Compress” button and wait. The waiting time can vary greatly - on SSD drives the process will take a few minutes, on older machines - a couple of times longer (since the hard drive is significantly inferior in operating speed). Once the process is complete, you will see noticeable improvements in the chart below - among the blue bars indicating existing disks, a black one labeled “Unallocated” will appear.
Open Disk Management using Computer Management
For some, the previous one may seem too complex and confusing. But you can also open Disk Management in Windows 10 through the Control Panel. To do this you need:
- Search for “Control Panel”
- Open "Administration"
- Select "Computer Management"
- In the next window, in the left column, select “Disk Management”
What to do if it doesn’t open
You should follow the suggested methods for starting the program in the specified sequence. If none of the methods produces results, you should check the rights of the account with which the user is trying to open “HDD Manager”. To run the utility, you must be an administrator.
If after the manipulations the manager for working with hard drives does not start, then you need to download and install third-party software to control the information storage. These are programs that have similar functionality to the Windows 10 utility, but have their own interface and a set of additional features.
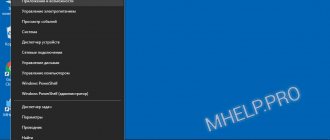
Open Disk Management via the Start button context menu
The necessary utility is located in the “Computer Management” section. But, starting with Windows 10 (after updating to 20H1), it became possible to go to the disk management section directly from the desktop. More precisely, using the "Start" button.
- You need to right-click on it and select “Disk Management”.
Just before opening Disk Management in Windows 10, you need to make sure that the user has administrator rights. Since “guest” access to system settings is not provided in order to protect data confidentiality.
Change a dynamic disk back to a basic disk
Applies To: Windows 10, Windows 8.1, Windows Server (Semi-Annual Channel), Windows Server 2022, Windows Server 2016, Windows Server 2012 R2, Windows Server 2012 Applies To: Windows 10, Windows 8.1, Windows Server (Semi-Annual Channel ), Windows Server 2022, Windows Server 2016, Windows Server 2012 R2, Windows Server 2012
This section describes how to delete all data on a dynamic disk and convert it to a basic disk. This topic describes how to delete everything on a dynamic disk and then convert it back to a basic disk. Dynamic disks are not recommended for use in Windows, and we do not recommend using them anymore. Dynamic disks have been deprecated from Windows and we don't recommend using them anymore. Instead, we recommend using basic disks or the newer Storage Spaces technology to combine disks into larger volumes. Instead, we recommend using basic disks or using the newer Storage Spaces technology when you want to pool disks together into larger volumes. To mirror the volume from which Windows boots, you can use a hardware RAID controller, such as the one found on many motherboards. If you want to mirror the volume from which Windows boots, you might want to use a hardware RAID controller, such as the one included on many motherboards.
To convert a dynamic disk to a basic disk, you must remove all volumes from that disk, thereby permanently deleting all data on it. To convert a dynamic disk back to a basic disk you must delete all volumes from the disk, permanently erasing all data on the disk. Before proceeding, make a backup copy of the data you want to keep. Make sure you back up any data you want to keep before proceeding.
Open Disk Management via Powershell
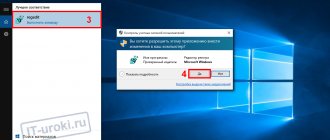
- To launch Powershell, you need to open Start and find the Powershell folder.
- In it, launch the “Windows PowerShell” executive file (or x86, if a 32-bit version of the OS is used).
- In the terminal that opens, enter the command diskmgmt.msc and press Enter.
How to open Disk Management in Windows 7? Likewise, you just need to make sure that all the latest updates for the OS are installed, including NetFramework 4.0. Otherwise? the outdated PowerShell shell will be used, where many functions and commands are simply not supported.
Option 1: Change where files are saved
Nowadays, almost all users have a hard drive divided into two logical drives (C and D), or these letters actually refer to two different drives. In both cases, especially in an SSD + HDD combination, where the solid-state drive is small, sooner or later there is not enough space on the system drive C to download any user files. The Windows 10 operating system allows you to change their save location to drive D. After this, critical updates for the OS will continue to be downloaded to C, but all unimportant files that do not affect the performance of Windows will begin to be saved to D.
- Open Start and go to Settings.
Here you need the “Memory” subsection, located in the panel on the left.
Find the clickable link “Change where new content is saved.”
Change all or some of the items, remembering to click “Apply” each time. After this, you can simply close the window.
But do not forget that these were only basic settings: many programs, mainly browsers, will continue to save everything in the previously specified folder. This is usually drive C, so don't forget to go into your web browser's settings and change the path where it downloads to your computer. The same goes for torrent clients, game clients and other applications that require downloading.
The instructions will not affect independent installers of new programs in any way: by default, they will always offer to install to drive C, so you will need to manually change the path each time. Changing this to automatically select D, unfortunately, can only be done by editing the registry.
Attention! We do not recommend that users without experience and without special need perform further actions! Changing a registry setting can cause Windows to malfunction and cause problems with running some programs!
- Press Win + R to open the Run window and type regedit. Click OK.
Copy and paste the following path into the address bar: HKEY_LOCAL_MACHINE\SOFTWARE\Microsoft\Windows\CurrentVersion and then press Enter.
First you need to select the “ProgramFilesDir” option, and then “ProgramFilesDir (x86)”. If the system is 32-bit, then only the last parameter will be edited.
Open it by double-clicking LMB, and in the “Value” field change the letter from C to D. On a 64-bit system, you will need to do the same with the second parameter.
- All that remains is to restart the computer to apply the changes.
Assigning a letter to a hidden system partition
We are talking about access using standard means to system partitions or recovery partitions from equipment manufacturers.
Such partitions are usually hidden from the user to protect against careless actions that could damage the system or its recovery tools. The need for access may arise, for example, when creating an external media for a recovery environment or modifying an existing environment to suit personal preferences. In cases where hardware manufacturers take additional measures to protect their data, the techniques described below may not work. list volume
— we define a list of volumes.
For example:
Volume ### Name FS Label Type Size Status Details ———- — ———— —— ———- ——- ——— ——— Volume 0 D DVD-ROM 0 b No carry Volume 1 Reserved NTFS Partition 350 MB Good System Volume 2 C NTFS Partition 43 GB Good Boot
As you can see,
Volume 1
is a hidden system partition (labeled “Reserved by the system”), which does not have an assigned letter.
select volume 1
- select Volume 1
assign letter=R
— assign the letter
R to that:
If the assignment of the letter was successful, the corresponding message will be displayed:
DiskPart: assignment of the disk name or mount point was successful.