When preparing for the exam, even if you know the subject well, it won’t hurt to learn how to make spurs in Word, to be on the safe side and gain additional confidence in your abilities.
And, if earlier they used a pen for this, filling out sheets of paper with small handwriting, now modern technologies come to the rescue.
The main task of preparing a cheat sheet for an exam is to place as much text as possible on the minimum area of the sheet.
This means that working in Word will mean reducing the font, margins and indents, as well as reducing information and making it easier to find.
The first thing to change is the size and position of the text. As a result, one cheat sheet will contain more information than any manually created one.
Moreover, during the preparation process it will also be possible to edit the text, which is impossible with an ordinary manual spur.
Changing font size and family
Once the answers to the questions have been found, you can begin editing the document. First you need to change the font size. This is done quite simply: select the entire text of the document using the key combination “ Ctrl + A ” and in the Home the Font section , reduce the font size to 6 points by entering the number “6” from the keyboard, because The minimum font size from the dropdown list is 8 points. To confirm the operation to change the font, press the Enter .
To ensure that such small text is readable, you need to choose a sans-serif font family. In our case, the Calibri font, which is installed in Word by default, is suitable.
Additional revision
You can get convenient cheat sheets by using other methods of reducing space and optimizing the time of searching for the necessary information:
- Replacing em dashes with em dashes and regular quotation marks “” with the abbreviated version ““ (using the “Replace” menu). This won't make the text much smaller, but it will still make it possible to reduce the size of the spurs.
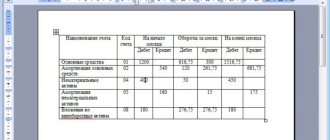
- By making the answers to exam questions a table by ticket numbers (first a table is created, then the text is copied into it one by one. At the same time, attention is paid to the boundaries of the cells, which should also be as small as possible).
Selecting margin options for table cells
- By placing some of the information alphabetically using the sorting function (by setting the necessary parameters - ascending or descending).
Setting text sorting options in the “Table” / “Sorting” menu in Word 2003
Step-by-step creation of a cheat sheet in Word
Instructions - How to make spurs in Word
« Previous entry
Changing letter spacing
To fit as much text as possible on a sheet of paper, you need to resort to one more trick, namely, change the spacing between letters. To do this, select all the text using the keyboard shortcut “ Ctrl + A ”. Open the Font using the keyboard shortcut “ Ctrl + D ”, or click on the icon (1) shown in the screenshot below. Then in the Font , go to the Advanced . Change the Spacing to Condensed (2) and opposite this parameter enter a value of 0.4 pt (3). Click OK (4) to confirm. As a result, the text will be more compact.
Placement of accents
For ease of perception of information, in any type of cheat sheet, be it a column or a table, you can highlight the main information or terms in color.
You can highlight text by changing the font color or filling the space behind the necessary information. You can change the text color by selecting the appropriate item in the main tab.
Filling is done in the same place by clicking on the adjacent icon. The font and fill color can be arbitrary.
No matter how convenient cheat sheets are, they can never replace the knowledge in your head. But despite this, hints in printed form are a good safety net that can help you pass exams, and you can quickly create them using the proposed step-by-step instructions and videos.
Changing line spacing
Now it's time to reduce the spacing between lines. We select all the text with the familiar keyboard shortcut “ Ctrl + A ” and click on the icon (1) shown in the screenshot below, in the Paragraph the Home tab Paragraph in the context menu that appears .
In the Paragraph , change the Before and After (2) in the Spacing to 0 . In Line Spacing, select Multiplier (3) and enter a value of 0.7 . Click OK to save your changes.
How to print a cheat sheet
After the exam answers are ready in electronic form, they need to be printed out correctly. To print small “spurs”, the sheet will have to be prepared in advance. To save space, it is recommended to run duplex printing. This is done as follows:
- You need to select the text information, select the “ Paragraph ” tab, find the “ Align text to the left ” item. You can do this by pressing Ctrl+ L . On the ruler marking the sheet, set the width to 6 units and the length to 9.
- Next, select “ Print ” from the main menu. The first thing you need to do is print 1 page.
- The next step is to prepare the second page for printing. Also select the text, but now the alignment should be right . In this case, the data length and width remain at the same level.
- Select “ Print ” from the menu and check here to print the second page. A previously printed sheet is inserted into the paper feed tray to obtain text on both sides.
If there are a lot of sheets, then you can speed up the process by editing the information in advance and printing the odd-numbered pages first. Then put the printed material back into the printer tray and start printing even numbers.
Attention! It is better to try before printing exactly how the printer prints and on which side of the sheet, so as not to ruin a large amount of paper.
How to make spurs in Word? Hyphenation
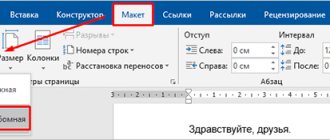
To automatically hyphenate long words onto a new line, dividing them into two parts, you need to switch Hyphenation to Auto . To do this, select all the text, then go to the Layout (1) in the Page Setup , click on the Hyphenation (2) and select Auto (3).
How to split text into columns
This technique will help you divide information into blocks to make it easier to navigate a bunch of lines. Click on the Layout tab, then Columns. Here we can choose one of the options for how our text will look.
In this section we can also specify the parameters that are suitable for our cheat sheet, select the number of columns, width and spacing between them. If you need to add a vertical line between columns, click on Separator.
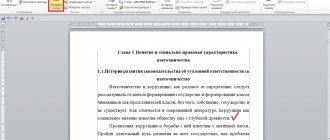
An example of how the text began to look (scale 100%):
Thus, MS Word saves your time and makes cheat sheets more compact and readable. If you need to insert a diagram, image or diagram into your cheat sheet, check out the article on inserting images into a document.
How to make spurs in Word? Setting up fields
The next step is to reduce the margins along the edges of the sheet. To do this, go to the Layout (1) in the Page Setup , click the Margins (2). In the menu that appears, select Custom fields (3).
In the Page Setup , change the margin size to 0.5, as shown in the screenshot below (1). Click OK (2).
As a result, more text will fit on the sheet.
Fold and hide the cheat sheet
How to hide a cheat sheet without the teacher noticing? There are many options.
- Fold like an accordion. This makes them easier to hide and take out. Make sure the spur fits comfortably in your palm.
- We wear outerwear with long sleeves. You can put elastic bands on your wrists, and crib sheets under them.
- We buy crib pens. They can be purchased at almost any office supply store.
- We glue the spurs onto the label of a water bottle with the necessary information inside.
Still have questions? Our experts are ready to answer.
How to make spurs in Word? Speaker setup
Now that the text on the page is as compressed as possible and takes up minimal space, it’s time to divide it into columns.
Go to the familiar Layout (1), in the Page Options click on the Columns (2) and in the menu that opens, select Other Columns (3).
In the Columns , change the number of columns to 5 Separator box (3) and set the gap between the columns to 0.1 – 0.2 cm (2). Click OK (4).
As a result, all our text on the page was divided into 5 columns, which are separated by a vertical line, along which it will be very easy to cut out a cheat sheet.
Set up narrow speakers
The size of the text may increase if it is not placed in one column, but divided into several columns.
To reduce margins when dividing, in Word 2003, select the Format menu and the Columns submenu.
Dividing text into columns (columns)
Instead of the standard 1.25 cm, an interval of 0.2 mm is set. And now your text will be placed compactly without losing its information content.
Interesting material on this topic:
- All methods: How to make a landscape page in Word
- How to delete a page in Word - 6 ways
- How to make a book page in Word: Several original ways.
Automatic word shortening
Often in the text there are a large number of repeated words that take up a lot of space. The best solution would be to shorten these words. For example, instead of economics write e-ka. But manually replacing all the words will require a lot of time and effort. In this case, the AutoCorrect tool will help us.
To use it, go to the Home (1) in the Editing and click the Replace (2). In the window that opens, in the Find , enter a frequently repeated word, and in the Replace , enter its abbreviated version (3). Click the Replace All (4).
Tips for creating cheat sheets
- Do not make a sheet of identical text from a cheat sheet, otherwise you will not be able to quickly find the information you need in it. Add headings to break up your document, highlight important points with bold or underline, and use numbered and bulleted lists. You can leave some white space around formulas or other hard-to-read elements to separate them from the main text.
- When creating cheat sheets, immediately plan where you will store them and how you will take them out during the exam. This will help you select the correct size for the text column.
- If you plan to fold the spur into an accordion, you can leave empty lines at the folds. This will make your cheat sheet easier to read.
- If you plan to use double-sided printing, you need to ensure that the margins and number of columns on both sides of the sheet match. Otherwise, cutting the spurs into strips will not work.
Remember that the best cheat sheet is a handwritten cheat sheet. In this case, you will remember a lot and will be well versed in the text. Therefore, if you have time, it is better to make spurs by hand.
Two ways to make cheat sheets
Inventive students come up with original ideas on how to make invisible spurs all the time. But still, cheat sheets are mainly:
- of classical origin, when they are written with one’s own hand using a ballpoint pen or a simple pencil;
- printed in Word.
These two methods are the main ones for creating cheat sheets for any subject, be it questions in mathematics, biology or literature.
The advantage of the first method is that it is accessible to absolutely everyone; it does not require computer equipment and a printer - spurs can be made simply “on the knee”. But if printing text to a printer from a computer is not a problem, then it is much better to use Word.
Typing text on a computer is much faster than filling out narrow strips of paper by hand, and it will be guaranteed to be more accurate—you don’t have to worry about the legibility of your handwriting. You just need to remember well the sequence of actions necessary to work in the editor and master them in order to know how to make cheat sheets in Word small and unnoticeable.
Creating compact cheat sheets in Microsoft Word
Many schoolchildren and students cheat or simply play it safe on tests and exams by making various cheat sheets and/or simply writing down the necessary information on all sorts of places and objects that are inaccessible to the eyes of “outsiders” - teachers and lecturers. You can be as sophisticated as you like, acting the old fashioned way, or you can significantly simplify this process by turning to specialized software for help - the Microsoft Word text editor. Today we will tell you how to create compact cheat sheets using it.
Let's sum it up
Attention!
If you need help writing a paper, we recommend turning to professionals. More than 70,000 authors are ready to help you right now. Free adjustments and improvements. Find out the cost of your work
Now you know how to make cheat sheets so that you can cheat on exams, tests or tests. Many teachers know that students cheat and therefore they monitor students very closely. Even if you don’t have the desire to cheat, having cheat sheets in your pocket still gives you confidence in your abilities.
Do your cheat sheets correctly and good luck on your exams!
Reducing margins
The next technique that helps make text more compact is reducing the size of the margins. And although the efficiency of this method is low, saving even 5% of space in our case is a good result, because every millimeter is important.
Algorithm of actions:
- select the “Layout” tab again;
- Now we are interested in the “Fields” button - click it;
- A drop-down menu will appear. Scroll down and again select the last line - “Custom fields”;
- as in the previous case, a window will appear with document field parameters that can be changed. In the upper section “Margins” we should set the value to two millimeters - if it does not suit us, we can always go back and reduce or increase this interval;
- Confirm the operation by clicking “OK”.
If you try to make spurs in Word 2010 and earlier versions using this margin reduction, then when you print the document, a warning may pop up that the text content exceeds the boundaries of the printable area. You should not pay attention to this message, since its relevance is questionable - for quite a long time most printer models do not take these boundaries into account, although the warning for compatibility with ancient printing devices remains.
After using this technique, you will notice that the number of document pages has decreased.
ADVICE. It is advisable to perform all formatting, including those described below, not on a blank page, but applying them to the entire text is not the best solution. A small fragment of a page or two is enough to get visual results of the changes made.