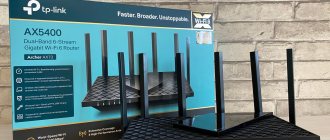
TP-LINK Archer C20 is one of the most affordable routers supporting the 802.11 ac standard in the company’s line-up and in the market as a whole. Let's get acquainted with this “baby”, and at the same time compare the performance of two similar models – Archer C20 and C50.
TP-Link Archer C20 V1 Wi-Fi routers and access points on
from 612 UAH
Suggestions: 11
Compare prices
Setting up the TP-Link Archer C20 router and firmware
The TP-Link AC750 router is a popular device on the Internet network equipment market in the Naro-Fominsk region at the dacha. The TP-Link brand produces quite powerful and reliable devices for the Internet. The manufacturer does not skimp on the quality of components and releases new models every year. Today we will take a detailed look at the technical characteristics of the model, and also provide detailed instructions for setting it up.
Setting up interactive IPTV television
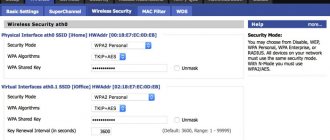
The TP-Link Archer C20 Wi-Fi router can work with Vlan virtual networks and allows you to connect interactive television from Rostelecom, Beeline or Dom.ru without any problems. To do this, go to the menu section “Advanced settings” → “Network” → “Internet”. So you will open the list of WAN connections and there will already be one line of the Internet connection created earlier. For IPTV, you need to create another one - click the “Add” button.
You need to create a connection type "Bridge". If your provider requires you to specify a virtual network number for digital TV to work (which you must first find out from technical support), then you will need to check the “Enable VLAN” box and indicate the network identifier in the “VLAN ID” field. Also, do not forget to put the number “4” in the “Priority” field. Click the "Save" button.
After that, go to the “Advanced settings” → “Interface grouping” section and click the “Add” button.
The window for creating a port group will open. Here you will need to specify another name - for example, “IPTV”. Below, in the field on the left, check the box for the LAN port that includes the TV set-top box. If there are several set-top boxes, then in the list we select all the ports to which the set-top boxes are connected. In the field on the right you need to select the “Bridge” type connection created above.
Click on the “Save” button. A new group has been created.
Go to the section “Advanced settings” → “LAN”:
Here you need to disable the DHCP server for the created group. Otherwise, the provider's set-top box will receive an IP address not from the provider's server, but from the router and, accordingly, will not work.
Now you can connect STB receivers and check the operation of digital TV.
Network equipment overview
The Archer C20 router is a universal device that is necessary for organizing a wireless Internet network at a dacha in the Moscow region.
The device of the model in question has advanced functionality:
- interactive television;
- media server;
- IP version 6;
- parental control;
- firewall.
This is a dual-band model that can be used for two frequencies. If the first channel is heavily loaded, the user can switch to another band. There is no built-in VPN server in this model. To connect to the Internet from your ISP, L2TP, PPTP and IPSec are used. The manufacturer does not provide an option to change the functions of the buttons.
Testing
To test the operation of the router, we used the PassMark Performance Test 8.0 benchmark, and the TCP routing speed was tested using two PCs with gigabit network ports, an ASUS PCE-AC68 adapter and an ASUS K501L laptop (Intel AC7260). We also compared the results obtained with Archer C20:
| Model | Archer C20 | Archer C50 |
| WAN - Internet access speed | ||
| WAN - LAN | 94.7 Mbit/s | 94.9 Mbit/s |
| WAN - WLAN (2.4 GHz) | 92.7 Mbit/s | 93.6 Mbit/s |
| WAN - WLAN (5 GHz) | 94.4 Mbit/s | 94.8 Mbit/s |
| LAN - data exchange speed on the local network | ||
| LAN - LAN | 94.9 Mbit/s | 94.9 Mbit/s |
| LAN - WLAN (2.4 GHz) | 92.9 Mbit/s | 75 Mbit/s |
| LAN - WLAN (5 GHz) | 94.5 Mbit/s | 95 Mbit/s |
| WLAN - data exchange speed between devices connected via Wi-Fi | ||
| WLAN - WLAN (2.4 GHz) | 94.5 Mbit/s | 32.5 Mbit/s |
| WLAN - WLAN (5 GHz) | 103.4 Mbit/s | 161 Mbit/s |
| WLAN - WLAN (2.4 + 5 GHz) | 183.2 Mbit/s | 178.5 Mbit/s |
| USB + HDD - using the drive as a Windows network drive | ||
| Reading | 8.5 MB/s | 8-9 MB/s |
| Record | 7 MB/s (LAN, WLAN 5 GHz), 4 MB/s (WLAN 2.4 GHz) | 7-8 MB/s |
As you can see, the Internet access speed for both routers is comparable and is limited by WAN bandwidth. There are differences in the results of LAN-WLAN and WLAN-WLAN routing for different configurations, but they are difficult to explain. Firstly, the results obtained do not allow us to identify a clear winner, and secondly, they may be associated with both hardware and software differences. In any case, for ordinary users for whom the models are designed, they should not be fundamental.
Execution
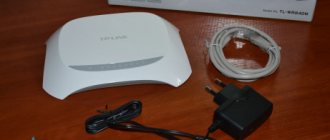
The appearance of the device is quite attractive. The top panel is dark blue, glossy. And the router underneath is beige. Compared to other models, the AC750 router stands out noticeably.
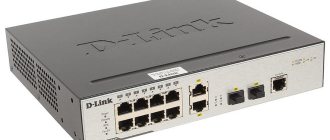
The device received three antennas for the Wi-Fi network. The signal is stable and reliable. There are 4 LAN connectors on the rear panel with an operating speed of 100 Mbit/s. There is also one connector for the provider cable. On the back of the device you can find a USB connector. There is also a reset and power button here.
You can connect a 3G/4G modem via USB to create a backup communication channel. You can also connect an external hard drive to this connector. On the back of the router there is a special button to disable the wireless broadcasting option.
Indicators and connectors
There are six LED indicators on the front panel of the Archer C20 V5.
The power indicator blinks during the boot process and stays on when the router is running. Two Wi-Fi indicators (separate for each band) report the status of the wireless network. But the Ethernet ports have one light for all. The Internet connection indicator shows what is happening with the connection to the provider: off - the cable is disconnected or there is no signal; lights up blue - the Internet is connected, lights up orange - there is a signal, but there is no Internet. The WPS light informs about the connection of devices: blinking slowly – connection is in progress, lit – the device is connected, blinking quickly – connection failed.
On the back panel, connectors and buttons are located from left to right. Immediately next to the antenna there is an output for the power adapter. Next to it is the power button. Then the RESET button (reset settings). Behind it is a button for passwordless connection to a wireless network (WPS). The WAN port for connecting the provider cable is indicated in blue. LAN ports of the local network are yellow.
We connect and prepare for work
The Internet kit for individual entrepreneurs with the AC750 router comes with a cable, documents and a disk. Before setting up the device, it must be installed in a suitable location. It is advisable to install the router where the signal will be distributed as evenly as possible throughout the house. Connect the power cable to the outlet. We use a network cable to connect the device to the workstation.
We connect the cable brought into the apartment from the provider to the WAN port. Then you can go to the device settings.
Preparing for setup
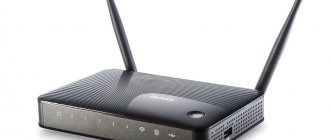
The router is removed from the box and unpacked. From there you get:
- power unit;
- Ethernet cable;
- CD disk.
To connect to the Internet, the provider must install a cable into the room. The router is placed next to the installed outlet. I recommend determining in advance the standard locations for devices (computers and other devices) that will be connected using a cable, so as not to drag unnecessary wires around the apartment later.
Now the next step is to connect all the connectors to the back panel:
- WAN (blue) – the cable transmitting the Internet is inserted here;
- connect the power supply (single-pin connector);
- connect the computer to one of the LAN sockets (the other end of the cable should go to the PC’s network card).
Now you can turn on the device by pressing the Power button. If everything is done correctly, the lights on the front panel will blink for a while, and then start to light constantly. But you will have to configure the Internet yourself.
Archer c20 router settings
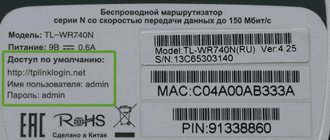
You need to configure the device via the web configurator. A label with the address and other model data is glued to the bottom of the device. Open a web browser on your PC or laptop and enter the address https://tplinkwifi.net. A window should open in which you need to log in. Enter the username and access key as indicated on the label.
You can use the default "admin" for both fields. If everything was entered correctly, you will be successfully taken to the web configurator where you can configure your router. Let's look at how to configure the TP-Link Archer c20 router below. You can choose the convenient auto-configuration option or perform manual configuration.
Overview and technical specifications
Wireless router Archer C20 AC750 is the youngest model in the TP-link Archer line. The laconic stylish design is the same as that of its more powerful colleague C2. Available in two versions – V1 and V5. In the fifth revision, the developers decided to remove the USB port and added a third antenna. The solution is ambiguous - signal strength is a necessary thing, but a USB port in a home router will not be superfluous. But here, apparently, the task was not to go beyond the maximum cost of the device, so we decided to save money. In the future, we will talk about the technical parameters and configuration of the router using the fifth version as an example.
The average price for Archer C20 is about 2,000 rubles.
The main advantage of this model is support for the 5 GHz frequency. If you’re going to replace your old router with something budget-friendly, then definitely one with dual-band Wi-Fi. Data transfer speed is 300 Mbit/s at 2.4 GHz and 433 Mbit/s at 5 GHz. Not much by today's standards, but considering that the network ports only provide 100 Mbps, this is quite enough.
Three antennas with a gain of 5 dBi provide coverage sufficient for a three-room apartment. The signal penetrates concrete walls well.
In addition to the main operating mode, the router can be configured as a bridge or signal amplifier.
Detailed characteristics of the device are available on the manufacturer’s website. To go to the description page, just scan the QR code on the box.
According to user reviews, the router occupies a worthy place in its price segment. There are no shortcomings as such - rather, minor quibbles.
Advantages and disadvantages
Low price
Easy and fast setup
Dual-band Wi-Fi
Big size
Sometimes Wi-Fi disappears, it is cured by rebooting
TP-link Archer C20i is another model in the same line. It differs from the C20 in the shape and type of antennas (they are built-in). Other differences can be seen in the table. This router is configured in the same way as the Archer C20.
TP-link Archer C20i
Automatic configuration of the TP-Link Archer C20 router
To perform the settings automatically, we need to find the “Quick Setup” subsection in the control panel. The installation wizard will do everything for you. The user only needs to follow simple prompts.
In a special window:
- indicate the country and city of residence;
- choose your service provider;
- indicate the connection type.
You can find out exactly what type of connection your provider works with from the contract. Your provider should have given it to you. If this information is not in the agreement, call the hotline. You need to register the login and password specified in the contract.
The router of the model in question is dual-band, so you need to select active operating modes. Users can leave two modes active.
Wireless Internet network settings in the office are performed automatically very quickly. After all the necessary parameters have been specified, click “Next”. Before saving the data, be sure to check that the information you entered is correct. If everything is correct, click on “Save”. The device will automatically reboot and function with the new settings.
Setting up via mobile application
To control Archer C20 from a smartphone, it is convenient to use the Tether mobile application. It can be downloaded from Google Play or AppStore. You can scan the QR code from the router, and your smartphone will immediately download the program.
To control the router, connect to it via Wi-Fi and launch the application. You will see the name of your router and its MAC address. To connect to it you will need to enter your login and password to access the web interface.
Through the application, you can configure the Internet, change Wi-Fi settings, and monitor the network status and connected devices in real time.
How to connect to providers manually
For individual configuration, it is better to set parameters manually. In the web interface of the device, find the “Network” category. Here we will be interested in the WAN item. All settings depend on which provider you use.
Let's look at an example:
- Rostelecom and Dom.ru. Since these two companies use the PPPoE network protocol, we select this option in the connection type item. Next, we indicate the name and key that are specified in the contract. We leave “Dynamic IP” as an alternative connection.
- Beeline. The company works with the L2TP network protocol. Investigator, we indicate L2TP in the connection type. The user name and access key are those specified in the agreement. Set up automatic address retrieval. The server name should be tp.internet.beeline.ru. When you make changes, be sure to save your settings.
- The company uses dynamic IP. The connection parameters are provided by the vendor. Identification is carried out through the physical address of the router.
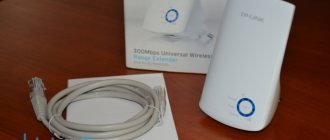
Wireless repeater TP-Link Archer RE200 AC750 class with support for 802.11ac
Content
- Delivery set, appearance and technical characteristics
- Settings and features
- Performance
- Conclusion
For many home users today, the terms “Internet” and “Wi-Fi” are synonymous.
Indeed, wired connections are relevant mainly for traditional desktop computers, while laptops, tablets and smartphones work well with wireless networks. On the other hand, when it comes to something more than website pages or communication in instant messengers, for example, online video, connecting smart TVs or media players, the question arises about the stability and speed of the network connection. In apartment buildings, the 2.4 GHz band today is in most cases so busy that there can be no talk of any quality of communication. You can partially try to correct the situation by installing your own access points in each room, but in this case no one can guarantee the speed. The second option to improve coverage is to use wireless repeaters. We have already encountered such devices several times on the pages of our resource. In this material we will get acquainted with the TP-Link RE200. This attractive model is equipped with two access points and is capable of operating both in the 2.4 GHz band and in the much freer 5 GHz band today. Moreover, in the second case, the 802.11ac standard is supported, although in its simplest form with a maximum connection speed of 433 Mbit/s. In addition, the device has a wired network port and can act as an adapter for connecting devices via Wi-Fi that do not have a built-in wireless controller.
Delivery set, appearance and technical characteristics
The device comes in a small cardboard box. It is decorated in light and bright colors. There is only a small description in Russian, but in English there is also information about the features of the model, use case and delivery set. We did not find any plates with technical characteristics.
Inside, the repeater itself is located in a plastic insert; the box also contains a small white patch cord, brief instructions in Russian and English, a warranty card and a mini-CD. The disc contains an electronic version of the printed instructions in English. In the technical support section of the manufacturer's website you can find documentation and firmware updates (though they date back to the end of the year before last).
In appearance, the model turned out to be quite attractive and stylish. In particular, this is ensured by the relatively small dimensions - excluding the fork, they are approximately 65x38x110 mm. The shape of the case is also complex and it is clearly clear that the designers have worked on it. True, it’s worth remembering that at the end of the summer of 2013 we tested a very similar externally model TP-Link TL-WA850RE.
To connect to the power supply, a standard two-pole plug is used. The device does not have a separate power switch. Due to the relatively large width of the case, the repeater may block adjacent sockets.
The body is made of white glossy plastic. On the front side we see a “diamond” texture similar to that of another well-known network equipment manufacturer, which is much more interesting than the usual smooth surface.
At the top we see a barely visible manufacturer’s logo, and at the bottom right there is a block of five indicators and a WPS button with a built-in LED. Depending on the state of the device, the color of the glow can be green or red, while the brightness is low, and they blink rarely.
On the underside of the case is a wired network port, as well as a hidden reset button. Despite its compact size, lack of ventilation grilles and built-in power supply, the case heats up relatively little during operation. The declared power consumption of the repeater is about 3.5 W.
The device is based on the popular SoC MediaTek MT7620A. The main processor handles the wired network port and wireless networks in the 2.4 GHz band. To implement operation in the 5 GHz band, an additional MediaTek MT7610EN radio unit is installed. The model's RAM capacity is 64 MB; an 8 MB flash chip is installed for firmware. The case cannot be easily disassembled, so we did not look under the cover. But judging by the photographs on the network, on the printed circuit board you can find contact pads for implementing a console port.
The model has two independent access points. In the 2.4 GHz band, 802.11b/g/n standards are supported with a maximum connection speed of 300 Mbit/s. For the 5 GHz band, 802.11a/n/ac can be used, and the maximum connection speed is 433 Mbps. As for the wired port, we note that it is rated at 100 Mbps connection speed and this will definitely limit performance in some scenarios. The declared AC750 class is obtained in this case by adding 300 and 433, followed by rounding.
The repeater was tested with firmware version 3.14.2 Build 150514 Rel. 38108n.
Settings and features
The main scenario for using the device in question is connecting it to an existing wireless network and creating two of your own with simultaneous servicing and wired clients. There is no option to work in access point mode.
An easy way to get started is to use WPS technology to connect to your main router. You don’t even need a computer or other device here, since the button to start establishing a WPS connection is on the device itself. You can check that the connection has been established using the indicators of the repeater or the system event log of the router. In this mode, the device creates wireless networks in the 2.4 and 5 GHz bands with the same name and protection as the network of the main router. So you don’t have to change anything on clients. They will independently choose the network that is most convenient for them. Note that the WPS button works specifically to connect the repeater to the router, but not clients to the repeater.
Of course, we are not talking about “seamless roaming” here, but for the vast majority of home applications this is not required. If necessary, you can now move the repeater to another location to expand the coverage area in the desired room. You can check the signal level of the main network by the color of the indicator on the repeater body, although only two options are available here (not including the lack of communication) - good quality (green) and weak signal (red).
Note that the repeater in this mode receives an IP address from the main router, so if necessary, you can access its web interface to change parameters. Its design is standard for this manufacturer - a menu tree on the left and reference information in the right column. But the only language is English. Note that to activate many parameters you will need to restart the device, but in this case this is not a significant drawback.
The second option for setting up the repeater involves using a computer or laptop to access its web interface. Here you can launch the built-in Quick Setup Wizard, which will simplify connecting the device.
The “Status” page shows the current operating modes of the device, including wireless network parameters, wired interface addresses, and general traffic statistics.
As we wrote above, the repeater usually receives its IP address via DHCP from the main router. If necessary, we can install it manually.
The model is also equipped with its own DHCP server, but in most cases it is more convenient to use this service in the router to configure clients.
Since the model uses a wireless network as the main connection to the router, it does not have much flexibility in its own radio module settings.
In particular, you can change the names of the wireless networks that the repeater creates, but the password for them is taken from the main router. Changing channel numbers will also not work. There is no power adjustment for radio modules.
The device has special “High Speed Mode” modes, when one radio module is used to connect to the router, and a second one is used to serve clients. But in tests we did not notice a significant effect from this option.
On a separate page there is an item for turning off the LED indicators on the device body.
The set of pages in the “System Tools” group is standard and includes updating firmware, resetting settings, saving and restoring configurations, rebooting and changing the administrator password.
The repeater does not have a built-in clock, so the event log entries look like messages from the past. Please note that it is possible to send the journal by email.
From the point of view of an inexperienced user, this model is a fairly simple device with all the necessary functionality and a simple installation procedure. But if you are used to dozens of pages of parameters in the web interface, this repeater may disappoint you. However, it copes with its basic functions, so the most significant note would be the lack of an access point mode, as well as the lack of password replacement for the device’s wireless networks.
Performance
To test the device's performance, we used an Asus RT-AC68U router and an Asus PCE-AC68 wireless adapter. These models support connection speeds of up to 600 Mbps in the 2.4 GHz band and up to 1300 Mbps in the 5 GHz band. All participants were tuned to the maximum speed of work if possible.
The distances between the router and the repeater and the repeater and the client were about four meters of line of sight. During testing, there was a significant number of neighboring networks on the air in the 2.4 GHz band. Let us note once again that in urban environments it is very difficult to objectively assess the capabilities of wireless equipment when working in it.
Performance testing was carried out between the repeater client and a computer connected to the main router when working with one/two and eight threads.
Let us remind you that the TP-Link Archer RE200 can connect to the main router only wirelessly (it does not support access point mode). In our case, judging by the router status page, it was 300 Mbit/s for 2.4 GHz and 433 Mbit/s for 5 GHz, which corresponds to the declared characteristics of the repeater.
The first graph shows the test results when the repeater is connected to the main router at 2.4 GHz. As for the client, on 2.4 GHz he was only able to connect at a speed of 144 Mbps, which is likely due to regional restrictions. The client's connection speed in the 5 GHz band was 433 Mbit/s. Note that the wired repeater port supports a speed of 100 Mbit/s.
As we can see, the maximum client access speeds to the main local network do not exceed 80 Mbit/s. And in the most difficult case, when both the repeater and its client use the 2.4 GHz band, they do not exceed 35 Mbit/s.
The second graph shows the scenario of connecting a repeater to a router in the 5 GHz band. Client connection speeds here were 300 and 433 Mbit/s for the 2.4 and 5 GHz bands, respectively.
It is quite expected that the highest results were shown in the scenario where only 5 GHz is used. Here you can count on more than 100 Mbit/s, which is no worse than other devices with a similar configuration. For a mixed option, when the repeater client works with 2.4 GHz, the results are generally good. Depending on the scenario, we received from 45 to 75 Mbit/s. This combination may be interesting for smartphones and tablets without 5 GHz support. The media bridge mode also performed well in this test - the limitation of about 100 Mbit/s is due to the parameters of the repeater's wired network interface.
To check the quality of the radio unit in the 5 GHz band, as the most interesting, we additionally conducted testing with the Zopo ZP920 smartphone as a client. This model has a dual-band wireless adapter that supports the 802.11ac protocol. The smartphone was tested at three points relative to the repeater - at four meters of line of sight, at four meters through one non-permanent wall and at eight meters through two non-permanent walls.
The results are quite satisfactory. Even at the most difficult point, we received a stable 50+ Mbit/s, which will be enough for the vast majority of mobile scenarios, including watching HD video.
With the exception of rather sad indicators when using the 2.4 GHz band, which were expected in a full airwave, the model performed well. It can be used both to expand the coverage area in the 5 GHz band and in media bridge mode.
Conclusion
The TP-Link Archer RE200 wireless repeater is interesting for its design, dual-band support and easy installation. This device can be useful for expanding the coverage of a wireless network, especially in the 5 GHz band. The model has a basic set of capabilities and settings and is aimed at the mass user. The most significant note about the firmware is, perhaps, the lack of an access point mode. Testing has shown that the performance of the repeater does not differ from other devices with similar hardware configuration.
TP-Link Archer RE200 is already on sale in domestic stores. Its cost at the time of writing this article was about 2500, and in this parameter the repeater clearly outperforms its competitors.
| Average price of TP-Link Archer RE200 |
| T-10989617 |
| TP-Link Archer RE200 Retail Offers |
| L-10989617-10 |
Setting up Wi-Fi
The Archer C20 device is capable of operating in two frequency ranges: 2.4 and 5 GHz. It is advisable to leave both modes active. Modes must be configured in separate tabs. During the initial settings, you need to set a name for the wireless network. You can create a new name or leave the default value.
In the “Security” subsection you need to install WPA/WPA2. Set a good password of at least 8 characters. For the key, use numbers and Latin letters. You can use the Guest Network option. Configured in the category of the same name.
You must set a different access key for this network. Use numbers and Latin letters. The “Access time” column determines the activity of the connection.
Setting up TP-Link AC750 in repeater mode
All modifications of the TP-Link AC750 router (Archer with indexes C) can function in repeater mode, that is, a signal amplifier of the main Wi-Fi network, and also as an access point. By default, the device operates as a router, but this mode can be changed if desired.
This can be done through the web interface by clicking on the “Wireless Mode” tab of the frequency that will be working (this is an important nuance, because if the main router operates at a frequency of 2.4 GHz, then the repeater must also operate in the same range).
Go to the “Basic Settings” item and activate the “Enable WDS” mode by checking the box next to it.
Now you need to start searching for available wireless networks by clicking the “Search” button and select the one you need from the list that appears. In principle, you can do without searching if you enter the name in the “SSID to which you want to connect” field. All that remains is to enter the password of your main network and click the “Save” button.
Now you need to go to the “DHCP Settings” tab, it is available in the menu of both wireless modes, and disable the DHCP server by selecting the appropriate selector. And click “Save” again.
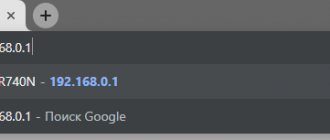
But that's not all. Go to the “Network” tab and select the LAN menu item. Here you need to specify the internal IP address of the router, which should not coincide with the main one. If, for example, the main router has IP 192.168.1.1, then for the TP-Link AC750 you can specify 192.168.0.1, but if this address is assigned to the first router, then it is advisable to increase it by one, that is, specify 192.168.0.2. Save the changes and reboot the router for them to take effect.
An easier way to configure the TP-Link AC750 as a repeater is through “Quick Setup”. The “Operating mode” menu item screen will open, in which you need to select the “Wi-Fi signal amplifier” operating mode. After clicking the “Next” button, you need to select the main network again and enter the password for it. On the next screen, in the “LAN Port Type” field, indicate “Smart IP (DHCP)”, click “Next” and carefully check whether we have done everything correctly, and then click “Finish”. The router will reboot, after which it will begin to work as a repeater, expanding the range of reliable reception of the Wi-Fi signal.
Additional settings
- Dynamic DNS. This option allows you to connect to the router via a remote domain name. To activate it, register your domain name.
- Safety. The Archer C20 router offers protection against DDoS attacks. By default it is disabled. To activate it, go to the “Advanced Settings” category.
- Parental control. Allows you to restrict access to children. The option settings are made through the web configurator. You set a schedule according to which access will be limited. In the subsection you can block specific web resources. Then children will not be able to visit them.
- Connecting a printer. Archer line routers are equipped with built-in USB connectors. Therefore, you can work with them as print servers. We connect the USB printer using a cable, then go to the USB settings and select the desired subsection. This should say "Online". If the function is deactivated, enable it.
- If you connect external storage, the user will receive a full-fledged media server. In the “USB Settings” category, select the “Media Server” tab. We need to come up with a name for our DLNA. Now you can add folders if necessary. We enable the function and save the settings.
Local network - connection setup
Before we start setting up the router, let's take a look at how the local network connection is configured. To do this you need:
Windows 7
1. Click on “Start”, then “Control Panel”.
2. Click on “View network status and tasks“.
3. Click on “Change adapter settings”.
4. A window has opened - here we see “Local Area Connection”. Right-click on it and select “Property”.
5. Now select “Internet Protocol Version 4 (TCP/IPv4)” and click “Property”.
6. A window has opened - here you need to check the boxes “Obtain an IP address automatically” and “Obtain DNS server address automatically”, then click the “Ok” button.
Windows 10
1. Click on “Start” then “Settings”.
2. Click on “Network and Internet”.
3. Select “Ethernet” and click on “Configure adapter parameters.”
4. A window has opened - here we see “Ethernet“. Right-click on it and select “Property”.
5. Now select “IP version 4 (TCP/IPv4)” and click “Property”.
6. A window has opened - here you need to check the “Obtain an IP address automatically” and “Obtain DNS server address automatically” checkboxes, then click the “Ok” button.
How to update firmware
Experts recommend periodically updating the firmware on Archer routers. You can download the software only from the manufacturer’s official website. Third party resources are unreliable.
You can update the firmware in several ways:
- We use the control panel. Among all users, this method is considered the simplest. In the web configurator, find the “System Tools” section, then find the “Update” item. To begin with, the system will prompt you to specify the path to the unzipped distribution. Click on “Update”. The firmware update procedure will take about four minutes.
- We use a USB device. After you have downloaded the firmware file, write it to external media. Then connect to the router. The update will be carried out through the control panel, as we described above.
Please note: through the mobile application on the phone, the user can only manage the router settings. It is not possible to update the firmware remotely.
Reboot TP-Link AC750, reset to factory settings
Some models of TP-Link routers and other brands have a combined Reset/WPS button, while some do not have it at all. The model in question has a separate Reset button, and you can use it to reset the device settings. But this method is not always simple - if the router “lives” in a hard-to-reach place (many place it somewhere on the mezzanine), then it is better to use the web interface.
To do this, go to the “System Tools” tab and select the “Factory Settings” menu item.
The next steps are clear - click the “Restore” button, agree with the warning that all existing settings will be reset to their original settings by clicking OK, and wait until the router reboots.
After this, it will need to be configured again. As for rebooting, there is no such button, but you can use the Power button to turn off the device and then turn it on again. You can also reboot remotely from the administrative panel.