Another detailed instruction for setting up TP-LINK routers. And this time we will configure the TP-LINK TL-WR840N. An interesting router model that is suitable for a small home or office. I have already connected everything, checked it, took a photo, and now I will write in detail and show you how to properly configure the TP-LINK TL-WR840N router so that it distributes the Internet to your devices and makes you happy with its work.
I won’t talk about the router now; I will review it and give my feedback in a separate article. And you most likely bought this router, and you are no longer interested in reading about its characteristics. You need to set it up faster. As for the setup itself, there are two options: configure it using the power of the utility that is located on the disk (which should be included in the kit), or through the router’s web interface. We will configure via the web interface. There is access to a variety of settings that you may need later, and you will already know where to find them. And not everyone now has the opportunity to run a program from a disk.
We will configure our TP-LINK TL-WR840N according to the standard scheme:
- Installing and connecting the router.
- Setting up an Internet connection.
- Setting up a Wi-Fi network on the TL-WR840N and protecting the wireless network with a password.
- Setting up IPTV (if your provider provides this service).
- Protecting your router settings.
If you have already configured a TP-LINK router before, then you can configure this model with your eyes closed, since everything is identical. And the settings are in Russian, which is important.
Description of the budget model TP-LINK TL-WR840N: appearance in the box
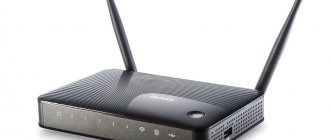
This router has a minimalist design. White plastic body. There are 5 indicator lights on the top panel along the front edge.
There are 5 indicators on the front that show the activity of individual buttons, ports and functions of the router
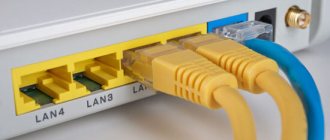
At the back there are a pair of gray antennas, 4 yellow sockets for LAN 100 Mbit/s and one blue socket for an Internet cable. To the right of the local outputs is a small key that combines two functions - WPS (hardware login to Wi-Fi without a password) and Reset (returning factory settings).
On the back there are 5 network ports and a WPS/Reset key
On the bottom panel there is a label with combinations for entering the router’s web shell with settings, as well as a mounting hole with which you can fix the device on the wall.
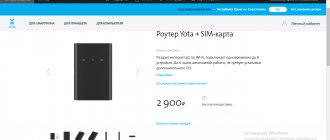
The router packaging contains a standard set of the device, an Ethernet cord for wired communication with a computer, charging, and a manual for use and configuration. The average cost of a model on Yandex.Market is 1,090 rubles.
Conclusion
The WR840N router is a high-quality device from the budget price segment. It has a high data transfer speed and can easily support several gadgets and devices at once, providing them with a high-quality network. A massive wall or a large living area will not be an obstacle for her.
pros
The advantages of the WR840N router include:
- a stable signal, provided by two antennas, covering a large area;
- hardware WPS button;
- stylish appearance;
- stable operation, high reliability.
Minuses
As disadvantages users note:
- boring and not very functional admin interface;
- non-removable antennas;
- lack of a USB port, which makes it impossible to enable many functions.
Table: about some technical features of the model
| Parameter | Meaning |
| Wireless standards | IEEE 802.11b, IEEE 802.11g, IEEE 802.11n |
| Antenna | 2 fixed 5 dBi antennas (from hardware version 2) |
| Frequency range | 2.4 GHz |
| Baud rate | 11n: up to 300 Mbps (dynamic) 11g: up to 54 Mbps (dynamic) 11b: up to 11 Mbps (dynamic) |
| Wireless Features | Enable/disable wireless broadcasting, WDS bridge, WMM, wireless network statistics |
| WAN connection type | Dynamic IP/Static IP/PPPoE/PPTP/L2TP/BigPond |
| Protocols | IPv4 and IPv6 support |
| Guest network | There is |
| System requirements | Windows 2000/XP/Vista™, Windows 7, Windows 8, Windows 8.1, Windows 10 or Mac OS or Linux based operating system |
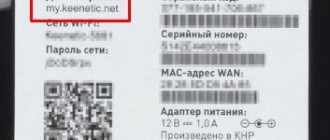
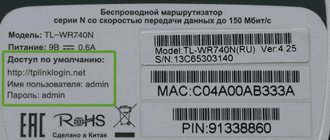
How to get to settings: web page address, what to enter to log in
How to get into the router settings: go to any web browser (Opera, Google Chrome, etc.) to 192.168.1.1. If it doesn't work, take 192.168.0.1.
On the authorization panel in the “admin panel” with settings, write admin in two empty lines and confirm the login.
Log in to settings using the word admin
Changing the password to enter settings
We recommend that you immediately change the codes for logging into the “admin panel”. Go to system tools (section in the list on the left) and open the “Password” block. Write the old data (the word admin) for authorization, and then immediately the new ones. Don't forget to save the information.
Enter a new password for “admin”
Preparatory work
Before setting up the router, it is necessary to carry out preparatory work. First of all, you need to correctly determine the location where the device will be installed. The router should be placed away from household appliances (TV, microwave, radio). If there are obstacles in the signal path, the data transfer speed will be significantly lower.
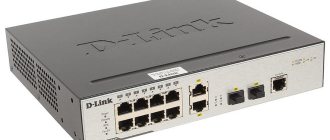
Next, you need to connect the patch cord to the device into the “Dedicated Ethernet Line” connector. If you have a desktop computer in your home, you need to connect it to the router using a patch cord. The final step is connecting the device to the electrical network.
Configuring operating system settings:
- Open Network and Sharing Center.
- Find the “Network Adapter Settings” tab.
- Right-click on the selected connection and click “Properties”.
- Put o.
- Click the “Customize” button and activate the “Receive automatically” option.
Selecting the Internet protocol
Carefully read your agreement with the provider - there should be information about the Internet protocol with which the provider works in your case, as well as all the parameters for settings. If you don’t find anything there, consult your operator’s technical support specialists.
L2TP or PPTP
The first protocol is used, for example, by the Beeline provider. Both protocols belong to VPN networks and are configured according to the same scheme:
- Expand the “Network” settings block. We remain in the first WAN tab - here all protocols are configured. We indicate PPTP or L2TP on the pop-up panel with connection types.
Install PPTP or L2TP
- We immediately write the password and user name, which are specified in the agreement with the supplier company.
- We determine the type of address - static or dynamic. If you choose the first one, you will need to additionally enter the IP, DNS servers, etc. We enter the VPN server address that your provider has.
- Click on the central button at the bottom “Save”.
Don't forget to click "Save" below
PPPoE protocol
This type of Internet is found in Rostelecom, TTK and other operators. You can establish such a connection using the following instructions:
- Select PPPoE on the panel. We rewrite the user name and password from the agreement twice.
- If necessary, indicate the type of secondary connection - dynamic or static.
- In this mode, we leave the network constantly active.
Set PPPoE to connection type
- Click on “Connect” and then on “Save” just below.
Static or automatic IP
If you have your own Internet address given to you by your provider, select “Static” among all protocols and carefully fill out the form with the data from the agreement with the provider.
Set a static address in the first menu
If you have a dynamic connection, you don’t need to configure it in any way - just select it in the panel and click on “Save”.
In the dynamic standard, you do not need to enter any data
Reviews
Analyzing the opinions presented, a tendency towards positive assessments immediately becomes visible. Consumers who purchased the WR840N budget router actively praise it.
- Alexander, 35 years old, Moscow, engineer. This user notes the unusual design, thanks to which the router fits perfectly into the interior of his apartment, made in white colors. In addition, the man noted the presence of rubberized feet, thanks to which the router behaves steadily on any surface. Among the technical features noted by the user, the stability of the signal and excellent penetration power stand out, thanks to which it easily penetrates several walls, with virtually no loss of speed.
- Daria, 28 years old, St. Petersburg. The user highlighted the bright appearance that fits into the “high-tech” concept. The router has been used for three months without any problems. The signal is stable in a one-room apartment on two smartphones, a tablet, a laptop and a personal computer.
- Alexander, 16 years old. This user purchased the WR840N as a temporary replacement for a more expensive router from another manufacturer. But he hasn’t changed it for several months. According to him, the router distributes the Internet perfectly, the signal does not “sag,” which is especially important in online games. It works around the clock, has not been turned off since the moment of purchase and first connection. There have never been any problems or failures.
Podgornov Ilya Vladimirovich All articles on our site are audited by a technical consultant. If you have any questions, you can always ask them on his page.
Setting up a Wi-Fi network: name and password
Wireless mode is configured as follows:
- Go to the “Wireless 2.4 GHz mode” parameter block. In the first paragraph, put a black circle next to “Enable” to basically activate the network.
- If you don't like the standard network name, feel free to change it. Even write the Russian version of the name in English letters - the system will not accept Russian characters and will show an error.
Set the desired network name and turn it on
- In the mode (network standard), it is better to leave the mixed option. We do not change the channel and its width unless necessary. We set up the access point broadcast so that it can be seen by devices nearby, including your computer, tablet, phone, etc. Click “Save”.
- In the second paragraph about security, we set the value that the system itself recommends to us. We write the code in the password - it is better to use not only numbers, but also letters (again, English). Save the changes at the bottom of the page.
Installing recommended protection
How to set up TV display (IPTV function)
If, in addition to the Internet, you also connected a TV, follow these steps:
- In the “Network” block, go to the third tab with IPTV parameters. Now the setup depends on your provider. Look in the contract to see what technology your operator uses.
- If it does not support IGMP, turn off the option in the drop-down menu. We define the mode in the menu below.
Select a mode from the drop-down menu
- If you specify a regular bridge, another panel will appear - on it put the number of the LAN socket (yellow) to which you will connect the cable from the TV set-top box. Click on “Save”. After that, connect the set-top box to the router and turn it on. Wait until synchronization occurs and the picture appears on the TV.
Install a port for the set-top box
Possible malfunctions and ways to eliminate them
Router TL-WR741ND: how to connect and configure
When working with the WR840N router, problems and malfunctions inevitably appear. For inexperienced users, this becomes a reason to call a specialist. However, fixing problems yourself is quite simple.
- After problems arise, the easiest way is to disconnect the router from the power supply, wait about a minute and turn it back on. As practice shows, this is enough to solve 9 out of 10 problems caused by internal failures.
- If this does not help and the Internet does not work, the next step is to call the technical support of the provider. A specialist will find out the cause of the problem. If it arose due to the fault of the company providing Internet services, it will correct it.
- Sometimes, especially if there are animals or small children in the apartment or house, the cable through which the Internet is supplied by the provider may be damaged. If you find a damaged area, you need to replace it. This is done for a fee by specialists from the provider.
- The problem also appears due to incorrect settings of the tp-link tl-wr840n router or changing fields in the administrator interface: the connection type is set incorrectly. You can look for the reason, but it is difficult for an inexperienced person to do this. It's easier to reset the settings to factory settings.
Changing the parameters of the local LAN network and DHCP server
To fine-tune the local area, you need to do the following:
- In the “Network” block, go to the second section LAN. Here you can change the IP address of your router in the local area (you go to this address to get to the device settings).
Set a different router address if necessary
- To configure DHCP, go to a separate block on the left. We will definitely activate the server so that it gives an address to each new device on the network.
- We specify the starting and ending addresses, which will determine the range of these local addresses. Click on “Save”.
In DHCP, enable the north and define a pool of IP addresses
FOR UPDATE
IMPORTANT: To avoid problems when updating the software, please read the following information about the update procedure. Check that the hardware version and software version match
Installing the wrong software version may damage your device and void your warranty. (Usually V1.x =V1)
Check that the hardware version and software version match. Installing the wrong software version may damage your device and void your warranty. (Usually V1.x =V1)
It is NOT recommended to install a software version that is not intended for your region. Click here to select your region and download the most current software version.
- DO NOT turn off the power during the update process as this may damage the router
- Do NOT update your router software over Wi-Fi unless this is the only way.
- It is recommended that all users stop using all Internet applications on the computer or disconnect the network cable from client devices before updating.
Note: Configuration files may not be installed correctly on new firmware versions that require a factory reset.
Recommendations for updating software: Wi-Fi router, Wi-Fi router with ADSL2+ modem, Wi-Fi signal amplifier
| TL-WR840N_V2_150929_RU | |||||
| Publication date: 2015-09-29 | Russian language | File size: 3.69 MB | |||
|
Port forwarding
If you need to add a new virtual server (forward some ports), follow these instructions:
- On the router settings page, click on “Forwarding” on the left. In the updated window, select “Add”.
Click on “Add”
- Among the port forwarding settings in virtual servers, you will find fields to fill in: Service port - this is the port that your device will use on the router’s local network for the required service.
- The external port is the port that will be used to forward traffic to the service port.
Fill out the form carefully to create a server
Assistant program from the manufacturer
First of all, let's get acquainted with the automatic configuration program from the manufacturer ZyXEL. The program is called Netfriend.
Before starting the setup, if the router has already been configured before, then we do a complete reset. To do this, press the “Reset” button on the back wall of the device and hold it for 10 seconds.
Reset button
Next, we take the disk included in the package and install the program on the computer from which we will further configure the router.
Program installation
Insert the CD into the computer's CD drive and the main program window will open. If autorun of disks is disabled on the computer, then launch the disk through “my computer”.
Main program window
Select the first item in the list – setting up Internet access. The installation of the Netfriend program will begin.
Program Installation Wizard
During the installation process of the program, the installation wizard will offer to install Yandex Bar. Whether or not to install the add-on is at your discretion.
After successful installation of the program, a shortcut will appear on the desktop, with which we launch the assistant.
Selecting the router operating mode
The first window after starting the program will be a brief instruction on how to prepare for the settings. It is advisable that all recommendations be followed.
Introductory instructions before starting setup
Click “Next”. The next step is to choose what exactly you want from the router. You can either start setting up, change the administrator password, or run diagnostics on the device.
Choosing further actions
Of course, we are interested in setting up the router, so we select the first item in the list. Netfriend will immediately begin automatically searching for a router connected to your computer. Our router should already be connected to the computer and turned on (except for the WAN port).
Selecting a provider, setting up a connection
In the next two steps, select the items connected to a leased line and setting up an Internet connection. Next, Netfriend will ask you to select a country, city, and provider from the list provided.
Choosing a provider
This list is quite large, all large and medium-sized providers are present in it, the probability of not finding yours is very small.
The next step will require us to enter the physical mac address of the router. It’s difficult to give any advice here, since further actions depend on the specific provider and connection technology. Some providers link the user account to a mac address, some do not. For your case, take the agreement with the provider and carefully read the relevant section. If everything is too complicated, we take the phone and call tech. support.
For example, let's enter the mac address of the router.
Selecting a mac address
And the final part of setting up the connection is entering your login and identification password. They are also necessarily present in the contract.
Entering your username and password
That's it, the setup is complete, then we try to access the global network.
Internet access
At this stage, the program will ask us to connect the Internet cable. We connect it to the WAN port.
Connecting an Internet cableAfter the indicator LED on the front panel lights up, thereby informing us that the Internet cable has been detected, click Next.
Finally, the program will offer us further actions:
- Set up a wireless Wi-Fi network;
- Change administrator password;
- Finish setup and exit.
Select the last item (or the one you need), reboot the router and try to access the Internet. If everything is done correctly, there should be no problems.
Factory reset
The hardware method is to hold down the Reset key on the back of the gadget itself (hold it for 10 seconds in total until the LEDs blink). When they light up, let go and wait for the reboot to complete.
Software method - open the “System Tools” settings block, go to the “Factory Settings” tab - immediately click on “Restore”.
Click on “Restore” and confirm the action
Upgrade the OS (firmware) of the TP-LINK TL-WR840N router
How to install a new firmware version on a model:
- Everything is done manually. We go to the manufacturer’s website - find links to download the latest firmware and download the file. It will be in the form of an archive, so after downloading, open it and extract the bin document from it.
Download the firmware from the official website
- In the “admin panel” of the router, in the same system tools, select the third item for upgrade.
- Click on “Select”. We launch the already unpacked OS installation file and begin the update. We wait a couple of minutes (it may take 5) for the system to install everything. We don’t touch the gadget, we don’t remove the cord from the outlet, otherwise you risk being left without a router.
Upload the firmware to the web page
How to reboot the router
You can do a hard reset - just unplug the power cord from the outlet, wait 10 - 15 seconds, and then connect the device to power again. Wait until it loads.
Another option is software. In the “admin panel” we go to the system tools and open the item of the same name “Restart”. Click on the button in the section. In the same block, you can configure the router to automatically reboot according to a schedule (every day or on some days - checked). The exact reboot time is also selected.
Click on “Reboot” and confirm the action
But keep in mind: the router will reboot according to its internal time, and it may differ from yours. To check this, go to the “Time Settings” section and set the correct one.