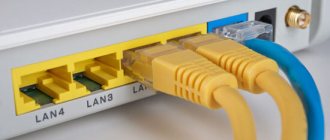
Hello! The topic today will be a little strange, but what can you do? As they ask, I answer. You can't please everyone, but you have to think about something.
Guys, this is a general article about setting up all TP- Link router models. I highly recommend that you search on our website for settings for your specific model - you will save both time and nerves. It’s better to download the manual from the official website - there is much more information there.
Another request - if you haven’t found any point, you still have questions, there are corrections - leave comments. I had a lot of TP- Link routers, we’ll come up with something together.
Customization goals
The main task of an ordinary home router (and TP-Link is one of the leaders in this market, so their models can be seen in half of their neighbors) is to please the owner. What does the owner need:
- 24/7 internet via Wi-Fi.
- A working local network (less often, but some people drop files, use a printer, and watch movies on TV).
- Other rare functions - everyone has their own thoughts, an individual approach is needed here, with this it is better to immediately comment.
In total, we need to connect the Internet during this manul, and the local network will configure itself. In fact, there will be nothing complicated, and the generality of the topic will not greatly affect - all routers are configured almost identically for basic functionality. TP-Link is no exception - I tried a lot of them. So watch, do, think about it, but if you have any difficulties, look for instructions for your model from us.
Before setting up
We will need:
- Router
- Cable connecting the router to the power supply
- Network cable connecting from router to computer/laptop
- Internet provider cable in the apartment (Ethernet or ADSL)
- A computer or laptop with the ability to connect via wire (you can, of course, use a smartphone or tablet, but some models don’t like that, which is what I asked you to look for for your model)
- Login and password for connecting to the Internet
- Login and password for connecting to the router
A few clarifications. If everything is clear with the device itself, then you need to find your login and password for the Internet. Usually it goes straight into the contract. If not, contact your provider by phone or in person. Sometimes they will understand.
Another problem is the data for connecting to the router for further configuration. Here you need to get:
- Connection address
- Login
- Password
Usually this is all located on a sticker under the router itself. Something like this:
If suddenly there is no sticker, try these values:
- Address: 192.168.0.1 or 192.168.1.1 or https:// tplinklogin. net
- Login: admin
- Password: admin
If during the setup process the values do not match, then there is a possibility that someone else used the router (even if it is new). Just reset the settings and everything will be as it should (more about resetting below). Sometimes it is even better to reset the settings to default than to reconfigure.
Why doesn’t it go into the router settings and what to do
In principle, I have already talked above about all the main possible reasons that users most often encounter. Especially for the lazy, I will once again briefly list them all:
- The device from which you are trying to enter the router settings is not connected to its local network or was accidentally disconnected. Check the connection. If the connection is via cable, try disconnecting it and connecting again. If necessary, replace the cable.
- The computer is connected to the router simultaneously through 2 interfaces - via cable and via Wi-Fi. This happens all the time among beginners. Disable one of the interfaces.
- You entered the symbolic URL or numeric IP address of the router incorrectly and therefore its control panel does not open. Check that the address is spelled correctly.
- The error “Invalid password” pops up. Check if you entered the password on the sticker correctly. If it doesn’t work, it means it was changed earlier and in order to get on the router, you will have to reset its settings.
- Your router is down. This also happens. In this case, the device behaves inappropriately. Try resetting it using the “Reset” button.
And finally, about the most unpleasant thing. Defects and hardware failures in routers also happen, although quite rarely. In this case, you will need to take it to a service center, or to the trash and buy a new one!
Installation and activation
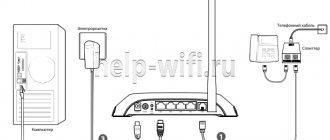
So, let's start assembling the structure. Make sure the router is turned on:
- We place the router in a convenient position - it’s enough to reach both the Internet cable and the computer/laptop. How to install the model depends on the device itself - you can put it, you can hang it. Routers are generally unpretentious things.
- If there are removable antennas, we install them.
- We connect it to power. Many TP links have an “Enable” button on the back - don’t forget to click on it. We look to see if the indicator lights are on (if any). If they are on fire, we continue.
- We connect our Internet channel - be it an Ethernet cable, a telephone cable, or even a USB 3G/4G modem - it depends on your needs and capabilities. As a rule, another light comes on when the cable or USB device is successfully connected. The most important thing is that the cable is connected to a separate WAN connector - it usually differs from other ports in color. Don't get confused.
- We wait about a minute - the procedure for identifying connections can sometimes take a long time, so there’s no shame in it. In the meantime, it’s thinking, read on.
What is the difference between the access point mode on the router?
Access point mode differs from it in that two routers are connected to each other via cable. Such a connection is more stable, which means that losses in signal quality and final speed within the network are reduced. That is, if you want to increase the WiFi reception area and at the same time minimize the negative aspects, then you should configure the second router as an access point connected via wire.
Another reason to use this method is when you have an old router with a weak WiFi module, but with standard LAN ports that support speeds of up to 100 or 1000 Mbit/s. This means that the speed via cable will be adequate, but via a wireless signal it will no longer meet modern requirements. In this case, you can just take a more modern router with fast WiFi and configure it as an access point.
Indication
More for your reference. Main indicators on the panel. May vary from model to model, but everything is approximately the same everywhere. Very useful to watch when you need to quickly analyze a problem.
- Nutrition . There is a separate light bulb. Even if nothing is connected, Wi-Fi is not working, it will still light up when the power is on.
- Internet . Active internet connection. Initially disabled. When connected it lights up, but during active use it usually flickers very quickly.
- WAN (this includes an Ethernet connection, a telephone ADSL connection, and a USB modem) - shows the presence of the connection itself (without the Internet). We connected the provider's wire - it caught fire. Sometimes combined with the previous lamp. For example, in ADSL it initially blinked when the line was established, and after connecting it simply glowed. But if it doesn’t light up, then you need to look at the wire.
- Wi- Fi is usually turned on initially, but can be turned off in the settings. If there is a wireless network, it will light/flicker/blink.
- WPS . Establishing a quick connection using a key. Usually starts blinking when you press a special button on a device with WPS. Available almost everywhere, but may be absent.
- Network ports. Also common lamps - on the back there are LAN ports for connecting wired devices to the router. So, when connected, the corresponding indicator immediately lights up. Usually there are about 4 ports, and the same number of lamps.
- USB. Likewise, if connected, it lights up. There may be other lamps, just look at the model. And something may be missing.
All. The preliminary procedure was carried out. Next, connect to your computer/laptop.
Preparation
The first step is to install the device. Most often, the router is installed in the center of the room. This is the most attractive option, since obstacles (walls, furniture, household appliances) will not interfere with the propagation of radio waves.
In addition, keep in mind that the Ethernet cable that your provider installed in your apartment is not stretched, otherwise the connector may become loose, and you will have to crimp the twisted pair, and for this you need a specialist or a special tool.
Connecting a TP-Link router
You can try to do the setup from a PC, a laptop, a tablet or a phone. Another question is that the Wi-Fi network will not always be available, so the classic option is to set up via wire. But the whole point here is in the connection. All other actions are the same. So I propose to consider further connecting via a laptop - there you can use both Wi-Fi and a wire.
- The wire . Everything is simple with the wire. We connect it and see that the indicator light comes on. Did it catch fire? Then everything is ok. I won’t describe all the problems; sometimes you may need to reset the operating system’s network settings. Or maybe something more interesting. So feel free to write your questions and experiences in the comments. From my notes, it is important to connect the wire to the LAN connector. Don’t confuse it with the WAN - the provider’s cable goes there; if you confuse it, you won’t be able to connect.
- Wi- Fi . There is nothing complicated either. We search the networks for a network with a name something like TP-Link with the best signal and connect to it over the air. The default password is usually empty, or is specified in the settings on the same sticker. There were times when it was impossible to connect at all. But the whole point was that the neighbors also had a TipiLink, and even a more powerful connection) In general, you won’t miss it.
How to get into the router settings via phone or tablet
Today, setting up your Wi-Fi router is as easy as setting up from your computer. The control panel of a network device has now been adapted for small phone screens, and therefore this process is no longer as hassle as it was 7-8 years ago. The procedure for entering the router settings is the same as in the case of a PC: on a phone connected to the local network, launch a web browser and write its address from the sticker in the address bar:
After this, you will need to enter a password for authorization and then the so-called “personal account” of the router will open, in which you can change the necessary settings.
By the way, there is another cool way to configure a router from a smartphone and subsequently manage its settings - this is a special mobile application from the developers. In the picture below you can see an example of such applications from TP-Link and Asus. Any major manufacturer of network equipment now has its own special application for configuring routers:
Branded mobile applications are also released for Wi-Fi MESH systems, and therefore now their basic setup has been simplified to the maximum so that any beginner can figure it out.
The main problem due to which the user cannot access the router settings through the phone is disabled Wi-Fi. The point here is that if the router is not configured, then there is no access to the Internet through it. A smartphone or tablet, seeing that there is a Wi-Fi network without the Internet, turns off and goes online via the mobile network. In this situation, the router control panel itself will not be accessible. Be sure to take this into account, otherwise you will suffer!!!
Authorization in the web interface panel
It's time to try going to the settings panel. To do this, go to the address recognized above, enter your username and password.
If suddenly the password does not work, reset the device to factory settings. On the back of the panel there is usually a Reset recess with a button inside. We hold it in the on state with a needle for 10 seconds and try to connect again - everything should work out.
There is usually nothing special about your personal account on the main page. Just general information:
Unlike the screenshot above, when turned on for the first time, the IP address values will be zero: 0.0.0.0. The figure already shows a successful connection establishment.
ADSL, Ethernet, USB
Once again, I repeat that all routers are built approximately the same. There is only a slight difference in the connection technology: via an ADSL telephone cable, via Ethernet, via a USB modem.
Everywhere you will be required to enter a login and password from the provider. If you have any doubts, still find a review for your model. Here, for complete coverage, I will take an ADSL modem - there are a little more settings for the connection. So, if you use a modern cable, you will have fewer possible problems.
It doesn't matter what operating system you use - Windows, Linux, Mac OS, iOS, Android or something else. The setup will still take place through the browser on the web interface.
Internet setup is easy
Any modern modem is now equipped with a convenient setup wizard, and also in Russian. Now in my model it’s written like this – “Quick setup”. Everything is really shown and explained there in great detail, just for dummies. Therefore, I will not dwell on this extensively here, I will simply give step-by-step instructions on what he usually does:
- Greeting you.
- It asks you to find out how you want to use the modem - set something like “Connect to the Internet”.
- It will ask how you want to do this - usually select PPPoE mode.
- Enter the login and password from your Internet provider.
- Usually here he asks about activating the Wi-Fi network. Asks you to create a password for her.
Starting setup through the wizard
Sometimes a special disk is supplied with the router. Usually there are no drivers on it, but a software setup wizard. The differences from the web interface are minimal.
That's all! All settings. Continuous further, further, further. So next I’ll show you a little more on the old modem with screenshots. Suddenly you need to use something like this. What’s cool is that all TPLink models have a very similar interface in one way or another.
Setting up the Internet is difficult
Everything is the same here - initially we are looking for either a quick setup, or Quick Setup, or Settings, or Configurations. It can be called differently. Here's an example:
What is important to do here:
- WAN Link Type – PPPoE – a common type for our networks, connection type.
- VPI/VCI – 0/33. At Rostelecom I had 0/35. We are only talking about old telephone connections. This parameter was always included in the contract next to the login and password. The same difference and complexity compared to new networks.
- PPP Username and PPP Password – login and password.
Everything else isn't that important here. The names may vary slightly on your model. Especially if they are in Russian) But you get the gist. Do this, and the Internet will appear on the router. The indicator will signal this.
Automatic configuration
Automatic router setup from TP-Link begins with determining the connection type:
- Select “Quick setup” in the navigation menu.
- Click on the “Next” button.
- Select a method for determining the connection type and telecommunications service provider.
- ABOUT.
- Look into the agreement concluded between the subscriber and the provider. You need to find the username and password. Enter your credentials in the appropriate field.
- If you have a dynamic IP address, the MAC Cloning window will appear. If you are connecting to the Internet from a host computer, then you should o.
- If you are using a static IP address, you will see a different window on the screen. You must specify the service provider's IP, subnet mask (255.255.255.0), default gateway, primary and secondary DNS. All necessary information can be found in the contract for the provision of telecommunications services or call customer support. It makes no sense to give specific examples, since we all use the services of different providers.
- Next you need to configure the wireless mode. In the “Wireless Broadcasting” item, select “Enable”. In the “Wireless network name” section, specify a custom name for the access point; you can use the default name. In the “Region” tab, indicate “Russia” or another country. In the “Mode” item, it is recommended to use “Mixed”. Leave the “Channel Width” and “Channel” parameters unchanged. The device will automatically determine the preferred one. Select the maximum data transfer rate “300 Mbit/s”. Set the encryption protocol to “WPA2-PSK”. Come up with a unique access key combination.
- Click "Finish".
If everything is connected, then you can go to any website on the Internet to check the connection. For more advanced users, below we suggest performing the configuration yourself to customize the settings for yourself.
Wi-Fi setup
Usually the whole point of setting up WiFi comes down to turning it on and setting security parameters. Sometimes it all comes together on one page. The setup occurs either automatically from the wizard, or through the menu items Wi-Fi, Wireless, Wireless mode or something like that.
Basic settings: Wireless – Basic:
What's important here:
- Enable Wireless – enable the wireless mode itself.
- Hide SSSID Broadcast – hides a network from the list of networks. On the one hand, it’s cool that no one can find your network without third-party applications. On the other hand, when connecting all your devices, you will have to manually enter the name of the network - and this is not always convenient. And modern Wi-Fi security allows you to leave this option unused. I assure you, if someone wants to hack your network, this option will definitely not save you.
- Wireless Network Name – network name. So it will be visible in the list of networks. Write something different from your neighbors)
Attention! Changing the network name will reset your current Wi-Fi connection. You just need to reconnect manually.
Now let's move on to Wi-Fi security: Wireless – Security:
Again on the safety points:
- Enable WPS – set to Disable if you do not use WPS. This is the ability to connect to a device without a password using the WPS function. Yes, there is a password there. But this password is searched faster than the password from WiFi itself. Modern models have all the necessary protection against brute force, but careful... If not necessary, turn it off.
- Network Authentication – type of network authentication. Determines the security level by specifying encryption. You need to select - WPA2 . And only so.
Do not use WEP - this system is very easy to hack!!!
- Wireless Network Key – password to your network. Use at least 10 characters, do not use simple constructions, use letters and numbers. The more complex the better. This is your first line of defense.
All. After saving, you can re-login to your network with a new password. This completes the basic settings. There is Internet, the network is active. You can use it. And this is how the setup works on any device.
Nothing succeeded? There are comments where you can ask your question. Just don't forget the name of your model and a detailed description of the problem!
Netis router as a wireless access point
On Netis, setting up this mode is a little more difficult - approximately the same as on Asus routers. We need to go to "Anvansed"
And open the “Wi-Fi Settings” subsection in the “Wireless Mode” menu. Here we are interested in the following points:
- Radio mode - select “Access Point”
- SSID - coming up with a name for the future wifi network
- Broadcast SSID - set “On”
- Authentication type - select WPA2/PSK
- Password - set the key to connect to the signal
Advanced router settings
Below I will give only a description of the possible functionality of routers. Options that are not used very often. Use it or not - only according to your needs. Experienced specialists usually figure things out on their own, but it would also be interesting to see such people in our discussion thread.
It is better to clarify the settings below for a specific model.
- Channel – can be set from 1 to 11. Usually there is an Auto mode. That's what we need. But if there is some kind of network load from neighbors or devices, you can try switching the channel, and suddenly the connection will improve. Use at your own risk.
- Mode – protocol for working with Wi-Fi. Now there are b/g/n and b/g/n+ac. You can't go wrong with choosing more. All current standards are compatible.
- Network bridge. Many routers allow operation in repeater (or repeater) mode. The essence comes down to intercepting a visible signal and repeating it with amplification. To reach the farthest room. Usually this setting is not visible, but it is present in many places. For me, it’s easier to purchase a separate repeater, but it’s more convenient for everyone.
- Filtration – wide range to reject different devices. Typically, access is filtered by MAC address. But you can also filter access to the Internet by issued IP.
Amplifier
In this operating mode, TP-Link TL-WA801ND will connect to the main router, and then you need to configure the mode. Instructions:
- Log in, go to the management console, select Operation Mode and the Repeater function, and then click Next.
- In the new menu, click the Survey button - a window will open in front of you, where all active Wi-Fi points will be indicated. Select your network and click the Connect button next to the desired connection.
- You will return to the reverse menu, in which a new Password line will appear - enter your network password into it, and then click the Next button.
At the end, the DHCP setup menu will open - you do not need to activate this feature!
The setup in the “Repeater” mode is presented in the following video:
However, pay attention to the IP Address item - for correct data transfer, both devices (the main router and our amplifier) must be within the same subnet (that is, their penultimate digits of IP addresses must match). You can find out the address by looking at the sticker on the bottom of the equipment.
If the devices use different addresses, then in the IP Address menu you must manually change the corresponding number so that they match. Now click Next, and then activate the Reboot function to reboot.
Firmware
Use in special cases. Usually everything works great out of the box. Only for those who know exactly what they are doing. Update plan:
- Download the firmware for your model from the official TP-Link website or a third-party forum with full confidence in compatibility.
- In the panel, go to “Software Update”. Select the downloaded file. Click “Update”.
- Installing new firmware takes up to 5 minutes - do not reboot the router during this operation - the device may be damaged.
- The device will most likely be rebooted.

