Most TP-Link router models have a USB port. It is used to connect USB drives, printers, and USB modems (on some models). Today I will show you how to connect a flash drive or external hard drive to a router, and without complex settings, access a USB drive over the network from almost any device. Simply put, from a computer or even a mobile device (Android) we can access a flash drive that is connected to a TP-Link router. Devices connected via Wi-Fi or a network cable will be able to access the drive. It will be possible not only to view files on the drive, but also to write and delete.
Previously, I already wrote an article on setting up FTP on TP-Link routers. This is also a good way to access a drive that is connected to the router, but the settings are more complex. And we will set up regular network access and connect a network drive in Windows so that there is convenient access to the flash drive.
If you want to watch files on your TV that are on a USB drive connected to the router, then it is better to set up a DLNA server. I wrote how to do this on a TP-Link router in a separate article:.
Also, a flash drive connected to the router can be used to download files offline. If your router model has such a function.
Purpose and features of connection
Before you begin the connection procedure, you should decide what result you want to get.
Most users want to use an external hard drive to store data on a closed home network. What does this give? Thanks to the router, all the data that is on the drive will be available in every device connected to the router. In most modern routers, on the rear connection panel you can find a standard USB port of 2.0 or 3.0 technologies. The speed of data transfer between connected gadgets depends on this digital indicator. In some models, manufacturers build in two ports at once.
Devices that can be connected to the router:
- External hard drive;
- Any media player with data and USB cable;
- Modem. Thanks to the use of 3G, you can connect the router to the Internet without a special cable;
- A printer. By connecting a printer to your router, you can create a remote server and print documents from different devices over a wireless connection. This type of organization technology can often be found in offices;
- Flash drive;
- FTP server. For storing large data on the network. The FTP protocol allows you to transfer large files without losing quality. When working with standard flash drive servers, errors may occur when trying to play a file.
Rice. 1 - router ports panel
The option of connecting a hard drive allows you not only to create a publicly accessible file storage. You can also set up a DLNA media server. This technology allows you to play not only files from the drive itself, but also from all other devices in the house. For example, the TV will be able to open photos saved on the computer, and the phone will launch a track from the smartphone of another network user. You can configure iTunes Server in a similar way.
If you need to access files from the Internet, you can use the AiDisk function to set up this process.
Let's move on to specific instructions for setting up the interaction between your router and external hard drive.
Features of connecting USB to an external drive
No matter how obvious it may be, many people forget to take this elementary and primary step. Perhaps subconsciously, users believe that a flash drive or disk will connect on its own without any help. This will probably be the case in the future, but for now we must do it ourselves.
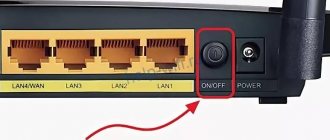
Often the router has several USB inputs - choose any one. If you additionally have, for example, a 3G modem connected, then use the remaining one.
Actually, this is where the instructions can end. Surprisingly, no manipulations need to be performed; shared access works like a magic wand even when you connect a flash drive or external drive.
Therefore, now we will talk about how to open and manage such a drive connected to the router.
Just in case, we also clearly demonstrate how to organize proper removal of the drive through the router settings interface.
Create a connection with the Asus router
Asus has created a very simple setup system for a home data server. Its essence lies in the initial connection of gadgets. Then the user must configure them in the menu on a PC or from a smartphone. You can access the router's software options through any browser on a computer connected to the router.
First, disconnect your router from the network. Now connect an external drive to it using a USB-micro USB adapter. You should get the following design:
Rice. 2 – example of connecting the drive to the router
If your router has two available ports, choose the one with the higher transfer speed (version 3.0). Simply connecting two devices is not enough, since the transfer of information on the home network is still not possible. Accordingly, other devices cannot yet recognize any files.
To configure the display of files from the network on your computer, go to the “This PC” window. On the left side of the element display panel, find the “Network” tab and go to this window. This displays all available network storage and transfer protocols that you can use.
Right-click on an empty area of the window and click on “Refresh” in the pop-up menu. Thus, the window will display the icon of the drive connected to the router.
Rice. 3 – “Network” window on the computer
Now just click on the icon that appears to go to the folder with the files of the external drive. If sharing is disabled on your computer, you will need to enter your login and password for the router settings to view the content. As a rule, the values of these fields are the same. This is the word admin.
Once you have access to the contents of the folder, you can create new files in it, edit or view existing content.
To control the router from the TV, just go to the Internet connection settings. The USB tab will appear in the window. By clicking on it, you can find out about the amount of free space on the disk or view its contents.
Rice. 4 – view external drive data on TV
To access files from your phone or tablet, you need to download the ES Explorer application. It will accurately display the desired folder and allow you to quickly open files or create new documents on the HDD:
- Connect your smartphone to the router and launch the Explorer program;
- Now, at the top of the screen, select the LAN window as shown in the image below;
- Wait for the content to load. Sometimes this may take several minutes. After the external hard drive folder appears, click on its icon;
- If necessary, enter data to gain access (login – admin, password – admin);
- After confirming the entry, all network files will be displayed on the phone.
Rice. 5 – connecting to external HDD files from a smartphone
For Apple mobile devices, the connection procedure is the same, only you need to use a standard file explorer.
Downloading torrents and sharing media
Torrent downloading is organized using the Transmission client installed as a separate module. After downloading it, you need to do the following:
- Select the "Applications" section.
- Go to the “Torrent Client” tab.
- Turn on this program.
- Determine the directory to save the downloaded content.
- Remote control via the Internet is also activated here: after this, the downloading and distribution process can be controlled from a PC or phone.
The next important feature is DLNA technology. It allows you to stream multimedia to TVs and other gadgets. To enable it, proceed in the same way as setting up Transmission: download and activate the component and specify the desired section.
Instructions for TP-Link
File sharing over the TP-Link router network is created as follows:
- Connect the hard drive or flash drive to the router and reboot both devices so that there is no software error in their interaction;
- Open any browser on your computer and enter the network ID 192.168.1.1 or 192.168.0.1 into the address bar. Only one of the specified addresses will do;
- Enter your login and access password in the pop-up window (admin, admin). Press Enter;
- Select the “Network Sharing” tab;
- Click on “Sharing Service”;
Rice. 6 – TP-Link router settings window
- On the right side of the window, click on the Edit field, which is shown in the figure below. This will allow you to make changes to your network sharing settings;
Rice. 7 – editing network access
- In the window that opens, set a new name for the hard drive that is connected to the network. Be sure to check the “share this volume” box so that other devices can see the drive folder;
Rice. 8 – creating a new storage
You can access storage information from a smartphone, tablet, computer, laptop or TV in the same way as was described in the instructions for the Asus router.
Now go to the “Network Sharing” tab again and open the “User Accounts” sub-item. Create a username and password. You will enter this data on all devices to gain access to the drive folder. If the fields are left blank, anyone connected to the network will be able to view and edit the files, which is not secure.
Rice. 9 – restriction of access to view drive data
All that remains is to activate the sharing function. To do this, return to the “Sharing Device” window and press the Start button.
Rice. 10 – launching the “Network Sharing” function
Connecting a Sagemcom router from Rostelecom
Sagemcom routers from Rostelecom connect to an external hard drive as follows:
- Connect the drive and router;
- Log into the router interface through a browser. Address - 192.168.1.1, username - admin and password - admin;
- In the "Multimedia" section, open the information storage server tab. After this, a table will appear in the right part of the window displaying the data of the connected drive. Remember the meaning of the “Volume Name” column;
- Go to the “Information Storage Server” window and specify the name of the drive and its manufacturer;
- Activate the “Enable server” field;
- Save your settings.
After registering the drive, we recommend that you exit the web interface and turn it on again to check whether the created account is saved.
In routers from Sagemcom, users often encounter the problem of saving settings. If necessary, create the drive profile again.
Rice. 12 – configuration of the Sagemcom router from Rostelecom
You may be interested in:
Connecting to Huawei
Most routers from Huawei are equipped with an optical GPON terminal, which has a built-in USB connector. Connect the hard drive to the router through this port and access the router's web interface using a browser on your PC. Follow the instructions:
- To access the software interface, the address 192.168.100.1 is used. Login and password are root and admin respectively;
- After successfully logging into the interface, pay attention to the tabs that are located at the top of the window. Click on “Network Application”;
- A list of available windows will now appear on the left side of the page. We need to open "USB Application";
- In the tab contents field, check the box next to the field shown in the figure. It activates the server. On the same page, fill in the fields “username” (user name), “password” (password). Near the “USB Device” line, open the drop-down list and select the name of the hard drive to which other network users will connect;
- Confirm the changes by clicking the Apply button.
Rice. 11 – setting up a Huawei router
Now the hard drive data is available to all devices that are connected to the Huawei router.
Connection
The process is similar for all routers, but the settings interfaces are different. Beginners do not always understand general instructions if items or options are called synonyms. Let's look at how a hard drive is connected to routers from the most popular manufacturers.
Connect the router to the hard drive with a USB cable.
TP-Link
How to make a home network on a TP-Link router is described in the following video:
To connect a network drive to a router from this manufacturer, do this:
- Connect HDD and router. Restart the router.
- Go to the WEB interface of its settings through a browser.
- In the “Network Sharing” section, click “Sharing Service”.
Huawei
For Huawei, the instructions are as follows:
- Connect the network drive and the router.
- Go to your router settings through your browser.
- Click "Network Application".
- Go to the “USB Application” tab in the left vertical menu.
- Enable FTP by checking the box next to the “Enable FTP Server” option.
- Fill out the fields below:
- Username;
- password for accessing the HDD;
- USB device name;
- the way to it.
- Save the settings with the “Apply” button.
Zyxel Keenetic
On the main page of the router's WEB interface, check the boxes shown in the screenshot below and reboot the equipment.
Sagemcom from Rostelecom
How to connect HDD here:
- As before, connect the equipment and visit the router settings.
- Go to the “Multimedia” section and activate “Information Storage Server” in the vertical menu on the left.
- Turn on the server, fill out the text fields and save the configuration.
MikroTik
Instead of a WEB interface, a connection is configured through the Samba application.
- Open the program, go to the “Disks” tab and click “Format Drive” to format.
Instead of buying expensive network storage, you can share files on your home network using any drive and a new router. We hope that everything was clear and that everything worked out for our readers. If you have any problems or questions, write in the comments!
Now we will connect a USB drive or external hard drive to the Asus router. For what? There are many options, but we will set up file sharing on this drive and a DLNA server. In the previous article, I explained why USB connectors are needed on Asus routers, and in this article I will show how you can use a flash drive connected to the router, or an external HDD to create a network drive that can be accessed from all devices connected to the router.
I’ll explain with an example: you have an Asus router with a USB port. For example, Asus RT-N18U (let's look at it as an example). We connect a flash drive or an external hard drive to it, configure “Network Neighborhood (Samba)” and from all devices that are connected to this router (via Wi-Fi or cable) we get access to the files that are stored on the drive connected to the router .
Very convenient to share files. For example, you can copy a movie from a computer to a drive, turn off the computer, and watch this movie from a TV that is connected to this router. Or, another option: if you use the file downloader built into the router, then all the files that the router downloads to the drive connected to it will be available from computers, TVs, and even mobile devices.
MikroTik Router Guide
Routers from MikroTik have one feature: you cannot connect a drive that is already filled with data to them. The device must be formatted and only then connected to the router.
Setting up file sharing is done using the Samba program. There is no need to use the web interface. As a rule, the utility can be installed on a PC via the disk that is included with the router. You can also download the program from the manufacturer's official website.
After connecting the drive to the router, you should go to Samba and format the device again. Open the main menu of the program and go to the Systems-Stores window. Select your hard drive from the list and click on "Format Drive".
Rice. 13 – preparing an external hard drive for connection to MikroTik
After the “Ready” value appears in the Status column, you can begin further settings:
- In the Samba application, open the “IP – SMB” tab and check the Enabled box;
- In the same window, set any name for the network workgroup and the name of the router;
- By checking the “Allow Guest” checkbox, you allow unauthorized devices to access your files. It is not necessary to confirm this line;
- In the interface column, set the value to All. Thus, you can view the contents of your hard drive from any device, regardless of its OS and interface type.
Click the Apply and Shares buttons one by one to apply the settings and activate the online data sharing feature.
Rice. 14 – setting up a MikroTik router
Thematic videos:
Setting up an FTP server on a Tp-Link router. Setting up a router on the inrouter channel
Are you wondering what to do with the USB port on the Tp-Link TL router? Connect a hard drive or a regular USB flash drive to it. And then this video will help you connect and configure FTP servers on your TP-Link TL router. What is it for? In order to have access to the same files from different computers.
how to make network storage (ftp) from an external hard drive and a router?
What to do with the USB port on the Tp-Link TL router? Connect a hard drive or a regular USB flash drive to it. This video will help you connect and configure FTP servers on your router.
How to create a network storage and configure FTP servers through a TP-Link router?
In the first one, we are asked to choose whether we will use the existing administrator login and password to log into the FTP server, or whether we need to create a new user. If you create a server through a TP-Link router that is located at home, you can use the same data, since most likely no one will use it except you. In the office, it’s better to make a new one so that you can’t get into the local network control panel under it.
Next, we need to set a name for the media or ftp server and select one or more simultaneously from three access methods:
- Network environment - in this method we allow access to the drive using the IP address of the router, for example “//192.168.0.1”
- An FTP server is exactly the type that we are mostly talking about today. When using it, you can connect to the flash drive using an ftp address, which consists of an IP and port number and looks something like this: “ftp://192.168.0.1:2121”
- FTP server over the Internet - finally, it is possible to coordinate the work of the server with DDNS services in order to connect to it not only from the local network, but also via the Internet. To do this, you need to configure DDNS, but this is a separate topic.
Finally, the last thing that needs to be done is to define those folders for network storage on a USB drive, flash drive or SD card that will be accessed via an FTP server. To do this, click on the “Add” button
Select the volume name and then use the “Browse” button to select the allowed folders.
We also give the folder a name that will be displayed in the router and assign permissions to it with checkboxes:
- Access from guest network
- Enable/disable authentication
- Write permission to the folder
- Exchange of media files (that is, broadcasting videos and photos to TV via DLNA)
After that, save everything with the “OK” button.
To change properties, click the edit icon next to the shared folder.
After applying the settings, the FTP server on the TP-Link router will start working and you can connect to it from any computer or phone - you can read about this in another instruction.
Connecting a USB flash drive or external HDD to the Asus router. Sharing files on the router
We have already discussed in detail why USB connectors are needed on Asus routers (see link). If you came to read an article with this title, it means you want to know more, and this topic is interesting to you. We are always ready to share our experience.
Flash drive in ASUS router.
A few words about what opportunities open up if you organize shared access to files from an external drive when it is connected directly to the router, and not to electronic devices, for example, a computer.
It is unlikely that anyone will deny that storing large media files (videos, photos, etc.) on external memory sources is quite advisable. It is also convenient that all electronic equipment can work independently of each other. If you connect a flash card or hard drive directly to the router, you are killing two birds with one stone: any file from the drive will be accessible to all devices that work through this router.
Moreover, it is convenient to organize a home “file sharing” through shared access. For example, through your phone or computer you downloaded the next blockbuster, which you save to an external drive. Now sit back on your sofa or armchair and watch a movie on the big screen of your TV. In this case, you can turn off the computer. It is even more convenient if you download files through a special application in the router, since any file that is downloaded through the router to an external memory device connected to it will also be available from all electronic devices working with this router.
Preparing the drive
Most "dummies" work on Windows, and therefore for them the choice of file system is obvious - NTFS. It is better to connect such a hard drive to Asus and Zyxel Keenetic routers, which use special NTFS drivers, which guarantees high speed. Other routers cannot boast of normal read and write speeds. Apple requires the HFS+ file system.
Since most routers run Linux, there will be no compatibility problems when formatting the hard drive to Ext4. However, connecting it to a Windows PC will be impossible without creating a new file system on the disk with data loss.
There's bad news for people planning to use their old drive. They will have to delete all partitions and format the drive, because routers, as a rule, do not recognize more than one partition.
How to open shared documents on electronic devices
On your computer, you need to go to “Explorer” and select Network from the list on the left. Next, run the Refresh command (usually done by right-clicking in an empty area of the window). After the update, you will see the router application that you need to open.
The folder will contain all files and documents saved to the external drive. However, in order to open the document you will need to enter the same login and password as for working with the router settings.
Please note that the illustration shows the login and password for the example - admin and admin.
If you entered the “appearance passwords” correctly, then now you are a real “information lord.” Do what you want: move, destroy files, create new folders, etc.
Users may encounter such a problem that if the file name uses Cyrillic letters (Russian letters), the device displays the following message: “Windows cannot access...”. Unfortunately, we ourselves do not yet know how to solve this problem. Therefore, if any of the readers found a way out, we ask you to share your experience.
The TV should connect without problems and see the media server itself. You do not need to enter any passwords to launch files.
If you use an Android phone or tablet, then you will need a special “lotion” like “ES Explorer” (it can be downloaded for free through the market). Use it to access the LAN file. It contains files from an external drive that are shared. The security settings on the computer are used as the password.
At this point, the settings process can be considered complete. If you succeeded, congratulations. If not, try following the instructions again or describe your problem in the comments.
Finally, let’s look at another feature.
iTunes Server on Asus routers
If you have an Asus router installed, then you can also set up iTunes Server and create a shared FTP resource. Unlike the media server, you will have to work a little to activate it.
To do this, first of all you need to go to the router settings, and then open the USB application - File / Media Server.
There you will find the following tabs: Media Server, Network Neighborhood (Samba) / Cloud Disk and FTP Share.
As you may have noticed, the sharing itself begins to work without additional intervention. “Network Neighborhood (Samba) / Cloud Disk” is needed to change the settings with the sharing option. For example, you want:
- Rename the device;
- Activate free entry;
- Manage user access;
- Block file sharing.
If you select the “Media Server” tab, you will see the following window and the parameters available for change:
We will skip the last tab “Share and FTP”, since we plan to devote a separate article to this topic.
Practical advice: When setting up all of the above accesses, make sure you do everything possible to secure your Wi-Fi network. Otherwise, unauthorized access to your personal files is possible.
How to map a network drive in Windows 10
In this guide, we'll show you how to map a network drive in Windows 10. Network drives, also known as network attached storage (NAS), are an invaluable tool for PC users, both for professional and leisure purposes.
A hard drive connected to your Wi-Fi router allows its contents to be accessible to all of your devices connected to the same network—or even remotely over the Internet.
If your business needs the ability to share files between co-workers or you just want to be able to stream media from one room to another in your home, set up a network drive.
While the thought of connecting your storage to the Internet may seem daunting, there's no need to panic. Setting up a network drive is easy, and we have a step-by-step guide to prove it.
We'll show you how to map a network drive in Windows 10. Network drive mapping is the process of mapping a network drive to Windows 10, allowing it to view the drive as if it were physically connected to your PC.
So, read on to learn how to easily map a drive and distribute files using it in our guide to map a network drive in Windows 10.
(Image credit: Shutterstock)
Connect the network drive to the router.
Most drives will contain some instructions, but the process is generally the same. Plug the drive into the wall using the included power adapter, and then connect it via a network cable (hopefully included) to one of the ports on the back of your router.
Then you can continue with the process of mapping a network drive in Windows 10.
(Image credit: Future)
2.Open This PC in Windows Explorer.
Open File Explorer (press the Windows key and "E") and then look at the sidebar on the left side of the window. Click "This PC" and then go to the "Computer" tab.
You can also search for "This PC" using Cortana. In the main window, make a note of the letters assigned to each drive - this will help avoid creating duplicates in the next step.
(Image credit: Future)
Select "Map network drive".
This will allow you to select a letter to assign to the drive. Avoid using C (usually the computer's local storage), while D to F are usually assigned to various removable media such as disks or USB drives.
Ensuring that the letter assigned is not one of those, which reduces complications in the future.
(Image credit: Future)
Find your network drive
Click the Browse button and you can navigate to the drive itself in the online menu that appears.
If this is your first network drive, hopefully there will only be one listed, but you may have to browse through several by name if you have more than one.
(Image credit: Future)
Find or create a shared folder
On the drive you'll find options for shared folders if there are any, or you can create your own. This is where you will end up putting your files to access anywhere else.
To create a folder, right-click and select New Folder. You can call it whatever you want, but remember it for when you need to find it on another computer.
(Image credit: Future)
6.Authentication using username and password
This password will be required when logging into a network drive, so be sure to write it down for any colleagues or family members who need access to it.
Select Reconnect at logon to allow the drive to connect when you turn on your computer.
You can skip this step, but it means your folder will be accessible to anyone who can log into your Wi-Fi network, so we recommend entering a password.
If you have already set up a password and username for your NAS device, you may need to enter them here to access the drive.
(Image credit: Future)
Disk access
Click "Done" and you will see a new window for the drive, which will be labeled with the letter you assigned in step 3.
You will also see that it contains the shared folders that we defined in step 4. You can now browse and open files on the network drive as if they were on a hard drive physically connected to your PC.
(Image credit: Future)
Move files to a network drive
The drive will now be listed in the sidebar to the left of any File Explorer windows, and you can open it in a new window so you can drag documents, photos, or anything else onto it.
This is done in the same way as with any other folder, so you can copy, cut and paste as usual.
Now you know how to map a network drive in Windows 10. Follow the same steps for any other Windows 10 PC on your network that you want to access the drive.
.
Wi-Fi router with USB port. How and which one to choose?
I decided to raise an interesting and relevant topic and talk in detail about choosing a Wi-Fi router with a USB port. Somehow, routers with USB appeared unnoticed. I was trying to find what the first model was, from which manufacturer, and I couldn’t find anything. And I myself don’t remember when these seemingly unnecessary USB connectors started appearing on routers.
Now I looked, more than half of the routers that are currently on sale have at least 1 USB port. On more expensive models, this is usually USB 3.0. There are models with two connectors, I have such a router. I just have internet now via a 3G modem. So the modem itself is connected to one connector, and I connect the drive to the second. Flash drive or external hard drive.
As practice shows, USB on a router is mainly used to connect storage devices. We connected a flash drive or external hard drive and got network storage. File sharing, FTP, or media server. You can set up backup, or download files directly to the connected drive. The set of functions, of course, differs from the specific router model, but they are all approximately the same. You can also use it for other purposes: connecting the same 3G/4G modems (if the router supports), printers, web cameras (rarely).
There are many possibilities. Manufacturers have already perfected all these functions, and everything works more or less stably and can be used. I believe that every router should have a USB port. It's over, it will be like that soon. Well, if you are now choosing a router, and have asked yourself this question, then take a model with USB and don’t even think about it. You may not need it now, but you’re not buying a router for a couple of months, or even for a year. Then you will need to connect something, and what, you will have to change the router.
Can a USB modem be connected to a router?
The question of how to connect a USB modem to a Wi-Fi router is quite simple: you just need to take the modem and plug it into the router's USB port. That's all. There is no need to make any additional settings. ... We connect the router to the computer using a cable (or via Wi-Fi).
Interesting materials:
How to take zinc and iron? How to take vitamin D3 drops? How to take fat capsules? How to suspend FOP Ukraine 2022? How to tame a wild horse? How to tame a horse in RDR 2? How did the republics join the USSR? How to tidy up mink? How to tidy up a synthetic pad? How to tidy up a suede jacket?
USB port capabilities on the router
I often come across questions like: “why do you need a USB port on a Wi-Fi router?” I have listed the main functions above, but let's take a closer look. Plus I will give links to some instructions that may be useful to you after choosing and purchasing such a router.
As I wrote above, the functions mainly depend on the manufacturer and the firmware on which the router runs. But if we take devices from the most popular manufacturers (ASUS, TP-Link, D-Link, ZyXEL), then the USB input is used for approximately the same tasks. Which we will look at below.
For external hard drives and USB flash drives
Everything is simple here. We take a flash drive or an external hard drive (aka HDD) and connect it to the router. If necessary, we set some settings and get shared access to the drive from any device that is connected to the router.
The following functions can be configured:
- Share files on a USB drive. This is normal network access to a drive that is connected to the router. On your computer, the drive will appear in the Network tab. Or you can connect it as a network drive. From Android devices, access can be obtained, for example, through the ES Explorer program.
- FTP server. You can set up an FTP server on the router and access the drive not only on the local network, but also via the Internet.
- Media server (DLNA server). Another useful feature. It can be useful for viewing photos, videos and listening to music stored on a network storage device on a TV (mainly on TV). The TV must also be connected to the router.
- Download Master, or offline file download. This is when the router itself can download files (torrents) to a hard drive or flash drive connected to it. Without a computer or other devices. New models from TP-Link and ASUS definitely have this function. I use it myself, it’s very convenient. Especially when the Internet is slow. You can schedule the download overnight.
- ASUS routers also have AiDisk (file sharing over the Internet) and Time Machine.
Instructions for setting up some features:
- Access to a USB disk (flash drive) via a TP-Link router over the network
- Setting up USB storage sharing on ASUS routers
- FTP server on TP-LINK
- Setting up an FTP server on an ASUS router
- Media server (DLNA) on ASUS and TP-LINK
- Offline file downloads on new models from TP-Link
A small nuance about connecting external hard drives. It happens that the power that the router provides to the USB port may not be enough to operate the hard drive. I have never encountered such a problem myself. I want to say right away that it is impossible to know in advance whether the router will be able to handle a particular hard drive. If you encounter such a problem, then it is better to exchange the router for another model. There are various USB hubs and drives themselves with additional power, you can look, but it seems to me that this is complete nonsense.
Well, if you have a USB 3.0 standard drive and you plan to actively use it, then it is better to buy a router with a USB 3.0 port. This is always indicated in the specifications. Externally, they can also be distinguished. The input is standard 3.0, and the plug itself is painted blue inside. The speed of writing and reading information will be higher.
For 3G/4G modems
If you have Internet via a 3G/4G modem, and you need to distribute it via Wi-Fi and cable to other devices, then you will need a router that has support for USB modems.
Important! If the router has a USB input, this does not mean that it can distribute the Internet from a 3G/4G modem. You connect the modem, but nothing will simply work. It is necessary to strictly check the compatibility of the router with the modem.
I have already written many articles on this topic. So I'll just give you the links:
- Wi-Fi router for USB 3G/4G modem - a lot of information on choice and compatibility. This article will definitely be useful to you!
- ASUS routers with USB 3G/4G modem support
- How to connect a 3G/4G USB modem to a TP-LINK Wi-Fi router
- Setting up a 3G USB modem on an Asus router
The main thing is to take the choice of a router for these tasks seriously. I also advise you to look on the Internet for information on the request “router model + modem model” before purchasing. I did just that at one time.
For printer (print server)
A printer is connected to the router (via USB) and the print server is configured. After configuration, all devices on the local network can use the printer or MFP. The process for setting up the print server will differ depending on the router itself.
To be honest, I don’t have much experience in setting up this circuit. Therefore, see the instructions on the manufacturers' websites. Everything is there.
Host to host via router - Practical work on the .net network
This article is part of a series about package movement—everything that happens to get a package from here to there. Use the navigation fields to view other articles.
Travel packages
We looked at what two hosts directly connected to each other need to communicate. And we've looked at what a host needs to communicate with another host through a switch. Now we'll add another network device and look at what's required to move traffic from host to host through a router.
This article will be a practical application of everything discussed when we looked at the router as a key player in packet movement. It may be worth reviewing this section before continuing.
We'll start by looking at the two main functions of a router and then see them in action when we look at how a router works.
To discuss our path through these concepts, we will use the following image. We will focus on R1 and what is required to forward packets from Host A to Host B to Host C.
For simplicity, the MAC address of each network card will be shortened to four hexadecimal digits.
Router Features
We mentioned earlier that the main purpose of a router is to facilitate communication between networks. Thus, each router creates a boundary between two networks, and their main role is to forward packets from one network to another.
Note that in the image above, R1 creates a boundary between the 11.11.11.x network and the 22.22.22.x network. And we have R2 creating a boundary between the 22.22.22.x and 33.33.33.x networks. Both routers have an interface on the 22.22.22.x network.
To forward packets between networks, a router must perform two functions: populate and maintain the routing table, and populate and maintain the ARP table.
Populating the routing table
From each router's point of view, the routing table is a map of all existing networks . The routing table starts out empty and fills up as the router learns new routes to each network.
There are several ways a router can learn the routes to each network. In this section we will discuss two of them.
The simplest method is the so-called direct connection . Essentially, when a router's interface is configured with a specific IP address, the router will know the network it is directly connected to .
For example, in the image above, the left interface of router R1 is configured with an IP address of 11.11.11.1. This tells R1 that the network location 11.11.11.x exists outside of its left interface. In the same way, R1 learns that the network 22.22.22.x is located on its right interface.
Of course, a router cannot be directly connected to every network. Note that in the image above, R1 is not connected to 33.33.33.x, but it is very likely that one day it will have to forward a packet to that network. Therefore, there must be another way to explore networks other than what the router is directly connected to.
The other path is known as a static route. A static route is a route that is manually configured by an administrator . It would be as if you explicitly told R1 that network 33.33.33.x exists behind R2, and to get to it, R1 must send packets to R2's interface (configured with IP address 22.22.22.2).
Eventually, after R1 learned of two directly connected routes, and after R1 was configured with one static route, R1 would have a routing table that looked like this image.
The routing table contains many routes. Each route contains a mapping of networks to interfaces or next-hop addresses .
Every time a router receives a packet, it consults its routing table to determine how to forward the packet.
Again, the routing table is a map for each existing network (from the perspective of each router). If a router receives a packet destined for a network for which it does not have a route, then, as far as that router is concerned, that network should not exist. Consequently, the router discards the packet if its destination is on a network not listed in the routing table .
Finally, there is a third route learning method known as Dynamic Routing . This involves routers discovering and automatically communicating with each other to inform each other of their known routes . There are various protocols that can be used for dynamic routing, each representing different strategies, but unfortunately their complexities are beyond the scope of this article series. They will undoubtedly be the subject of future articles.
In this case, the routing table will tell the router which IP address to forward the packet to next. But as we learned earlier, packet delivery is always a Layer 2 job. And in order for a router to create an L2 header that will deliver the packet to the next L3 address, the router must maintain an ARP table.
Populating the ARP table
Address Resolution P ( ARP When , resolves a correlating MAC address. Devices use ARP to populate the ARP table or sometimes called ARP Cache, which is a mapping of an IP address to MAC addresses.
The router will use its routing table to determine the next IP address the packet should receive. If the Route indicates that the destination exists on a directly connected network, then the "next IP address" is the IP address of the packet's destination—the last hop for that packet.
In either case, the router will use the L2 header as a means of delivering the packet to the correct network adapter .
Unlike the routing table, the ARP table is populated on an "as needed" basis. This means that in the image above, R1 will not initiate an ARP request for Host B's MAC address until it receives a packet that needs to be delivered to Host B.
But as we discussed earlier, the ARP table is simply a mapping of IP addresses to MAC addresses. When the R1 ARP table is completely populated, it will look like this image.
Once again, for simplicity, the images in this article simply use four hexadecimal digits for MAC addresses. A MAC address is actually made up of 12 hexadecimal digits. If it's easier, you can simply repeat the four-digit hex MAC address three times, giving the left R2 interface the "real" MAC address bb22.bb22.bb22.
Router operation
With an understanding of how a router populates its routing table and how a router intends to populate its ARP table, we can now look at how these two tables are used in practice for a router to facilitate communication between networks.
In the R1 routing table above, you can see two types of routes: one pointing to the interface and the other pointing to the next hop IP address. We will frame our discussion of router operation around these two possibilities.
But first we will discuss how host A delivers the packet to its default gateway (R1). We'll then look at what R1 does with a packet that was sent from Host A to Host B, and then with another packet that was sent from Host A to Host C.
Host A receives a packet on R1
In both cases, host A is communicating with two hosts on foreign networks. Therefore, host A will need to receive any packet to its default gateway - R1.
Host A will create an L3 header with a source IP address of 11.11.11.77 and a destination IP address of 22.22.22.88 (for Host B) or 33.33.33.99 (for Host C). This L3 header will serve to receive end-to-end data.
But this L3 header is not enough to deliver the R1 packet. We'll have to use something else.
Host A will then encapsulate the L3 header into an L2 header, which will include the source MAC address aaaa.aaa.aaaa and the destination MAC address aa11.aa11.aa11—the MAC address that identifies R1's NIC. This L2 header will serve the purpose of delivering the packet through the first hop.
Host A will already be configured with its default gateway IP address, and hopefully Host A will already be communicating with external hosts. So Host A more than likely already had an ARP table entry with R1's MAC address. Conversely, if this were Host A's first communication with a foreign host, generation of the L2 header would be preceded by an ARP request to discover R1's MAC address.
At this moment, R1 will receive the packet. The packet's destination IP address will be either 22.22.22.88 for communications sent to Host B or 33.33.33.99 for communications sent to Host C. Both of these destinations exist in the R1 routing table - the difference is that one route points to Interface , and the other Route points to the next hop IP address.
Routes pointing to an interface
The route in the routing table that points to the interface was usually learned because the router was directly connected to the network. If the packet's destination IP address is on a network that is directly connected to the router, the router knows that they are responsible for delivering the packet to his last transition.
The process is similar to what was discussed earlier. The router uses the L3 header information to determine where to send the packet next, and then creates an L2 header to deliver it there. In this case, the next (and last) hop this packet must take is to the network card on Host B.
The L3 header will remain unchanged - it is identical to the L3 header generated by host A.
What's different is the L2 header. Note that the source MAC address is bb11.bb11.bb11 - the MAC address of the right interface of router R1. The old L2 header that Host A created to forward the R1 packet was removed and a new L2 (R1) header was generated to deliver it to the next NIC.
The destination MAC address is, of course, bbbb.bbbb.bbbb - the MAC address for host B.
Routes pointing to the next hop address
For a packet from host A sent to host C, the destination IP address would be 33.33.33.99. When R1 accesses its routing table, it will determine that the next hop for network 33.33.33.x exists at IP address 22.22.22.2, the IP address of R2's left interface.
In effect, this instructs R1 to use the L2 header, which will deliver the packet to R2 to continue forwarding that packet on its way.
Since the current "hop" is between R1 and R2, their MAC addresses will make up the source and destination MAC addresses:
Again, the L3 header remains unchanged, it includes the same source and destination IP addresses originally set by Host A - these addresses represent the two "ends" of the communication. The L2 header, however, is completely regenerated at each step.
If R1 does not have R2's MAC address, it simply initiates an ARP request for the IP address in the route: 22.22.22.2. From now on, it will have no problem creating the correct L2 header that will receive the packet from R1 to R2.
As the process continues, R2 will finally receive the packet and then face the same situation as R1 in the example above - delivering the packet before its last hop.
If necessary, this process can be continued. If host A were trying to contact host X, which had 10 routers in its path, the process would be identical. Each hop router on the path will have a Route mapping the network of host X to the IP address of the next hop on the path. Until the last router that is directly connected to the network is in host X. And this last router will be responsible for delivering the packet to its last hop - host X itself.
Series navigation >.
Router with USB input. What to look for when choosing? Which model should I buy?
There is nothing special about the choice. Look at the number of ports and version. There are routers with one or two ports. I didn't see any more. Also pay attention to the version of the USB port. There are USB 2.0 and USB 3.0. The latter will have a higher speed. The specifications for the router always indicate what standard the port is. If there are 2 of them, then most likely one will be 2.0, and the second 3.0.
I am against recommending any specific models. You have all the information you need. Therefore, choosing a router will not be difficult for you. Moreover, the presence of USB is only one of the points by which you can navigate. You also need to look at other characteristics of the router, price, etc. Most likely, you will also need an article with tips on choosing a router for your home or apartment.
Below I will show several models of routers that have this same USB input.
Xiaomi Mini Wifi and Xiaomi WiFi MiRouter 3
These are probably the cheapest USB routers on the market.
There is a port, but as far as the software part, settings and how everything is organized there, everything is sad. It's a bit difficult to figure out. Access through an application from a mobile device, an application in Chinese, etc. I looked, read, and even lost the desire to set up file sharing. Therefore, as a router specifically for file sharing, I would not recommend this router. But there is an entrance.
Yes, there are alternative firmwares, etc. If you like to tinker with the settings, you can buy it. But if you want to quickly set it up and forget it without any problems, then this is not the best option.
TP-Link TL-WR842N
Inexpensive router with USB input from TP-Link. It seems like support for 3G/4G modems is stated. Well, support for all the functions that I wrote about above.
You can see a review of this model. There I wrote in more detail about modem support.
TP-Link Archer C20i
A more serious model with support for Wi-Fi 5G, and 1 USB 2.0. No modem support.
If you are interested in the model, you can read its review: https://help-wifi.com/otzyvy-i-informaciya-o-routerax/tp-link-archer-c20i-ac750-otzyvy-obzor-xarakteristiki/
Asus RT-N18U
I have this router now. Two ports. One of them is USB 3.0 version. As for working with 3G modems and storage devices, everything is very cool. But it doesn't have support for the new IEEE 802.11ac Wi-Fi standard. And this is a minus.
If you don’t need 5GHz Wi-Fi support and are happy with the price, then you can buy it.
A few more inexpensive models: D-Link DIR-620A, D-Link DIR-632, Zyxel Keenetic 4G III, Zyxel Keenetic Omni II, TP-LINK Archer C20, Asus RT-N14U.
The choice is very large. I still recommend choosing routers from popular manufacturers. I can say for sure that all the declared functions will work there. And in most cases they will work stably. Yes, and there are instructions for setting it up. You can configure everything without any problems.
Review, comparison, pros and cons of the most popular models
Recently, more and more models of routers equipped with USB ports have appeared on sale. Among them, according to Yandex.Market ratings and user reviews, the highest rated models are Keenetic Viva, MikroTik hAP ac2, TP-LINK Archer VR400, ASUS RT-AC66U B1, D-link DIR-620/GA. All of them support 3G/4G modems and are dual-band, i.e. capable of operating simultaneously at frequencies of 2.4 and 5 GHz.
Keenetic Viva (KN-1910)
The Viva router is a middle-class representative in the line of routers from the famous one, which separated from the Zyxel company at the end of 2022 and now operates under its own brand. The KN-1910 model has powerful hardware, represented by a dual-core MediaTek MT7621A processor, 128 MB of RAM and the same amount of flash memory. Among the distinctive features are the presence of five ports providing Internet connection speeds of up to 1 GB, and two USB ports version 2.0 with support for 3G/4G modems and expanded functionality.
Why doesn't the router see the hard drive?
Quite often, when connecting to a TV over a network, the router does not see the hard drive. What can be done in this case?
A similar problem, for unknown reasons, does not appear on all drives. Older models of external hard drives are detected without problems. This is probably due to the software and the unique device number, which is not included in your router’s database.
The reasons for the hard drive not being connected to the network adapter can be divided into the following types:
- Bad connection. Everything here is quite simple: disconnect and connect the device, and if necessary, test it on another router.
- Malnutrition. In many cases, when connecting drives with large amounts of memory, more power is required. The drive body has an additional 5V power connector. You can determine exactly this reason by using the network access via the command line via telnet.
- The disk space is too large. In some cases, the router firmware cannot work with drives larger than 1 TB. If this particular problem occurs, it is recommended to reinstall the firmware to a newer version. For example, if the device still has a standard one, then the manufacturer does not provide the ability to connect via telnet due to the fact that this is a developer zone. Therefore, it is recommended to download and install MirWiFi v2.1.
Have a question? Call! Our phone number in St. Petersburg: +7 Laboratory equipment
| Laminar flow hood | Specialist's workplace | Microscope |
| Tools for working in containment zones and replacing BMGs | A large number of donor discs | |
Connecting a drive
We connect the flash drive/disk and connect to the router via telnet. There we will be asked for a login and password - the same as in the web interface.
Next we run the command
:~# dmesg|grep lun Attached scsi removable disk sda at scsi0, channel 0, id 0, lun 0 /dev/scsi/host0/bus0/target0/lun0: p1 p2 p3
The line /dev/scsi/host0/bus0/target0/lun0: p1 p2 p3 tells us that our drive is connected, and p1 p2 p3 are the partitions on it.
If you made the markup the same as I suggested, then you have
p1 - swap partition.
p2 - section for installing packages (optware).
p3 - section for other files.