Sometimes there are situations when it is necessary to change the time on a computer or even the date, but as practice shows, even this simple task can confuse novice computer users. After reading this article, you will learn how to set the date and time on your computer by going into the BIOS settings, as well as in the Windows 7 and Windows 10 operating systems.
In what situations might you need to change the time settings on your computer? For example, you flew with your laptop to another time zone and in order for your computer to work in local time, it will need to be changed.
Or, for example, after you turn off your computer, the time is constantly lost and you need to adjust it every time. In this case, you first need to figure out why this is happening, and after eliminating the problem, set the date and time.
The time may be lost because the battery is dead, then you just need to replace it. By the way, as soon as you remove the battery from the motherboard, all system settings will be lost and returned to the default settings, including the time, and after replacing the battery it will need to be configured again.
Some programs that have a license tied to a date will not work if it is not installed correctly on the computer, so you need to monitor the normal operation of the system clock.
Change the time on Windows 10 using Settings
Settings is a built-in utility for basic Windows configuration. In order to change the time on Windows 10, you must:
- Press the Win + I key on your keyboard
- Then open the “Time and language” item.
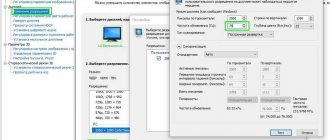
- In the window that opens, you need to select the “Date and Time” tab on the left. And you won’t be able to change the clock value right away; the “Change” button will be inactive. To change this, disable the “Install automatically” option.
- After that, click on “Change” and configure.
The same method is suitable for Windows 8.
M or F? Take the test and find out who you are in everyday life: are you a man or a woman?
Changing the date and time manually
To adjust the time and date manually, you need to enter the device settings. This can be done in two ways:
- Use a vertical swipe from the status bar to open the curtain and tap on the icon depicting a gear.
- Enter the application menu by tapping on the icon with the image of six dots located in the dock bar. Find the gear icon and briefly touch it to open the “Settings” section.
Find the “Date and Time” item at the bottom of the list that opens and briefly touch it to open this tab. In some gadgets, the settings menu may look different, and time and date settings should be found in the “Options” section.
Manual time and date settings will be available if the “Auto detect time” option is unchecked or “Network date and time” is turned off (depending on the Android version).
- To change the date, select the “Date” or “Set date” item, where we select the day, month and year and confirm by tapping the “Ok” button.
- To change the time, you need to select the “Time” or “Setting time” item, where we set the correct time and confirm by tapping the “Ok” button. Here you can set the time format – 12 hour or 24 hour.
How to change the time on Windows 10 using the Control Panel
You can also set the time on your computer through the Control Panel. This option is preferred by those who have previously actively used Windows XP and 7 (since the time change is performed in the same way in them).
- Go to “Control Panel”
- Next, go to “Date and Time”.
- Then select "Change date and time". In the next window, change the time and click OK.
- And then be sure to click “OK” again.
Before changing the time on Windows 10 in this way, you need to check that the correct time zone is set. Otherwise, the clock will continue to get lost.
Volga or Pobeda? Are you familiar with the Soviet automobile industry? Test yourself in a fun test!
Setting the time and today's date using the system
To change the date and time settings, launch the system settings management tool - the Settings .
Let's go to the " Date and time " section. The options that interest us are here. Namely:
- Automatic time and date settings.
- Automatic time zone setting.
- Setting the date manually.
- Manual time zone selection.
If you want the phone to set the current time and date itself, tap the top button shown in the screenshot above. Choose one of two synchronization methods - via network or via GPS.
For the feature to work, the device must periodically connect to the Internet or cellular operator. Otherwise, it will have nothing to synchronize with.
If the data is displayed incorrectly, change the time zone in the settings of the same section. Click the " Select Time Zone " button and select the region you are currently in. Or enable " Automatic time zone synchronization over the network "
How to change the time in Windows 10 using the Quick Access Toolbar
The Quick Access Toolbar is the area at the bottom where the time icon is located. How to change the time on Windows 10 through it?
- Call the context menu, then select “Time Settings”.
- The Options window will then open. How to set the time there is described in detail in this article in the corresponding subtitle.
Take the test on the topic “Legends of the 90s”, remember which of these you had?
How to change the time on Windows 10 using the command line
The command line also allows you to adjust system settings using special commands. To run it you need:
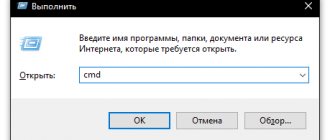
- Click search and enter cmd, you need to open it as an administrator
- Then enter a command like time 12:12 into the terminal window and press Enter, where instead of 12:12 enter your time.
What instrument are you? Take the test and find out
What to do if the number is wrong and the system clock is in a hurry or behind
Unnamed devices from the Middle Kingdom often suffer from a similar “disease.” The reason is crooked firmware or low-quality radio elements of the system board. Often nothing can be done about such a defect, since there may not be any other suitable firmware, and repairs will cost more than buying a new device. We have to look for workarounds.
In fact, there is only one way - to install a third-party application that will mask the flaw. My choice fell on ClockSync , a free utility that synchronizes the time and date on the device, regardless of system settings.
The only difficulty in using it is the need to obtain root rights (a superuser with access to protected system files and functions). Everything else is very simple - just disable synchronization in the device settings (I described how to do this above) and enable it in the utility itself.
- Launch ClockSync and tap the menu button (three dots in the top right corner). Select " Settings ".
- In the menu section " Automatic synchronization " o. Below you can set the synchronization time interval, enable high-precision mode, activate options for saving traffic and battery power, enable auto-tuning of time zones, etc.
- If after this the program shows inaccurate time and date, restart the gadget (turn it off and on). That's it.
When using ClockSync, try to turn off your phone or tablet as rarely as possible and connect it to the Internet at least once a day (so as not to miss synchronization cycles). Then the utility’s readings will be as accurate as possible.
How to change date and time in Windows Powershell console
PowerShell is a modernized version of the terminal that appeared in Windows 7. How to change the time on Windows 10 using it? To start:
- Launch PowerShell itself as the device administrator. To do this, click on the search icon on the taskbar, enter “Power Shell” and select “Run as administrator”.
- Then enter a command like Set-Date-Date 16/01/2021 18:00, where instead of “16/01/2021 18:00” specify the day, month, year, hours, minutes, respectively. And to save the changes you will need to press Enter.
Problems with time and time zones in Android and ways to solve them
Let's say you've been using Android for a long time, and therefore it may seem that it copes perfectly with time synchronization tasks - alarms go off on time, there are no obvious time deviations, etc. However, are you completely sure where Android comes from? actually receives data about the exact time and time zones? If you have any doubts about how this works, welcome to cat.
Android has two problems with time: its unpredictable synchronization and the need to update time zone data even in the latest version of the OS. Background: Android is a mobile OS based on the Linux kernel, it easily connects to the Internet and, of course, one can assume that time synchronization is carried out using NTP, however, this is not the case. Historically, Android was intended to be used exclusively on mobile phones (think version 1.6). At the same time, only by the 3rd major version did it acquire an interface for tablets and other progress began towards unifying the interface and OS hardware. However, even versions 4.4 and Android L receive time signals using the same methods that Nokia 3310 and other earlier GSM/3GPP phones received them, i.e. from cell towers when registering on the network (when connected to the tower). At the same time, tablets or other devices without a communication module, in principle, do not have the ability to synchronize time automatically.
Unfortunately, in order to teach Android to synchronize time completely automatically using NTP, we need root access because there is currently no API for accurately setting the time in Android.
Let's get started.
The first thing you need to do is turn off time synchronization with the mobile network. At the same time, I recommend leaving the time zone setting in automatic mode, and turning it off only if there is a guarantee that the device will operate in stationary mode. Screenshot of the settings window “Settings -> Date and time” of Android 4.x version:
Next, we need to install the ClockSync application, which will act as an alternative to the time synchronization daemon using NTP.
Screenshots of the ClockSync program window before synchronization (left) and after (right):
The screenshots show that the difference with the exact time turned out to be quite small, however, there are different situations, for some the time on the device can even float back and forth because the operator did not bother to put things in order on his BS.
After making sure that everything works, we’ll set up automatic synchronization in the ClockSync program. To improve accuracy, I recommend enabling the “High Accuracy Mode” and “Only via WI-FI” options. If with the first option everything is clear from the description in the program (see screenshot below), then I recommend enabling the second option primarily not for reasons of saving mobile traffic, but because the mobile Internet is not able to guarantee at least some stable delays.
A little more about accuracy:
The still widespread mobile Internet of the 2nd (GPRS/EDGE) is, in principle, unable to provide stable transmission delays. Even the Internet of the 3rd (3G) and, to some extent, 4th (LTE/LTE-advanced) generations, when the network or communication channels between BS are heavily loaded, which is a typical situation for large populated areas, cannot guarantee stable delays. Therefore, even with approximation, the final accuracy of time setting can be worse than a fraction of a second and can even easily reach several seconds.
In addition, I recommend enabling the “When turned on” option so as not to wake the device from deep sleep once again and thereby save energy.
Screenshot of automatic synchronization settings in ClockSync:
In connection with large-scale changes in time zones in the Russian Federation in the fall of this year, it is necessary now to think about updating information about them on all devices, and if there are no problems with supported desktop OSes, then in Android even the latest version of the OS contains outdated data. To make sure of this, install TimeZone Fixer and observe an unsightly picture.
A screenshot of the TimeZone Fixer program running on Android 4.4.4 (Cyanogenmod firmware dated August 4, 2014), which clearly shows that the data in the firmware is out of date:
A little bit of common sense and concern for users:
The author of the TimeZone Fixer program warns us that updating time zone data files can completely “break” the device and even gives recommendations on how to protect yourself from additional problems, although the cases of problems are isolated and very specific - this is really good care for ordinary users.
That’s the only reason I included this piece in the article; although it is not directly related to the problem, it is a really good example of caring about users. At the same time, the warning about versions 4.3+ is caused by only a small number of reviews about the program for devices with new OS versions, so please be sure to write a review about this application after use.
After updating the time zone data, the program will offer to reboot, however, I recommend rebooting the device yourself through the system menu since the program performs a reboot that is actually equivalent to a reset, which, although with a low probability, can lead to problems and data loss.
I will be happy to answer any questions or make additions that the community deems necessary, however, I would like to avoid overloading the article with additional information in order to adhere to the format of a compact guide to solving a specific problem.
UPD:
This instruction completely solves the problem of time zones only for versions younger than 4.4. From version 4.4, additional patching is needed, while the issue is at the stage of exploring the possibilities for creating a user-friendly solution.
What to do when time keeps getting lost
The first thing you need to do is determine what is causing the time on your device to get lost on a regular basis. This may happen for the following reasons:
- The wrong time zone is set, and at the same time the “Automatically detect time” function in “Settings” is activated. In this case, the clock will always be adjusted a few hours back or forward.
- After turning off the PC or laptop and the next time it is turned on, the time shows 12 o'clock at night. This means that the problem lies in the BIOS.
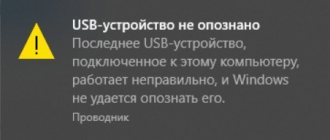
- The computer is infected with viruses that adjust the time. This can be done to organize DDoS attacks. How to change the time on Windows 10 in this case and prevent them from changing?
What instrument are you? Take the test and find out
How to change the time on Windows 10 in the BIOS
By default, Windows "reads" the time value in the BIOS. Accordingly, if the time is set incorrectly, then in Windows it will be lost periodically. To solve the problem, enter the BIOS and set the correct time. For this:
- Read how to enter the BIOS on all types of PCs and laptops here
- In the “Main” section there is a “System Time” item. It is there that you need to indicate the current correct time (using the keyboard).
- Next, press F10 to save the settings. The PC will reboot automatically.
If, even after this, the time is constantly lost and every time you start it shows 12 o’clock at night, then this means that the BIOS does not save the settings. This occurs because the CR2032 battery installed on the motherboard is discharged. That is, it needs to be replaced.
Its operating voltage is 3.3V. If it is below 2.5V, then this precisely indicates its unsuitability for further use (you can measure it with a voltmeter or multimeter).
Synchronization with Microsoft services
In Windows, by default, you can enable time synchronization with Microsoft servers. In this case, it is adjusted every time you turn on the PC. To use this function, you need:
- In the "Control Panel" select "Date and Time".
- In the next window, open the “Internet Time” tab.
- Click "Change settings". Enter time.windows.com and click OK.
And before you change the time on Windows 10 in this way, you need to make sure that the time zone is set correctly.
Invalid time zone
If the wrong time zone is set, the time is constantly adjusted several hours forward and backward. But the minutes, as a rule, are shown correctly. To change the belt you need:
- In "Settings" go to "Time and language"
- In the “Date and Time” section, find the “Time Zone” item and select the one you need there (according to your location).
How to set the time and date on your computer
How can this be?... With each update of the operating system, finding familiar computer settings becomes more and more difficult.
There are so many possibilities, but the most basic settings are hidden so that you can’t find them... If earlier setting the time was very simple - you just need to click on the date and time in the lower right corner and select change the system time, but now it’s a little more complicated. But let's take a look at where these settings can be found in different operating systems.
Windows XP
Double-click on the date and time with the left mouse button.
Or go to the control panel and select “Date and Time”:
After this, a window is displayed where you can set your time and date, select a time zone and enable or disable synchronization with the time server (for synchronization, it is recommended to first specify today’s date and only then click “Update now”. When synchronization is enabled, the time and date you specified changes automatically).
Windows 7, Windows 8
Left-click once on the date and time (which are located on the bottom right).
Click “Change date and time settings.”
Click “Change date and time” and enter the current values.
Click "OK". To synchronize the time automatically, you need to go to the “Internet Time” tab.
Click “Change settings” and check the box according to the following figure:
If synchronization does not work, try setting today's date and updating synchronization.
Windows 10
Right-click on the time or date (bottom right) and select “Set date and time” from the drop-down list.
If desired, the items “Set time automatically” and “Automatically set time zone” can be enabled. Then there is no need to manually set the time.
If there are any discrepancies with the time, check Windows updates. If all the updates are installed, but the time is still behind or in a hurry, install it manually. To do this, disable “Set time automatically” and click the “Change” button.
After that, enter the current date and time and save your changes.
It is important to note: if the date and time on the computer constantly gets lost (for example, after turning it on), then it’s time to change the battery inside the system unit (on the motherboard). And although a dead battery does not affect the performance of the computer in any way, due to an incorrectly set date, the browser may report an invalid certificate, and in some cases, even restrict access to the Internet.
If you cannot change the time and date using the above methods, you can try changing it through the BIOS.
If, when changing the date and time, the computer requires administrator rights, you can try to display the administrator account, log in, and change the necessary data there.
And, of course, we are waiting for your comments! Write whether you managed to solve the problem or not. This may be a short comment, but it is very important for us. Only your questions will help us more accurately describe the material and solve the corresponding problem. And most importantly, through the comments you can quickly get an answer to your question. But I think I’ll write about this in a separate article :)
Published: 2018-06-28 01:56:43