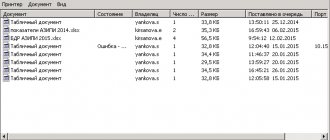
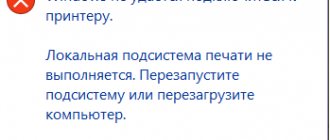
When a print job is given from a computer, all documents go into a queue. If there are a lot of jobs, then they will all be in the queue window until the previous ones are printed. In some cases, printing may freeze, and an error message may appear in front of the document.
The freezing problem can happen if the printer has low specifications and a lot of documents are sent to it for printing. In both situations, it is imperative to delete the print queue, because this is the only way to resume the printing function. Cleaning also helps to cancel printing of queued files.
How to cancel printing a document on a printer: clearing the print queue
Tell me how I can set up the printer: I sent 3 documents to it for printing. As a result, he printed one, but not the other two. Now no matter how much I send documents, it doesn’t print anything.
A window pops up with a document printing queue - one of them seems to be frozen. There is no way to clear this print queue or delete it. How can I do that?
Yes, there is a similar problem: when sending several files for printing (especially if they are large and weigh several tens of megabytes, contain graphics, drawings, etc.), it is not uncommon for the print queue to freeze. And, of course, until it is cleared, the printer may not respond in any way to sending new documents for printing.
Actually, today’s article will be on this issue.
All possible reasons why the printer does not print documents and queues them are described in detail here: https://poprinteram.ru/stavit-v-ochered-no-ne-pechataet.html
3 ways to stop printing documents on your printer
Method number 1: through the printer properties
1) First you need to open the Windows Control Panel at:
Control PanelHardware and SoundDevices and Printers
2) Next, right-click on the printer to which you are sending documents for printing. In the pop-up window, select “View print queue” (as in the screenshot below).
View the print queue
3) After which, by selecting any of the documents present in the queue, you can cancel (to remove it from the queue, just select it with the mouse and press the Del key). See example below.
I would also recommend trying to restart printing the document before deleting it from the queue.
Right-click on the document and cancel its printing.
This method will help solve the problem in half the cases. However, sometimes, no matter how many times you press the Del button, not a single document may be deleted from the print queue. In such severe cases, use the options below.
Method No. 2: stopping the service and cleaning the PRINTERS folder
Windows has a special service responsible for printing documents (called “Print Manager” or “Spooler”).
So, if you stop its work, then you can “manually” delete all the files that were sent for printing. Actually, below we will show how to do this.
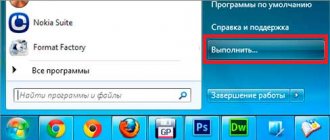
1) First you need to open the list of services. To do this, press the Win+R button combination and enter the command services.msc. Example below (works on all versions of Windows).
services.msc - open the list of services in Windows
2) Next, find in the list a service named “Print Manager” or “Spooler” - you need to stop it. See the screenshot below.
Stopping the print spooler
3) After stopping the service, go to the folder: C:WindowsSystem32SpoolPRINTERS
4) In this folder, you need to delete all files with the extensions .SPL and .SHD (on my computers this folder is generally empty.) .
If suddenly the files will not be deleted, use the recommendations from this article.
This folder is empty
5) Enable the Print Spooler service (which was previously disabled) and check the operation of the printer. The problem must be resolved.
Method number 3: using the command line
In some cases, the previous methods may not work, for example, when the conductor freezes. In this case, everything can be done on the command line in a few steps.
1) The first thing you need to do is open a command prompt as an administrator. To do this, open the task manager (combination Ctrl+Alt+Del or Ctrl+Shift+Esc) and click “File/new task”, enter the CMD command and check the box that the task should be run as administrator. Example below.
Run Command Prompt as Administrator
2) Next, enter the command net stop spooler and press Enter. The print service must be stopped (see example below).
The print service has stopped
3) Then enter two commands in sequence:
- del %systemroot%system32spoolprinters*.shd
- del %systemroot%system32spoolprinters*.spl
After entering each one, press Enter. Thanks to these commands, temporary files for printing will be deleted from the PRINTERS system folder (they are the ones present in the print queue).
Temporary files sent for printing have been deleted
Please note that after entering each command, nothing should be written in response (this means that the command was completed successfully).
4) Next, start the print service by entering the command net start spooler.
The print service has started again
PS
If, after clearing the print queue, the printer still does not print the newly poisoned documents (I apologize for the tautology), I recommend reading this article: https://ocomp.info/ne-pechataet-printer-chto-delat.html
Hope your problem will be solved.
Method 1: via graphical interface.
A longer way to clear the print queue compared to the second, but understandable to the average user .
1. Open the “ Services” snap-in. The fastest way to open “ Services ”: press the Win+R and type the command services.msc .
Alternative path in Windows7: Start / Control Panel / Administrative Tools / Services.
2. In the snap-in, find the “Print Manager” service and click “Stop”
3. Clean the print queue files. Go to the folder C:\Wiondows\System32\spool\PRINTERS and delete all files from it.
3. Return to the Services snap-in and launch “Print Manager”.
Force clearing the print queue | 2 ways
Hello friends, today I decided to write an article about a fairly common problem. The problem is related to when the print queue hangs in Windows operating systems. This problem prevents new documents from being sent for printing, so here I will describe several ways to clear the print queue.
Method one
So, clearing the print queue is usually done through the “Devices and Printers” window. To get there you need to go to the Control Panel, then to “Hardware and Sound” , and then to “Devices and Printers” .
You need to right-click on the problematic printer and select “View print queues” . In the window that opens, we click on the “Printer” and in the context menu that pops up, select “Clear print queue” . All erroneous queues, as well as completed ones, should be cleared.
It happens that documents are not removed from the print queue. This means that, most likely, they are blocked, either by the system or by the printer driver. Such documents can only be cleared when you restart both the computer and the printer. If you cannot do this, then you can forcefully remove them from the queue.
| Important! If you use force completion, this will clear all queues on all printers, keep this in mind, especially if this is done in some company. |
I want to say that when a document is sent for printing, two files are created in a certain place in the system: one with the .SHD the .SPL extension - which contains the data for printing. This data is located on the system disk along the path System32spoolprinters .
Now we need to delete all the contents of the PRINTERS folder, which will also delete the print queues. We will look at this in the next method.
Method two. Clearing the print queue via the command line
To complete this task, we need to run the command line as an administrator, and then execute these commands in order:
This set of commands first stops the print service, then deletes all files with the .spl and .shd extension and the PRINTERS folders, and then starts the print service again.
If you are unable to enter these commands, you can try downloading this file and executing it as an administrator. This is the same set of commands, only in a bat file.
Important! It happens that the script may not work, in this case you need to check whether the C:windowssystem32spoolPrinters . To do this, go to “Devices and Printers”, then click on the printer and at the top of the window select “Print Server Properties” , in the window that opens go to “Advanced Settings” and see the path there.
Usually the path that we are considering is there, but if this is not the case, you will have to correct it in the script.
This technique that we reviewed works on all versions of Windows. Starting with seven and ending with ten. If you have any questions, write in the comments, or you can write to us through the VKontakte group.
Restarting the Print Spooler Service
This method involves restarting the Windows system service, which is responsible for setting up print jobs. It's called “Print Manager”.
Stopping the Print Spooler service
After stopping this service, you need to go to the C:\WINDOWS\system32\spool\PRINTERS folder and delete all files from there.
C:\WINDOWS\system32\spool\PRINTERS – temporary storage folder for files sent for printing in Windows
This is the folder that contains all the files that you have queued for printing. After cleaning it, the Print Spooler service can be started again.
We have automated this entire procedure for you and now forcibly clearing the print queue is performed with one run of a special batch file.
Download this file from the link above and run it as administrator.
Running a file to force clear the print queue in Windows as an administrator
A command prompt window will open and you may be asked to close related services. Press “y” on the keyboard.
Steps taken to clear the print queue
After this, all the above steps for stopping and starting the “Print Manager” service, as well as emptying the folder with jobs, will be performed automatically, after which the print queue will be cleared.
Source
How to remove documents from the print queue
Delete queue via printer properties
To reset the entire list of printed materials, click on “Printer” - “Clear print queue”.
If many documents have been sent to the queue and you need to cancel printing of a specific one, then select it and use the context menu to cancel.
In Windows 10, the feature can be used in the Settings window.
System tray icon
The printer icon on the taskbar also allows you to open the queue window.
Forced cleaning
If you cannot cancel the queue through the device menu, you must forcefully reset the tasks. This clears the list on all devices connected to the network. This technique is applied to certain HP and Canon models.
Restarting the Print Service
- Click Start.
- Select "Control Panel". On Windows 10, start typing the name in the search, which is located near the Start menu.
- Go to the “System and Security” - “Administration” section.
- Select Computer Management.
- In the list that opens, find the “Services and Applications” item.
- Click on "Print Manager".
- Click Restart.
For Windows 7, 8 and 10, quick access to “Services” is possible through the “Run” window, which is launched by the Win + R button combination.
Enter the command services.msc. The manager will be cleared after pressing the “Restart” key.
Clearing the temporary Printers folder
Documents for further processing create two temporary archives.
- The first one with the .SHD extension stores settings.
- The extension of the second file is .SPL. It stores working information.
Automatic cleaning of the stack with non-persistent data occurs when the equipment is turned off or rebooted. If the queue is not cleared, the archives must be cleared manually in the system folder C:WindowsSystem32SpoolPrinters.
When you try to delete, you may receive a notification that the file is already in use.
Then stop the print spooler. Delete the files and start the service.
Once data is deleted from a folder, it cannot be restored. The information will appear in the queue only when it is retransmitted to the printer.
Unqueuing via command line
The method is used if the list in the manager is not deleted by previous methods. To enter the Windows 7 line, you need to open “Accessories” through “Start”. Select “Command Prompt” from the drop-down menu. For OS versions 8 and 10, enter the cmd command in the search.
Management is done on behalf of the administrator:
- net stop spooler – stop printing;
- del %systemroot%system32spoolprinters*.shd/F/S/Q – deletes the archive with settings;
- del %systemroot%system32spoolprinters*.spl/F/S/Q – deletes files with displayed information;
- net start spooler – start the spooler.
If the commands do not work, check your hardware settings. Find out the address for saving current data and edit the code to suit your needs.
Creating and running a .bat file
The method is used in case of system failures and allows you to instantly remove the existing queue.
- Open a new Notepad file.
- We save the empty template in the “file_name.bat” format.
- We write the text for deleting .shd, .spl archives (written in the previous paragraph).
- Save the file.
As soon as you need to remove documents from the queue, double-click on the created file.
Run only as administrator.
Delete queue via printer properties
- Go to Start.
- Open the "Devices and Printers" section
- Select a printing printer from the list.
- Right-click on the name. To view all documents sent for printing, select the appropriate option from the drop-down list.
To reset the entire list of printed materials, click on “Printer” - “Clear print queue”.
If many documents have been sent to the queue and you need to cancel printing of a specific one, then select it and use the context menu to cancel.
In Windows 10, the feature can be used in the Settings window.
Instructions on how to cancel printing or remove documents from the queue
There are many different problems with printing devices. Sometimes fixing them is quite simple. But sometimes an inexperienced user has to work hard to get the device to work again. Many people search on the Internet for “how to clear a printer’s print queue” - this is the correct first action when printing simply stops without reason or error.
As a rule, the problem with the inability to remove documents from the task list occurs on models from HP and Canon. In this article you can find several ways to forcefully delete a print queue on a printer when standard actions do not clear it. The instructions are relevant for the family of all versions of Windows 7,8,10 operating systems.
Possible causes of problems
Before you start troubleshooting any problem or error, you need to know for sure that it exists. Documents may become stuck in the queue for several reasons, and it is not always necessary to clear or reset all tasks. The reasons may be:
- Printer software errors.
- Problems with the Windows operating system.
- The presence of viruses on the computer or incomplete elimination of the consequences of their actions.
When printing large documents and pictures, there are situations when the document may take a long time to load for printing or freeze. This is not a problem and no user action is required. You just need to wait a little. You should sound the alarm only when the dimensions indicated in the figure below are equal and printing has not started.
Printer Task Manager
The easiest and most standard way to clear the queue of documents for printing on a computer or laptop is to do everything through the printer task manager. But first you need to get to it. You can do it like this:
- Open the Control Panel via the Start button or by pressing WINDOWS+R, and then type “Control”.
- Find the "Devices and Printers" section.
- Select your model from the list that opens.
When there are many devices on the list, it will be difficult to find. You should search by the model name, which should be indicated on the device itself. The option we need will be indicated with a green checkmark. Another sign of the right choice is the presence of jobs in the queue.
- Select with the mouse and press the right button.
- In the context menu, select “View Queue”. You will see all unfinished tasks.
- In the window that you see now, there will be a list of frozen documents.
- To remove everything at once, click on “File” at the top and select “Clear print queue.”
- To remove a specific document from the print queue, highlight and right-click and click Cancel from the menu.
Forced cleaning methods
Activities to remove documents from the queue do not always go so smoothly and simply. Often you have to resort to very different and sophisticated options to delete the print queue on the printer. This section will talk about forced ways to achieve success. Use them if the standard one through the dispatcher did not help.
Windows Services
Windows operating systems have different services that perform a large number of tasks. Among them is the print spooler service. The role of this equipment is extremely simple and quite important - to control printing on your computer. Problems with printing freezing may be related to this. An inexperienced user will not be able to accurately verify this fact.
All that can be done in our case is to try to restart this service. To do this, follow these instructions:
- Through the start we get to the control panel.
- Among the large list we find the “Administration” section.
- From the list of shortcuts, click on “Services”.
- In the list, look for the “Print Manager” snap-in.
- Let's restart it.
Clearing the temporary folder
Few people know that when printing, the system creates temporary files in which it records all the information necessary to complete the operation. If there are no such files and information, the list of files to print will be empty, which is what we need.
You can find the required folder at C:/Windows/System32/spool/Printers. If the Windows system is not installed on drive C, then the drive name in the path must be changed to the current letter. You only need to delete the files in the folder, and not the Printers directory itself. After removal, you should restart your computer or laptop.
Experts recommend stopping the print service before deleting files from a folder, and then turning it on again after rebooting. How to do this is described in the previous section.
Command line
If you have experience working with DOS system commands and understand at least a little something about it, then you can use the water command method to clear the queue.
You need to run command line mode as an administrator.
Further actions will be to run the following commands:
- net stop spooler.
- del %systemroot%system32spoolprinters*.shd /F /S /Q.
- del %systemroot%system32spoolprinters*.spl /F /S /Q.
- net start spooler.
Print queue problem
HP LaserJet Pro MFP M127fw printer
After the next update, the network printer stopped working. It is far from certain that the update was the cause of the problems.
The printer (MFP) is detected on the network and diligently prints a test page when installing the driver. And after that it stops printing, because, apparently, something happens with the services responsible for printing. Documents do not get into the printer queue (that is, it seems empty to me), and the “Printer Print Queue” service itself (or any phrase similar in meaning to the word “queue”) is not in the list of services; there is only a “Message Queue”. The standard troubleshooting tool does not reveal the problem (however, neither does the utility from HP “HP Print and Scan Doctor”. Not a single text editor “swears” when trying to print something about printer errors).
At the same time, the scanner in the MFP continues to work properly.
I have already done a lot of things to solve the problem, but I have not achieved success.
What can be used additionally?
If all of the above methods seem complicated to someone or do not give the desired effect, you can use third-party utilities, among which the most interesting is the HP Print and Scan Doctor program.
The application can automatically detect and fix some printer-related errors. As a rule, after the error handling process is completed, most printers begin to work normally.
If for some reason the printer is still not responding, you can reinstall or update the device driver, temporarily disable brandamair, or log in with a different account and print the necessary documents.
How to clean Epson printer nozzles - a method for the most difficult cases
This method is also intended for "severe cases". If the printer completely refuses to print, that is, the print head nozzles are tightly blocked by a plug, use this method.
- Remove the print head.
- you need to find a small box, rinse it with distilled water and fill it with resuscitation fluid so that the height of the liquid column in the box is
3-4mm, then place the print head with the nozzles facing down. It is also necessary to place a cotton swab on the top of the head, generously soaked in the washing liquid. To prevent the liquid from evaporating, put everything in a bag or wrap it in food-grade cellophane and leave it for 5-6 days.
- Let's go back.
- We insert cartridges with resuscitation fluid. Using the control panel or driver, we carry out 4-5 cleanings. Turn off the printer and leave it for a day to normalize the pressure in the ink channels of the print head.
- We insert the cartridges and work.
What should I do if the print queue is not cleared?
Many users complain that files from the waiting list continue to print even after being cleared. To resolve this issue, use the following recommendations:
- Disconnect the printer from your computer.
- The process associated with the Print Spooler service is being forced to terminate."
- Then it is recommended to check the “PRINTERS” folder for the contents of temporary files. If there are any, remove them.
+ zhivye-oboi-windows.ru Application is blocked from accessing graphics hardware Windows 10: 7 steps to fix
- If you can't remove unnecessary documents, restart your computer and try standard cleaning.
- Download and run the Bat file to force cleanup.
In one of the steps presented, you will still be able to terminate unnecessary processes that send documents to print. As a last resort, you should carefully scan your device for viruses and repeat the steps described above again.
Image source: it-tehnik.ru
Cleaning via Settings
Another option is to automatically delete the queue, which is suitable if you cannot find the printer icon in the taskbar. This time it is proposed to act according to the following scenario:
- Launch the Start menu by clicking the Start menu icon or pressing the Win key.
- Open Settings (gear icon).
+ zhivye-oboi-windows.ru How to add an option to empty the Recycle Bin to the Windows 10 context menu
- Go to "Devices" and then to "Printers and Scanners".
- Find your device in the list and click its name with LMB.
- Click the "Open Queue" button.
- Follow steps 4-5 of the previous instructions.
Therefore, this method also uses the built-in Windows utility. The only difference is how to access it.
