Home » Uncategorized
Vladimir 10/31/2021
1 comment
Owners of the Windows 10 and 8 operating systems may be surprised that the following material makes at least some sense, because in these versions you can take a photo with a webcam in the built-in Camera application.
The answer is simple: Windows 7 and earlier operating systems cannot boast of such functionality. This is where third-party solutions come to the rescue, which are freely available on the Internet.
These are not only applications, but also online services that you just need to go to and take a photo on your webcam.
Method 1: Built-in utilities
Webcam for PC
To take a photo with the webcam of a laptop or computer running Windows 10 and Windows 8 you need to:
1 Go to Start
2 Click on All applications or use search
Camera app
3 Find the Camera application alphabetically and launch it
4 Click on the camera shortcut and take a photo, which will be saved in the Camera Album folder located in Images
In Windows 7, standard means of taking photographs from the web are not provided, so here you can take a photo using solutions from the Internet, but if someone still has the good old Windows XP OS installed, you can take a photo directly from Explorer.
The method only works from an external camera that is connected via USB to a PC. For the photo you need:
- connect the camera
- go to My Computer - USB Video Device
- A viewing window should open in which the image from the webcam is located. In the left function column, select Take a new photo, after which it will appear in the Pictures folder
Internet sites
This method requires an Internet connection, so if there are no problems with this, you can use special sites. There are many of these on the Internet. Each of them has different functions for adjusting the shot. Some even flash while taking pictures, by lighting the screen white.
In addition, on such resources you can choose ready-made color or distortion special effects. To find such a site, you can use any search engine. The Internet will give you many options that will take photos for free and save the files on your laptop.
Method 2: Third Party Programs
Webcam video and photo capture apps can be downloaded for free online. Let's consider the popular utilities LiveWebCam and MyCam. If you need to take a beautiful photo with effects applied, use a similar application Altercam , in which you can customize the image from the webcam for conversations on Skype and other instant messengers.
LiveWebCam
Program interface
The program can be downloaded for free from the link:
Now you need to install it on your computer and during installation specify the folder where to save the photos you take. Switching on occurs from the desktop or the Start menu.
The interface will be intuitive for everyone. After launch, it immediately captures from the webcam, and on the side there are a few functional buttons: Take photo, Auto shooting, Detector settings, Program settings, Upload to FTP, About the program, Exit.
1 To start taking photos, you need to click on the Take photo button. You can also go to the program settings:
Checking the settings
2 In the Files tab, you can change the location where captured photos are saved:
Specify the path to save the pictures
MyCam
Program interface
Another easy-to-use program, which can be downloaded from the link:
It is free, you just need to download it and install it on your PC.
At the top there are two buttons in the form of a camera and a red Play circle. The first is responsible for instantly taking photos, and the second is for recording videos. You can customize the program to your liking.
Animation in Pikachu
It’s easy to create a short video using the service. Of course, it will be an incomplete video, but such a pseudo-video is more attractive than a static photo. Animation mode involves recording several frames in a sequence that repeats. The picture is mounted right there and saved in a file with the gif extension. You can send it to friends or save it on your local computer drive.
To record a video, in the appropriate section you must click “Start Recording”
Method 3: Take a photo from your webcam online
The most convenient solution to avoid clogging up your hard drive with some applications if you only need to take photos or videos from a webcam once. The main advantage of online services is the use of filters and other image editors.
There is a large list of different online services, but we will show a few to understand the shooting process.
Shoot-Yourself
The service is located at the following link: After opening, you are greeted with the next page in the first photo.
Adobe Flash Player required for correct operation
1 To start using the site you need to click on Click to enable Adobe Flash Player
2 Next, confirm this if a pop-up notification appears about allowing Flash Player
3 Give access to the camera and microphone by clicking Allow
Opening access
4 Confirm the use of browser recording devices again in the upper left corner
We open access in the browser
5 The webcam capture will appear. All you need to do is click on the icon that says Click and take a photo
Click on the camera icon
6 Next, you can save what you took to your computer by selecting the desired photos at the bottom of the application. To do this, click the Save button. If for some reason the photos turned out to be of poor quality, delete them by clicking on the cross next to the photo
Specify the path to save the finished image
Webcam Toy
webcamtoy service
The service is more functional, because here you can add filters to the photos you take and there are more settings. Also here, the picture is taken 3 seconds after pressing the button, so that the person can choose a position that is comfortable for themselves.
1 Click on Are you ready? Smile
2 After granting all permissions you are greeted with the following page
Click on the camera icon
3 Using the arrows you can change the shooting effects
Choosing effects for shooting
4 Some settings are hidden in the “gear”
Advanced Settings Menu
5 To take a photo, click on the camera icon
6 Now you can share the image with your friends on social networks. There is a Save button to download images.
You can share the photo using your favorite social network or Google Photo app
Pixect
1 To start using the service, follow the link: and click the Let's Go!
Opening the service
2 Now select the Use Camera button
Click on the icon
3 Grant permission to use the video capture device as you did two steps earlier
4 This is what the service for creating pictures from a webcam looks like. In the center is a button for shooting, to the left of it are various effects, there are also funny ones like distortion and other things, and on the right are timers and a collage function. In this mode, you can take many different photos in just a few seconds
Photo tools
5 This is how photo collage works
Creating a collage
6 After you click on the OK button, online Photoshop will open, where you can edit the picture as you wish, and then save it to your computer or share it on social networks Vkontakte, Facebook or Twitter. If you don't like the result, go back by clicking Back
That's all
Benefits of Picachoo
No social network is complete without photographs. Users constantly update their galleries with pictures of all kinds. Sometimes, the loading process itself is so complex that you have to carry out such a simple action, making many different movements.
But almost three years ago the Pikachu service appeared! He made life in online gatherings easier and more interesting.
Having simplified the process of uploading photos, the service provided new features:
- The service exists online; there are no downloads or installations of applications, drivers, etc. you won't need it.
- With Pikachu, you can take a photo with your webcam in seconds. You don't need any special skills to apply creative effects - everything is done with one click!
- It is possible to create collages and GIF animations from your photos.
- You can save pictures in your personal gallery and send them to the wall of Vkontakte, Facebook, Twitter, Livejournal, or publish them on blogs.
- There is a photo chat where users can upload their own photos and communicate with each other.
What to do if all methods do not work
device Manager
If none of the methods work, there may be a problem with the webcam itself. First, make sure it is plugged into a working USB port on your PC. You need to try connecting it to another computer and see if it takes photos at all. It is also possible that the drivers are incompatible with the operating system version or they simply are not installed.
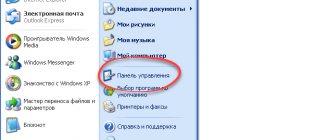
To check this you need to:
- go to Start
- right click on My Computer
- select Properties
- In the left column, click on Device Manager
- in the list of connected devices that appears, look at Image processing devices
If the device is not displayed at all in the manager list, then the problem is at the hardware level, and if there is a triangle with an exclamation mark next to the camera icon, the drivers are not installed and they need to be downloaded and installed. Often the manufacturer uploads the software to its official website.
Thus, taking photos with a webcam is very simple, considering all the above methods of taking photos online or using third-party tools.
For a more visual guide to taking photos from a webcam, we suggest watching a training video on this topic below.
Video: How to take a photo from a Web Camera?
FAQ
How to save a screenshot to a separate file?
Use the PhotoSCREEN program. Apply the default hotkeys. The photo can be processed and then exported using the Save to Disk function. Enter a title and select a file format.
Where can I find screenshots?
The location of the files depends on how the screen was created. When using utilities, media is stored in the default folder. If you took a screenshot on Windows 10 using hotkeys, the result is located in “Images” - “Screenshots”.
Why can't I take a screenshot of the screen on my computer?
The problem can occur for several reasons:
- Printscreen key malfunction;
- third-party software may run in the background and interfere with shooting;
- faulty keyboard drivers;
- The Fn function is enabled on the PC.
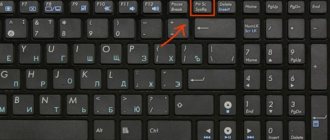
How to take a screenshot on a computer if there is no Print screen button?
The optimal solution would be to download a special program and install custom key combinations. You can use PhotoSCREEN. To configure the buttons, launch the software and go to the “Hot Keys” section. Click on the desired mode and hold down the new button.
How to take a photo on a Macbook
Screenshot of a MacBook
The Mac OS operating system is different from the Windows that most users are used to. The tools perform the same tasks, but they look different and the algorithm for using them is different. The standard process for accessing the webcam when you have a Macbook in front of you would be as follows:
- Tap the search bar at the top of the Spotlight screen.
- Enter the “Photo Booth” command, and select a webcam from the list that opens.
- The shooting window will open on the screen.
- All pictures taken will be saved in a special Photos application.
note
! If you have an iPad or iPhone connected to a Macbook, then all pictures will be automatically saved to these gadgets.