VPN is not only an opportunity to access blocked resources, but also a technology that allows you to increase your security and privacy on the Internet. Today we will look at setting up a VPN connection in Windows 10.
- 2 How to connect a VPN in Windows 10
2.1 Selecting a server
- 3.1 How to connect to a VPN
3.1.1 Setting up automatic connection
Create a VPN profile
Before connecting to a VPN, you need to set up a VPN profile on your computer. To get a VPN profile from your company, you can either create a VPN profile yourself or set up a work account.
Before you begin, follow these steps:
If you will be using a VPN connection for work, check for the VPN settings and/or application on your company's intranet site while you work, or contact your company's support representative.
If you're signing up for a VPN service for personal use, visit the Microsoft Store to check for an app for that service, and then go to the VPN service's website, which may provide the VPN connection settings you need.
Click the Start button, and then select Settings > Network & Internet > VPN > Add a VPN connection.
In the Add a VPN connection section, do the following:
For VPN provider, select Windows (built-in).
In the Connection name field, enter a name that you understand (for example, “My Personal VPN”). This is the name of the VPN connection that you will need to look for to connect.
In the Server Name or Address field, enter the address for the VPN server.
Select the type of VPN connection you want to create. You should know what type of VPN connection or VPN service your organization uses.
In the Login Information Type field, select the type of login information (or credentials) to use. This could be a username and password, a one-time password, a certificate, or a smart card if you're connecting to a VPN for work. Enter your username and password in the appropriate fields (if required).
Click the Save button.
If you need to change your VPN connection details or specify additional settings, such as proxy settings, select the appropriate VPN connection and click More settings.
Settings via Control Panel
On Windows XP, Vista and later versions of the OS, you can create and connect to VPN networks using built-in software. Let's consider this connection step by step:
- First you need to go to the “ Network and Sharing Center ”. Use the program search or go through the network icon. You can also use the Win + R key combination and enter control /name Microsoft.NetworkAndSharingCenter in the line
- Click on the item "Setting up a new connection or network».
- Click on the third item "Connection to the workplace».
- Now the user will see a window with a choice of how to connect to the server. If you plan to use a VPN connection for Windows 7 in the future from a remote location, for example, from home or a cafe, then you need to create a secure network over the Internet. If the computer is used only at the workplace on a local network, then select the second option without the Internet. To connect, you will need to connect all devices via LAN cables (fiber optic or telephone). It is better to create a private secure network (VPN) with an Internet connection on Windows 7 and other operating systems; it is more convenient and practical to use.
- Now Windows XP, 7, etc. will require the user to provide data to connect to the server. To do this, you need to find out the IP or domain of the server from your service provider. They are entered in the first line. The second column is the name for this connection; you can choose any value.
- The last step is to provide network access information. The username and password are also issued by the supplier class=”aligncenter” width=”470″ height=”345″[/img]
- Next, the connection is made according to the entered data. At this stage, a number of problems and errors may arise due to incorrect operation or configuration of Windows. Their correction will be described later.
If the remote VPN server receives the correct data, then within a few minutes the computer will connect to the new private network. In the future, you do not need to configure the connection each time; it will be in the quick connection selection section.
Connecting to a VPN network
If you have a VPN profile, you can connect to it.
Select the network icon ( or ) in the far right corner of the taskbar.
Select the VPN connection you want to use, and then do one of the following, depending on what happens when you select a VPN connection:
If a Connect button appears below your VPN connection, select Connect.
If the VPN section opens in Settings, select that VPN connection, then select Connect.
When prompted, enter your username and password or other login information.
Once connected, the name of the VPN connection will be displayed below it. To check if you're connected to a VPN while working on your computer, click the Network icon ( or ) on the far right of the taskbar and make sure that the VPN connection says Connected.
In the modern world, cybernetic space has become much more popular than the real world. Young people are more likely to spend time playing online games and social networks than going for a walk or reading a book. And this is understandable - the availability of information increases awareness and overall human development. However, for some reasons, information and social resources may be blocked by providers, government agencies, or the sites themselves. In this case, do not despair, since in most cases the blocking can be bypassed.
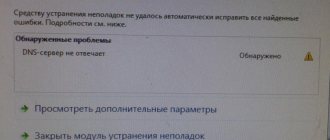
Possible problems
The most common problems encountered are:
- "619: Unable to connect to the remote computer." Most often, this problem occurs if the server has data encryption disabled. Go to the configuration properties (in the VPN settings, find the desired profile). On the Security tab, select “optional data encryption” from the drop-down list. However, if you use a VPN specifically for increased security, then you should abandon such a server;
- "691: Access denied." This is usually a signal that you entered your login information incorrectly. Double check them. Please note that keyboard case and layout play an important role. Check if Caps Lock is enabled;
- "800: Could not connect to VPN." The error indicates incorrectly entered server data. Recheck your configuration. It is also possible that the server you are trying to connect to is no longer available.
If you took server data from an open resource like VPNGate, then the problem is often caused by a server that is no longer active. Most of these situations can be easily corrected by simply changing the configuration to another server from the list.
If you successfully connect to a VPN but your internet connection drops, check the location of the server you chose. Most likely, data is being transferred, but extremely slowly, and the browser may time out for loading pages. Try changing the server to a faster one that is closer to you.
What is a VPN connection and why is it needed?
VPN (English: Virtual Private Network) is a generalized name for technologies that allow one or more network connections (logical network) to be provided over another network (for example, the Internet). Despite the fact that communications are carried out over networks with a lower or unknown level of trust (for example, over public networks), the level of trust in the constructed logical network does not depend on the level of trust in the underlying networks due to the use of cryptography tools (encryption, authentication, public key infrastructure, means to protect against repetitions and changes of messages transmitted over the logical network).
Wikipedia
Free or paid VPN?
According to a survey by the American publication PCMag, 62.9% of users do not want to pay more than $5, and 47.1% prefer to use a free VPN. But are free services as reliable as paid ones, and what services does the user pay for?
Price
The most important point is the price. Free VPNs are suitable if you don't need to share too much personal and financial information. This is an excellent option for surfing blocked resources.
Safety
Running a strong security protocol requires advanced infrastructure, which most free services do not have.
They provide 128-bit encryption technology and PPTP (which is one of the least secure protocols today). Paid users typically have more features, such as 256-bit encryption, OpenVPN (an open-source protocol that uses SSL encryption), Layer 2 Protocol (L2TP), and a combination of IPsec.
Personal data protection
Despite the fact that many free services promise 100% security of personal data, this is usually not the case.
Developers are not charities, they are businesses that want to fund their activities and make a profit. Therefore, there is always a possibility that the data will be sold to a third party. With paid VPNs, as a rule, the opposite is true: developers receive their income from customer subscriptions, so they have no reason to sell other people's data. They must ensure that their clients' personal data is safe and protected from hackers and other third-party agencies.
Confidentiality
If a service says it logs user activity, or doesn't specify its logging policy at all, it's best to avoid it.
It is recommended to check where it is legally based. In the case of Panama and the Virgin Islands, it is difficult to find out who actually owns or operates the company. But, on the other hand, it may be difficult for a user who is dissatisfied with the service to get his money back.
How to create and configure a VPN connection on Windows 10
There are several options for setting up a VPN for Windows 10. Conventionally, they can be divided into:
- built-in (standard OS tools);
- third-party (special programs and browser extensions, as well as functions of some routers).
Creating a VPN through Windows Settings
Creating a virtual network through Windows Settings is the most time-consuming, but at the same time the most reliable way to gain access to blocked resources. In addition, once the VPN is created, it is quite easy to manage it and, if necessary, change the server address:
- Press the Win+I key combination and go to the “Network and Internet” applet.
In the “Windows Settings” block, open the “Network and Internet” element - Open the VPN tab and click on the plus icon that says “Add a VPN connection.”
Click on the plus icon with the caption “Add VPN connection” - Next, fill out the form:
- "VPN service provider" doesn't have much choice, leave it to Windows;
- We choose the “connection name” at our discretion;
- “Server name or address” must be found independently on the Internet. It is best to use the search engine query “Open VPN servers”;
- “VPN Type” is left at “Automatic”;
- “Login data type” is set to “Username and password”;
- the remaining two points do not need to be filled in.
Fill in the required fields, then save the connection - We save the changes using the button of the same name.
You can then use this connection for surfing. Just click on the “Connect” button and wait until the server accepts your request to occupy the channel.
Click on the connection and click “Connect”
Open VPN servers can be found on the Internet, for example, here or on a similar resource.
Video: how to create a VPN connection
How to disable or remove a VPN connection
If you no longer need a VPN or you don’t like the services provided, the created connection can be disabled or deleted:
- In the VPN settings tab, click on the connection and click:
- “Disconnect” to disconnect the computer from the virtual network;
- “Delete” so that all information on the connection is erased.
Click on the connection and press the “Delete” button
Automatic configuration of a virtual network using special programs
Like most Windows features, creating a VPN connection has been adopted by software developers. As a result, users got a whole market with programs that simplify creating a tunnel and connecting to virtual networks. Most of them are a small window with just one button - connect/disconnect from VPN.
One such program is HideGuard VPN. Using her example, it is very easy to see how a connection to a virtual network occurs:
- Download, install and run the program.
- In a small window, select the preferred server, move the toggle switch to the ON position and wait for the connection.
Select the server and enable the program - We take advantage of all the capabilities of a virtual network.
Setting up via router
Unfortunately, not all routers support VPN connections. To do this, the router must have DD-WRT technology, but devices that are less than four years old almost certainly have the necessary firmware. The settings of routers vary, but in general, virtual network management is located in the same tabs:
All about local networks and network equipment
Continuing the topic about a secure VPN connection, let’s look at how to connect to the network on a modern “ten”.
From other articles on our site, you can find out what a virtual network vpn windows 10 is, and how to create a connection via vpn windows 7. Here we will focus on how to set up a vpn connection on windows 10 and how to disable vpn if the client interferes with normal operation.
WHAT IS A VPN
VPN (from the English Virtual Private Network) is a general name for technologies that allow you to provide a network on top of another network. Simply put, this is a virtual cable over the Internet to your personal network. A connection to a VPN is called a “tunnel.” WHY DO YOU NEED A VPN VPN is used by IT company owners to establish communication with employees working remotely. Using a virtual private network, an employee connects to the corporate network from home. But most often, VPNs are used by ordinary users to gain access to blocked sites or replace the IP address. For example, there are musical resources, access to which is limited in Russia. When connected to a VPN, these resources are unblocked. Using a VPN, you can connect to your home network while away from home. Overall, a VPN makes your internet experience safer.
Setting up a Windows XP connection
The connection setup process is almost the same as in Windows 7.
- First you need to go to the network connections section, to do this you need to follow the following sequence: “Control Panel» — «Net» — «Internet connections» — «Network connections».
- In this section you need to run "New Connection Wizard" In its window you need about, then click “ Further».
- In a new window about via the Internet.
- Now you need to enter a name for the virtual network, you can enter any name here.
- Windows XP supported the pre-connection feature via phone number. Here you need to check the box to cancel the preliminary connection.
- The penultimate step requires you to enter the VPN server address and agree to create a connection.
Now the connection can be made through the networks menu. You just need to enter the user and password to log in.
Finally, it is recommended to configure the connection properties in the same way as on Windows 7.
HOW TO SET UP A VPN ON YOUR HOME COMPUTER?
There are two options for creating a virtual private network: paid and free. The good thing about free VPN services is that you don't have to pay for them. But this is also a minus - no one can guarantee the safety of your data. However, to try to master a VPN, you can also use free services. Let's list the most popular and easy to use: CyberGhost Avast SecureLine VPN Hotspot Shield ExpressVPN TunnelBear ZenMate Paid services work faster and more stable, they value their customers and reputation. Reliability is definitely at a higher level. Next, we will show how to connect a VPN in the latest version of the Windows operating system – 10.
Additional connection properties
For the connection to work correctly, it is recommended to slightly change its parameters. To do this, after clicking the Connections button, in the menu that appears, select the Properties button. You can also open these properties through the “ Change adapter settings ” section from the Control Panel.
Follow the instructions:
- Go to the “ General ” section, uncheck the “ Dial the number for this connection first ”.
- In “ Options ”, disable the “ Include Windows login domain ” option.
- In the “ Security ” section you need to install “ Point-to-Point Tunnel Protocol (PPTP) ”. From the checkboxes about and following it “ Microsoft CHAP protocol version 2 (MS-CHAP v2) ”.
- In the “ Network ” section, check only the second checkbox (TCP/IPv4). You can also use IPv6.
Setting up a VPN on Windows xp, 7, 8, 10 through the Control Panel is the same in terms of execution algorithm. The exception is a slightly modified design depending on the operating system version.
After the connection is established, you need to figure out how to remove the VPN. To do this, just go to the “ Change adapter settings ” section from the Control Panel. Next, right-click on the unnecessary element and select “ Delete ” from the menu.
VPN for Opera
If you completely abandoned Opera in favor of the now so popular Google Chrome, then you are in vain. After all, it has... a built-in free VPN service that allows you to access any sites to which access is blocked for one reason or another. We'll show you how to find and enable a VPN in the Opera browser. First, let's go to the settings:
Next, let's move on to the main browser settings:
And already there we set three treasured letters in the search bar - VPN. All that remains for us is to “move” the blue cursor to enable this function. Ready!
Installing the OpenVPN server service on Windows
Download the OpenVPN MSI installer for your version of Windows from the official website (https://openvpn.net/community-downloads/). In our case, this is OpenVPN-2.5.5-I602-amd64.msi (https://swupdate.openvpn.org/community/releases/OpenVPN-2.5.5-I602-amd64.msi).
Start the installation.
If you plan to have the OpenVPN server run in automatic mode, you don't have to install the OpenVPN GUI. Be sure to install OpenVPN Services .
Starting with OpenVPN 2.5, the WinTun from the WireGuard developers is supported. This driver is believed to be faster than the classic OpenVPN TAP driver. Install the Wintun driver, do not install TAP-Windows6.
Install the OpenSSL utility EasyRSA Certificate Management Scripts .
Start the installation.
By default, OpenVPN is installed in the C:\Program Files\OpenVPN directory.
After the installation is complete, a new network adapter of type Wintun Userspace Tunnel . This adapter is disabled if the OpenVPN service is not running.
Creating encryption keys and certificates for OpenVPN
OpenVPN is based on OpenSSL encryption. This means that in order to exchange traffic between the client and the VPN servers, keys and certificates must be generated using RSA3.
Open a command prompt and go to the easy-rsa directory:
cd C:\Program Files\OpenVPN\easy-rsa
Create a copy of the file:
copy vars.example vars
Open the vars file using any text editor. Check the working directory paths.
Be sure to adjust the EASYRSA_TEMP_DIR variable as follows:
set_var EASYRSA_TEMP_DIR "$EASYRSA_PKI/temp"
You can fill in the fields for certificates (optional)
set_var EASYRSA_REQ_COUNTRY "RU" set_var EASYRSA_REQ_PROVINCE "MSK" set_var EASYRSA_REQ_CITY "MSK" set_var EASYRSA_REQ_ORG "IT-Company" set_var EASYRSA_REQ_EMAIL "" set_var EASYRSA_REQ_OU "IT department "
The validity period of certificates is set using:
#set_var EASYRSA_CA_EXPIRE 3650 #set_var EASYRSA_CERT_EXPIRE 825
Save the file and run the command:
EasyRSA-Start.bat
The following commands are executed in the EasyRSA Shell environment:
PKI initialization:
./easyrsa init-pki
The following message should appear:
init-pki complete; you may now create a CA or requests. Your newly created PKI dir is: C:/Program Files/OpenVPN/easy-rsa/pki
Now we need to generate the root CA:
./easyrsa build-ca
Specify the CA password twice:
CA creation complete and you may now import and sign cert requests.
This team formed:
- Root CA certificate: "C:\Program Files\OpenVPN\easy-rsa\pki\ca.crt"
- Key
Now you need to generate a certificate request and key for your OpenVPN server:
./easyrsa gen-req server nopass
The utility will generate two files:
req: C:/Program Files/OpenVPN/easy-rsa/pki/reqs/server.req key: C:/Program Files/OpenVPN/easy-rsa/pki/private/server.key
Let's sign the request to issue a server certificate using our CA:
./easyrsa sign-req server server
Confirm that the information is correct by typing yes .
Then enter the CA password from the root CA.
The server certificate will appear in the issued directory (“C:\Program Files\OpenVPN\easy-rsa\pki\issued\server.crt”)
Now you can create Diffie-Hellman keys (this will take a long time): ./easyrsa gen-dh
For additional protection of the VPN server, it is advisable to enable tls-auth . This technology allows you to use HMAC signatures on SSL/TLS handshake packets, triggering additional integrity checks. Packets without such a signature will be discarded by the VPN server. This will protect you from VPN server port scanning, DoS attacks, and SSL/TLS buffer overflow.
Generate the tls-auth key:
cd C:\Program Files\OpenVPN\bin openvpn —genkey secret ta.key
The file “C:\Program Files\OpenVPN\bin\ta.key” should appear. Move it to the C:\Program Files\OpenVPN\easy-rsa\pki directory
Now you can generate keys for OpenVPN clients. For each client that will connect to your server you need to create your own keys.
There are several ways to generate keys and transfer them to clients. In the following example, we will create a client key on the server and protect it with a password:
./easyrsa gen-req kbuldogov ./easyrsa sign-req client kbuldogov
This key (“C:\Program Files\OpenVPN\easy-rsa\pki\private\kbuldogov.key”) must be passed to the client and the password must be provided. The client can remove password protection for the key:
openssl rsa -in "C:\Program Files\OpenVPN\easy-rsa\pki\private\kbuldogov.key" -out "C:\Program Files\OpenVPN\easy-rsa\pki\private\kbuldogov_use.key"
If you want to generate a key that is not password protected, you need to run the command:
./easyrsa gen-req clientname nopass
On a server with OpenVPN you can create an unlimited number of keys and certificates for users. Generate keys and certificates for other clients in the same way.
You can recover compromised client certificates: cd C:\Program Files\OpenVPN\easy-rsa EasyRSA-Start.bat ./easyrsa revoke kbuldogov
So, we have generated a set of keys and certificates for the OpenVPN server. Now you can configure and start the OpenVPN service.