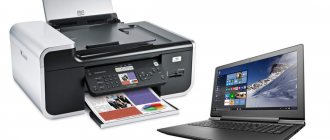
A network printer is the main, and at the same time, sought-after participant in any local network, whose purpose is to facilitate the process of preparing all kinds of printed materials, from text to illustrations.
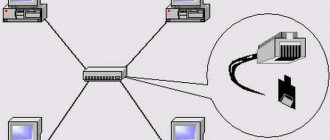
There are several ways to organize the printing process. In the first case, the network printer is connected to the router using a twisted pair cable or via a Wi-Fi connection, provided that it is equipped with a network card. In the second case, the printer is connected directly to the USB connector of the computer and after installing the appropriate drivers, shared access to this device is configured. As a result, the printer receives a network name and can be accessed from other computers on the local network.
Next, we will consider in detail the process of setting up a network printer, and also open general access to it. The article is most relevant in relation to the home local network. Network printers that support Ethernet have a relatively high price and are more expensive to maintain, while a regular printer directly connected to a PC can be easily converted into a network printing device.
Why do you need a network printer and what is it?
Typically, the printer is connected to one computer via a USB cable. Printing information is transmitted through it, and the external device performs the task. But sometimes at home, and even more so in the office, there are several PCs at once with one printer. Of course, the devices can be reconnected every time, but this is extremely inconvenient.
The solution to the problem is setting up a network printer. He is able to print documents sent to him from all computers located on the premises. Thus, one device serves up to several dozen employees.
Set up printer sharing in settings
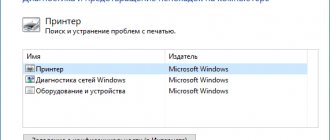
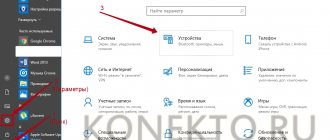
1. Open the Start menu and go to Settings.
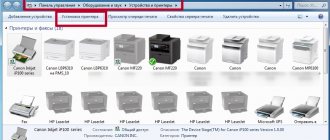
2. Go to “Devices” => on the left side, select “Printers and Scanners” => on the right side, click on the printer that you want to share and select “Manage” in the menu that appears.
3. Click on “Printer Properties”.
4. Click on “Sharing Settings”.
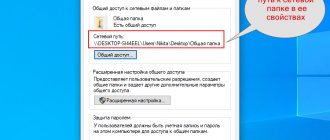
5. Open the “Access” tab, check the box next to “Share this printer” => next to “Resource name” you can write any name for the network printer. If you want the drivers for this printer to be automatically installed on computers that connect to it, click on “Additional drivers.”
6. By default, drivers are available for systems with the bit capacity of this computer. In order for computers with a different bit depth to also automatically receive drivers for your printer, check the required boxes and click “OK” => select drivers for the required bit depth (if you don’t have them, download them) and click “OK” in all windows.
How to connect and configure?
Connecting and setting up a network printing device will not cause serious problems if you have previously connected one computer to a printing device. Next, you just need to perform a few simple manipulations with the settings.
Important. To properly configure printing, all computers that are planned to be connected to a common device must be on the same local network.
"Options"
A standard connection method that does not require the user to have serious knowledge in the field of setting up equipment, if you do not take into account the fact that public access must be opened in advance. All actions are performed through the built-in “Settings” application, and the algorithm itself looks like this:
- Open Settings via the Start menu.
- Go to the "Devices" section.
- In the “Printers and Scanners” tab, click on the “Add a printer or scanner” button.
- Click LMB on the inscription “The required printer is not in the list.”
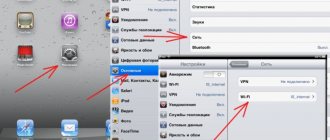
- The next thing to do is to highlight the “Select a shared printer by time” item and enter the address in the format “\\Computer name or IP address\full name of the printing device.”
- If you do not remember the exact name of the equipment, then click on the “Browse” button and select the device from among the available ones.
- Click Next.
- Wait until the connection setup is completed.
To test the connection, which is carried out without a password, it is recommended to make a test page by printing a pre-prepared template on it. You can do without this step by closing the settings window.
PowerShell
The second method will be faster, but at the same time more complex. The operation is performed through the PowerShell console, which processes user requests. The computer owner must know the name of his profile and printer. Without this information, connection becomes impossible. If you have all the input data, then start following the instructions:
- Right-click on the “Start” icon or hold down the “Win” + “X” keys.
- From the list provided, select run PowerShell with administrative rights.
- To set up a printing device, enter a request in the format “Add-Printer -ConnectionName \\PC Name\Printer Name”.
- Press the "Enter" key.
If the addition of a printing device was successful, a corresponding notification will appear in the console. Please note that you can also share a device not by the computer name, but by its IP address. In this case, the command “Add-Printer -ConnectionName “\\PC IP address\Printer name”” will be used. To process the request, press the “Enter” key again.
Control Panel
An alternative method, many of the actions in the algorithm are reminiscent of the first method discussed in the material. But, if you were using the “Settings” application then, now you will have to turn to the “Control Panel”. The setup is performed according to the following instructions:
- Open the “Control Panel” in any convenient way. For example, through the search string “Windows”.
- Go to the "Devices and Printers" section.
- Click LMB on the “Add Printer” tab.
- Select your printing device from the available devices. If it is not in the list, click on the inscription “The printer you need is not in the list.”
- Check the second box and enter the address of the network device location.
- Click on the "Next" button to establish the connection.
After the computer manages to detect the printing device, it will be prompted to check the connection using a test page. You can refuse this option by clicking on the “Done” button.
Network settings
Often sharing a printer to provide local access in Windows 10 is not enough. In addition to the parameters listed above, you will also have to set the correct detection parameters for the current network profile.
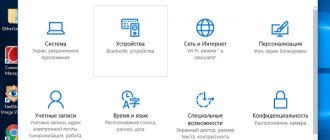
Settings are set in the “Network and Sharing Center” (the section is called up through the “Settings” of the system, in the “Network and Internet” category).
Next, go to the “Additional parameters” sub-item.
The final step is to select a “home” or “private” network profile (the one that is used by default and therefore eliminates security issues) and activate the “Enable sharing and discovery” sliders.
For versions of Windows 10 OS release 1803, you must configure the “Publish Feature Discovery Resource” service to start automatically.
If you have a printer installed on your computer and you want to print to it from other computers on the network, you need to give it shared access so that other computers can connect to it. In today's article, we'll look at various ways you can set up printer sharing in Windows 10.
If the computer to which the shared printer is connected is turned off or in sleep mode, the printer will not be accessible to other computers on the network.
What problems might there be?
The most common problem that occurs when trying to connect a network device is that the computer cannot detect the device. Most likely, the sharing option was not activated in the hardware settings. To troubleshoot problems, use the instructions:
- Connect your printing device to your computer via a USB cable.
- Make sure the PC recognizes it.
- Open Settings and go to Devices.
- Go to the “Printers and Scanners” tab.
- LMB click on the name of your equipment.
- Click on the "Manage" button.
- Go to Printer Properties.
- Open the "Sharing" tab and activate the sharing feature.
After saving the settings, the detection problem should be resolved. If this does not happen, check whether all computers are on the same local network. It is also recommended to check your firewall settings:
- Through Control Panel, open Windows Defender Firewall.
- Go to "Allowed programs"
- Check the boxes next to File and Printer Sharing.
- Save your settings.
The printing device should now connect without any problems. Other difficulties may be due to the lack of up-to-date drivers, so be sure to update the software before setting up the connection.
Setting methods
You can activate network discovery and open access to the printer in Windows 10 both through the “Settings” of the operating system and in the “Control Panel”. The methods are largely similar - the only difference is in some sections of the menu that you have to navigate between. An alternative is the PowerShell command line shell. Implementing your plan will take even less time, because you will need to enter a couple of commands and secure the result with the Enter button. Read more about each method below.
Add a printer using TCP/IP or hostname
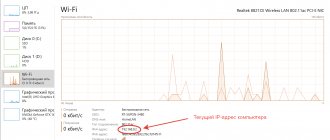
To do this, you will need the printer's IP address (static), which you will find on any PC connected to the network. From Control Panel / Printers, right-click on the corresponding SP / click “Printer Properties” / then the “Ports” tab, find the corresponding printer, see its IP address (you may need to expand the first column for this). Then return to your PC and enter the IP address in the "Hostname" or "IP Address" field; it will also automatically appear in the Port Name field.
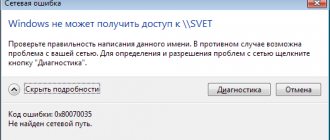
The "Windows can't connect to this printer" error is much less common than it used to be. Early users of Windows Vista or Windows 7, trying to add a printer to their network, often encountered the following message: “Windows cannot connect to the printer. The operation could not be completed (error 0x0000007e)."
In 2010, Microsoft released a hotfix to address a specific printer driver issue: this hotfix was integrated into versions of Windows from that era, so unless you're running an older version of Windows that you never update, you're unlikely to encounter this particular message.
Other problems may cause Windows to not connect to the SP even if the system identifies it. There isn't a one-size-fits-all solution: a search on IT forums reveals many approaches you can try. But more often than not, the headache of trying to add an invisible SP to a Windows computer can be alleviated by following the simple troubleshooting tips outlined above. Well, if you encounter difficulties that are insoluble for you, an IT specialist will come to the rescue.
Sometimes you need to provide network access to your printer to Windows computers that are not members of the same workgroup.
Today we will talk about how to share a printer between Windows machines that are on the same network but belong to different workgroups.
Instructions on how to share a printer over a network Windows 10, 8 and 7
Modern printers have evolved into networked devices that make office work easier for employees and organizations. After preliminary configuration, they do not depend on the computer (whether it is turned on or not); they are self-sufficient elements of a local computer network. Not all printers are designed to work offline on a network and require configuration.
Before the release of Windows 10 1803 in April 2022, scanners and printers were shared in the operating system, as in previous versions of the operating system. In the update, Microsoft decided to remove the "Home Group", thereby changing the process of granting access to network devices.
Features of using Windows 7 sharing
If there are more than two computers on the local network, carefully configure folder access rights so as not to lose files.
Shared access can be provided not only to folders, but also to selected local drives (this is done in the same way).
When the “share” button in the folder properties is not active, you need to go to the folder settings (you can put a link to an article I wrote) and view the tab.
After reading this article, any user can easily set up sharing on a local network. You can also use Dropbox to sync files between computers.
Set up printer sharing in Control Panel
1. Open the “Control Panel”: one way is to enter control and press the Enter key.
2. On the right side, next to “View”, select “Small Icons”, open “Devices and Printers”.
3. Right-click on the printer you want to share and select “Printer Properties.”
4. Click on “Sharing Settings”.
5. Open the “Access” tab, check the box next to “Share this printer” => next to “Resource name” you can write any name for the network printer. If you want the drivers for this printer to be automatically installed on computers that connect to it, click on “Additional drivers.”
6. By default, drivers are available for systems with the bit capacity of this computer. In order for computers with a different bit depth to also automatically receive drivers for your printer - check the required boxes and click “OK” => select drivers with the required bit depth (if you don’t have them, find them through a search engine and download) and click “OK” in all windows.
Now computers on your network can connect to this printer.