Very simple. Moreover, there are many ways to view the technical parameters of a PC or laptop. Firstly, Windows 7, 8 and 10 have 4 built-in tools with which you can find out the properties of your computer. Secondly, there are special programs that show absolutely all information about a PC or laptop. Therefore, below we will consider the simplest ways by which you can find out the characteristics of a PC in Windows, and determine what kind of video card, RAM, processor, etc. you have.
Why is this necessary? Most often, you need to know the characteristics of your laptop or PC for:
- installing games (to understand whether they are suitable for your case or not);
- driver updates for the video card (you need to know its model);
- purchasing new RAM (it is recommended to install the same level that you already have);
- selling an old PC or laptop (to provide the buyer with all the information he needs).
Windows tools
Let's look at the main methods and tools with which you can find out your PC settings without installing additional programs.
Via Explorer
1. Click on the Explorer icon on the taskbar.
2. On the left, click on “This PC”. The “Devices and Drives” tab will display information about hard drives and drives.
Connected flash drives, card readers and other removable media are also available in this tab.
3. To view information about the processor and RAM, right-click on a free area in the “This PC” window and select “Properties”.
The “Processor” item shows the CPU model and frequency. Below you can see the amount of RAM and OS bit depth.
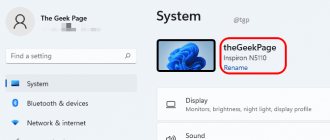
4. Return to the Desktop, right-click on the free part and select “Display Settings”.
On the Display tab, go to Graphics Adapter Properties.
The “Adapter” tab shows the installed video card model and its memory capacity.
5. To view the properties of the network card, click on the “Start” button and open “Settings”.
Go to the “Network and Internet” section.
Clicking on the "Configure Adapter Settings" menu will open all available network connections.
In Device Manager
1. Right-click on Start and select “Computer Management” from the context menu.
2. Go to the "Device Manager" section. The right window will show all connected components.
There is no detailed information here, but the model and name of each device is indicated. In the future, you can find out the characteristics of the model in a search engine.
In system information
System Information is a Windows tool that automatically collects data about your PC's performance and displays it on the screen.
1. Directly in the open Start menu, enter msinfo and launch the application.
2. The following information will be available in the “System Information” tab:
- Motherboard manufacturer.
- CPU.
- RAM.
- Bit size of the installed OS.
- Windows build and version.
3. To view information about other components, expand the “Components” tab and go to the desired subcategory.
Via DirectX
In the Start menu, type dxdiag and open the application.
The System tab lists the motherboard manufacturer, processor, and RAM.
On the “Screen” tab - video card properties.
On the “Sound” tabs - sound playback/recording devices.
In the task manager
The task manager, through which we forcefully terminate hung processes, can also display brief information about the hardware.
1. Right-click on Start and open Task Manager.
Or call it via the keyboard shortcut Ctrl + Alt + Delete.
2. Go to the Performance tab. In the bottom column you can see the characteristics:
- Processor.
- Random access memory.
- Hard drives.
- Network adapters.
- Video cards.
This tab is also convenient for viewing the load on a particular device.
Via command line
1. In the Start menu, type cmd and launch the application.
2. Type the systeminfo command.
A list of information will open with information about the OS installation date, motherboard manufacturer, bit depth, RAM, etc.
In the BIOS menu
BIOS is the motherboard control panel that loads when the computer starts. Through it you can find out the parameters of the motherboard, processor, connected hard drives, video adapter and other devices.
Important! Do not change any default settings to avoid disrupting stable operation. View the characteristics and exit the menu without saving changes.
1. When the computer starts, press the Del or F2 key to enter the BIOS. The keys may differ on some models.
2. The control panel will open - it may vary in appearance depending on the manufacturer and model.
For example, I have a motherboard model and the processor name is displayed in the top menu. The installed RAM sticks are shown below. The “SATA Information” button will show all connected hard drives. And information about the video card can be viewed in advanced settings (Advanced mode).
How to find out the specifications of your macOS computer
About this Mac
To find out what hardware your Mac uses, you just need to do two things: click the apple icon in the top left corner of the screen, and then select About This Mac. The window that opens will display key information with the macOS version, model name, as well as processor type, amount of RAM and video card.
System report
If the previous information is not enough, click the “System Report” button in the “About This Mac” window. You will see the most detailed report with all possible details about the computer components.
Mactracker
Another convenient option is the Mactracker application. This is an entire encyclopedia that contains detailed information about all Apple products throughout the history of the company. Computers, laptops, mobile devices, software - you can find everything here.
To view the specifications of your Mac, select This Mac from the side menu. In the product window, information is divided into categories and displayed on the corresponding tabs.
The only negative is that Mactracker does not analyze the equipment, but takes data from the catalog and shows only standard models. Therefore, if you upgraded, say, memory or storage, this will not be reflected in the summary.
Power supply information
Most power supplies do not have a special module that monitors and shows the total power and consumption. As a rule, such a control menu is only available in elite, expensive power supplies - the utility is supplied with the device.
In order to find out the characteristics of a standard power supply, you need to remove the side cover of the case and look at the label. It will indicate the manufacturer, model, total power and voltage along the power lines.
But in fact, Chinese inexpensive power supplies often overestimate the power indicated on the label by 10-15 percent (sometimes more). Therefore, start from average values or you can look for reviews on the Internet for your model.
How to view PC characteristics in the system unit
To do this you will need a screwdriver, a flashlight and a notepad. Unscrew the two bolts and remove the side cover. Inside you will see the motherboard with components connected to it. Use a flashlight to illuminate each device and write down the model name in a notepad. Next, in the search engine you can find out detailed characteristics and reviews of each component.
Everything is much simpler on a laptop. As a rule, information about its composition is pasted on the front part, near the touchpad. Or you can find them out by entering the company and model of the laptop into a search engine. The brand and model are usually indicated on the back (on a sticker).
Author: Ilya Kurbanov Editor: Ilya Krivosheev
How to find out the characteristics of a Linux computer
HardInfo utility
On Linux computers, it is convenient to view hardware parameters through the HardInfo utility. It clearly displays information about all installed components - from the processor and video card to expansion cards and USB.
HardInfo is included with most distributions and appears under the name "System Information and Testing" (under the Administration menu). If the utility is not there, you can install it using the terminal command sudo apt-get install hardinfo.
lshw command
For those who are accustomed to using the command line, we can recommend the lshw utility, which displays a huge amount of information about the installed equipment and allows you to find out the characteristics of the computer. As a rule, it is included in distributions, but if it is not there, you can fix it with the command sudo apt-get install lshw.
To launch the utility, simply enter sudo lshw in the terminal and confirm the action by entering the administrator password. For a more concise and convenient presentation, it is better to add the -short parameter, that is, use the following command: sudo lshw -short.
device Manager
Device Manager is a Windows component that includes information about connected devices. Using it, you can update or remove the drivers of these devices, determine and change the operating parameters of any device. You can also find out whether the connected components are working correctly. In a word, good stuff.
How to start? This is almost a rhetorical question, since I answered it in the first paragraph. That is, you will need an open “System” window in which you need to click on the “Device Manager” link on the left. You can also open it using the Start menu by searching for “Device Manager.” This component can also be launched using the command mmc devmgmt.msc in cmd or in “Run” (Win + R).
Method 5: CPU-Z
The most important thing is that the program is completely free and contains a lot of information.
- We go to the official website of the program.
- We need the regular Classic version, so we look at the first block and download the English version. It doesn’t matter which option you choose to launch the file (SETUP) or the archive (ZIP).
- You will be redirected to the download page - click “DOWNLOAD NOW”.
- If you downloaded the exe file, like me, then run it and install the application on the system. At the very end we launch CPU-Z.
Let's start from the very beginning. I will make recommendations on what you should prescribe. You can also simply take a screenshot or photograph the tabs on your phone.
- CPU – data about the processor is written here. We are interested in the full name (Specification), as well as the socket type (Packege). Most likely this will be enough, but you can, just in case, also write down the row data: Family, Ext. Family, Model, Ext. Model, Stepping and Revision.
- Mainboard – the exact details of the motherboard are listed here. We write down the company (Manufacturer) and model (Model), as well as Chipset and Southbridge.
- Memory – data about RAM. We record data about the total size (Size), as well as the type of RAM (Type).
- SPD – here you can see the exact data about the RAM. Look at how many slots you have on your motherboard - this is very important. Look at the picture above, it says that I have 16 GB of RAM. But on the “SPD” tab there are two 8 GB slots. That is, I have two sticks of RAM. Sometimes only one die is inserted, and a second one can be purchased. In my case, all slots are already occupied.
- Graphics – graphics processor. There may be data about two video cards, we only write down the name “Name”. You can also specify the size of the video memory in the “Memory” subsection.
Why you need to know the parameters of your PC
Whether you are a geek, a gamer, or an ordinary person who has only recently become acquainted with the world of personal computers, knowing the basic parameters and characteristics of your PC can make life much easier. This information:
- will help in case of problems with the device;
- will allow you to determine whether the game will launch on this configuration;
- will help you find out whether you are trying to connect to the right access point remotely and much more.
Video: how to find out if the game will work on PC
Method 7: Speccy
- The utility is completely free and can be downloaded from the official website here. You will be asked to download the paid version - we reject everything, click “Download Free Version”.
- Install and launch the program.
- All the necessary information will be on the main screen, so you can simply write everything down, or take a screenshot.
Method 9: Look inside
The most inconvenient method, since in this case you will have to climb under the hood of your iron computing friend. Of course, I’m talking specifically about the system unit; it’s better not to do this with a laptop. Simply unscrew the side cover and remove it from the system unit.
You will find the model of the video card and motherboard quite quickly. You will also have to remove the RAM - to do this, simultaneously press on the white side fasteners. The die should fly up on its own.
But you may have problems with the processor, since a cooler is usually installed on top of it. It will have to be unscrewed. Most often it is screwed to the motherboard. In rarer cases, a latch system is used. After you remove the cooling system and wipe off the thermal paste, you will be able to see the processor model. When you install the cooler in place, do not forget to apply new thermal paste.
Determining the version of the most important system software
For full-fledged operation, a set of specialized software must be installed on modern computers, which will allow many third-party programs and services to function successfully. It is important to be able to determine the versions of installed packages and keep them up to date if necessary.
DirectX
For stable operation of programs and trouble-free launch of complex modern games and web applications, it is imperative that the computer has a set of special DirectX software, the first name of which was Windows Game SDK.
Previously, game developers included a DirectX installer in their software distributions, but now it is included in the standard Windows software package. To check the version of DirectX on your computer, do the following:
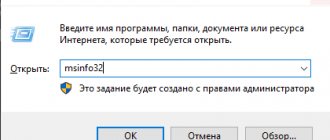
- Bring up the Run window by pressing Win + R;
- Enter the dxdiag command.
- Click OK.
If DxDiag is launched for the first time, a message will appear in which the program will ask permission to check for digital signatures on drivers.
The program will ask permission to check for digital signatures on drivers
After this, the main window will open in which you will see the version of DirectX on your PC.
The “DirectX Version” field indicates the version of DirectX installed on the PC
Strictly speaking, this is not the value of installed DirectX, but the version of the library that is active and used when working with the system interface. However, modern Windows may lack many older DirectX libraries of versions 9 and 10.
If a game reports at startup that the system is missing files like d3dx9_43.dll or xinput1_3.dll, then for it to work properly you need to download and install one of the older versions of DirectX (in this case, DirectX 9). You can download it from the official Microsoft website.