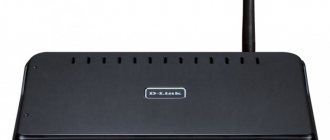
Light indicators are LEDs, usually located on the front of the router . They are designed to indicate the operating status of the modem. With their help, it is easy to identify and eliminate any problem that may arise.
Reference! Depending on the Wi-Fi router model, the number of indicators may vary, but most often there are 8 or 9.
LEDs have three states:
- flashing;
- continuous glow;
- Out of Service.
In some modems they can even change color.
Let's look in detail at what each light bulb is responsible for and what each state means.
Indicators on the router - purpose
Routers vary by model and manufacturer. But modems use the same designations. There are device models that differ in color or number of diodes. There are 8 common indicators on routers, which we will talk about in more detail.
Power
Indicates network on/off. If the icon is lit, the router is connected and power is turned on. An off diode indicates that the device is disconnected from the network.
WLAN
Wireless network connection. It has three main modes:
- The icon is not lit - there are no connections.
- Flashing: Data is being transmitted.
- Constant Mode Diode: The connection point has been created and is ready for use.
WAN
Internet connection indicator. Usually the icon is in the form of a globe, which indicates the presence of a connection to the global network. In some series of routers, the icon turns orange when there is no connection.
LAN
Port for connecting an Internet cable. On routers it is marked with LEDs indicating a connection on the local network. They do not light up when the wire is disconnected or not connected. During data transmission, the diodes begin to blink.
USB
Present on modems with a USB port. If the router is not connected, the icon will not light up. Flashes when communication is in progress. Continuous mode indicates a successful connection to the USB port (No. 6 in the figure).
WPS
Not on all routers. Works in three modes:
- The modem is connected and working properly - the light is constantly on.
- The indicator flashes slowly: the connection is in progress.
- Flashes quickly: An error has occurred.
SYS
The light bulb is responsible for errors in the system. This also happens only on some modems. The light operates in three modes:
- Flashing diode: the device is working properly.
- The indicator is not lit - an error occurred during the operation of the modem.
- When the device starts, the diode lights up and does not blink.
Continuous operation for more than a minute means that a system error has occurred.
LOS and PON
This icon appears on models that are connected via fiber optics rather than via a regular cable. This high-speed connection allows you to use telephone and television services. The PON indicator works continuously and is responsible for registration in the network. The LOS indicator indicates a connection.
Which indicators should be on?
If you have turned on the router to the network, but have not connected the Internet cable and patch cords of network devices, the Power indicator on it should be on, the SYS indicator (if any) should be blinking, and the wireless network indicator should be on (it is usually turned on by default). If none of the indicators are lit, then the router is not receiving power.
If you have successfully connected the router to the network, your Internet connection indicator should be lit or blinking, the WLAN indicator if the wireless network is turned on, and the LAN indicator if your PC is connected to the router via cable. The remaining lights may not light if nothing happens to the corresponding ports and connectors.
That is, if your router is working properly and the Internet is connected, the Power indicator should be on, the SYS indicator should be blinking, the WAN indicator should be on or blinking green, the Wi-Fi and/or LAN indicators should be on or blinking.
Preparing your computer
A static IP address must be specified in the properties of the network card on the computer.
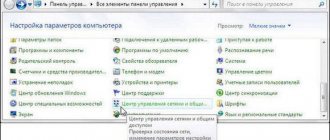
Right-click the connection icon and select Network or Sharing Center. Then select Change adapter settings.
Right-click the Local Area Connection or Ethernet adapter (this is in Windows 10) and select Properties. In the TCP/IPv4 properties, note the IP address 192.168.1.10 and the subnet mask 255.255.255.0.
When finished, turn on the adapter.
Checking the network card settings for connecting the router to the computer (Windows XP,7)
Everything is very simple, we need to check that the settings are set to automatic. For this:
On Windows XP:
- Start >> Control Panel >> find “Network Connections”
- Local area connection, right-click and select “Properties” >>
- In the list with checkmarks we will find “Internet protocols TCP/IP” and double-click on the inscription.
- In the window that appears, put dots opposite the points where the words “Automatic” are.
Now click on the “OK” button everywhere. Yes, and also, if the fields in the last window were filled out, write down everything that was there on a piece of paper - this will be useful when setting up the Internet.
On Windows 7:
In the lower right corner (near the clock) there will be a network icon in the form of a monitor, click on it and select “Network and Sharing Center”
Now the Status window will appear, in it click on the “Properties” button
The “Properties” window will open, look for “Internet protocols version 4 (TCP/IPv4)” in the list, select and click “Properties”.>> Next, check the dots opposite “Obtain an IP address automatically” and “Obtain a DNS server address automatically”.
Now click on the “OK” button everywhere. Yes, and also, if the fields in the last window were filled out, then write down everything that was there on a piece of paper - this will be useful when setting up the Internet.
We diagnose the router ourselves
After applying power to the router, you need to observe the behavior of the light bulbs. We discussed above how recovery manifests itself. In general, the most important thing is that the “Power” indicator is on. If it is off, check the power. Each router connector in turn connects to a working network device. This device can be a computer to which a patch cable is connected, and the indicators should react predictably to the connection. When power is supplied to the router, cables cannot be connected.
Port light does not light up
Sometimes the hardware port to which the provider cable was connected burns out and stops working. It’s not difficult to find out whether this is true: for example, the “LAN / network” lights react adequately to the presence of a connection, but the “WAN” indicator does not work. Most likely, in this case the WAN port burned out.
You can try to create a "bridge" between the WAN port and any of the remaining LAN connectors, which will then be used to connect to the Internet. This option, by the way, is not suitable for routers that have a hardware switch installed.
Let's say a provider cable is connected to the WAN port and the “WAN / Internet” indicator is not lit. Does this mean the port is faulty? This is not at all necessary. Before checking, make sure there are no problems on the provider's side. A sign of a faulty cable is an exclamation point on the connection icon that you configure on your computer. If you use ADSL, the problem becomes more complicated: you need a working modem to test the cable.
Reset settings, use Ping
Many people know that to reset the settings you need to press the reset button located on the router case. This button is held until the indicators begin to flash. Of course, the best way to do this reset is to unplug all cables and wait a minute after turning on the power. But a “real” factory reset is the 30/30/30 method. The reset button, or reset and reset, must be held not for 10-15 seconds, as in the first case, but for exactly 30. Then unplug the power connector and wait another 30 seconds. After connecting the power, you need to wait another half a minute and only after that you can release the button.
Performing a 30/30/30 reset will return the device to its original state.
This means that everything else must be done according to the official instructions. You can also learn how to set the IP address assigned to the network card from the instructions downloaded from the official website. Typically they do this: The router's IP address is 192.168.1.1, which means we set the value to end with the numbers 1.2. Well, and the like.
When the LAN port is connected to the PC using a patch cable, the router should respond to the ping request. In the console, you can run the command ping –t. There will be "Timeout interval exceeded" responses first, then when the download is complete the command output should change.
If this does not happen, you will not receive a ping response. But it is not a fact that in this case you will have to pay something. The problem may be entirely software-related, even if it cannot be solved at home.
Why doesn't it light up (@)
When encountering difficulties for the first time and noticing that the dog (@) icon is not lit, users should use the simplest method to solve problems. They should simply turn off the equipment and leave it for a couple of minutes, then turn on the device again. Such actions will allow you to restore the operation of the device after a possible failure.
Internet cable not connected
The next step that can help restore your Internet connection is to check the cable. Subscribers will have to take a closer look at how securely and firmly the wires are connected to the router. Poor contact of the cable with the device is one of the most common reasons for lack of communication
In this case, the user may not suspect that the contacts have moved away, since sometimes one awkward, careless movement leads to problems
Technical work on the provider's side
Sometimes the light does not blink green due to the actions of the service company. You can find out about technical work:
- on the official portal of the provider;
- in the client’s personal account;
- by calling the contact center and asking support operators questions;
- by contacting consultants in another way convenient for the client;
- by visiting the nearest office and talking about the difficulties that have arisen with the manager working there.
Connection errors
The next reason that can lead to connection difficulties is incorrect router configuration.
To correct the situation, you will need:
- turn on the set-top box and connect to the network via a computer or laptop (lack of connection will prevent you from accessing the Internet, but will not interfere with the connection);
- open the browser and enter the combination 192.168.1.1 into the address bar (the exact address is indicated on the device);
- log in to the system (usually the admin/admin pair is used);
- open the network settings section;
- change parameters by following the instructions or by contacting support operators to clarify the required values;
- save status changes.
After that, all that remains is to check the result and make sure that the malfunctions are a thing of the past.
Forgot to pay for internet
Situations when subscribers forget to top up their account deserve special mention. You can check your balance and make sure you have enough money in your personal account. To log in to the official portal, you just need to know your account login and password.
An alternative way to obtain information is to call the universal hotline. Such a solution is convenient due to its accessibility, since to use it it is enough to have a phone at hand and know the number of the contact center.
The solution to the described problem will be to replenish the balance with the required amount.
ISP cable not connected
Checking your cable Internet connection is the first step to solving the problem. If the indicator is red, the device does not see this cable in 90% of cases.
As a result, the user will not have access to the Internet, since the signal from the provider does not reach the device.
To fix the problem, it is not necessary to go into the router settings or connect it to a computer (depending on the device model). The main activity is to check the integrity of the case and the quality of the cable connection to it.
Power
When connected to the network normally, the power lamp should light green. If the indicator is not lit, it means that your router is either not receiving power from the network or has failed. In such cases, it is worth checking whether the power supply is connected to the outlet, whether there is electricity in it, and whether the network adapter has burned out. Sometimes the problem is due to contamination of the plug or insufficiently reliable contact with the socket in the router. In such situations, you need to clean the plug and check how tightly it fits into the connector.
Setting up the operation of the ADSL - USB modem
If there is no Internet connection, check whether the hardware device is connected to the cable correctly. The “USB” and “DSL” LEDs on the modem body should be lit. If at least one of the LEDs is off, reconnect all cables.
Check your modem settings.
In some cases, Internet problems occur due to an incorrectly installed driver. In this case, it is worth uninstalling the current version of the software and installing a new driver.
In some cases, if you have Windows 98 or Windows ME, you must ensure that the "Remote Access Controller" is present. If it is not installed, use the standard installation in the Add or Remove Programs menu in Control Panel."
If necessary, see the User's Guide for detailed instructions on setting up your USB ADSL hardware. The modem comes with detailed instructions for installing and using the device. If you have any questions, you can search there for the information you need.
Router: what the lights are blinking about
Modern routers are equipped with many indicators. Through them, devices signal status, network connection and problems. Using the example of the popular SERCOMM RV6699 optical terminal, we will understand what exactly the blinking and color changes of the light bulbs mean.
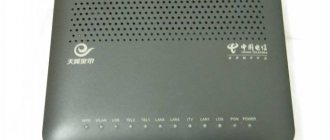
The SERCOMM RV6699 terminal is a router, Wi-Fi access point, optical modem, switch and VOIP gateway for connecting a phone in one. The device is popular with providers who offer subscribers connections using GPON technology. It involves laying a fiber-optic cable to the user’s apartment. And this is one of the terminals that Rostelecom subscribers receive.
The device has ten indicator lights on the front panel. In order, the purpose of the indicators is as follows: “Power”, “GPON”, “Status”, “Phone”, “Wi-Fi 2.4 GHz”, “Wi-Fi 5 GHz”, “LAN”, “USB”, “Internet” " and "LOS". The indicators on a working device can glow in different colors, stay on constantly, or “blink.”
| Indicator | Values |
| Nutrition | Lights up solid green when power is applied. Goes off when turned off. |
| GPON | Solid green—registration and setup completed. Off - no connection to GPON. Blinking 5 Hz (5 times per second)—device setup is in progress. Blinking 1 Hz (1 time per second) - GPON registration in progress |
| Status | Blinking 5 Hz (5 times per second) - the device is booting (connection establishment). Blinking 1 Hz (1 time per second)—software update in progress. Lights green—connected to the Internet. |
| Telephone | Lights green—the number is registered on the network. Off—the number is not registered. Blinking (once per second)—the phone is off-hook and the telephone line is in use. |
| WiFi 2.4 GHz | Off - WiFi network is not available. Solid green—Wi-Fi network is available. Flashing (green)—data transmission. Flashing (blue, 1 time per second) - WPS connection mode is activated. Flashing (blue, 5 times per second) - WPS function error. Lights blue—device connection via WPS is successful. |
| Wi-Fi 5 GHz | Off - WiFi network is not available. Solid green—Wi-Fi network is available. Flashing (green)—data transmission. Flashing (blue, 1 time per second) - WPS connection mode is activated. Flashing (blue, 5 times per second) - WPS function error. Lights blue—device connection via WPS is successful. |
| LAN | Lights green - there is a connection to the LAN. Off—no LAN connections. Flashing green—traffic transmission on LAN ports. |
| USB | Lights green - there is a connection to the USB port. Off - no connection to the USB port Flashing green - data is being exchanged with a USB device. |
| Internet | Off—no Internet connection. Lights up green - the IP address has been received and there is an Internet connection. Flashing green—data transmission/reception. |
| LOS | Off - the optical cable is connected, the transceiver is working. Lights red—the optical cable is not connected or the transceiver is disabled. |
Common problems and their solutions
During the operation of the router, malfunctions occur, which are indicated by the special illumination of the lamps located in the upper part of the gadget’s body. Let's look at the main problems that most often arise when using it.
WAN is not lit or is lit in the wrong color
The indicator will light up yellow, orange, red. This depends on the model and manufacturer. When the cable is connected but there is no Internet, the icon will be illuminated in orange. Problems also arise due to incorrect settings, system errors or ISP-related reasons.
To solve the problem, the user will have to restart the gadget and double-check the connection settings. If these steps do not solve the problem, you need to connect the network cable to the PC. If there is no Internet, you will need technical support.
If the WAN icon does not light up at all, then you need to check the integrity of the wire and its correct connection. If there are no visible problems, you will need to contact technical support.
Wi-Fi is off
Some models have a button to turn on Wi-Fi. It is located on the back of the device. To activate your wireless internet connection, simply press it once and then wait a few seconds. The indicator should turn green. If it doesn't turn on, you will need to restart your device and then press the button again. Depending on the model, the way to turn on the Internet may differ, so the user should read the instructions first.
Another reason could be that Wi-Fi is disabled in the settings. You will need to go to the settings menu, select the “Wireless Networks” section. If the slider next to Wi-Fi is disabled, it should be enabled.
If after completing all the steps, your internet connection still does not appear, then you need to contact the service center for help.
Only the power light is on
If, after turning on the modem, only the power button lights up, and the other diodes do not light up or work in constant mode, this is due to a software error. The violation is associated not only with a lack of Internet connection, but also with the router’s web interface.
The main causes of the problem:
- Downloading the wrong firmware version. The user must check if the file is suitable for the modem. It could also be due to a virus infection or the file was not fully downloaded during download. It is recommended to download the file only from an official source.
- A power failure also causes the modem to malfunction. The device freezes and stops working. A factory reset will help here. The user must use the Reset button. After a long press, the diodes will go out and the device will reboot.
All indicators are on or flashing
After turning on the device, all diodes light up simultaneously and continue to work continuously. Or they start blinking continuously. This usually happens due to a software glitch or a broken router.
First of all, the user must perform a factory reset. Perhaps the reason lies in the installation of inappropriate firmware.
Power LED is red
If the power icon is red, it is due to one of the following reasons:
- incorrect operation of the electrical network;
- malfunction of the voltage stabilizer, extension cord or other intermediate equipment;
- faulty socket;
- faulty router or network adapter.
To solve the problem, the user must check the correct operation of the equipment and outlet. It may help to unplug the modem's power supply and then turn it back on. After connecting to the network, you need to activate the power button on the modem body. If this does not help, you will need help from a service center. The power supply or router may be faulty.
How to turn off the blinking lights of a TP-Link router in night mode?
In modern TP-Link models, a night mode function is built into the firmware to turn off the light bulbs. The fact is that flashing lights can disturb sensitive people's sleep. If you turn them off or set a schedule for when they are on, this problem disappears.
In the router control panel, this function is located in the section
You can also turn off the flashing lights on the router through the TP-Link Tether mobile application from your smartphone. To do this, go to the menu “Tools - Indicator Management”
Here you can either turn off the lights completely or set the operating hours.
Did not help
What to do if the red light is on on the Rostelecom router?
Why the red light is on on the Rostelecom router is an important question. If a light comes on on your router that wasn't turned on before, there's no reason to panic. It is enough to understand the reasons and solve the problem using the methods presented.
Internet users are often lost and do not know what to do when the red light is on on the Rostelecom router. Such an error can indicate many problems: damage to the device design, configuration errors, lack of money in the account, breakdowns in the electrical network, and so on. The user’s task is to diagnose the malfunction in time and fix it immediately.
What do the indicators look like and what do they mean?
Today you can purchase routers of various models and modifications. For example, the Chinese company ZTE, the second largest manufacturer of telecommunications equipment, today produces branded routers for Russian operators - MTS, Beeline, Megafon. And network equipment from manufacturers ZyXEL, Huawei and Asus is perfect for both medium and small businesses, and for the home.
Many users have questions about what lights on the router mean what and how to independently determine the cause of the problem. On modern devices, there are a number of buttons and lamps on the front panel that light up and blink in different colors and with a certain intensity.
In most router models, these indicators are traditionally located from left to right and the color signal of their bulbs has a specific designation. Next, we will look at what lights should be on on the router from Rostelecom and other manufacturers during normal operation of the equipment.
Connect the ASUS router in recovery mode and start the process
Connect the router to your computer or laptop using a network cable.
Further attention!
- Turn off the router. The adapter can be removed from the outlet, connected to the router, or turned off with a button. I just turned off my router.
- Press and hold the RESET button. Usually signed "WPS/reset".
- Without releasing the RESET button, turn on the router.
- Hold the button until the power indicator on your ASUS router starts blinking slowly.
In my case, the power light was always on and all other lights were blinking slowly. But it’s okay, the router was in recovery mode.
If this happens to you, it means the router has entered recovery mode. If not, try again.
Then run the firmware recovery utility (if it is not running). Click the "Browse" button and select the firmware we downloaded. To get started, click the “Download” button.
If everything went well, the status should appear: “Loading the system recovery file. ".
Also the status of automatic system recovery.
We are waiting for the router to reboot. Everything we can customize and use.
Error: "No devices found in recovery mode"
This error may first appear when the firmware recovery program fails to detect the router in recovery mode.
In this case, you must first check the router itself. If it is in recovery mode. This can be understood by the behavior of the indicators. I wrote about this above. Try closing everything, restart your computer, check the router connection and restart it in this mode. Also turn off your antivirus and firewall.
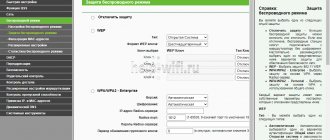
How to use wps?
Let's look at what the wps mode is on a router using the example of the same “intercom” that protects your network from lovers of “free” Internet.
As in the “classic” version, there are two possible connection methods: software (using a manually entered code combination) and hardware (using the corresponding button).
— Software connection to wifi
via wps is carried out in the case when the router supports the corresponding function, but the qss button is missing on the router (or the device is located in a hard-to-reach place).
Here, for a wps connection, you will need a special pin code indicated on the service label of the router (located on the back panel of the device).
If in the future physical access to the router will be limited, it is recommended to write down the wps PIN code (Wireless Password/PIN) in advance when connecting and initially setting up the device.
On a device connected to the network (consider the example of a laptop running Windows 7), you need to go to and single-click the “Connection” menu in the SSID you need (usually, the name of the router is used here as the network name).
Next, a system window will open where the setup wizard will ask you for a wps pin code to automatically connect to this wireless network. Enter your eight-digit PIN, click Next, and your wireless connection to your router will be automatically established.
— What is the wps button on the router for?
To connect to a wireless network via wps using the “hardware” method, you just need to first press the corresponding button on the WiFi adapter (or gadget connected to the network), and then on the Wi-Fi distributing router.
Within a few seconds, the basic parameters of the network connection will be transferred from the router to a special controller of your device, and the connection to this access point will occur automatically.
Router and power supply repair
Typically, when such a problem occurs on the Tp-Link router, only the power indicator (power indicator) is lit. In some cases, the transmission indicator is still on. It is clear that Wi-Fi is not distributed and does not go into the router settings. No Wi-Fi, no cable. The problem is really serious, and I’ll say right away that there is no specific, simple and functional solution. If two indicators are on on the router: power and equipment, this is still half the problem. But if only the power light is on on your Tp-Link, you will most likely have to take it to service under warranty (if any).
I would also like to note that the problems described above most often occur on the TL-WR841ND and TL-WR741ND models. However, I think this is most likely due to the fact that these are the most popular models. And problems when only the power indicator is on appear on other models from this manufacturer.
Such a problem could look like this, everything worked, the Internet just disappeared. Also, very often the router stops working after a thunderstorm, some kind of power outage, or just a power outage. Well, after unsuccessful firmware. Simply put, there are times when software fails. In such cases, you can try to reset Tp-Link yourself, now I will tell you how to do this. But when the router does not work and only one indicator is on - power, most likely this is a technical malfunction. Simply put, something burned out on the router board itself or something with the power adapter. In such cases, it is better to contact the service or simply buy a new router.
WPS function in a router: what is it and why is it needed?
In fact, wps mode is by no means a radical way to get rid of dangerous equipment. Everything is much more prosaic and safer: the WPS function (from Wi-Fi Protected Setup) makes it easier for the user to connect to the wireless network of this router.
To “clarify” the picture, let’s look at what wps on a modem is more clearly.
Imagine that the wireless network created by your router is a house in which its owners “live” - user devices connected to the network (your PC, tablet, etc.).
“Residents” of the home network can leave the house and return back (connection to WiFi), assign management (device priority) and invite guests to their place (temporary connection of new users).
But in the WiFi world (as in any other) there are freebie lovers, and every such “home” needs to be protected with a good combination lock. After all, if you leave the “door” open (not installed), thieves (unauthorized network users from among neighbors or random passers-by) will certainly break into the house and begin to shamelessly steal your traffic.
However, such protection of a WiFi network with a password lock often complicates the life of the owners of the “house” themselves: after all, now in order to get inside they have to look for the right key every time and open a complex lock. What to do if your password key is lost? Or is there simply no time to “open the door”? It gets to the point where users try to hack their WiFi or .
To avoid such incidents, you need wps on the router: this function acts as a kind of intercom, automatically creating a new wireless connection and generating all the parameters necessary for it (security key, etc.).
In this case, a computer running Windows 7/Windows 8 automatically scans the qss function, and (if a wps network connection is available) informs the user with a corresponding system message.
Downloading the firmware and Firmware Restoration utility to restore an ASUS router
First, we need to download the firmware recovery utility and the firmware for our router. All this can be downloaded from the official ASUS website. On the page dedicated specifically to our router. Therefore, first we need to find out the router model. To do this, look at the sticker at the bottom of the device. I have ASUS RT-N12+.
Follow the link and enter your router model into the search bar. For example, "RT-N12". We find our model in the search results (it is important that the model matches exactly) and click on the “Drivers and Utilities” link next to it.”
Then select the version of Windows installed on your computer. Open the Utilities tab and download the ASUS Firmware Recovery utility by clicking the Global link. We save it on the computer.
Then open the “Firmware” tab and download the first firmware for our router in the list.
We should have two archives on our computer. The firmware must be extracted from the archive so that the file with the .trx extension is located in a folder or on the desktop.
You can also extract the folder from the archive using the Firmware Restore utility.
Next, you need to install the firmware recovery utility. To do this, run Setup.exe or Rescue.exe in the folder. Installation is very simple, just follow the instructions. When finished, the wizard will prompt you to run the utility. You can agree as the link will not appear on your desktop. And to launch it later, you will need to search in the Start menu.
The firmware has been downloaded and the utility has been installed. You can continue.
Why did the red “LOS” light on the router come on?
On modern high-speed routers, a situation may arise when the indicator indicating the “LOS” connection lights up in red. This is a common occurrence on GPON connections. The network is fast and requires user control.
In its normal state, the LED is essentially off and should not be lit. If the red light on the Rostelecom router is on or flashing, this indicates a reconnection problem at your home or at your provider. By the way, some routers do not have a “LOS” indicator. Its function is performed by another indicator: “PON”. Therefore, the value of the label type does not matter. The main thing is that they do not burn. But we will talk about this indicator below, but for now here are the steps to fix the problem:
- It is necessary to check the condition of the cable: there are no visible breaks, kinks or damage to the insulation. In this case, the cord must be replaced and protected from pets.
- The cable is fine, but the red "LOS" LED on the router keeps flashing red. You need to carefully check all connections and connectors from the cable entry in the house to the router. The router itself must be secured in a fixed position.
- Connect the cable.
- Alternatively, you can change the plug itself. This could be the reason why the light is on. Invite a specialist, he can change the attachment to the cable.
- The spark plug could simply have oxidized. Sometimes it is necessary to wipe with a cloth moistened with alcohol.
Causes
Among the most common causes of the problem are:
- line failures;
- incorrect operation of the power supply;
- the need to install flashing;
- lack of connection;
- device malfunction;
- incorrect software settings.
At the same time, in determining the reasons, which particular light bulb changed color or stopped burning is of great importance.
The red light on the Rostelecom router is on: Los, status, exclamation mark, power
It was already mentioned above that which particular light bulb lights up in red is of great importance for diagnosing problems. Each indicator is responsible for its own operating parameters of the device, so first of all, users are advised to find out what the equipment is “complaining” about.
Los
Is the los indicator lit in an unusual color or blinking, and the pon light has gone out? Such signals indicate the absence of a signal from the provider. Reasons for lack of communication can be caused by:
- an insecurely inserted cable;
- broken or torn cable;
- problems in the work of the provider.
What to do in each case is obvious.
Status
The reasons why the red “status” light is on on the router are extremely similar to those listed above. But in addition, there is the possibility of a simple equipment failure. To fix the problem, just reboot the device and check if the situation has changed.
Exclamation mark
If the user has an exclamation mark, there is a problem with authorization. In such a case, you need to check the correctness of the router settings. For this it is recommended:
- connect the Internet cable directly to the PC and establish a connection;
- log into the modem's Web interface;
- Check with your provider for the correct settings;
- enter the required parameters manually;
- save the result.
Nutrition
The appearance of an unpleasant signal on the power button indicates problems with the power supply. In such a case, it is recommended:
- make sure it is turned on;
- check the quality of the connection between the wire and the modem;
- plug the device into another outlet;
- change the power supply.
If the above measures do not help, all you have to do is contact the service center.
Forced restriction of Internet access
Manual assignment of IP addresses
If you connect to the Internet in an office or other public place, you can't rule out using advanced settings on your router that limit Internet access to users.
One of the filtering methods is to manually assign IP addresses to computers. In normal mode, the router automatically distributes IP to all connecting devices through the so-called DHCP server. But it can be disabled in the settings. And the addresses are manually registered by the network administrator for each client.
If you have access to a router, you will need to manually register an IP address for your computer, laptop or smartphone. Or enable DHCP server
If your router does not have a password, contact your system administrator to add you as a user.
Guest network and client filters
Additionally, to prevent anyone from accessing the Internet, you can configure different levels of content access through the router. For example, a guest network with no Internet access or network access limited to certain users.
Also, in some models, you can provide access to the World Wide Web only for devices registered manually. And for all new ones connected to Wi-Fi, limit the Internet.
Parental controls or MAC address filtering are often used for this. It can be configured to allow Internet access only to devices that are on a predefined whitelist.
You need to add your own computer or ask the person responsible for the local network in your office to do so.
The orange light is on or flashing due to a program failure or a broken WAN port of the router
If the orange indicator suddenly lights up - the Internet worked yesterday, but today it doesn’t, and the provider says that everything is OK, then you need to think about why this happened. The first thing that comes to mind is that due to a power surge, all the settings on the router were lost. In the future, to avoid this, connect it only through a voltage stabilizer.
Finally, no one excludes a breakdown inside the WAN connector or on the router chip. These are the thoughts on how to fix the problem of a burning or blinking orange indicator on the router - it seems like I haven’t missed anything, but if you have anything to add, write in the comments, we’ll figure it out together.
Tp-Link (TL-WR841ND, TL-WR741ND and others): only one Power indicator is on
Some suggestions for this problem:
- First, unplug and plug your router several times.
- Try resetting your Tp-Link settings by following these instructions.
- If two indicators are on on your Tp-Link router (power and hardware) and you have one of these models: TL-MR3220v2, TL-WR842ND, Archer C7 AC1750 v2, TL-WR740Nv4, TL-WR941NDv5, TL-WDR4300ND, TL-WR1042ND , TL-WR940NDv2, TL-WR841NDv8, TL-WDR3600ND, TL-WR741NDv4, TL-MR3420v2, you can try to reset it yourself. I wrote how to do this in detailed instructions: https://help-wifi.com/tp-link/kak-vosstanovit-router-tp-link-posle-neudachnoj-proshivki/ If only one power indicator is on, then, honestly speaking, I don’t know if it will be possible to reset the router this way. You can also try.
- There is a way to reset your router via the serial console. The method is very complicated - you need a special cable, it needs to be disassembled, soldered, etc. It’s easier to send the router for repair or buy a new one.
- You can try replacing the power supply if you have one.
- If all else fails and the router is under warranty, then, of course, you need to contact the service. Yes, it is problematic, but for a long time, but you have the right to it. Let them figure it out, fix it or return the money. If your ISP provided you with a router, you can call their support and ask for advice on what to do in this situation.
- If there is no warranty, there are two options: have it repaired or buy a new one. If you have a budget model, such as the TL-WR741ND itself, it will probably be easier to buy a new one. It is unknown how much the repair will cost and how long the router will work after this repair. You can take it to a service center, look at it and tell us the cost of repairs. And you have already decided whether to repair or buy a new router.
If resetting and resetting according to the instructions did not help, there are two options - buy a new router or contact workshops and service centers (under warranty).
How to find out what current an LED is designed for
All of the above applies to conventional LEDs operating without additional built-in elements. Existing technologies allow additional components to be built into the device body. For example, quenching resistors. This is how LEDs are produced for higher voltages - 5.12 or 220 V. It is almost impossible to visually determine the ignition voltage of such devices. Therefore, there is only one way left.
If the previous methods did not produce results and you are sure that the LED is working, you should try applying increased voltage to it. First, 5 V, then increase the voltage to 12 V; if there is no result, you can try increasing it further, up to 220 V. But it is better not to experiment to such values - this voltage is dangerous for humans. In addition, in case of an error, the LED housing can be destroyed. This may cause a slight bang, melting of the wire insulation, fire, etc. Nowadays, technology has come a long way, and LEDs are not so expensive that you would risk your equipment and health because of it.
We consolidate knowledge with the help of videos.
Changing settings
The following video explains how to connect and configure a TP-Link router:
How can I check if my router settings are correct? Some TP-Link equipment models may have different Internet sources (for example, cable connection, USB modem, Wi-Fi bridge). Therefore, the correct source must be selected in the settings.
To access the settings you will need:
- Connect to the router in any convenient way. You can use a cable (preferred option, cable included, you need to connect to your computer/laptop via the LAN port).
- Open a browser (any browser, you can do it on your phone) and enter in the address bar: 192.168.1.1 and press Enter (the address for accessing the settings may be different, you can find out from the sticker on the router itself or from the instructions).
- Enter your username/password to access settings. By default, TP-Link is set to: login admin, password admin (it is recommended to change them to others to prevent unauthorized access to device parameters).
- Go to the “Network” tab).
- In the WAN section, select Dynamic IP Address. Make sure you click "Save" at the bottom of the page after entering your new settings. Without this, the new settings will not be applied.
- If there is an “Internet” item, select the required source from it (WAN is a cable connected to the WAN port, in most cases this should be selected).
In some cases, you can still choose to connect not to a dynamic IP, but to PPPoE, but in this case the user will still have to enter a username/password (these are provided by the provider itself, you can look in the agreement).
By the way, the Network section also displays automatic connection check data. If Disable is specified, there is no internet at the input (that is, the data is not from the provider).
Optimal equipment
Since the company provides a wide list of supported equipment, its setup will vary. Among the optimal models for connecting to the Internet, the provider identifies three routers:
- D-Link DIR 620;
- NetGear JNR 3210-1NNRUS;
- Upvel UR-315 BN.
WAN parameters
For example, the setup will be performed on D-Link DIR 620 network equipment. To get to the necessary parameters, you will first need to go to the router’s control menu.
To do this, by opening your browser, you need to enter the IP address of the equipment, which should be indicated in the instructions that come as standard. In the case of the DIR line, by default it has the value 192.168.0.1.
After logging in to the specified address, a form for entering your login and password will appear on the screen. In case of a complete reset of settings due to problems with the Rostelecom router, the fields must be filled in with admin and admin data, respectively.
After confirming the login, the user will be taken to the main D-Link equipment settings page. In the first item on the top left, called “Network”, the click'n'connect option will be available.
Using it, you can automatically obtain WAN parameters for a successful connection.
If this does not allow you to establish Internet access, you will need to resort to manual data entry. To do this, the user must go to the “Advanced settings” item, then “Network” and select the “WAN” sub-item.
By clicking on the active connection, a menu will open with fields in which you will need to enter the parameters specified on the company’s website or in the contract.
Do not forget to confirm and save the settings using the item with the image of a miniature light bulb, which notifies you when any action is required. You also need to remember that all settings will become active only after the equipment is rebooted.
If all actions on the Rostelecom router are performed correctly, the place of the burning red indicator will be replaced by a green one, indicating a correct connection with the provider.
WIFI connection settings
If the Internet icon on the Rostelecom router does not light up, this may mean a complete reset of the equipment parameters. In cases of connecting via Wi-FI, to configure them, in addition to entering the WAN values, you will also need to add wireless connection options.
Having entered the main page of the equipment menu, as indicated in the previous paragraph, you must select the second option from the top “Wi-Fi”.
There will be a step-by-step setup with system prompts. If you want to adjust the options in more detail, you need to go to “Advanced settings” in the lower horizontal menu, and then select “Basic settings” in the “Wi-Fi” item.
You will also need to install “Security Settings” by going to them from the previous window. After this, wireless Internet access will open, as evidenced by active indicators on the Rostelecom router.
Do I need to restore the firmware?
To carry out initial diagnostics, you will need a working power supply that is compatible with the router being repaired. If you have one, turn on your router without connecting any network cables. All connectors (WAN, LAN and even antenna) must be left empty. After a minute, you need to see how the light bulbs behave. The device may be in firmware recovery mode.
Let's list the “symptoms” of recovery mode:
- For ASUS routers: the “Power” indicator blinks slowly, the “Wi-Fi” indicator is off
- For TP-Link devices: all indicators flash, turn on and off simultaneously
- On D-Link routers, the power light blinks orange
- For all routers: It doesn't matter whether all the lights are flashing or just one, but the flashing period is always 1-1.5 seconds.
If Recovery Mode is already enabled, you cannot remove the device from it. Rather, the procedure for such an output involves installing firmware. You need to find the firmware file that matches the model and hardware version of the device (the value is indicated on the sticker).
Not all firmware, even branded ones, are compatible with recovery mode).
Let's look at how to get the router out of recovery mode, that is, how to install the firmware:
- For D-Link devices (except older models), a recovery console is provided, accessible from a standard IP address. Only now, since the router's DHCP server is down, the network card is set to "static" so they try to open the web interface.
- For ASUS routers, the firmware reset utility acts as a reset page. After setting the network card to static values, the router connects to the PC using a connecting cable, but then the utility starts instead of the browser.
- For ZyXEL devices, everything seems more complicated: you need to install a TFTP server. See details here: zyxel.ru/kb/2146.
- For TP-Link devices, except for the latest models, as well as for older D-Link devices, the only method is suitable - you need to connect a UART cable. The UART connector is located under the housing cover and is best reset in the center.
All of the above recommendations are “software” repair methods. But you can use them only at your own peril and risk. Once you have determined that "Recovery Mode" is active, you can switch the router to SC. The duration of firmware recovery is 10 minutes, unless other problems arise during the process.
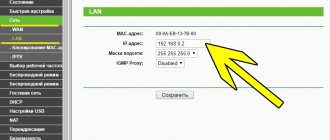
LAN ports
Basically, standard router models have four LAN ports. This is due to the number of network ports where user devices are connected using a network cable. If the connection to the port is via a wired connection, the lamp lights up; when data is being exchanged, it blinks. If there is no connection to the port, there is no signal at all.
If the device has several LAN connectors, but there is only one indicator, the light may light up when equipment is connected to at least one of the ports.
Possible malfunctions and their elimination
The readings indicate problems that you can fix yourself. Here are some of them.
Wi-Fi light does not light (disabled)
If the Wi-Fi indicator on the router does not blink or light up, the access point is disabled. You can check this in the router's administration panel, in the "Wireless Network Settings" section. To do this, connect to the router using a patch cable and enter the settings panel through the browser line at 192.168.0.1.
For the created access point to be active, the checkbox next to “Enable wireless router broadcasting” must be checked.
If everything is installed and the indication is not lit, check whether the Wi-Fi on/off button on the back of the device (or on it) is pressed.
If pressing the button does nothing, reboot your device. If the problem persists and devices are not detecting Wi-Fi, reset your router to factory settings by pressing the reset button for 7-10 seconds.
Planet light (WAN) is orange (red)
This means that the cable from the provider's network equipment is not connected or damaged. First of all, check to see if the connector on the WAN port is loose, it may simply have become disconnected. If the connector is securely connected but the Internet icon is not green, reboot your device. Not yet? Call your Internet service provider's technical support line.
Rarely, the WAN port may run out. You can check its functionality using an Ethernet cable through which the PC is connected to the modem. Move it from the LAN port to the WAN port. If the LED is green, the port is working.
LOS indicator lights up red
In a fiber optic router, the LOS is shown in red and there is no Internet connection, which means the router is unable to establish a connection. Possible damage to the cable on the line.
If the LOS light on your Wi-Fi router is blinking, the signal strength is not strong enough to be recognized by the receiver. Before calling customer service, make sure that the fiber optic cable is properly connected to the router (if the connector is securely inserted into the connector).
Sources
- https://it-tehnik.ru/hardware/lampochki-na-routere.html
- https://tablitsa-mendeleeva.ru/lajfhaki/na-routere-gorit-ili-migaet-krasnaya-lampochka-los-pon-alarm-internet-pitanie/
- https://web-shpargalka.ru/asus-rt-n10-gorit-tolko-indikator-pitanija.php
- https://rufus-rus.ru/router-gorit-tolko-pitanie/
- https://tuseti.ru/the-device/why-the-internet-does-not-work-on-the-router-the-tplink-router-only-lights-up-the-power-indicator-and- does-not-go-into-the-settings.html
- https://wifika.ru/router-goryat-lampochki-internet-ne-rabotaet.html
- https://a174.ru/router-d-link-gorit-tolko-power/
- https://GoldSerfer.ru/wifi/vse-problemy-s-routerom-tp-link-ot-proverki-do-sbrosa-nastroek.html
- https://WiFiGid.ru/sovety-po-nastrojke-routerov/kakie-lampochki-dolzhny-goret-na-routere
[collapse]
Wi-Fi doesn't work
Another common problem. If the WLAN light is not on, check whether the wireless network is active in the settings. You need to go to the device control panel. Next we find the category with Wi-Fi. If the network is deactivated, it must be turned on. Many router models have a special key that activates and deactivates the wireless network. The Wi-Fi button is located on the back panel of the router case. If it is in the “Off” position, we transfer it to the active state. Just in case, restart your device. If the steps you took did not help resolve the problem, then a software glitch has occurred. You should also not exclude the possibility of hardware failure. Perform a reset and update the firmware if necessary. If all else fails, the device needs to be shown to a specialist.