Welcome to our Mac Wi-Fi troubleshooting guide, which offers fixes for situations where Wi-Fi isn't working, your Mac refuses to connect to the Internet, your MacBook won't connect to Wi-Fi but other devices or your wireless signal Strength is poor.
There are three main reasons why Wi-Fi stops working: a problem with your router, your broadband provider's network not working, or a problem with your own Wi-Fi network. Less commonly, there may be a problem with the MacOS software you are using. We will cover all these scenarios in this article.
We'll go over the different steps below, we've started with the ones that will hopefully fix your Wi-Fi problem quickly, but you can try the last few tips if you're out of luck.
In this article, we will cover the following tips to fix Mac WiFi problems:
- Check for software problems
- Check Wi-Fi recommendations provided by macOS
- Find out if your broadband provider is having any problems
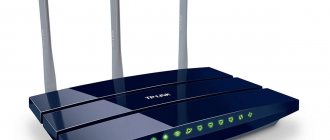
- Reboot your router
- Restart your Mac
- Turn off Bluetooth
- Forget your network, then reconnect
- Make sure your router is cool, check its location and make sure nothing is blocking the signal
- Use Apple Wireless Diagnostics
- Check competition on other networks, change your network name, change your Wi-Fi channel - consider using the 5GHz band
- Check your security settings
- Run Apple Diagnostics
- Reboot SMC, PRAM or NVRAM and change DNS settings for your network
You can go to the guide for each of these steps by clicking the link above or simply reading the steps in order below.
We will look at problems with a weak Wi-Fi signal in a separate article: How to improve your Wi-Fi signal.
Check Apple Software
In the past, when Mac users updated their computers to a new version of macOS, they sometimes encountered Wi-Fi problems. This was a big problem with the original version of El Capitan (macOS 10.11): after the update, many users found that their Mac could no longer connect to their wireless network.
Apple released a software update, but it wasn't easy for MacBook Air owners who could only connect to the Internet via Wi-Fi. When we had this problem, we had to update our Mac to the new version of macOS while transferring the connection from our mobile phone.
You may have to do the same if you need a software update, in which case be careful when reconsidering your data permission! (Read our tips for sticking to your iPhone's data allocation here.)
You may also experience problems with Wi-Fi if you are using the beta version of macOS. For example, we had a lot of problems with Wi-Fi dropping out when we launched the High Sierra beta.
Here's the latest information about macOS Catalina.
Reinstall macOS
Finally, the last option you can try is reinstalling the system. If it is performed correctly, all previous errors that could have accumulated after macOS updates from previous versions are erased and if the problem was in them, then it should be solved.
To do this, you will need a bootable USB flash drive with the operating system, which must be connected to the computer. After rebooting while holding down the Option key, all you have to do is select the flash drive in the list of bootable drives and follow the prompts of the installation wizard.
Check with your broadband provider
If the problem is on the supplier's side, there's nothing you can do about it other than complain—and you should.
Even if the network is down, it could be a supplier problem (or a BT problem). For example, sometimes the wiring to the house can be at fault; If your Internet connection frequently drops in bad weather, it may be due to water getting into the cables.
You can also run a Ping test to find out if there is a problem connecting to the website you are accessing. Read about running Ping on Mac here.
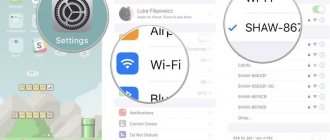
Forget about the network
You may find that forcing your device to forget about the network can help. Turn off Airport, go to System Preferences > Network, then select Wi-Fi from the list on the left and click Advanced. Select the network you want to forget, click (-) and agree to delete.
After doing this, your Mac and other devices using iCloud Keychain will not connect to this network.
Now try connecting to the network again, adding a password when prompted.
Error
Rarely, but still, some users of MacBook PRO and other models have seen the inscription “Wi-Fi: no hardware available.” What to do in this case? Try resetting the NVRAM memory settings.
How to do it? Reboot the laptop, immediately hold down Command + Option + P + R at the same time. Wait for the reboot and the startup sound, release the pressed buttons.
If this does not help, try resetting the SMC (the management controller, which is responsible for low-level functions in the MAC). This procedure is performed in different ways:
- Laptop with built-in battery. Turn off the laptop and connect via the MagSafe adapter. Press Shift + Control + Option simultaneously (located on the left side of the keyboard) and press the power button. Then release the keys and turn on the MacBook.
- MacBook with removable battery. Turn off the laptop, disconnect MagSafe from it and remove the battery. Hold down the power button for 5 seconds and replace the battery and MagSafe adapter. We turn on the laptop.
MagSafe is a magnetic power connector on Apple laptops. Newer devices use USB-C instead.
Check the location of your router
Another thing to check is the location of your router. You'll get a better signal if it's not on or near large metal surfaces - so don't put it on top of a filing cabinet, for example, or place it next to a radiator.
Move your laptop closer to your router and see if you can get a signal from there. If the signal appears to be fine when you're near your router, there's probably something in your home or office causing interference. We have advice on where to find your router in our article on improving Wi-Fi range.
Find out if something is blocking the signal
There are many reasons why signal strength may be weaker in certain locations and not others. For example, thick walls in older houses may make it impossible to receive a signal in one corner of the house.
If there is a lot of metal in the building, which could also cause problems with your Wi-Fi, it may be worth checking what materials were used in the construction of your property.
You can use the NetSpot app (£7.99) to create a map of the Wi-Fi signal in your building. Move your Mac and plot the signal strength in different places to get an idea of where the signal is stronger and weaker.
If you've identified the problem as a problem with signal strength in certain parts of your building, we recommend purchasing a Wi-Fi extender, such as one of these Powerline adapters.
When setting up a Wi-Fi extender, be sure to change the SSID (Wi-Fi name) and password of the new device to match your current wireless router and modem, so your Mac can choose which device offers the best connection without having to switch and enter a new password.
Alternatively, the problem may be with other electrical devices such as fans, motors, microwaves, and cordless phones. Does your Wi-Fi drop while you're using your microwave? Since they both use radio waves, you may experience interference when you turn on the microwave.
Try placing your router away from these devices.
Use Apple Wireless Diagnostics
You can also get an idea of whether your signal is causing drops on other devices using MacOS's built-in wireless diagnostic utility.
To create a graph like the one shown above, follow these steps:
- Open wireless diagnostics. Either find it using Spotlight (Cmd+Space) or hold Option/Alt and click the Wi-Fi icon in the top right corner of the screen, then select Open Wireless Diagnostics.
- Before you click Continue to run the report, go to the menu and click Window > Performance (or press Alt + Cmd + 5).
This will create three graphs that tell you about the transfer speed, signal quality, and signal and noise levels. If you observe this for a few hours, you will be able to determine if there is a problem.
The top graph displays your wireless network's data speed in Mbps. The graphics level will be determined by your router and other equipment you have connected to it. From a troubleshooting perspective, the important thing is that the speed is fairly stable. If you see dips or complete drops in data transfer speed, this indicates a problem.
The middle graph, labeled "Quality," displays the signal-to-noise ratio over time. Ideally, it should be a straight line with small spikes. If you notice frequent line dips, there's probably something interfering with your Wi-Fi signal.
The bottom graph, labeled Signal, displays both the signal level and the measured noise. Both are shown as dBM, or decibel milliwatts, a commonly used unit of absolute power in radio signals. A reliable signal should have a signal level between -60 and -10 dBm and a noise level below -75 dBm. The smaller the gap between two lines on the chart, the more unreliable the signal will be.
If you notice a sudden increase in noise, try to determine when and why it is happening. Does this happen, for example, when a cordless handset is used or when a microwave oven is turned on? If you find that a particular device is interfering with the signal, move your router away from the device causing the problem.
You can also try changing the router's height as well as its horizontal position to see if this affects reception when using an interfering gadget.
Check out the competition
Your Wi-Fi connection may also suffer due to other networks nearby sharing radio waves with you, especially if you are in a built-up area.
To find out what other traffic is in your area, you can try the WiFi Explorer app (£19.99).
WiFi Explorer helps you see what other networks are in your area. It provides a lot more information than you'd normally see in the list of available networks on your Mac, which you'll see if you click the Wi-Fi logo in the menu bar.
Generating a Diagnostic Report
Wireless Diagnostics will automatically save the diagnostic report before displaying the overview. You can create such a report at any time: Press and hold the Option key, then select Generate Diagnostic Report from the Wi-Fi Status menu. The report creation process may take several minutes.
- macOS Sierra and later saves the report in the /var/tmp folder on your startup drive and then opens that folder. To manually open this folder, choose Go > Go to Folder from the Finder menu bar and enter /var/tmp.
- In OS X El Capitan or earlier, the report is saved to the desktop.
Change your Wi-Fi channel
You can take the route of counteracting competition from other Wi-Fi networks by changing the channel you're on. There are 13 channels and all but 1, 6 and 11 overlap. It would be wise to choose a channel as far away from your neighbors as possible, if possible.
Routers are good at automatically selecting channels based on what else is running nearby. However, if you open the Scan tool from the Windows menu in Wireless Diagnostics and notice that your router is running on the same channel as another router nearby, you might consider changing it manually.
The steps you need to take to change the channel on your router will depend on your router software. To access your router software, you need to know your router's IP address. Most routers have an IP address of https://192.168.0.1 or https://192.168.1.1, although BT routers usually have https://192.168.1.254.
Open your web browser, enter the IP address in the address bar and press enter. This will bring up your router software. Find the channel information and log into your router to change it.
However, don't just move it to the next available channel. The channel frequencies overlap, meaning that narrowband routers use five channels simultaneously, while broadband routers use seven. So if you're manually switching channels, make sure you're moving at least five or seven channels away from the one your router is running on.
As you make changes, keep an eye on the graphs in Wireless Diagnostics so you can see which ones have a significant impact on signal quality.
Alternatively, you can set your Wi-Fi network channel to automatic so that it chooses the best channel to use.
Causes
There are quite a few reasons why a MacBook does not see the wifi network, but most of them can be eliminated yourself at home.
The main reasons why wifi does not work well on a Macbook:
- motherboard malfunction;
- malfunction of the built-in WiFi antenna;
- wireless module failure;
- software conflicts.
You need to start identifying the cause and solving the problem according to the principle - from simple to complex.
Use the 5 GHz band
These channels mentioned above are in the 2.4 GHz frequency band. Another way to improve your Wi-Fi signal is to switch to the 5 GHz band. The 5 GHz band provides more bandwidth than the 2.4 GHz band and is less susceptible to interference since other household devices do not use this frequency.
In the UK there are some legal restrictions placed on this band, regulated by Ofcom, and for this reason switching to 5GHz in the UK will not necessarily solve your problem in the same way as in the US. But it's still worth a try.
To use the 5GHz band on your dual-band router, you first need to separate the 2.4GHz and 5GHz networks on your router (check the manual to find out how to do this) and give them different names. If you have an AirPort Extreme or Time Capsule, this option is under the Wireless tab in AirPort Utility.
Click the Wireless Options button at the bottom of the window and check the 5 GHz Network Name box. Now give it a different name.
By separating the 2.4GHz and 5GHz networks, you must tell your Mac and iOS devices to join the 5GHz, preferably the 2.4GHz. On macOS, go to the Network panel in System Preferences, click Wi-Fi, then the Advanced button, and drag the 5GHz network to the top of the list.
On your iOS device, tap Settings, then Wi-Fi. Click on the "i" next to the 2.4GHz network and slide "Auto-Join" to turn it off.
For more information on how to separate 5GHz and 2.5GHz on your router, check out our guide to improving your Wi-Fi signal here.
Disconnect all accessories from your Mac
If Wi-Fi is working, but the connection is intermittently interrupted, or the Internet is too slow, try disconnecting accessories from the computer that are connected to the USB 3 or USB-C ports. Some of them may interfere with the network.
While it's strange, some accessories can interfere with Wi-Fi, especially on newer MacBooks and MacBook Pros.
If after you disconnect all accessories, Wi-Fi starts working normally, then the problem is with them. If your USB cable allows it, you can move the accessory further away from your computer to minimize interference.
Some users solved the problem by changing the connection from 2.4 GHz to 5 GHz. Some accessories may also interfere with Bluetooth functionality.
Run Apple Diagnostics
If you still haven't resolved your Wi-Fi problems, you can use Apple Diagnostics to check for Wi-Fi or network problems.
To do this, follow these steps:
- Disconnect all external devices (except the keyboard and screen).
- Turn off your Mac, then turn it on while holding down the D button.
- When you see a screen prompting you to select a language, do so and then watch the progress bar show your Mac is grading. This will take 2-3 minutes.
- If problems are found, Apple Diagnostics will suggest solutions.
Change DNS settings for your network
Changing your DNS settings is also recommended, but like resetting SMC, PRAM and NVRAM, this is not for beginners.
You'll need to start by deleting your Wi-Fi settings files, but we recommend backing them up first!
- To find Wi-Fi settings, open Finder and select Go > Go to Folder and enter: /Library/Preferences/SystemConfiguration/
- In this window, find the following files and drag them into the clearly labeled backup folder on your desktop: com.apple.airport.preferences.plist com.apple.network.identification.plist com.apple.wifi.message-tracer.plist NetworkInterfaces. plist preferences.plist
- Restart your Mac.
- Turn on Wi-Fi and see if it works.
- If the Wi-Fi is not working, you need to create a new location on the Wi-Fi network by adding a custom MTU and DNS information.
- Before you do this, close any applications that may be using Wi-Fi or the network.
- Go to System Preferences > Network and select Wi-Fi. Click on the menu next to Location and select Edit Locations, click + to create a new location and name it something catchy. Click Finish.
- Join the Wi-Fi network using your regular router password.
- Click Advanced and on the TCP/IP tab select Renew DHCP Lease. Go to the DNS tab and add 8.8.8.8 and 8.8.4.4 to the list of DNS servers. (This is Google DNS, which are usually the fastest options, but you can add something else if you want).
- Select Hardware and Manually Configure.
- Change MTU to Custom and set it to 1453, click OK and Apply.
If you decide the problem is with your router and you can't fix it, it may be time to buy a new router. You can take a look at our review of the best routers for Mac. Plus, here's what you need to do to fix Blue Screen of Death on Mac.
Specify a different network location.
The placement option allows you to quickly switch between specified settings, which is important for mobile users working from several places - home, cafe, coworking office. Sometimes changing the old location to a new one can help solve the problem. Adding a new placement is simple: follow the path “Settings” - “Network” - “Placement” - “Edit placements” and add a new position by clicking on the “+” icon. Save the result by clicking on the “Done” button.