Many people love listening to music; it inspires and gives strength. It is better to do this with headphones so as not to disturb others, especially since their tastes may not coincide with the musical preferences of a music lover. Sometimes problems arise with accessories of this kind, or more precisely with their connection. Owners of expensive equipment are not immune to this, just like lovers of cheap smartphones. It happens that the iPad, iPod or iPhone does not see the headphones. This material will tell you in as much detail as possible what to do if the headphones on your iPhone 7 don’t work, how to set up the connection, and what to do if one headphone suddenly stops functioning.
What to do if iPhone 7 does not see headphones and why
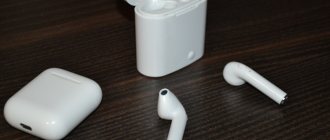
First of all, it’s worth understanding that headphones for the iPhone, as for some other devices, are divided into classic wired ones and accessories of the new wireless generation. The latter were called AirPods, they are gaining popularity, gradually displacing tangled wired devices from the market.
If your iPhone 7 headphones don't work, it may be due to a hardware failure.
For your information! After their release, Apple received many complaints related to design and connection flaws. If the phone does not see the new wireless headphones, then most likely this is due to synchronization errors.
The reason for the lack of sound and the inability to identify the device may be:
- operating system updates that were not installed correctly due to failures;
- dirt, dust or sand has entered the headset jack, as a result of which the phone does not receive contact to detect and switch to listening mode from headphones;
- Dirt or, what happens most often, moisture has gotten into the phone case. It could oxidize the headset input contacts, which also prevents the signal from passing to the processor;
- the smartphone or headphones were dropped, as a result of which the cable responsible for transmitting signals was damaged.
iPhone 7 Plus also often suffers from problems with headphones
Important! It is a careless attitude towards equipment and accessories that causes most breakdowns, which may not be related to headphones. Do not expose your phone to direct sunlight, leave it in damp areas, or drop it on a hard surface.
The first thing to do is restart your iPhone or iPad. If this does not help, then you can reset all user settings and updates. Perhaps the problem lies in the software part in which the failure occurred. After restoring the phone, it is advisable to return backup copies of updates prepared before resetting the settings.
It often happens that some program simply prevents the phone from turning on the vibrate option. You need to remember what updates or software products were recently installed on the device and remove them manually, and then check for connectivity and sound.
If water gets into the phone, the contacts may oxidize and the operation of many modules will be disrupted. Need as soon as possible:
- Unscrew the outer screws of the iPhone case and detach the back cover.
- Using a suction cup or sharpened credit card, carefully remove the display and remove its cable.
- Dry the device with a hairdryer and remove oxidation with alcohol if any appears.
- Reassemble the phone in the same sequence.
If after all this the music does not appear and the headphones are not detected, the problem is in the connector. It is recommended to carefully clean it with a needle and cotton wool, which will remove dirt and dust lumps that have accumulated there due to being carried in a trouser pocket.
The headset may not turn on due to a faulty adapter
Important! All these actions are performed at your own peril and risk. If the user does not know how to properly disassemble his phone, he should immediately contact the nearest service center. It is advisable that it be a certified Apple store.
Why did Apple decide to abandon the 3.5mm jack?
It's clear that wireless is the future from Apple's perspective; take a look at the wraparound AirPods Max and the ever-popular AirPods Pro, for example. If you don't have the required amount, Apple's subsidiary Beats offers a wireless model with a neckband for a quarter of that price.
Portable devices have been equipped with a 3.5 mm headphone jack since 1964, when it appeared in the Sony EFM-117J radio. After the release of the Sony Walkman player in 1979, its heyday began.
It's worth noting that while the removal of this connector caused a stir, the original iPhone also didn't have one that would suit everyone.
The first version of the iPhone introduced by Apple in 2007 was equipped with a headphone output (which was rare on mobile phones at the time), but it was set so deep that not all models could be connected to it. The first-generation iPhone's audio port was recessed a few millimeters into the top end of the case, and the notch was narrower than most headphone plugs. There were three solutions to this problem: you could use the Apple earbuds that came with the iPhone (their connector matched the diameter), try to cut off the rubber coating of the plugs of other headphones (this may seem funny, but some readers will sigh nostalgically when remembering this procedure), or use adapter
Considering the process of generational change, we can conclude that an important advantage of abandoning the 3.5 mm jack in 2016 could be a reduction in the thickness of the iPhone 7 case. However, in reality this did not happen: both the iPhone 7 and the previous model iPhone 6S it is the same - 7.1 millimeters.
One of the rumors turned out to be true: the space that was previously occupied by the headphone jack has now been given to a second speaker. The iPhone 7, followed by the iPhone 8, 8 Plus, X, XR and XS, supported the stereo format, which Apple claimed provided much better sound without headphones.
Ultimately, the company decided that the usefulness of the 3.5mm jack in the iPhone did not justify the space it took up - and, of course, this was a great reason to motivate owners to switch to Lightning headphones. Subsequently, the main competitors of such headphones became wireless models.
How to turn on wired headphones on iPhone
The phone does not recognize Android headphones - what to do, how to get the sound back
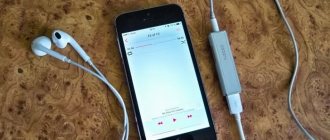
You can easily use a headset from an iPhone on an iPad or iPod touch. If these are wired headphones with a 3.5 mm jack, you just need to insert it all the way into the corresponding jack on the phone. This should be done as carefully as possible, without connecting the accessory abruptly, moving it to the sides. If everything is done correctly, an icon will appear on the display, symbolizing that all contacts in the socket are closed and the headphones are successfully connected.
On iPhone 7 Plus the jet connector is at the bottom.
Note! You can perform all these actions with other accessories with a 3.5 mm audio jet, but you need to remember that there is no point in connecting headphones with an impedance of more than 32 Ohms. The power of the phone and the battery are not enough to produce the same high-quality sound that they are capable of when connected to a computer or laptop.
Control playback, music, Siri and other functions
You can control many functions using AirPods. On the classic version, this is done by double-tapping the earbud. In the “Settings” menu (in the Bluetooth section, the headset must be connected) one of the earbuds needs to be selected right or left, and then set one of these functions:
- Calling Siri (in addition to using the phrase “Hey Siri!”) in order to control melodies - switch between tracks, change the volume and any other actions available to this voice assistant;
- Turn on music, pause or stop playlist playback;
- Switch to the next song;
- Skip to the previous audio track.
In addition to these functions, the improved version of AirPods Pro has the Noise Canceling option and its three modes. If you hold the sensor on the body of the right or left earbud, the modes will change: “Active noise cancellation”, “Transparent mode” and “Off”. To configure which modes the headset switches between, do the following:
- Go to “Settings” of the wireless headset;
- Scroll below to find the “Press and hold AirPods” section;
- Here, tap on the right and then the left earphone and set the “Noise Control” option;
- Next, two or three noise control options will become available for selection.
As for the microphone, both the right and left ones have a voice recording function inside. The voice is automatically read from both headsets, but if you use only one headset, then it will be the microphone. However, in “Settings” you can set the parameter so that one of the earbuds performs this function. Just select one of them: “Always left” or “Always right”.
How to set up headphones on iPhone
Why doesn't the computer see the iPhone in iTunes via USB?
Usually only wireless headphones need to be configured. If they are used for the first time, you need to make sure that the latest version of the software is installed on your smartphone. Then you should do the following:
- Go to the Home screen.
- Open the case with the headphones and place them next to the phone.
- Wait for the setting animation to appear on the display.
- Click “Connect”.
- In the case of the Pro version of the headset, carefully study all instructions.
- Click "Done".
The accessory may not connect due to moisture getting into the phone case
Important! If you are signed in to iCloud, the headphones will be configured to work with any supported devices connected via Apple ID automatically.
Does Lightning really provide better sound?
It's been a long time since the first truly wireless in-ear headphones were introduced in 2015, and the level of audio technology in the sector has advanced radically.
Every version of the iPhone we've tested so far has sounded better with each new iteration. And while this is largely determined by the capabilities of the headphones used, iPhone 12 now supports Dolby Atmos and Apple's own spatial audio processing technology, allowing you to listen to surround sound recordings in AirPods Pro and AirPods Max headphones. We have long been accustomed to the fact that the sound of Apple smartphones can safely be attributed to the best samples on the market, and the latest iPhone 12 has taken the baton from the iPhone 11.
Wireless headphones initially performed worse than their wired counterparts in the same price category, but a quick glance at the reviews of the new AirPods Max makes sure that Apple managed to get rid of the generational curse. Lightning headphones, which receive a digital rather than analog signal from your device, may well be better than their traditional rivals - but the difference is likely to be small.
Why can't my iPhone see headphones via Bluetooth?
Why the iPhone doesn’t see the SIM card - reasons
Even iPhones, which are the epitome of trouble-free and modern mobile technology, can have problems identifying headsets and other Bluetooth devices. The most common causes of the problem are:
- violation of the software integrity of the firmware, physical damage to the motherboard and individual contacts of the wireless module;
- various software failures due to both unexpected actions and updates;
- conflicts between system and user applications.
Important! Installing software from unverified sources can not only cause operating system failure and software conflicts, but also cause complete or partial inoperability of the gadget.
The adapter must be plugged into the connector through which the iPhone is to be charged.
The correct operation of Bluetooth is also affected by increased temperature, moisture, voltage drops or surges in the home electrical network during charging.
Basic equipment
The basic configuration of the iPhone 8 line, which includes the 8 and 8 Plus models, includes:
- smartphone;
- charger;
- EarPods with Lightning connector;
- various documentation;
- paper clips to remove the SIM card tray.
All components are packaged in a branded box with an image of the iPhone on the front side. In addition to an accurate image of the purchased phone, the packaging contains information about the memory capacity of the selected model.
One iPhone earphone stopped working: what to do?
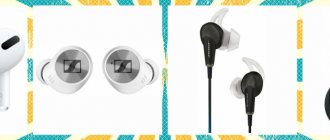
Unfortunately, the quality of Apple headphones leaves much to be desired. AirPods, of course, moved the company forward in this regard. But after using them constantly for a couple of months, they also often fail. The most surprising thing is that most often it is one earphone that breaks, and it is the right one, which contains the microphone and the volume or video recording switch.
It would seem that you will have to buy a new accessory or use it on one ear, but there is one catch. All sounds on the phone are played in stereo mode: the song is divided into left and right channels. One can hear a voice, and the other, for example, the sounds of individual musical instruments. That is why when listening on one ear it is not always possible to enjoy the sound quality.
AirPods may not be supported by older versions of iPhone
The solution to the problem is unique, since it does not force the second earphone to work. The point is to set the sounds to play only in mono mode. It uses only one channel, and all components pass through it into one ear. To switch to mono, you need to go to your phone settings, find “Universal Access” and switch the desired option.
Software recovery
This is perhaps the most radical method, and it’s not for nothing that it ended up at the end of the article. It’s worth resorting to if none of the above helped. This option involves rebooting the system and completely reinstalling the firmware. This is a universal method that will help you save on a service center and avoid having to deal with a “brick phone” that does not play sounds and loses a significant part of its functionality.
In this case, if you make a backup, everything will be saved (files, music, purchased applications, photos, etc.), but the settings will be reset to standard. In addition, this method requires a computer, and in terms of duration, this repair method will take the most time.
To restore the operating system, make sure that iTunes is installed on your computer. If necessary, download from the official Apple website. Then:
- Install the latest iTunes updates if required by the program;
- Connect your smartphone via the original USB cable;
- The next step is to put your iPhone into emergency mode (also called DFU). This is necessary for the application to recognize the phone immediately. This is especially helpful if this is your first time going through these steps. In addition, this significantly reduces the firmware time.
How to do this: for phones 6th generation and lower - hold down the lock and “Home” buttons simultaneously for 10 seconds, after the allotted time, continue to hold “Home” and release the power button. Repeat this step until iTunes recognizes the device.
For models 7 and above - since Apple has changed the mechanical Home button to a touch button, the process is slightly different. To put your smartphone into DFU, hold both the volume buttons on the side and the phone lock key, the same as for older models, for 10 seconds. Release "Power", but keep the volume swing until the program sees the iPhone.
- To understand whether you did everything correctly, just receive a notification from the program. A window should pop up saying that iTunes recognized the iPhone;
- Make sure you have made a backup. To do this, take your iPhone and go to “Settings”, click on the very top line where your name or nickname is written, then move the checkbox to the right to “iCloud Backup”, and then click on “Create a backup copy”. During copying, the smartphone must be constantly connected to the Wi-Fi network;
- Next, one single action will be available in the window and this is what needs to be done - “Restore iPhone”. This action will remove the outdated firmware and install the new, latest and available one. During the process, it is strictly forbidden to disconnect the smartphone from the computer.
This action will not only fix the “Headphones” mode that won’t turn off, but also reset unnecessary data, free up space and fix other problems.
After completing the procedure, the user will have to go through the same thing when he first picked up the iPhone - select the country, language, enter the login and password for the ready-saved Apple ID account, and so on. If you decide to erase the data, then refuse to restore the copy. Do not forget that for all actions an active SIM card must be inserted into the iPhone.
Therefore, we strongly recommend that you always create backup copies on your iPhone, set up automatic data backup in iCloud, and regularly create copies when connecting your smartphone to a computer and using iTunes.
If all the recommendations that we described did not help you disable headphone mode, most likely the problem is in the headphones themselves or in your device. In this case, you need to take your device to a service center so that specialists can diagnose and repair it, if possible. Just be sure to make sure that this is an official Apple service center or its partners, otherwise no one will be responsible for the quality of work.
Share link:
How to connect a speaker to a phone via Bluetooth
For users who like to listen to music through speakers wirelessly, a method for connecting a Bluetooth speaker to an iPhone will be relevant. You can do this as follows:
- Place a speaker or a pair of them in close proximity to the phone to ensure future wireless communication. If the distance is too long, connection may fail.
- Turn on the speakers and put them into pairing mode by pressing the corresponding button on the case. If it is not there, then you should carefully study the operating instructions for the speakers.
- Go to the phone menu and select the “Settings” icon (gray gear).
- In the general settings window, find the “Bluetooth” item and go to it.
- Enable the module by moving the slider to the appropriate position. After loading, a list of devices that are in close proximity and ready to connect will appear on the screen. The speakers will be displayed under the name of their manufacturer or model.
- Click on the names of the speakers and connect to them. Pairing may take some time, most often it is no more than 2-3 minutes. If you don't see the speakers, you can turn them off and on again, or refresh the search list on your phone.
- Once paired, the speakers are ready to use. You can test them, turn on some melody.
Original headphones for iPhone seven
Note! Sometimes to connect to speakers you need to enter a password, which is indicated on their case or box. If it is lost, you should study the speaker manual.
Third party pedometer apps
Apple allows access to system services that collect data on the owner's physical activity. So you can install any step counting app. Let's look at some in this section.
Stepz
One of the most popular pedometer programs. Stepz receives data directly from the smartphone coprocessor and provides it to the user in a convenient form. The color scale on the main screen will clearly show your achievements for the week, warn you about lack of activity, or “praise” you for fulfilling the quota. The statistics section of the graph displays the average values of steps taken, distance in kilometers and other useful information.
Runkeeper
A sports app with a lot of features. In addition to standard step counting and building various graphs, Runkeeper allows you to share your achievements on social networks, receive audio tips and instructions from the built-in trainer. You can take pictures during workouts and much more. Runkeeper is distributed free of charge, but a number of functions are available only with a subscription.
Pacer
Another simple pedometer. Among the functions, we highlight the presence of recommendations for an active lifestyle, calculating calories burned, the level and period of activity during the day. Pacer has two built-in fitness plans: walking for weight loss and achieving 10 thousand steps. In addition, you can create a personal activity plan.
You might also be interested in knowing which iPhone holds a charge better.
How to remember a Bluetooth device on an iPhone
It happens that when using Bluetooth headsets, people accidentally click on the “Forget device” item in the connection settings. After this, the phone no longer finds accessories and cannot work with them. The following sequence of actions may help:
- Turn off Bluetooth.
- Restart your iPhone.
- Turn on Bluetooth.
- Search all devices.
- Find the one you need and start pairing.
Sometimes this does not help, and then it is recommended to reset the phone and accessories. This is a rather radical method, and sometimes you can do without it. Just try one more step-by-step instruction:
- Turn off the headset.
- Press and hold the “On/Off” and “Synchronization/End” buttons on it simultaneously for ten seconds or until the indicators begin to blink alternately.
- Start searching for the headset from your phone (blinking mode—ready to search).
Bluetooth pairing fails on iPhone - a fairly common error when connecting a headset
Thus, we discussed how to turn on wired and wireless headphones on iPhone 7 and other versions of the popular smartphone. It is worth noting that in most cases, the failure of components and accessories is due to user negligence. Therefore, you should use your gadget carefully, and then everything will work properly.
Problems connecting wireless headphones to iPhone
In some cases, the iPhone may refuse to recognize the headphones. In such a situation, we check the availability of the headset for detection by other devices. If the Bluetooth indicator is constantly on and not flickering, to activate it, press a separate button or press and hold the power keys.
This action has its own characteristics in different headphone models. Disabling Bluetooth and reactivating it may help. There is a possibility that after this the accessory will appear in the list of devices that are available for connection. If you follow the instructions given in the instructions for the headphones, the connection is successful.
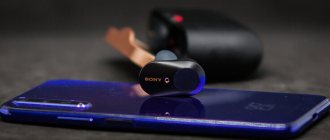
True Wireless Stereo is translated from English as truly wireless stereo, so TWS headphones use Bluetooth not only to connect with the device, but also each ear monitor with each other.
Why are there connection problems?
Wireless headphones produced not by Apple, but by third-party manufacturers - Samsung, Huawei, Xiaomi? and little-known Chinese brands - are deprived of the usual magic of AirPods, when a couple of clicks are enough to pair. Therefore, before connecting audio equipment to your iPhone, you will have to double check every little detail:
- Distance problems. Bluetooth 0 operates at a distance of up to 10 meters, previous versions of the wireless connection cover a distance of 8-9. But, as practice suggests, sometimes 50 centimeters is too much for the first pairing: it is better to keep the headphones as close as possible to the iPhone, iPad or iPod Touch.
- Network experiments. The old problems of Bluetooth and Wi-Fi incompatibility are still encountered occasionally. Temporarily disconnecting from unnecessary network sources will help get rid of the error. Switching to airplane mode followed by forced activation of Bluetooth will also help.
- Reboot iPhone. A banal but sure way to get rid of rare problems and temporary difficulties. The reboot method depends on the iPhone version (5, 6, 7, 8 or X): on models with Face ID, hold down the side button and the volume down or up key; on phones with Touch ID, hold down the button located on the top or side of the case.
- Refusal to pair. If the question of how to connect wireless headphones to your iPhone has long been resolved, but it is still impossible to enjoy music due to problems with playback, often desynchronization and loss of signal, then the Bluetooth section in “Settings” will help you figure out the problem.
- From there, the wireless technology is “forgotten”, and then connected again, but with a clean slate and without previous errors or problems found.
- Reset settings to factory settings. A radical method that should be resorted to only if other steps have not helped, the headphones are 100% operational and function on third-party equipment from Apple.
The “Basic” section, the “Reset” menu item will help you return the settings to their initial form. From there, either the network settings are reset, or “all settings” are reset at once. Depending on the specific situation and observed problems. For example, when connecting, pairing or while listening to music.