Many users, while working with Word documents, are interested in the question of how to make a bibliography in Word. A similar list of references is necessary in Word if the text of the document uses various borrowings from other sources.
A Word reference list is a list of all sources, such as books, magazines, newspaper articles, Internet sites, etc., cited in a document. The Word reference list is usually located at the end of the document.
If you do not show links to sources, then the author of this document may be accused of plagiarism because he did not indicate where he got the information used. Such information often refers to authoritative sources, so they give additional “weight” to this document.
There are two types of links to information sources: copyright and digital types. How to prepare a list of references in Word depends on the requirements emanating from a higher authority, the editorial board of the journal, the management of the educational institution, etc.
Links in Word to a bibliography consist of a link in the document text to a source located in the bibliography. Thanks to this, the reader can quickly find out what exactly was referred to in a given piece of text.
In this article we will look at how to make a bibliography in Word in several ways. These instructions can be used in the following versions of the application: Word for Microsoft 365, Word 2022, Word 2016, Word 2013, Word 2010, Word 2007. There may be minor differences in the interface of Microsoft Word between versions.
How to make a bibliography in Word automatically
First, we will try to create an automatic bibliography in Word. The text of the document will contain links to sources that will be added to the bibliography.
Complete the following steps in the Word text editor window:
- Place the mouse cursor in the place in the document fragment where you need to create a link to the source of information.
- Open the “Links” tab, go to the “Links and References” group.
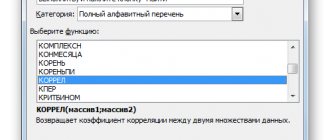
- In the “Style” section you need to select a link style.
For socio-political and literary sources, the “MLA” and “APA” styles are usually used. In technical literature, references with numbers are more common, for example, “ISO 690 - digital reference.”
If you need a list of references in Word according to GOST, select the appropriate style. In Word, the list of literature according to GOST can be used in two options: “GOST - sorting by name” or “GOST - sorting by title”.
- First, click on the “Insert link” button, and then in the drop-down menu on the “Add new source...” item.
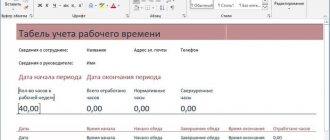
- Fill out the required fields in the “Create Source” window by entering all the required information.
You need to select the source type (book, journal, abstract, report, website, etc.) and then fill out the recommended fields. To open additional fields for a specific source type, check the “Show all reference list fields” checkbox.
After the author's last name, place a comma before his initials. If this book has multiple authors, activate the “Corporate Author” option to add information about all authors.
- Click on the "OK" button.
- Similarly, add a new source link in the edited text.
- Links to the Word bibliography will appear in the text of the document.
If you need to enter a previously created link into the text again, click on the “Insert Link” button, and then select it from the list of available ones.
- After adding all sources to this text, place the mouse cursor, as a rule, at the end of the document text where the list of used literature should be located.
- Click the Bibliography icon to select the appropriate format using the built-in examples: Bibliography, References, or Works Cited.
- A list of references in alphabetical order in Word will appear in the document.
How to format a footnote
The text of the footnote, where the source is indicated, is formatted in the same way as the bibliographic list. Due to the abundance of all kinds of dashes, colons and slashes, it would not hurt to first ask the teacher about his personal opinion on the proper appearance of a bibliographic footnote.
Also, do not be lazy to ask him whether to write down the total number of pages of the book or indicate only the page on which the quotation is located.
Below are examples of source descriptions of different categories in accordance with the relevant GOST.
Book with one author:
Kurpatov, A.V. Happy at my own request / A.V. Kurpatov – M.: Bustard, 2015. – 224 p.
Book with two authors:
Genkin, A.R. Blockchain. How it works and what awaits us tomorrow / A.R. Genkin, A.O. Mikheev – Moscow: EKSMO, 2016. – 454 p.
Book with three or more authors:
Bredemeier K. Black rhetoric / K. Bredemeier [et al.] - Yaroslavl: Tree of Knowledge, 2016. - 324 p.
Article in a magazine or newspaper:
Neleyvoda, K.Z. Crisis of funny names / K.Z. Neleyvoda // Expert. – 2022. – No. 3 – pp. 26-28.
If an article was written by several people, the rules for naming them coincide with the description of a book with two, three or more authors.
Electronic resource:
Tarasenko Yu.V. An hour and a half to return to your place [Electronic resource]. – Access mode: URL: https://www.psychologies.ru/wellbeing/poltora-chasa-chtobyi-vernutsya-k-sebe/ (06.06.2018)
If you are revisiting a source, you can shorten its description to the author, title, and page number where the citation is located. However, some instructors do not accept abbreviated footnotes, so be sure to check with your advisor about this.
Adding information about a source in the bibliography
If there is not enough information about the literary source, you can use the Placeholder function. Reference placeholders do not appear in the reference list.
Go through the following steps:
- Click on the "Insert Link" icon, select the "Add Placeholder..." command.
- In the Placeholder Name window, create a name for the specific placeholder.
- Click on "Manage Sources".
- In the Source Manager window, a question mark will appear in the Current List field next to the placeholder name.
Placeholders in the current list are arranged by tag name in alphabetical order with numbers in the title.
- Select the placeholder, click on the “Edit...” button.
- In the "Change Source" window, fill in the required information.
The easy way – Mendeley
When I did everything described in the first method and everything worked, I was already thinking about stopping there. However, by chance I saw a mention of the Mendeley program on one of the pages. I decided to see what she was like. And you were right! Judging by the number of features, free (.) Mendeley is superior to paid analogues, such as EndNote, RefWorks, Zotero, Papers.
Mendeley turned out to be extremely easy to use, intuitive, has the ability to synchronize between devices, is cross-platform, and provides 2Gb of space for storing original articles in pdf and other formats. Interested? Then let's get started!
- We go through a simple registration on mendeley.com
- Download the desktop version for Windows Mendeley-Desktop-1.13.8-win32.exe
- We install it, and then the client starts.
- Enter the email and password specified during registration.
- Now we can get to work.
- We drag files directly into the client, or open them in the menu
- The program will immediately try to automatically fill in the fields “Author, Title, Year, Where published
- If the program does not recognize it correctly, you can always edit it in the left column, or use the search by name. If an article is found in the Mendeley online library, it will automatically correct errors.
- You can also organize articles into convenient folders for you.
Installing a plugin for MS Word
Let's move on to the best part: a plugin for Microsoft Word!
- Go to the menu Tools -> Install MS Word Plugin.
Select the style we need:
- Russian GOST R 7.0.5-2008 (Russian) – sorting by author
Russian GOST R 7.0.5-2008 (numeric) – sorting by order of mention
Now we can directly use:
- Place the cursor where you need to insert a link to a literary source
- Click the “Insert Citation” button.
- In the window that appears, we look for the source we need
This is where I end this article, I think you can figure out the rest of the capabilities of the Mendeley program on your own, and I hope that you managed to solve the pressing problem of how to format a bibliography in MS Word according to GOST 7.0.5-2008 in square brackets ))).
Digital reference list Word (square brackets)
When creating a bibliography, references in square brackets with ordinal numbers are often used. The reference number to the source found in the list of references is added in square brackets.
Creating a bibliography in Word is as follows:
- Create a bibliography yourself.
- Select sources from the list.
- Open the "Home" tab, go to the "Paragraph" group.
- Click on the arrow of the “Numbering” icon and select a numbering format. default (Arabic numeral with dot).
The previously selected list of references will be automatically numbered.
- Place the cursor at the desired location in the text fragment.
- If you only need a link to the source, then do not insert anything into square brackets - []. If you need to add a page number, insert this information in this form - [, p. 107].
- Go to the "Insert" tab.
- In the "References" section, click on the "Cross-reference" command.
- In the "Cross-References" window, select the type of link - "Numbered List" (or "Paragraph"), and in the "Insert Link to:" field - "Paragraph Number".
Perform a similar operation with the following link located in the text of the Word document.
You may also be interested in:
- How to make a table of contents (table of contents) in a Word document
- How to remove a blank page in Word - 6 ways
If, after saving, you start editing the file again: inserting new or deleting old links, then the numbering in the reference list may no longer match. You can solve this problem as follows:
- Select the document text using the “Ctrl” + “A” keys.
- Right-click inside the document.
- In the context menu that opens, click on “Update field”.
The list of references will be automatically numbered again.
What it is
A link is a word or phrase that, when clicked, takes you to another page. The object for it can be a picture, an application, a piece of text. Word offers different reference options to help make your work easier. Let's look at what links there are in more detail.
There are two ways to make a link active in Word:
- Copy it from the address bar of the browser, paste it into the document, click the “Enter” key;
- Select a word, right-click on it and select the “Hyperlink” option;
- Next, establish a connection with the Internet page by entering the name of the site in the “Address” field.
How to make an alphabetical list of references in Word
In some cases, users need a bibliography in alphabetical order.
You can do this in the following way:
- Select a list of references.
- If it is already numbered, click on the arrow next to the “Numbering” button.
- From the drop-down menu in the numbering library, click on the "None" format.
- Enter the "Home" tab.
- In the Paragraph group, click the Sort icon (A-Z).
- In the “Sorting Text” window, click on the “OK” button.
With the default settings, text is sorted in ascending order.
- Click on the “Numbering” button, and then select the numbering type.
The hard way is using xsl styles
Word has a utility that allows you to manage literature sources. You can find it in the Links tab, and it’s called “Links and references.” This utility has several built-in styles, 2 of which are called “GOST - sort by name” and “GOST - sort by name”. If you have already tried to use them, then you already know that they have nothing to do with modern GOST 7.0.5-2008. I note that this utility is terribly inconvenient and creating a bibliography in it takes a huge amount of time. However, if you have already done a lot of work and created your own list of literary sources, and the problem is only in the design of the bibliography according to GOST, then the first method is just for you.
How to delete a bibliography in Word
The MS Word application does not provide functionality for removing unnecessary links to information sources using programmatic methods.
If you click on the “Manage Sources” icon in the “Links and References” group, then in the “Source Manager” window, when you try to remove an unnecessary source from the list, you will see that the “Delete” button is not active, so you will not be able to use this functionality.
You will have to remove links to sources and the bibliography itself manually.
Do the following:
- Click on the field with the list of references.
- Click on the arrow next to the “Bibliography” icon.
- In the menu that opens, click on the “Convert bibliography to text” item.
- Select the contents of the reference list block.
- Press the Delete key.
- Then manually remove references to sources in the text of the document - highlighting the links one at a time, and then pressing the “Del” key.
If there are a lot of links, use the following method:
- Select the text in your Word document.
- Press the keys “Ctrl” + “Shift” + “F9”.
- As a result of this operation, all links from this document will be deleted.
You will need to delete the reference list manually.
How to insert a link to a website
Making a hyperlink is simple. Let's look at the simplest ways to quickly add hyperlinks in text.
Using the toolbar
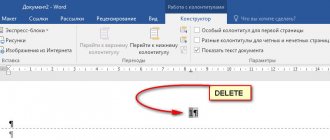
Step 1: On the top panel of Word 2007, find the Insert tab, look for the Hyperlink button and click.
Figure 1 – Toolbar
In Word 2010, 2013 and higher, you can find the Hyperlinks button as in the photo below.
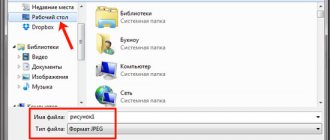
Step 2: After clicking, a dialog box appears. Inside, look for the “Address” line and paste the link to the page.
Also in this window you can make hyperlinks to another Word or Excel document.
Using the right mouse button
Step 1: Write any word, for example site, highlight it, press the right mouse button, look for the line “Hyperlink” and click
Step 2 is the same as in Method 1. Paste the link to the site and click OK
If the word is highlighted in blue and underlined (ayt), then everything was done correctly.
On a note! To activate a link, you need to hover over it, hold Ctrl, and click. This action will open the browser and the desired page will open.
Settings
You don't quite like the placement of the footnotes. They are numbered incorrectly. We need to swap them. You can solve all these problems in the settings.
Switch to the “Links” tab. Click on the small button in the right corner.
You can set endnotes to appear at the end of a section or document.
Below you can change the numbering. To count from another number, letter or symbol, write or select the desired value in the “Start with:” field.
To start counting anew in each section, select “In each section” in the “Numbering” item.
To use other symbols to represent the words being explained, click on the “Symbol...” button and select the one you like.
The settings will work for certain sections if you select this in the “Apply” item. By default, they will be assigned to the entire document.
Click “Insert” to add a new footnote, or simply “Apply” to save the settings.
You can create footnotes per page. To do this, leave the starting number in “Start with:”. And in “Numbering:” select “On each page”.
Removal
Place the cursor next to the text of the footnote that you want to remove in the editor.
Erase words in a note line using the Backspace button.
Highlight a word's superscript. Click Delete.
Clearing the text of a footnote will do nothing to remove it.