BSoD - Blue Screen of Death - a problem only for experienced Windows users. If a programmer says he/she has never experienced a BSoD, there is a 99% chance that he/she is lying. BSoD errors are very popular and can tell a lot about the health and performance of your PC. One of them is BSoD/STOP error 0xc000021a, which occurs when updating or reinstalling Windows.
Resolving error 0xc000021a in Windows.
What does this error mean?
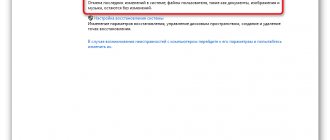
The error says that your computer has encountered a problem and needs to restart. It does not appear separately, but inside the “blue screen of death”. This can cause serious problems that damage the internal structure of Windows. Often the error cannot be resolved even after restarting the PC. Error code 0xc000021a usually occurs on a Windows 10 PC after upgrading from a previous version of the OS or after running a system restore. The BSoD contains the following information:
"STOP: c000021a {Fatal system error}
The Windows Logon Process terminated unexpectedly with status 0xc0000034 (0x00000000 0x0000000)
The system has been shut down."
Fix Windows 10 Kernel ntoskrnl.exe is missing or contains errors 0xc0000221
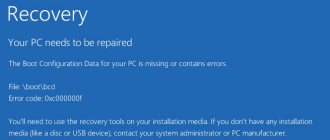
Error code 0xc0000221 is displayed by some Windows 10 users immediately after shutting down the computer. Several users are reporting that they are stuck in an automatic repair loop with this error code. In this article we will talk about possible reasons and suggest ways to solve the problem.
Error code 0xc0000221 indicates that the problem may be due to a damaged or missing driver file on the partition (can be fixed by scanning), a hard drive error (fixed by chkdsk /r), or a RAM problem that may require hardware replacement.
Messages on the screen:
What is the Ntoskrnl.exe file?
Ntoskrnl.exe (also called kernel image) provides the base and executive layers of Windows NT kernel space and is responsible for various system services such as hardware virtualization, process and memory management, and is therefore an integral part of the system. It contains a cache manager, an executive, a kernel, a security reference monitor, a memory manager, and a scheduler.
Reasons for error 0xc000021a
There are two files in the Windows operating system whose corruption is the main cause of the problem:
- Winlogon.exe, which is responsible for logging in and out of Windows. This file may become corrupted due to a conflict between system files or third-party programs.
- Csrss.exe, related to the server subsystem and console applications. If this file is damaged, this error may also appear.
Two system files, damage to which is the main cause of the problem.
The error occurs when:
- damage to operating system files;
- failure of hard disk sectors or exposure to viruses;
- unsuccessful installation of Windows updates (including KB3004365);
- incomplete installation or conflict of third-party software.
Reference! The error may cause damage to the Windows file structure.
On Windows 10
In Windows 10, BSoD with error 0xc000021a accompanies the system update process. This damages the winlogon.exe file, causing Windows 10 to refuse to boot. This file controls entry and exit from the operating system, so damage to it causes a “screen of death” with information about the corresponding problem. A file conflict or interference from third-party utilities during an update can have a destructive impact on this important system file.
The second specific factor that causes BSoD is damage to the csrss.exe file, which belongs to the Microsoft client or server. Fixing this defect may require reinstalling the OS, but you should check for other causes before resorting to extreme measures.
Among the possible causes of a system problem, the following are common:
- failure to install an OS update;
- conflict between new software and the OS kernel;
- failure when reinstalling "ten";
- destructive influence of virus programs;
- incorrect configuration of files in bad sectors of the hard drive;
- breakdown of RAM lines;
- paging files in bad sectors of the hard drive;
- Incorrect update for this OS.
Based on the above factors, we can conclude that it is not only developer errors that lead to the problem. However, it is much easier to start troubleshooting the problem if you delve into the possible causes.
On Windows 8
In Windows 8, the OS may fail due to similar system problems. It should be borne in mind that the reasons described above often apply to both “ten” and “eight”, so the search for specific factors for different modern versions of operating systems is not always justified.
However, you should be aware of the features of Windows 8 that can lead to a blue screen:
- installed system files do not correspond to this version;
- conflict between the software and the current operating system;
- Incorrect archiving when restoring a hard drive.
Special diagnostic programs will help to identify what the error refers to in this case. Thanks to them, you can build a competent algorithm to solve the problem.
Characteristics of STATUS_SYSTEM_PROCESS_TERMINATED
Error code 0xc000021a has the following features:
- when it appears, the process of the conflicting application is terminated if it is the source of the trouble;
- the computer automatically turns off or restarts when you launch a specific application or access a device;
- control and information input devices stop responding to pressing their buttons and moving the mouse cursor;
- The system periodically freezes for a few seconds.
DLL not found
If a window appears with error 0xc0000022, which states that the required dll library is missing, then most often the problem can be fixed. By going to the C:windowssystem32 directory, you can replace or add the desired file.
If a message about a problem appears on the screen when starting the game, reinstalling DirectX or video card drivers may help.
Disabling peripherals
While the operating system is loading, some drivers may conflict with the system kernel, causing it to stop loading.
To eliminate this possibility, you must disconnect all unused external devices: flash drives, printer, scanner, etc. (except for the mouse pointer, keyboard and monitor), and restart the PC, checking if the computer boots.
Disconnect all unused external devices from the computer
Reference! If disconnecting devices will resolve the error, you must connect them one at a time, identifying the device causing the error.
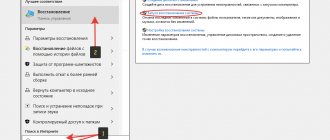
System recovery with stop code 0xc000021a
Before proceeding directly to the methods of solving the problem, pay attention to where exactly we will solve it, provided that Windows 10 shows a blue screen with error 0xc000021a upon boot.
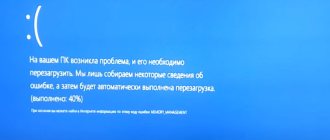
After restarting your computer several times with this error, you will see the message “Preparing automatic recovery”, then “Diagnostics of your computer”.
Once the diagnostics are complete, a screen will appear with the title "Automatic Repair" and a message indicating that the computer did not start correctly. This is what we need: click the “Advanced options” button.
The Windows 10 recovery environment will be launched with tools that will be useful to us to restore the functionality of the computer or laptop. Other ways to start the Windows 10 recovery environment (for example, you can use a bootable USB flash drive if the method described above does not work in your case).
Run CHKDSK
- Open your computer. This can be done by double-clicking the computer icon on your desktop (if you have one) or pressing the Windows logo + E key to launch Windows Explorer (Windows Explorer usually starts with the computer open by default, but if this requires you to be in another location, simply navigate to your computer using the left pane of Windows Explorer).
- Use the DHKDSK utility to find the drive you want to analyze and right-click on it.
- In the context menu that appears, select “Properties”.
- Go to the Tools tab.
- In the Error Checking section, click Check to launch the Disk Error Checking utility. The utility launches and begins checking the selected drive for file system errors and other problems such as bad sectors.
- If Windows detects errors or other problems on the selected hard drive, it only prompts you to scan the hard drive. If the system does not detect any errors on your hard drive, you will receive a message telling you that you do not need to scan the drive, although you can continue scanning. Simply click "Scan Drive" to have CHKDSK scan the selected drive for errors and problems.
CCNA, Web Developer, PC Troubleshooter
I am a computer enthusiast and practicing IT professional. I have many years of experience in computer programming, troubleshooting and hardware repair. I specialize in web development and database design. I also have a CCNA certification in network design and troubleshooting.
Source
Disabling driver signature verification
The first method that works in cases where you encounter stop code 0xc000021a is to temporarily disable driver digital signature verification. This method is suitable in cases where the error occurred after installing updates (including drivers), when restoring from a restore point, and also after installing some programs.
The procedure will be as follows:
- On the first screen of the recovery environment (how to get into it was discussed above), select “Troubleshooting”.
- Then go to the "Advanced Options" section, click "Boot Options" and then the "Restart" button.
- The computer will restart and then you will see a screen with boot options. Press the F7 key (on some laptops - Fn+F7) to boot Windows 10 with driver signature verification disabled.
- If the download is successful this time, wait for Windows 10 to finish loading and, if it finishes installing updates or any software, allow the system to do so.
- Restart the computer in normal mode, if this is our case - this time the computer will boot without errors.
- If the computer boots with driver digital signature verification disabled, and a subsequent normal reboot does not work, try rolling back the drivers (if you updated them before the problem appeared) or uninstalling recently installed antiviruses and third-party programs, especially those that install virtual device drivers on computer.
Instructions for doing the same with other methods: How to disable driver digital signature verification in Windows 10.
Restoring the integrity of system files with error 0xc000021a
The same error can be caused by damage to important Windows 10 system files: in particular, if you damage or delete the csrss.exe or winlogon.exe files, you will receive this exact stop code.
The solution will be as follows:
- In the recovery environment, go to Troubleshooting - Advanced Options - Command Prompt.
- In the launched command line, use the command sfc /scannow /offbootdir=C: /offwindir=C:WindowsSimply entering sfc /scannow in the recovery environment will not work, more about this in the material Restoring the integrity of Windows 10 system files.
- After entering the command (don't skip spaces), press Enter and wait for the process to complete, which may take a long time.
- If we're lucky, you'll see the message "Windows Resource Protection found corrupted files and successfully repaired them."
If everything worked, close the command line and restart the computer: in a scenario where the cause was changed or damaged system files, the blue screen 0xc000021a should not appear.
Restore points and uninstalling updates
If the previous two methods did not help in fixing the error, pay attention to two more items in the “Advanced options” of the recovery environment:
- System Restore - Restore Windows using a restore point. If you have recovery points, try using this item, even if the error itself began to appear precisely after using recovery points, but from the Windows interface
- Uninstall updates - using this item, you can remove recently installed Windows 10 updates that could cause the error.
If none of this helps, I can suggest either trying to manually restore the Windows 10 registry (unfortunately, in the latest versions of the system it is difficult - they do not store an automatic backup copy of the registry) or restoring the system to its original state (including saving data) .
You will find the required item called “Restore the computer to its original state” to start the recovery in the “Troubleshooting” section. The essence of this action is described in the article How to reset Windows 10 or automatically reinstall the OS.
How to fix it
There are several proven ways to fix error 0xc000021a in Windows. Try them one by one until you achieve the desired result.
Removing recently installed software
This solution is one of the most effective. First of all, do the following:
- Press the Windows key, and while holding Shift, click Power/Restart. The boot will begin in recovery mode.
- In the recovery window, from the Recovery Options menu, select Troubleshoot.
- Click Advanced Options, then Startup Options.
- Select Reboot.
- After rebooting, press F7 and in the menu that appears, select “Enable Safe Mode”, then “Restart”.
If you're lucky, the PC will boot to the Windows 10 desktop. Then:
- Click Start, type "programs" and select "Programs and Features."
- Sort programs by installation date, then remove as many recently installed apps as possible.
- On the left side of the window, find “View installed updates” - installed OS updates will open.
- Uninstall any recently installed updates.
After uninstalling recently installed apps/updates, reboot your system.
Reset BIOS
Many users report that resetting the BIOS settings helped them solve the problem. This is easy to do - you just need to remove the CMOS battery from the motherboard for a couple of minutes. The method does not work with laptops because their motherboards are not available. To reset your PC BIOS, do the following:
- Turn off your computer.
- Disconnect all power cables from the PC, making sure that the computer's access to electricity is completely turned off.
- Open the case.
- Locate the CMOS battery (somewhere on the motherboard) and remove it.
- Wait 1-2 minutes and reinsert the battery.
Reassemble the case, start the computer, and check if it boots successfully into Windows.
Replacing all damaged registry files with backup copies
To use this method on Windows 8 and other versions:
- Insert the Windows installation disk or USB into your PC and restart it.
- As soon as the boot starts, enter the BIOS settings and change the boot priority from HDD/SSD to CD/DVD or USB flash. The BIOS boot instructions may vary, but will almost always appear on the first screen that appears upon boot (with the name of the motherboard).
- Save the changes and exit the BIOS.
- Select your language and time zone, click Next.
- In the “Install Now” window, click “Repair your computer” / “Troubleshoot” / “Advanced options” / “Command Prompt”, after which it will open.
- Type c: and press Enter.
- Next, enter the commands one by one and after each press Enter cd windowssystem32config
- dir
- ren (FILE NAME) (FILE NAME).old
For example, ren SYSTEM SYSTEM.old – for the SYSTEM file. ren SECURITY SECURITY.old – for the SECURITY file.
- Next, enter the following lines in the command line one by one, pressing Enter after each: cd RegBack
- dir
- copy /Y SOFTWARE
- copy /Y SAM
- copy /Y SYSTEM
After that, close the command prompt, press EXIT, then ENTER. Remove the Windows installation disk or USB and restart your PC. check if it can boot successfully without BSoD and error 0xC000021A.
Setting up BIOS (UEFI) PC
Most often, when this error occurs, Windows cannot boot into safe mode. In this case, you can boot the system from the installation DVD/USB disk by disabling the driver digital signature verification function.
Note! Digital signature verification is performed to protect the system from unsigned or modified drivers.
To boot Windows from the installation disk, you need to make the appropriate settings in the BIOS (UEFI).
Step 1. Insert the installation flash drive into the PC’s USB port (example).
Insert the installation flash drive into the USB port
Step 2. Turn on the PC and immediately after startup press the “Del”, “F2” (or “F1+Fn”) key to open the BIOS menu.
After turning on the computer, press the “Del” key
Note! The button to enter the BIOS can be found on the computer screen when it boots or in its technical documentation.
Step 3. After entering the BIOS (UEFI), click the installation USB flash drive in “Boot Priority”.
Click the mouse to select the installation USB flash drive in “Boot Priority”
Step 4. Click "Advanced" or the "F7" key.
Click "Advanced" or the "F7" key
Step 5 : Click OK.
Click "OK"
Step 6. Click “Load”, scroll the list to the “Hard drive boot order” column and in the “Boot option #1” line, select the installation USB drive from the drop-down menu.
Click “Load”, scroll the list to the column “Boot order of hard drives”, in the line “Boot option #1” select the USB drive
Step 7: Click Exit and click Save Changes and Reset.
Click “Exit” and click “Save changes and reset”
Booting Windows from the installation disc
Step 1. After restarting the PC, press any key to boot from the installation disk.
Step 2. Select the installation language and click “Next”.
Select the installation language and click “Next”
Step 3 : Click System Restore.
Click “System Restore”
Step 4. Click on the “Troubleshooting” icon.
Click on the “Troubleshooting” icon
Step 5. Click on the “Advanced options” icon.
Click on the “Advanced options” icon
Step 6. Select "Download Options".
Select "Download Options"
Step 7: Click Reboot.
Click “Reboot”
Step 8. Press “F7” to launch the “Disable mandatory driver signature verification” mode. The computer will be booted for diagnostics and repair.
Press “F7” to launch the “Disable mandatory driver signature verification” mode
Important! When restarting the computer and loading Windows from the hard drive, you must remove the installation USB disk from the connector.
Working with the command line
Checking the hard drive
In case of file system errors, the CHKDSK utility is used, which scans the hard drive (HDD) and corrects its errors.
Step 1. Follow Steps 1-6 of the section “Restoring system boot...”.
Step 2: Click Command Prompt.
Click “Command Line”
Step 3. Type “chkdsk C: /f” in the line and press “Enter”. Wait for the diagnostics and system recovery to complete.
Type “chkdsk C: /f” in the line and press “Enter”
Reference! In place of the letter “C:” there should be a letter of the drive with Windows located on it.
Checking system files
The SFC command is used to check and overwrite system files.
Step 1. Type “sfc /scannow” in the line and press “Enter”.
Type “sfc /scannow” in the line and press “Enter”
Step 2. Wait for the scan to finish and the files from the backup to be overwritten.
SAM file recovery
If the SAM storage is damaged, you can copy its working version from the backup folder.
Step 1. Type: “copy C:WindowsRepairSam C:WindowsSystem32Config” and press “Enter”.
Type “copy C:WindowsRepairSam C:WindowsSystem32Config” and press “Enter”
Step 2. When asked about replacing the file, press the “Y” (“Yes”) key.
System Restore
To resolve software update issues, you must restore the system to an earlier working state.
Step 1. Press “Win+R”.
Press “Win+R”
Step 2: Type “sysdm.cpl” and click OK.
Type “sysdm.cpl” and click “OK”
Step 3. Select the “System Protection” tab and click “Restore”.
Select the “System Protection” tab and click “Restore”
Step 4. Click “Next”.
Click “Next”
Step 5. Select a restore point and click Next.
Select a restore point and click “Next”
Step 6 : Click “Done.”
Click “Finish”
Step 7. Click “Yes”. The system will roll back to the specified restore point.
Click “Yes”
Uninstalling update package KB3004365
Step 1. Press “Win + R”, enter the word “control” and click “OK”.
Enter the word “control” and click “OK”
Step 2. Select the “Large Icons” category in “View” and click “Programs and Features.”
Set the “Large Icons” category to “View” and click “Programs and Features”
Step 3. Click on the “View installed updates” column.
Click on the “View installed updates” column
Step 4. Select the KB3004365 package from the list of updates shown in the example and click “Delete”.
Left-click on the line with the KB3004365 update package and click “Delete”
Step 5. When asked to delete the package, click “Yes”.
Confirm the action by clicking “Yes”
In-place update
If the steps in this article do not resolve the issue, perform an in-place upgrade. For more information about how to do this, click the following article number in the Microsoft Knowledge Base: 292175 How to perform an in-place upgrade of Windows 2000 978788 How to perform an in-place upgrade (reinstallation) of Windows XP 816579 How to perform an in-place upgrade for Windows Server 2003
Last Known Good Configuration
If the steps in this article do not resolve the problem, start your computer using the Last Known Good Configuration. To start your computer using the Last Known Good Configuration, follow these steps:
Note
Because there are multiple versions of Microsoft Windows on your computer, the steps below may vary. If so, check your product documentation to complete these steps.
- Click the " Start > Work " button.
- Click Restart > OK .
- Press F8 at the specified time:
- For an x86 computer: When the text screen appears and then disappears, press F8. (The text screen may contain a memory test, BIOS lines, and other lines.) Additionally, a message may appear telling you when to press the F8 key.
For computers with Itanium processors: After you make your selection in the boot menu, press F8. A prompt may appear telling you when to press the F8 key.
- Use the arrow keys to select last known known configurationand press ENTER.
To use the arrow keys on the numeric keypad, NUM LOCK must be removed.
- Use the arrow keys to highlight the operating system, and then press Enter.
Note
- Selecting the Load Last Known Good Configuration option can restore problems, such as recently added drivers, that may not be correct for your hardware. However, it does not solve problems caused by damaged or missing drivers or files.
- Selecting the Last Known Good Configuration option restores only the information in the HclmSystemCurrentControlSet registry key. All changes made in other sections of the registry are saved.
Remove incompatible software using the Recovery Console
If the steps in this article do not resolve the issue, use the Recovery Console to uninstall the incompatible software. Follow the steps in this article, but this is not how to do it. However, you can use the following articles as guidelines for performing this procedure.
313670 How to replace a driver using the Recovery Console in Windows 2000 816104 How to replace a driver using the Recovery Console in Windows Server 2003 326215 How to use the Recovery Console on a Windows Server 2003-based computer that won't start 229716 Description of the Windows 2000 Recovery Console 307654 Installing and using the console recovery in Windows XP 307545 repairing a damaged registry that is preventing Windows XP from starting 216417 Installing the Windows Recovery Console
Hide update KB3004365
Hiding the update will allow the system not to install it in the future.
Step 1. Press “Win+R”, type “ms-settings:windowsupdate” and click “OK”.
Type “ms-settings:windowsupdate”, click “OK”
Step 2. In the “Windows Update” section, click “Check for updates.”
In the "Windows Update" section, click "Check for updates"
Step 3. Right-click on the KB3004365 update and select “Hide update.”
Right-click on update KB3004365 and select “Hide update”
Clean start Windows 10
To identify Windows loading errors, you need to disable all services that do not directly affect the functioning of the operating system.
Step 1. Press “Win+R”, type “msconfig” and click “OK”.
Type “msconfig” and click “OK”
Step 2. Select the “Services” tab and do o. Click "Disable all".
Select the “Services” tab, oh, click “Disable all”
Step 3. Select the “General” tab and o. Click “Apply”, then “OK”.
Select the “General” tab and click “Apply”, then “OK”
Step 4. Restart your PC.
Step 5. If the system starts up normally, you need to check all services, in Step 2 , instead of “Disable all”, one by one unchecking the services and restarting Windows.
Uncheck the service, click “OK”, restart the system
Fixing RAM problems
This error may appear after installing a “fresh” line of RAM in the PC, its contamination or poor performance.
To check the RAM, you will need to open the PC case.
Step 1. Turn off the computer and unplug its cord from the 220V outlet.
Turn off the computer and unplug its cord from the 220V outlet
Step 2. Disconnect the connectors of all devices from the PC, remembering or writing down its order.
Disconnect the connectors of all devices from the PC
Step 3. Unscrew the screws holding the PC unit cover on the right (look from the direction of the connectors). It is also possible that the cover is held in place by latches that need to be pulled back.
Unscrew the screws holding the PC unit cover on the right
Step 4. Slide the cover along the system unit 1-2 cm towards the PC connectors, disengaging it, then turn it sideways and remove it.
Move the cover along the system unit 1-2 cm towards the PC connectors
RAM in a PC is installed in the form of strips.
In a computer, RAM is inserted in the form of strips
The RAM strips are inserted into special connectors on the PC board.
Special PC board connectors for RAM sticks
Step 5. Remove static charge from your hands by holding a regular faucet with your hands, preventing the discharge between your body and the PC components. Get started with RAM sticks:
- if there is more than one stick installed on your computer, you can remove one of them and use the others to check Windows boot;
- if the PC has a recently installed bracket, remove it;
- if one stick is installed, you can replace it with a similar one (see the RAM characteristics in the documentation for the PC).
Step 6: Pull the side latches holding the memory stick in place to release it.
Pull the side latches holding the memory stick, releasing it
Step 7. Remove the RAM stick.
We take out the RAM strip
Step 8. Clean the strips from dust and dirt, eliminating overheating and poor contact in their connectors.
We clean the strips from dust and dirt, eliminating overheating and poor contact in their connectors
Step 9. Insert the cleaned or new strip until the connectors snap into place, taking into account the presence of protrusions on the strip that block its incorrect installation.
Insert the cleaned or new strip until the connectors snap into place
Step 10: Reassemble the computer in the reverse order of disassembling it and check for errors.
Automatic error resolution
Alternatively, you can select the Startup Repair option, where Windows will automatically scan your computer to find the problem.
- Hold down the Shift key on your keyboard and select Restart from Power Options for Windows. You may need to use a Windows boot disk or Windows bootable USB drive if you cannot access the Restart feature.
- It should load up to a blue screen that says “Select an option.” Select Troubleshoot.
- On the troubleshooting screen, select Advanced Options.
- Next, select Startup Repair, which scans and attempts to repair your computer automatically.
Hopefully, Windows has found and fixed the problem that is causing your PC to not boot correctly.
Sources:
- https://nastroyvse.ru/opersys/win/kak-ispravit-oshibku-0xc0000021a-v-windows.html
- https://pc-consultant.ru/operatsionny-e-sistemy/0xc000021a-windows-10-kak-ispravit-esli-kompjuter-ne-zapuskaetsja/
- https://siniy-ekran.ru/kody-oshibok/0xc000021a/
- https://windows10i.ru/ustranenie-nepoladok/kak-ispravit-0xc000021a-windows-10-posle-ustanovki-i-obnovleniya.html
- https://remontka.pro/0xc000021a-error-windows-10/
- https://docs.microsoft.com/ru-ru/troubleshoot/windows-server/performance/troubleshoot-stop-0xc000021a-error
- https://comhub.ru/0xc000021a-windows-8-10/
Scan for damaged files
Windows comes with a tool called sfc, which stands for System File Checker. For more information on the operation and use of SFC, please refer to our knowledge base. The following steps run the Startup Repair option from the command line on the Windows configuration disk and use System File Checker to try to repair your computer.
- Insert the Windows installation DVD into your PC's CD-ROM drive,
- Turn off your computer completely and make sure it is completely turned off,
- Turn on your computer
- Press any button when you see “Press any button to boot from CD or DVD...”.
- Click on the "Repair your computer" link in the lower left corner after selecting your language and keyboard options.
- Wait until Startup Repair checks your computer for Windows installations, then select your installation from the list that appears.
- To start, select Command Prompt from the list of available recovery options.
- After running Command Prompt, enter the following to use the System File Checker to check whether corrupted, invalid, or deleted system files are installed. If the previous page shows that your Windows installation has a drive letter other than C:\, make sure you use the one below!