find the nvlddmkm.sys file there, and rename it to nvlddmkm.sys.old.
Now go to your Nvidia directory (usually C:\Nvidia) and find the nvlddmkm.sy_ file there. Copy this file to your desktop (or to the desktop directory on your disk). Now click on the “Start” button, type cmd in the search bar, and press enter.
In the command prompt window that opens, enter:
and press enter.
Next enter:
and press enter again.
After this, copy the nvlddmkm.sys file from your desktop to:
Restart your PC.
Solution #2. Rollback the graphics driver
If no problems were observed before, but they appeared after installing some update (new driver), try rolling back the PC to the previous driver.
- To do this, click on “Start”, enter devmgmt.msc in the search bar and press enter.
- In the “Device Manager” window that opens, expand the “Video Adapters” tab, click on your graphics card, right-click and select “Properties”.
- Now we need to go to the “Driver” tab, and select “Roll Back Driver” there.
- Then reboot our PC.
Update all
We often underestimate the updates of everything. And often this is the best way to fix all sorts of PC problems such as the nvlddmkm driver.
Windows Update
Every month Windows receives different updates, both security and quality. Therefore, if we have problems, the first thing we should try is to update the operating system. If there are security or quality patches, we should always install them via Windows Update .
The same goes for Windows updates that come out every 6 months. Every new version of the operating system releases new features and functionality, besides fixing problems and other bugs, which can help us solve all kinds of errors while playing or using the OS.
Update NVIDIA drivers
The same thing happens for NVIDIA drivers . Each new version of drivers allows us to better utilize the capabilities of the GPU/GRAPHICS PROCESSOR, in addition to helping in eliminating possible glitches, errors and problems that may exist in the system.
If we use GeForce Experience, the program itself will allow us to download the latest drivers to our computer. Otherwise, we will have to manually download the updates from the NVIDIA website and manually install them on the PC.
Update the game or program
We can blame Windows and the video card, but the game itself is to blame. And this is not the first time that developers have sold us launch games full of bugs, errors and all sorts of problems. Therefore, another way to fix all sorts of bugs and errors is to download game updates whenever possible.
These updates can almost always be easily downloaded from the game client we use. For example, if we play with steam, or from the Epic Store (among others), we can download new versions from there.
Solution #3. We perform a clean driver installation
If the previous solutions turned out to be ineffective in solving the nvlddmkm.sys blue screen, then you need to completely remove the Nvidia graphics driver and its components from the system using special tools (for example, the DriverSweeper program).
Then restart your PC, boot into safe or normal mode, and run the new Nvidia driver installer. If it is not on your hard drive, you must first download it to your hard drive, or a special program for updating drivers at the DriverPack Solution level. After installing the new drivers, reboot your machine.
Causes of problems with Nvidia
Blue screen error nvlddmkm.sys often appears in Windows 7, 8 or 10 and is most often the result of problems with the Nvidia driver, but not always. In addition to the wrong driver version, the problem can be caused by the following factors:
- Damage to drivers during installation or malware, incorrect configurations, etc.
- Conflict between hardware and software.
- Invalid entries in the system registry caused by various reasons (a virus, program or user may have accidentally or intentionally deleted/damaged registry data).
- Damaged hard drive, bad sectors.
- Incorrect BIOS settings.
- Insufficient paging file size.
- The power supply is not enough.
- Incorrect operation of the RAM, malfunction of one of the memory sticks.
- Overheating of the video card and other problems.
The error stopping the nvlddmkm.sys file in Windows is solved by applying various fixing methods one by one until eliminating the failure, since the real cause of the problem can be anything.
Removing update packages
It is also worth removing the latest downloaded update packages for Windows 10 and 7. Some of them may not work correctly, causing the nvlddmkm sys error.
Detailed instructions:
- Press the combination “WIN+R”, enter “appwiz.cpl” and click “Enter”.
- Let's move to the appropriate section.
- Select the new software by installation date and click “Delete”. Additionally, we look for the package “KB4056892” and delete it.
Reboot the device and check the result.
Solution #1. Rename and copy the nvlddmkm.sys file
Download and install the latest Nvidia drivers on your PC. Now go to the folder:
find the nvlddmkm.sys file there, and rename it to nvlddmkm.sys.old.
Now go to your Nvidia directory (usually C:Nvidia) and find the nvlddmkm.sy_ file there. Copy this file to your desktop (or to the desktop directory on your disk). Now click on the “Start” button, type cmd in the search bar, and press enter.
In the command prompt window that opens, enter:
and press enter.
Next enter:
and press enter again.
After this, copy the nvlddmkm.sys file from your desktop to:
Restart your PC.
Clean and tune your equipment
Another reason why a computer can crash and we see errors like nvlddmkm is because the temperature is too high. Therefore, if we have enough knowledge and are not afraid to open our computer, we can take advantage of this to clean it inside.
We can remove dust from components, check that fans are working properly, and even, if we dare, change the thermal paste of the processor and graphics to lower their temperatures and reduce the likelihood of something going wrong.
Use the correct screen resolution and frequency
Another reason why the nvlddmkm driver may fail is if Windows (or game) is configured with the wrong resolution or refresh rate . If the screen is Full HD (1920 × 1080), and our resolution is higher, then over time something will go wrong. The same thing happens if our screen is prepared to work at 60 Hz, and we force Windows, programs and games to work at 75 Hz.
Therefore, from the Windows Screen Properties we must make sure that everything is configured correctly. Our computer uses the appropriate resolution and the frequency matches the operating frequency of our computer.
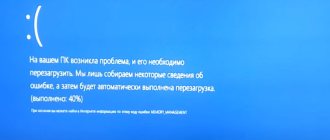
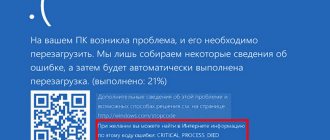
Symptoms
It looks like a classic blue screen of death with an error code that displays the dump creation process. After it completes, the computer restarts. For more advanced users, seeing the name of the problematic file nvlddmkm.sys it should become clear that this is a system file related to drivers for controlling the functioning of the graphics card (in this case nVidia).
There are quite a lot of options for solving the problem on forums and on the Internet. Let’s look at them, starting with the most effective (the conclusion is based on the number of positive user reviews).
Configure PC power settings
Although it's weirder, it's possible that some PC components aren't getting enough power due to a misconfiguration of the power settings of Windows itself. Therefore, another thing we can try to see if the problems are resolved is to change the Windows 10 power profile.
In Control Panel > Hardware and Sound > Power Options we can select either a Balanced profile (which should not cause us problems) or " High Performance ", which will allow each of the PC components to use all the energy they need if the power supply allows it .
Be careful if we have a laptop, because increasing the energy means much higher battery consumption.
Disable overclocking
Overclocking is very useful, if you know how to do it correctly, for making small improvements to the overall performance of your computer without having to buy new hardware components. But this could also be the reason why our computer is unstable and errors like nvlddmkm appear.
If we have made an OC on the RAM memory or processor, we must disable it in the BIOS / UEFI of the system itself. In the same way, if we have overclocked the video card, we must deactivate it in the program we are using (for example Afterburner). At least to check if the PC continues to have problems after deactivating it.
If the same thing continues to happen after deactivating the OC, we can activate it again to take advantage of this extra performance.
Resetting BIOS Settings
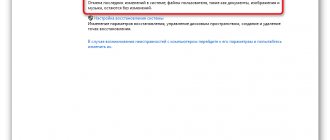
If a message appears with the text “system thread exception not handled” or a blue screen, the culprit of which is nvlddmkm.sys, you can reset the BIOS settings if the previous options did not help. We won’t go into the details of the process: while the computer is booting, click on the key to enter the BIOS settings, find the option or button responsible for resetting the settings to factory settings, and click/call it.
Another reset option is to remove the CMOS battery for a couple of seconds.
Users of Nvidia graphics cards may experience a sudden appearance of a “blue screen of death” on their PC screen, the text of which mentions the unknown driver “nvlddmkm.sys”. This often happens after installing the next system update or some external program on the system, after which the “blue screen” begins to appear with enviable consistency. The appearance of the video_tdr_failure (nvlddmkm.sys) error indicates that the driver for the Nvidia graphics card is not working correctly, and is usually solved using a set of standard methods. In this material, I will analyze the essence of the dysfunction in question, and also present ways to eliminate the nvlddmkm.sys screen of death on Windows 7/10.
Type of error (code 0x000000d1)
Another type of conflict of this type is the same error with code 0x000000d1. As mentioned earlier, it is associated with the incorrect operation of the NETIO.SYS system file. But don’t be scared, there is a solution to fix the problem.
Basically, it basically just comes down to disabling IPv6 if it's not in use.
Don't use overlapping widgets
Screen overlay widgets These types of widgets allow us to see the performance of games and access certain social or streaming features. Besides consuming resources, using these types of items can cause all sorts of problems when playing.
If we can't live without widgets, the most recommended one is the Windows 10 Game Bar because, after all, it is the one that is best integrated with the operating system itself. However, if we can avoid using it, so much the better.
Method 3: check and fix video card overheating
Sometimes problems with a video card can be caused by overheating. You should check whether heat is dissipated well enough from this component, which under certain loads (especially during games) gets very hot. Also, some users make attempts to “overclock” the video adapter in order to achieve better performance. This often results in overheating and possible failure of the device.
The temperature of the video card can be monitored using a third-party utility HWMonitor and other similar programs.
RAM
Broken or incompatible memory sticks with the motherboard can also cause nvlddmkm sys failure. You can check modules for errors using the Memtest86+ utility or the standard Windows 10 and 8 tool.
The second utility is launched as follows:
- Open the search bar, enter the phrase “memory” and click on the appropriate item.
- Select the first item marked "recommended".
- After this, the computer will restart and the scan will begin.
- Wait until the procedure is completed.
- Pay attention to the “Status” column. All found problems will be displayed here.
It should be noted that this diagnostic method does not detect compatibility problems. Therefore, you need to check module compatibility manually.
I’ll tell you how to do this using the example of “ASUS”:
- We go to the website of the motherboard manufacturer.
- We enter the model of the motherboard into the search bar.
- Move to the section “Support – processors/memory – memory/devices”.
- Download a document in PDF format to your PC, which describes in detail the compatibility of the components.
If necessary, we update the BIOS version, and, as a last resort, change modules or the entire board.