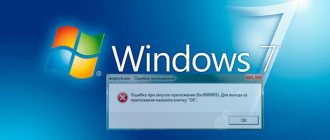
Initially, it is worth noting the fact that the Windows 7 operating system is convenient.
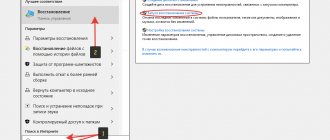
A rollback of such a system can only be performed if the recovery service (function) was started earlier, before problems occurred. If you did not enable it, then a rollback can only be done using a boot disk with the operating system. In order to activate the Windows recovery service, go to the “Control Panel” section, which can be done from the start menu.
Next, find the icon called “System Restore”. Now click on “Start recovery” and the system will display a message - the recovery service is disabled and you will be asked to activate it.
How can I restore the operating system through BIOS?
Most PC users know that there is such a “Windows” and that you can install the system through BIOS. Naturally, over the past 10 years the number of advanced users has become much larger, but the quality of their knowledge often leaves much to be desired: it is often fragmentary, not supported by their own experience. For example, very often such a “specialist”, instead of restoring the system, simply reinstalls it. Not to say that this is completely wrong, but usually in this case data and user settings are lost. In organizations, this method is almost always unacceptable, since specific programs may be installed that require knowledge in their configuration that a “specialist” does not have. You need to understand that reinstalling the operating system is the last resort and that almost all problems can be solved by restoring the system using standard means.
Different versions of Windows - different recovery options
You need to understand that progress does not stand still; it is constantly developing both technology and methods of handling it. You need to understand that everything new, to one degree or another, is based on the old and well-studied. The general principles and methods remain the same as for Windows 95 and for Windows 8.1. Although the tools and reliability of each new version are getting better and higher. So, if you need to restore your system after a critical error caused by installing poorly compiled drivers or crooked programs, a newer OS will provide more options and the process will be faster.
Since the revolutionary Vista OS, operating system recovery mechanisms have become more advanced and reliable. Any system recovery on a PC is performed from within the BIOS. Even modern Linux distributions, such as Ubuntu and other versions, have an “operating system recovery” option in the boot menu.
For all those who need to save their computer after an attack by viruses or other troubles, you need to know that from under the BIOS you can easily start the system recovery process, both using an installation disk and a special resuscitator. And in new editions, starting with Vista, it is possible to boot from a special partition of the hard drive or SSD media.
The era of Windows XP is ending
Extended support for Windows XP ended in early 2014
As of April 2014, extended support for this older operating system has been discontinued. Supporters of this system will say that there is nothing to worry about, antiviruses and all major programs, including browsers and flash players, still support this OS. But you need to understand that this will not last so long and progress “cannot be trampled on.” However, most corporations and large companies in the US and other countries continue to use this OS. And the question of how to restore HR after an accident is still quite relevant. Indeed, despite its high stability, this axis still has many security flaws and does not like frequent installations and reinstallations of software, especially if it is of dubious origin.
Naturally, systems like XP or Server 2003 require much less system resources, they are fast and stable on older PCs. When using them, there is less load on the hard drive and other elements of the PC, in particular the motherboard; this is very important for laptops, the cost of which is quite high. However, manufacturers of computer hardware, especially laptops, have long abandoned XP due to its advanced age and the cancellation of support by the manufacturer. Since 2007, drivers for XP have almost ceased to be produced. And using driver packs is not always advisable, as it can lead to unstable operation of the PC and eventually damage it. Or you will have to decide how to restore XP after such dubious drivers. All experts advise using only drivers from the official websites of equipment manufacturers or the Microsoft developer website.
No matter how much we would like to extend the life of XP, it becomes a thing of the past every day. An alternative is Windows Vista, 7, which is more demanding on hardware; 8; 8.1. Many will counter by saying that lightweight Linux distributions are the best. However, it is difficult to find drivers for them, a lot of things need to be added and completed yourself, you need good preparation plus retraining for Linux programs. Moreover, many modern Linux systems have almost equaled the requirements of new operating systems.
Restoring the legendary Windows XP after errors
But let’s return to the issues of the ability to restore Windows XP from the BIOS. To get started, you will need a boot disk with this system and good instructions.
So let's start, first:
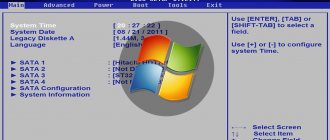
- You need to insert the installation disk into the PC drive and restart it. When starting the computer, press the F2, F1 or DEL key, which opens the BIOS program menu.
- And here you need to find the menu responsible for the boot order from Boot Devices.
- From the list that appears, you need to select the optical drive (the BIOS menu will tell you which keys to use to make the selection and how to save it). It is necessary to save all changes in the BIOS program.
- After this, the PC will reboot, and when you see the message Press any key... on the display, you will need to press any key on the keyboard and activate the installation disk. Next, you will be presented with a dialog box. In it you need to press the R key (for XP). In a new window you will need to select the OS to restore (rarely, but it happens that several OS are installed on the PC). If there is only one, the recovery system will show its folder C: WINDOWS. Then you need to hold down the Enter key. Since anyone can restore the system, the reinstallation option should be considered as a last resort.
- Next you will see a line in which you need to enter fixboot from the keyboard and press “Enter” and “Y”. After all these combinations, the OS will begin setting up its boot sector on the hard drive.
- When the process is completed, a notification will appear indicating that the boot sector was successfully configured. Then you need to enter the fixmbr command from the keyboard, then press “Y”. These commands will create a new boot entry. Then you need to enter the Exit command, which will force the PC to reboot, and then it will work in its normal mode.
The Windows XP installer contains utilities for restoring the OS if necessary
That's it, you saved the system and saved a lot of time. Anyone who wants their PC to start up a little faster at startup can go into the BIOS again and switch booting from the optical drive to the hard drive.
Restoring Windows 8 OS
These OSes can be restored from an archived image or directly from the installation disk using the console menu items.
Taking the example of the newest version of Windows, we note that the new Refresh Your PC functions are very convenient and easy to use.
In this edition of the "windows" it became possible to update the system via BIOS without losing files (Refresh Your PC) or deleting all user data and completely reinstalling the system (Reset Your PC).
Each method has its own advantages and disadvantages. But during the announcement of Win 8, they said that it would become very stable and almost “eternal,” with the ability to endlessly self-repair without losing user data and personal settings.
Refresh Your PC is much more interesting from any point of view; reinstalling the system is, of course, good, but Win XP and older systems also had a similar opportunity. We want to find out how to restore system functionality without losing data and settings. For many advanced users who have been working on Windows XP for a long time, this will seem almost impossible, but new editions of the Microsoft OS are capable of this.
Often users do not understand how to restore the system using the Refresh Your PC function and how does the Win 8 system restore occur? First, you need to clarify that in the Russian edition of the OS this function is called updating a PC without deleting files, this is the same as reinstalling the system. This can be done using the installation disk, in which case the user will save personal files on drive C and applications for Metro, and all programs you have installed will be completely deleted.
If you created a WIM image of the system, then during recovery the OS returns to the state of the OS at the time the image was recorded. The image creation procedure itself is performed by the recimg utility. When you do not have an image, Refresh Your PC will require an installation disk with the system, in which case you can still automatically restore the system, even if it does not start.
Refresh Your PC is a new feature in Win8
The benefit of the function is simply colossal and lies in the fact that a not particularly trained user needs to make a minimum of physical movements to return the system to functionality.
If you have problems booting, Windows 8 will automatically launch diagnostic and system recovery utilities.
In case of critical errors and inability to start, Win 8 itself enters the recovery menu. In this case, the user has the opportunity to boot from both a previously created recovery disk and an installation disk. In the second case, you will need to select the OS language and click “System Restore”. By clicking "Diagnostics" and then "Restore", you will start an automatic process that will ultimately restore your system to a fully working state. The only trouble is the deleted programs, but the OS will leave a list of everything deleted and provide you with links to the official sites of the programs that were deleted.
The function of restoring Windows 8 from an archived image has become no less simple. The developers included the recimg utility in the OS, which will quickly create a system image and remember its location in order to quickly restore Windows functionality at the right time.
To create a backup image of Win 8 in a command prompt running as an administrator, enter the command: recimg /createimage D:backup.
After which, your operating system will be restored from this image automatically, even when launched from the installation disk. Thanks to this archived snapshot of the system, the rollback is performed even without installation disks, immediately upon entering the Windows RE environment.
In conclusion, it should be noted that even old versions of the OS allow you to restore the system to functionality, at least for data backup, or to completely restore the system in the case of new OS, and there is no need to immediately go to extremes, rearrange systems and lose data.
Thank me by sharing the link with your friends on social networks:
Changing BIOS Settings
We connect the removable installation media with the Windows distribution to the computer. By default, it will boot after the hard drive. But we can change the priority through the BIOS.
- Reboot the computer.
- We go into the BIOS.
- Find the section with boot priority.
- We put the installation drive in first place, and the hard drive in second position.
The main difficulty in this operation is finding the priority settings in the BIOS. Here are some common options.
- Phoenix Award BIOS - go to the “Advanced BIOS Features” section, select the “Hard Disk Boot Priority” item, swap the drives.
- AMI BIOS - go to the “Boot” tab, select the “Hard Disk Drives” item, and put the installation drive in the “1st Drive” line.
Changing boot priority
The UEFI interface is easier to understand. Often the list of devices with boot priority is displayed on the first screen, so all we have to do is drag the installation disk to the first place.
System Restore
After the computer restarts, the installer interface will appear. At the first step of the wizard, we select the language, time format and input method. All parameters can be left as default, because we will not perform the installation itself. Click “Next” to move to the next screen.
You can't change anything here
In the installer window, click on the “System Restore” link.
Go to the system recovery environment
A screen with available actions will appear. Select the item “Diagnostics”. Then go to “Advanced options”. Here we see several options for system recovery.
All system recovery tools are presented in this section
If we have recovery checkpoints, then select the first method - “System Restore”. When you launch it, the same window will appear as when working in a Windows environment. In it we select the desired date for the rollback from the list and start the recovery.
Choosing a suitable point
After the procedure is completed, the computer will automatically restart. Since the flash drive priority is set in the BIOS, we will again be taken to the Windows installation screen. To check if the system is working, remove the boot disk or change the priority in the BIOS, putting the hard drive first.
If rolling back the system to a checkpoint did not solve the problem, then connect the flash drive again (or change the priority) and try to restore Windows in other ways - for example, using the command line. We follow the same steps to get to additional diagnostic options and select the appropriate recovery mode.
Method 4: Activate MBR partition
If this does not help, then run the command line again and enter the following commands:
We display a list of all sections:
We are interested in two sections. The first one is 100 megabytes in size and contains all Windows boot modules. The second is the disk on which your OS is located. You must find the disk with your operating system yourself - look at the size. Also, the disk name (letter) may differ from the actual one, so we don’t even look at it.
Now we need to select the partition with boot modules (use the volume number):
sel vol 1 activ exit
Enter the command with the letter of the volume where your Windows is located. In my case it is drive "D", but yours may have a completely different letter:
Launch advanced options without installation disc
If you don't have an installation disc, you can access advanced boot options using other methods. The main thing is that Windows boots at least before the welcome screen. Even if you can’t get to the desktop, you can use this method:
- On the login screen we find the shutdown button. Hold down the Shift key and click on it. Select the “Reboot” mode.
- Without releasing Shift, click “Restart Anyway”.
- After the “Select Action” menu appears, release the Shift key.
- Click “Continue”.
- Select “Diagnostics” - “Advanced options” - “System Restore”.
There are other ways to access advanced boot options, but they only work from within Windows, so they don't make much sense in our case. If we can get to the Start menu, we can run System Restore without the complex manipulation of rebooting.
Creating installation media
If you don’t have a flash drive with the Windows 8 distribution, you will have to write the necessary information onto the media yourself. You will need:
- Windows 8 distribution.
- A flash drive or disk with an available capacity of at least 4 GB.
- A utility for creating an installation disk.
The distribution can be downloaded from the Microsoft website, but it is much more convenient to use the Media Creation Tool utility:
- Launch the Media Creation Tool, select which version of Windows you want to burn to disk.
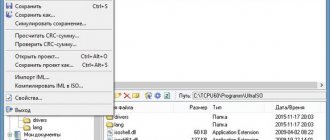
- Please provide a location. If you use a flash drive, then the distribution can be immediately written to the media. If you are going to make an installation disk, then create an ISO image, which you will then need to burn using programs like UltraISO.
After recording the distribution package through the Media Creation Tool program, you can begin setting up the BIOS and restoring the system.
Changing boot priority
Typically, the computer boots the system first from the hard drive. But to restore Windows, you need to change the boot priority, putting the installation disk/flash drive first. This can be done through the BIOS:
- Connect the installation media to your PC and reboot.
- When starting the system, press the F2 key to get into the BIOS. The BIOS entry key differs on different versions of laptops and motherboards, so look for it in the documentation or on the start screen.
- Change the boot priority through the “BOOT” section. The mouse does not work in the BIOS, so you will have to use the keyboard - arrow keys and the Enter key. Install in the first place the connected media with the Windows distribution kit, which is needed to restore the system.
- Save the BIOS configuration by pressing F10 and entering "Y".
You can do without changing the BIOS settings and launch the Windows 8 installer through the boot menu. The boot menu is called up by pressing F11 or F12 depending on the laptop model or motherboard. However, sometimes this method does not work, while changing the priority through the BIOS works in 100% of cases.
What are factory settings
The computer's initial settings are written to the CMOS memory chip on the motherboard. They guarantee the correct operation of the computer in normal mode. Resetting the configuration to default is required to undo changes made by the user. This procedure is recommended if you encounter errors when booting your laptop.
BIOS allows you to return the netbook to its default state.
To reset the changes made, you need to go into the BIOS and activate the “Restore default settings” option. In some cases, you can disconnect the CMOS battery from the motherboard for 20-30 seconds, then install it again.
With similar manipulations you can return the original BIOS configuration. To roll back to the initial settings of the operating system, you will need to restore from the Recover partition on the computer’s hard drive.
Automatic recovery
Among the recovery tools on the Windows 8 installation media there is a function to automatically find and fix errors. Use it to quickly restore your system.
- Click “Next” in the first window of the installation wizard to proceed to selecting the operating mode. Click "System Restore".
- Go to the "Diagnostics" section. Go to the “Advanced Options” submenu.
- Select automatic recovery.
When you run this procedure, the wizard will try to detect problems that are preventing Windows from loading normally. If errors are found and can be corrected, the recovery wizard will do this without your help.
How can I return my computer to a few days ago?
To perform a System Restore, do the following:
- Click Start, then select All Programs - Accessories - System Tools - System Restore. ...
- In the System Restore window, click Continue. ...
- Select a restore point and click Continue.
Interesting materials:
How to trim an audio recording on Android? How to trim an mp4 file? How to trim and join music? How to trim and join multiple songs? How to cut ringtone on Samsung? How to cut a song to play on a call? How to cut a ringtone song? How to cut the outer corner of a ceiling plinth? How to trim a downloaded song? How to crop in Audacity?
Rollback to a checkpoint
If Windows works with errors or does not start at all, then try restoring the system to a state where there were no problems. This tool is usually used in a Windows environment, but since we launched the installer from bootable media through the BIOS, we will use its capabilities.
- Click System Restore.
- Go to the "Diagnostics" section. Open the “Advanced Settings” subsection.
- Select "System Restore".
- Select the target system - Windows 8.
The standard recovery wizard window will open. You need to specify a checkpoint to which the system should be rolled back.
Remember that user files will remain intact after the rollback, but programs installed after the checkpoint was created will be uninstalled.
Method 6: System
In general, if we are unable to restore a file manually, then we can force the bootable media to do it. To do this, we need to first delete the file with boot modules, which takes up 100 MB. And then go through standard recovery, through the boot disk - then the system will resuscitate itself.
From the command line we write:
diskpart list vol
Select the partition with boot modules:
sel vol 1 format fs=ntfs activ
We write the command twice:
Then the system will not be able to boot, since we deleted the file, so we boot from the media again. The program will offer to fix the download - we agree and reboot.
If the system boots, then it’s good, if it still gives an error or freezes, then we boot from the media again, and from the list of methods select “Startup recovery”.
Recover without deleting files
If rolling back to a checkpoint does not resolve Windows errors, you should try another troubleshooting method called “Refresh your PC.” Using this method, you will also save user data, so you don’t have to worry about the safety of important documents or photos.
- In the installer window, click System Restore.
- Go to the "Diagnostics" section. Click "Restore".
A warning will appear telling you what will happen to your system as a result of using the Refresh your PC function. User files will remain untouched, system settings will be reset to their original state, and the applications you installed will be deleted.
It's a small price to pay to get Windows 8 back up and running quickly, so click Next and select your target system. If you're using a laptop, make sure it's connected to the network, and then click Restore. An emergency shutdown of the machine during system recovery can lead to consequences that will require a complete reinstallation of Windows.
Where is Recovery located and its activation
The Recover partition can be accessed through the disk management function.
The recovery partition is located in a hidden area on the computer’s HDD. It stores OS and driver installation files in the form of archives, as well as application distributions installed by default on the laptop.
A recovery partition is available on all netbooks that come with a pre-installed operating system. In some cases, such as: upgrading a computer with replacing a hard drive, incorrect user actions, or hard drive failure, it is impossible to use a hidden drive. In the standard OS Disk Management utility, it is easy to find where the Recover partition is located on the computer.
On TOSHIBA laptops, files for reinstalling Windows are placed in the HDD Recovery system folder on drive B, which cannot be deleted, since in this case the owner of the netbook will not be able to start the recovery process to the original settings.
For some netbooks, there are special programs for rolling back to factory settings.
To avoid accidental deletion of user information, program activation is only available if certain conditions are met. To do this, press the hot key combination when booting the laptop. At the same time, manufacturers use different commands for different models. If everything is done correctly, a service menu appears on the screen, offering several ways to restore the configuration of your computer settings.
Return to original state
If none of the above recovery methods helps, then a radical method remains - returning the computer to its original state. This is almost the same as a complete reinstallation of Windows, so not only programs will be deleted, but also your personal data, which is stored on the same partition as system files. If you do not lose anything as a result of such a rollback, then feel free to use it:
- Click "System Restore" in the installation wizard window.
- Open the "Diagnostics" section.
- Click Reset.
A warning will appear that all files and applications will be deleted. Click Next and select the target system. If the hard drive is divided into several partitions, the wizard will specify which volume needs to be cleaned. Choose the one that contains Windows files.
Specify the cleaning mode – “Just delete my files”.
Wait for the computer to return to its original state to complete. Never turn off the machine or attempt to abort the operation, as this may cause an even more serious problem than the one you are trying to resolve.
Method 8: “NTLDR is missing” error
If, when loading the system, you see this window: “NTLDR is missing Press ctrl+alt+del to restart,” then do not rush to panic. This error occurs quite rarely on the “seven” and usually the NTLDR file is located on other versions of “windows”. But let’s not go into the essence of the problem and start solving it. As you may have guessed, it can also be solved through the console. You’ve already learned how to run it, so I won’t write about it.
After launch, enter the commands:
diskpart list volume
Here we need to again find the letter to which the system drive is assigned. In my case, this is again the letter “D”.
Exit bcdboot. exe D:\ Windows
Again, you need to enter the letter of the system drive - look at your volume.
So, we have created a loading module. Now you need to activate it. To do this, enter the commands:
The command displays all connected physical media. I only have one, but you can have two - you need to choose the one on which the system is loaded.
sel disk *HARD DISK NUMBER* list partition
The partitions of the hard drive you selected will be displayed here. Select a partition with a capacity of 100 megabytes and enter the number in the following command:
sel part 1 active exit
When might a system restore be necessary?
If various problems occur, it is recommended to first restart your personal computer (desktop device, tablet, laptop). If rebooting the operating system does not correct the operation of the necessary files, you will need to perform the OS recovery procedure through the BIOS.
Possible cases of using this resource:
- an error occurs after the desktop screen appears (usually a message with a problem code appears);
- lack of standard boot option (a blue “screen of death” may appear);
- incorrect operation of the operating system of the personal device (corresponding notifications may also be displayed on the monitor).
The first thing the PC owner should do is roll back the operating system to the settings made during the initial installation (factory settings). If the procedure could not be activated or the process did not lead to the desired result, proceed to work with the BIOS block.
How to connect a netbook to a computer monitor
Modern netbooks are equipped with a video output for connecting an external display. To display an image on a monitor, you must first correctly determine the type of connector. The most commonly used types of video outputs are:
- VGA;
- DVI;
- HDMI;
- DisplayPort.
The last two types are used mainly on expensive netbook models. Depending on the type of connector, a cable of the appropriate format is selected. Then you should make sure that the monitor has a similar interface.
It is recommended to turn off the power to both devices before connecting the cable. First the external display turns on, then the netbook. After this, the image appears simultaneously on the computer screen and monitor.
In the Windows operating system, the user can configure several operating modes for two displays:
- duplicate – the same image is displayed on all devices;
- expand – both displays are combined into a single space, the mode is convenient to use for simultaneously opening several programs;
- display the desktop only on ½ monitor – the image is displayed on one selected device.
Each display can have its own resolution. You can make the settings on the “Display Options” tab.
How to roll back Windows 10 via BIOS
There are two options for rolling back the Windows 10 operating system - using additional media on which the image of the required Windows is installed, and without a boot disk or removable flash drive. In the first case, the OS is launched as follows:
- create a bootable external drive;
- insert a flash drive (disk), start rebooting the personal device;
- before the OS logo appears, press one of the “F2” - “F12” buttons (sometimes the “Ctrl+F2” combination or the “Delete” key works);
- prioritize booting from external media, press “F10” or “Save/Exit” at the top of the menu;
- After loading the device, select the layout and language;
- then go to the “System Restore” section;
- in the new window, click on “Diagnostics”;
- Click on the “Recovery” line.
After this, the process of rolling back the current OS version to the previous state will begin. If there is no additional flash drive and there is no way to create one, choose the following option:
- When loading your personal device, press and hold the “F8” button, a window will open to start the PC in safe mode;
- go to the “Control Panel” section;
- In the new window, select the “Recovery” line.
After moving to a new block, select the desired point and confirm the start of the procedure.
Method 9: Error “BOOTMGR is missing”
When loading, you may see this message: “BOOTMGR is missing. Press Ctrl+Alt+Del to restart." As I already said, the system has a so-called MGR boot file, which is called “BOOTMGR”. It weighs, as you understand, only 100 MB. Sometimes this file can break or even be deleted by viruses. Then you see the error that the “BOOTMGR” file was not found.
There are two options here. The first is that it is so broken that it cannot start the system. The second is that it has been deleted or moved to another section. Alternatively, the system could select another partition, disk or device as boot. To solve this particular problem, see the instructions at this link.
Source
What problems arise
When activating the Windows rollback process on a personal device (desktop computer or laptop), various difficulties may arise. The average processing time for information is two hours. If the operation is delayed, it is necessary to check the functionality of the files used (the operating system itself, the recorded image, the selected status points).
BIOS is the main element of the operating system, setting the order of operations and ensuring the interaction of elements of a personal device. Rolling back the OS to the previous version helps fix some errors and malfunctions of built-in files and applications.
Restoring Windows 7 startup: raising the bootloader
ATTENTION! All methods presented in the article have been tested by a specialist.
Hi all! Today we will talk about restoring the bootloader in Windows 7. As a result, you can observe only one symptom - the system refuses to boot. This may occur due to a breakdown of the system files that are responsible for loading the main system modules. I often encountered this problem myself, so I decided to write detailed instructions.
Remove all flash drives and disks from your computer or laptop. If after this the system boots, then check the boot BOOT MENU in the BIOS - you need to set the boot priority of the hard drive (HDD or SSD). Next, I will give several ways to restore the boot in the “seven”. If you have any questions, write in the comments.