System Restore in Windows 11 and Windows 10 allows you to roll back your PC days or weeks back to a working state.
Sometimes you make some manipulations with the settings of the system itself and something stops working. Maybe you accidentally changed some registry or group policy settings that caused the system to become unstable.
You can make a full system backup to restore everything later, preserving all files and settings, but this takes longer than creating and enabling a restore point in Windows 11/10.
System Restore works by detecting system changes to system files and settings, the registry, applications and drivers, saving a working state as a "restore point". If your computer or laptop is experiencing any problems as a result of a misconfiguration, you can use a restore point to undo the changes and fix performance issues.
By default, System Restore is disabled in Windows 11/10, but when enabled and configured correctly, it can automatically create checkpoints, but you can create restore points manually before making any changes to the system. This will be more efficient than creating a copy of the registry, a copy of Group Policy.
In this guide for Windows 11 and Windows 10, you'll learn how to enable a restore point, how to create one, and use system rollback to get your computer back to working order.
Set up and use System Restore to undo changes that could harm your device. In addition, we will look at how to start a restore point when the PC does not boot.
How to enable System Restore
In Windows 11/10, System Restore is disabled by default, but you can follow these steps to enable it:
- Press the Win+R and enter sysdm.cpl .
- Go to the “System Protection” tab, select the main system drive where Windows is installed and below click “ Configure ”.
- Select the Turn on system protection . Click "Apply" and "OK".
Below you can use the slider to indicate the volume that will be stored. For example, 3GB of the specified space will accommodate 10 recovery points, when there is no more space left, the system will delete the old ones and add new ones. But if you create a restore point manually, it is better to set the default to 1% to save disk space. After completing these steps, a new restore point will be created automatically when important system changes occur, such as before installing an update.
If you need to delete checkpoints, you can click the " Delete " button, which is convenient to free up space on low-capacity SSDs.
System rollback from Windows 7
This method is useful when the computer turns on and works, it doesn’t matter how it works, the main thing is that it works :). For example, after installing some program or driver, problems appeared with the computer. You uninstalled the program, but the problems remained. In this case, a system rollback should help.
We do this: click “Start” and start writing “recovery” in the search bar. In the search results, find and launch the “System Restore” program.
A window will open in which we click “Next”.
Now you need to select the restore point to which you want to rollback and click “Next”.
Confirming the restore point. Click “Finish”.
One more warning, click “Yes”.
A window will appear asking you to prepare for recovery. Then the computer will restart and a message will appear stating that “System Restore was successful.”
If this does not solve your problem, then try rolling back to another point. This is where we can finish with the first method.
How to create a manual system restore
By enabling the feature in the above way, a restore point will be created and overwritten automatically during major changes; there will be times when you need to manually create a restore point before changing any settings on the system that may cause problems.
- Press the Win+R and enter sysdm.cpl .
- Go to the “System Protection” tab, select the enabled system drive and click “Create". In the window that appears, you can write a comment so that later you know which one to choose from the list, and click “ Create". Now you can roll back the system back to a working state if you messed up the registry or the driver installation caused a crash.
How to roll back from Windows
This method, like the previous one, is not suitable if Windows does not start. Using this method, you can roll back the system to factory settings with the loss of all data or partial loss of data. As in the first case, open the Control Panel and go to the Recovery window.
To open computer settings, click on the last line
In this window, you need to click on the item If there are problems with your PC, you can restore it in PC settings . Computer Settings window will open on your computer on the Recovery .
Windows 8 system rollback
There are three recovery options on this tab: Recover your computer without deleting files. In this case, after restoring the system, files and all programs will be lost except for files located in the system folders Music, Video, Documents, Downloads and Images, and programs and applications that were installed from the Windows Store will also be saved. Removing all data and reinstalling Windows. In this case, a clean reinstallation of the system will occur and all files will be deleted from the system disk and you will have to perform data recovery after reinstalling the system. Special download options. In this case, you will need an installation disk that was used to install the system on your computer. Having selected the desired option, click Next , and after going through the recovery procedure, you need to install your favorite programs again.
How to roll back the system using recovery
If you encounter any problems in Windows 11 or Windows 10, you can roll back changes using a restore point to return your computer to a working state.
- Click Win+R and enter sysdm.cpl.
- Go to the “System Protection” tab and click “Restore«.
- In the window that appears, click "Further«.
- Choose the most last known working restore point, which will help you fix your current problem. Click the button Search for registered programs"to see the apps that will be removed, if they are installed after create a restore point.
- Click "Ready” and the computer or laptop will return to its previous state where everything is working correctly.
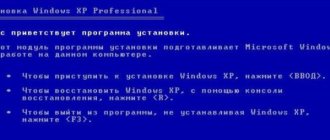
Rollback to previous settings using a boot disk
I left this method for dessert, because here you will need a boot disk with Windows 7. But this method also has its advantages. For example, you can rollback when even safe mode does not work, in short, in the most severe cases :).
As I already wrote, you need a boot disk with Windows 7, in the article How to burn a Windows image to a disk? written how to create it. Next, you need to set the BIOS to boot from the CD/DVD drive and boot from the installation disk.
In the language selection window, click “Next”.
Next, select “System Restore”.
A search for installed systems will begin. If you have more than one, then select the one you need and click “Next”.
Then select “System Restore”. Then the whole process is no different from the first two methods.
Click “Next”. Select a point for rollback and click “Next”
In the next window, click the “Finish” button and answer “Yes” to the warning. We wait until the recovery process is completed and click “Reboot”.
We remove the disk from the drive, and the computer should boot in the usual way. All!
This concludes the interesting story about how to roll back the system :). It seems like I’ve written everything, I’m waiting for your comments and wishes in the comments. Good luck!
Recovering from a point where the system does not boot
In the previous steps, we looked at how to use a restore point while you still have access to your desktop. There are situations when you may need to use System Restore when Windows 11/10 does not load onto your desktop. If you are unable to start your computer, you can use the advanced system options to access System Restore, which you can do with the following steps:
- Press the restart button on the computer itself 4-5 times, reaching the BSOD error or the windows boot logo to trigger the error and call up the process diagnostic menu. In the blue window that appears, select “ Troubleshooting«.
- Next, find “Extra options«.
- Select "System Restore". Next, simply follow the instructions and select the latest known working restore point that will help you fix your current problem.
See also:
- Create a portable Windows system on a USB drive with Windows To Go
- Error 0x8000ffff when restoring Windows 10 system
- Disable automatic playback of videos in the Windows 10 Store
- How to remove old Windows 10 updates
- How to find out your computer's IP address
Channel Chat
Restoring Windows to a previous state
This option is really very useful. You can always use it after the computer becomes unstable after making certain changes, such as, for example, installing a program or updating a driver.
But there are two conditions that must be met to successfully use Windows System Restore:
- The recovery option itself must be activated;
- There must be a restore point with a rollback date that suits you.
In order to check whether the recovery option is activated on your computer, you need to do the following:
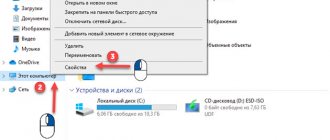
Right-click on the “Computer” icon on the desktop or in the “Start” menu and select “Properties” from the menu that opens.
Go to computer properties
Next, select “System Protection” at the top left.
In the window that opens, opposite drive C should be “Enabled”. This means that recovery on the system disk is activated.
Checking the activation of the recovery function
As already written above, the second point is to have a restore point, the date of which suits you. Well, let's say you want to roll back to the state of the computer that was yesterday, and the closest point is only a week ago. In this case, you must understand that if you use this restore point, then everything that has happened to the computer over the last week (installation of programs, configuration of services) will be canceled.
Does System Restore help clean your computer from viruses?
Often the overall performance of the operating system is greatly reduced due to viruses and spyware. This is explained by the fact that in addition to tracking and providing the user’s personal data to attackers, viruses often modify or delete system files, as a result of which the system begins to slow down greatly, many functions stop working, and sometimes even personal files disappear .
Usually an antivirus helps in this situation, but many users rely only on the built-in Windows Defender , neglecting additional protection measures and, after Windows starts to slow down, they try to solve the problem using a restore point.
It’s worth saying here that this only partially works. Firstly, a lot depends on when exactly the system restore point was created. That is, if a restore point was created before the virus entered the system, theoretically, restoring the system should help.
However, in practice the situation is completely different. It all depends on which files the virus infected. For example, there are often cases when recovery point files are also among those infected, despite the fact that they were initially protected by the system from editing. So it turns out that the user seemed to have restored the system using safe mode or the Windows recovery environment, but in fact everything remained as it was.
In addition, there are types of viruses that, even after partial removal, can self-heal using the Internet for this.
Therefore, we strongly recommend using a high-quality antivirus and constantly updating it. In addition, it is recommended to check your computer at least once a week in order to protect your personal data from being deleted and possibly falling into the hands of third parties. You can read more in detail in the article “How to check your computer for viruses?”.
How to quickly recover data after system recovery in Windows 10/8/7?
If you have restored your computer to its previous state and discovered that important information has disappeared for some reason, do not panic. There is a way to quickly recover lost data . RS Partition Recovery program for this . This method is very convenient and allows the user to avoid many unnecessary manipulations. In addition, this method is recommended to be used if you had to restore the operating system after the next update, and you discovered that all files from the desktop have disappeared.
RS Partition Recovery is very convenient and easy to use, and the presence of modern recovery algorithms makes this process very fast. In addition, the program is not demanding on computer resources, which allows it to be used on almost any PC or laptop.
To quickly recover your files, follow a few simple steps:
Step 1. Install and run RS Partition Recovery .
RS Partition Recovery program
One-stop data recovery solution
Step 2. Select the media or disk partition from which you want to recover data.
Step 3: Select analysis type.
Quick analysis should be used if files were recently deleted . The program will analyze and display the data available for recovery .
Full analysis allows you to find lost data after formatting, disk repartition or damage to the file structure (RAW).
Step 4. View and select files to recover.
Step 5. Adding files to save to the “Recovery List” or selecting the entire partition for recovery.
It is worth noting that it is best to select another disk or partition as a place to write the recovered file to avoid overwriting the file.
As you can see, the file recovery process is incredibly simple and fast. It is great for those who do not want to waste their personal time on unnecessary manipulations with the command line, system utilities, etc.
Introduction
Imagine that until May 4, your computer was working properly, but while working on the computer on that day, you began to notice some problems with Windows. In this case, using Windows Restore to a Previous State, you can return to the correct system settings that were set in Windows before May 4th, on any of the days where a special recovery point was created.
What kind of control point is this? A checkpoint is like a point where all parameters and settings of the system are saved at the current moment. Just like in games, you can save the completed stage, and then if you lose, load from the save point and continue playing from there. It's about the same in Windows. You can create a checkpoint on any day and at any time, which will contain information about the system parameters for that day. Then, if any problems arise in Windows, you can use the recovery tool to return to the previously created point when your system was still working as it should and without problems.
In addition to the fact that you can create recovery checkpoints manually, the system can also create them automatically. Typically, the system itself creates a checkpoint before installing each new program in Windows, before installing drivers and before making any major changes to the system. All this is done so that if you install the wrong driver, program or change some settings, you can roll back Windows back to the moment when those changes in the system that caused problems had not yet been made.
Please note that the recovery tool does not affect your personal files, folders and other documents in any way. Only settings, system parameters, and probably some installed programs and drivers will be affected. Those. Before running this recovery tool, you won’t have to make copies of your files; they will all remain in place!
Restore Windows 10 using a disc
The recovery disk is useful for rolling back to a saved point or returning to its original state if Windows refuses to start. A regular flash drive, external hard drive or DVD will do. The recovery disc should be written in advance and stored in case of system failure.
Click the "Start" button and start typing the phrase create a recovery disk. Open the found application. In the menu that appears. Connect the external storage device to your PC and click “Next”.
If something happens to Windows 10, boot the system from a flash drive or disk. In the recovery environment that opens, click Troubleshoot. Start returning to a system restore point in the “Advanced options” → “System Restore” menu.
Restore Windows 10 using a full system image
Another option for restoring Windows is to roll back to a previously created system image. It can be written to a hard drive, DVD or network share.
To create a full system image, click Start → Settings → Update and Security → Backup → Go to Backup and Restore.
In the menu that appears, select which of the existing partitions and files to include in the system image and on what media to burn it.
With a complete system image at your disposal, you can quickly return Windows to the state you want. You can start recovery using this method when you restart your computer. Click Diagnostics → Advanced Options → System Image Restore.
What happens to the data when using System Restore?
When a user observes a significant decrease in the speed of Windows, he immediately asks the question: “What can I do to return to the previous speed and do I need to install the operating system again or is there another way?” After this, he usually looks for a solution on the Internet and if it cannot be found, users most often choose the operating system restore function to return everything “to the way it was before.” However, despite the apparent simplicity of this solution, there are several points that are worth paying attention to.
Firstly, if you are using a Windows restore point , you should consider that all programs that were installed after the date the restore point was created will be deleted.
Accordingly, if important information was stored in any of these applications, it will be lost. For example, if you use various kinds of photo managers, you may lose your data , since usually such programs can store photos both in the user’s directories and in their own. For example, ACDSee can import photos into its own directories (it all depends on how the application is configured), and if the installation date of this photo manager is later than the system restore point date, you will lose all the photos that were stored in the application folders .
Secondly, when the operating system creates a restore point, it copies only the operating system settings, some drivers (which will be needed in the future for the correct operation of some devices) and a copy of the Windows registry is made. Personal user data, such as photos, music, documents, tables, presentations, etc. unfortunately, they are not saved. Therefore, if you have lost some file that is important to you, there is clearly no point in trying to restore it using the system restore function. about how to recover lost data in the last paragraph of this article.
Features of working with the “System Restore” function are described in detail in the article “Windows Restore Points”
It is also worth noting that the recovery function does not always work correctly and the user sometimes fails to restore the operating system to a working state. Accordingly, data loss on the C:\ drive is almost guaranteed.
Method 2: System rollback in safe mode
If the operating system does not boot at all, you can use system rollback in safe mode. To do this, you need to restart the computer and press a function key, for example F8 or F12, depending on the manufacturer. When a window appears asking you to select a boot option, select safe mode.
The computer should boot into safe mode.
Then we repeat all the steps described in method No. 1, starting from the first point: through the “Start” button, go to the panel and select “System Restore”.
If all actions are performed correctly, the computer will reboot again, and its subsequent startup will occur in standard mode.
Note!
Enabling will be standard if the loading problem has been resolved; if the problem concerns the performance of computer components, then you will have to deal with the hardware.
If the computer turns on
If the computer or laptop on which Windows 7 is installed basically starts and the only problem is that it is not working correctly, rolling back the system settings to a certain date will be quite simple - no more difficult than updating the video card drivers. Below are three methods to restore Windows 7; Having studied the instructions, the user can easily determine which option is suitable in his case.
Rollback using a backup
To roll back your Windows 7 by a few days, hours or even minutes, the most logical option is to use such a useful option as “System Restore”. In Windows 7, as in later generations of Microsoft OS, it is activated by default; The essence of the process is creating backup copies of system settings and files before critical events: installing new programs, disabling or activating individual components, as well as at the user’s request.
Important: there are usually several options for system recovery, less often - just one. If the user, who carefully followed the instructions, did not see a single backup point, he should immediately move on to other methods.
To roll back Windows 7 to a previous state using System Restore:
- Enter the Start menu by clicking on the Windows 7 checkbox at the bottom left.
- Opening “Control Panel” - finding the shortcut in the right column will be easier than understanding why Windows 7 does not find updates.
- Go to the "System and Security" section.
- And the “System” subsection.
- Click on the “Advanced system settings” link.
- In the new window, switch to the “System Protection” tab.
- Click on the “Restore” button.
- Click “Next”.
- And get acquainted with the list of system-created restore points that allow you to roll back Windows 7 back a few days.
- If the date after which, in the user’s opinion, the Windows 7 computer slows down more, is not in the list, check the “Show other recovery points” checkbox.
- To understand what exactly will happen after the changes take effect, just click on the backup version of interest, and then click on the “Search for affected programs” button.
- When the desired backup is selected, click “Next” again.
- Once again, familiarize yourself with the conditions for rolling back Windows 7, click “Finish”.
- And confirm your decision by clicking the “Yes” button.
- Now the user will have to wait from several minutes to an hour or more for the data to be prepared to roll back Windows 7.
- And during the reboot the changes will take effect.
- Upon completion of the procedures, the user will receive a Windows 7 system restored to a successful state; If this does not achieve a positive result, you should restore the computer to an earlier point - or look for the problem in another area.
Important: you can cancel the system rollback some time ago by again clicking on the “Restore” button located on the “System Protection” tab.
In addition, the user will see a display of the applied changes in the general list of recovery points - you can roll back the Windows 7 system from here.
Backup and recovery
A user looking for how to roll back Windows 7 to a few days or hours ago most likely does not use special backup software on their computer. Perhaps he does not know about the possibility of archiving important data - but since this option is a system one, it can be enabled, which will help to quickly and easily roll back the OS to a working version.
To perform a rollback using this method, the computer owner must:
- Open the Start menu again and expand the All Programs list at the bottom left.
- Go to "Maintenance".
- And run the “Backup and Restore” utility.
- Click on the “Recover my files” button.
- Next, to roll back the Windows 7 system, select “Browse Folders”.
- Click to select the desired directory with data - you should focus primarily on the time and date of its creation or update.
- And click on the “Add Folder” button.
- Make sure that the directory is added to the list for system rollback and click “Next”.
- Since the user needs to roll back Windows 7 “to live”, and not just restore old saved data, in the next window you need to select the “To original location” option and click on the “Restore” button.
- The rollback process takes quite a long time. If it seems that the system has frozen during recovery, you should click “Cancel”.
- And confirm the termination of the process, and then find another way to roll back the operating system a few days or hours ago.
Did the applied method not bear fruit? Don't despair; It’s enough to return to the original “Backup and Restore” window:
- Click on the “Restore system settings or computer” link.
- And then - “Advanced Recovery Techniques”.
- Click on the “Use system image...” button.
- Save all important data, including documents, photographs, audio recordings on removable media - otherwise they will be lost during the rollback process. There is no point in using the “Archive” system option: it will take much more time. In addition, if the data is stored not on the system drive, but on any other connected hard drive, there is no need to archive anything - just click the “Skip” button.
- Once again making sure that all valuable information has been copied and saved on other media, the user can safely “Restart” Windows 7.
- After preparing the files for recovery.
- You should select the interface language.
- And, if the system does not see the rollback image, manually specify the path to it.
The further process is no different from the first method to roll back Windows 7 a few days ago - having selected the data for recovery, the user must confirm his desire to roll back the system and wait a little. Upon completion, he will receive a working version of Windows 7 - and will be able to use it as usual.
Rolling back updates
Often the cause of problems with the operating system, including Windows 7, is incorrect installation of updates. A user who notices problems after another such event can easily delete the data that interferes with the correct functioning; for this you will need:
- Open “Control Panel” and go to the “Programs” section.
- Next, go to the “Programs and Features” subsection.
- Click on the “View installed updates” link.
- In a new window - move by moving the slider at the bottom of the list to the right.
- And set the updates to be sorted by installation date.
- Find the Windows 7 update, after downloading which the problems supposedly started, right-click on the corresponding line and select the “Uninstall” option - usually it is the only one in the list.
- To roll back Windows 7 a few days or hours ago, confirm deleting the update.
- And after waiting a few minutes.
- Reboot the system. As a result, the user, without risking any of his data, will be able to restore Windows 7 to a working state - and subsequently correctly download the required updates.
Tip: to optimize the performance of a computer running Windows 7, a user who already knows where the “Programs” section is located can remove unused applications and also disable unnecessary system components.