03/27/2017 windows | for beginners
In some cases, automatically installed Windows 10 updates can cause problems with your computer or laptop—this has happened several times since the OS was released. In such situations, you may need to uninstall the latest installed updates or a specific Windows 10 update.
This guide contains three easy ways to remove Windows 10 updates, as well as a way to prevent specific uninstalled updates from being installed in the future. To use the described methods, you must have administrator rights on the computer. You may also find it useful: How to completely disable Windows 10 updates.
Note: For some updates, using the methods below may not have an Uninstall button, and when uninstalling using the command line, you may receive a message: “The update for Microsoft Windows is a required component for this computer, so uninstallation is not possible,” in this situation, use the guide : How to remove a required Windows 10 update that won't uninstall.
How to delete downloaded, uninstalled, frozen
Sometimes downloaded updates can cause problems on the PC for which they are installed.
Some problems are minor, others can cause bugs that will negatively impact performance, lead to data loss or loss of functionality, or even prevent the OS from loading.
To remove a problematic downloaded update:
- Press the Windows key on your keyboard and type “Uninstall a program” in the search box.
- Select the "Add or Remove Programs" result from the list of search results.
- A window will open, where you need to select “View installed updates.”
- The window will display all updates installed in the OS.
- Use the search above or try to find the update you need. If you choose the latter, click on the Installed heading to sort them chronologically.
- Once you select the version you want, click on it and simply delete the file.
The OS may require a mandatory restart of the computer to complete the process.
Removal techniques
Initially, in Windows 7, Microsoft specialists did not provide a tool for getting rid of old system update files.
Therefore, PC owners had to use workarounds to free up valuable disk space on the hard drive.
Fortunately, the developers have released a special package “KB2852386”, which makes this process safe and easy to perform even for novice users.
If this package is not installed automatically, then this wizard can be manually downloaded and installed on the official Microsoft resource. Its exact name is “Windows Cleanup Tool”.
Thus, to the question: “Is it possible to delete old saved updates from the system volume?” - Microsoft itself has already responded positively, but there is one very important condition.
This cleaner successfully copes with its tasks, both in 32-bit Semerka and x64, but you should definitely take into account that the installation of this wizard for cleaning old files is only possible if Semerka is updated to SP1.
Next, we will consider the most effective methods for solving the problem, which make it possible to rid your PC of unnecessary “junk” as simply and safely as possible.
The methods below will help you erase previously installed upgrades from your computer’s memory and remove updates that have not yet been installed on the system.
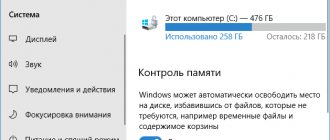
Cleaning up from a previous build
Windows.old is nothing more than a build of the previous OS. This build is around 5-10 GB, so it is recommended to delete the folder.
Before deleting, make sure that all personal files have been correctly copied from the old OS to the new one. If necessary, you can copy them manually by going to the Windows.old directory. Once deleted, these files cannot be recovered.
To remove an old assembly:
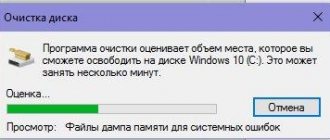
- Click on the drive where the Windows.old folder is located and click Disk Cleanup.
- After a short wait, files that can be deleted will be shown. However, you are interested in the “Clean up system files” feature.
- In the list about and click "OK".
After this, the folder will be deleted. This action will help save almost 8 GB of space.
Method 2: Command Line/PowerShell
A universal tool with which you can probably achieve everything within your system. Right-click on the Windows icon and select “ PowerShell (Administrator) ” in the menu that appears, or run the command line as Administrator, whichever is more convenient for you. In the window that appears, enter the command “wmic qfe list brief /format:table” and press Enter. The answer will be to display updates in the form of a table, where each update is marked with a unique ID; it is these numbers that interest us. The next command will be “wusa /uninstall /kb:ID”, where instead of ID there will be a seven-digit code that we see in front of us. After removal, do not forget to restart the computer if necessary.
Cancel automatic update
Windows 10 automatically downloads updates to each device to update the functionality of the OS and ensure the reliability and security of your PC. However, these updates require auto-downloading, which can take a long time or cause various OS-related issues. If you do not need regular updates, you can disable them in two ways.
Standard method
In Windows 10, it is possible to permanently disable automatic downloading of updates. This is done through the registry:
- Press the key combination “Win+R”.
- In the “Run” line, write regedit - this will open the registry.
- Follow this address: HKEY_LOCAL_MACHINE\SOFTWARE\Policies\Microsoft\Windows
- Create a new partition in Windows. Give it the name "Windows Update".
- Open the created partition and create another folder there called AU.
- In the AU section, create a DWORD (32-bit) named NoAutoUpdate. Change the value from 0 to 1.
After rebooting the PC, automatic updates will be completely disabled on our computer.
Using a third party program
You can also disable specific updates using the WUSHOWHIDE utility. To do this you need:
- Download WUSHOWHIDE Troubleshooter from .
- Launch wushowhide.diagcab on your PC and follow the on-screen instructions.
- Select "Advanced" and uncheck the "Apply updates automatically" checkbox.
- Then click the "Hide Updates" button to select the specific update you want to block.
Uninstalling updates on domain computers using GPO policies
If you need to remove a specific update from multiple computers in an Active Directory domain that does not use WSUS, you can use the Startup/Shutdown functionality of a Group Policy Script (GPO).
To do this, create a new GPO aimed at the desired OU / site (an example of targeting group policies to AD sites is described here) / or group of computers. And then in the Computer Configuration -> Policies -> Windows Settings -> Scripts (Startup/Shutdown) section, create a new script with the wusa command from the previous section.
You can also use PowerShell logon scripts to remove updates.
What to do if updates are not removed
Although the process of removing updates does not cause difficulties, sometimes users receive an error report when trying to clean them. Typically this occurs due to a specific setting in the configuration file. However, this is easy to fix, just follow these instructions:
- Open the Notepad application.
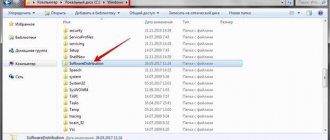
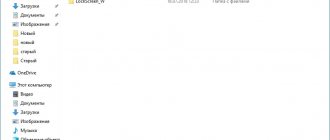
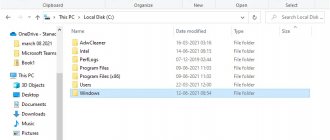
- After reconciliation, click “File” – “Open”, and then follow the following address: C:\Windows\servicing\Packages\.
- In this folder, find the file “Package_for_KB_ХХХХ”, instead of the characters XXXX there should be the number of the desired KB, for example, KB4560959. The file format must be MUM. If this is not displayed, then in the “File type” item, specify “All files”.
- A text document with a large number of entries will open. You need to find the line: permanent= "permanent". Just replace the word in quotes with "removable".
- Close Notepad and save your changes.
After this, you can remove unnecessary updates using any of the above methods, the error should disappear.
Viewing logs via Options
The logs display the entire list of fixes with their statuses, actions (even if there were unsuccessful installation attempts), date and time of their processing.
1. Call Settings and visit the “Updates, Security” section.
2. Follow the link to view the update log.
All information about operations and attempts to process updates is displayed here.
Get more information using PowerShell.
2. Run the following code: Get-WindowsUpdateLog to import the data into text format, a form that is easier to read visually.
3. Open the text document WindowsUpdate.log located on your Desktop.
On the Microsoft website you can find explanations of the basic concepts, because most of the entries are unfamiliar to the average user. https://support.microsoft.com/ru-ru/help/902093/how-to-read-the-windowsupdate-log-file
System rollback
If you can't remove the update using the standard method or you have trouble identifying the problematic update, there is an alternative way to roll back Windows back to a working state using the System Restore feature in Windows 10.
System Rollback allows you to return the OS to a previous point in any saved Windows state. But you should make sure that you have saved restore points from when the computer was still working well.
Clearing log history
To clear the history log, you should use the Disk Cleanup function. To do this, do the following:
- Run Disk Cleanup from the This PC window.
- Click on the OS drive and click “Properties”.
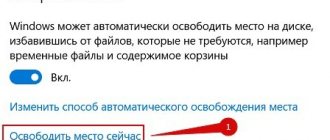
- After analysis, in the window that opens, check the box next to “Windows update log files.”
- After clicking the “OK” button, the program will completely clear the Windows 10 update history, freeing up some free disk space.