Most people are accustomed to adding phone numbers to their smartphone's memory. However, this method of storing data often fails.
In order to protect the device's memory, Android platform developers have added synchronization with Google to their smartphones to import contacts. According to many users, it is the most secure cloud storage system. The level of trust in her increases every year.
Next, we will tell you in detail about:
- how to add to Google Cloud;
- how to look in Google;
- how to transfer from Google to device memory;
- how to save via Gmail.
Main advantages
One of the main advantages of this transfer method is that you can never lose this information. The technical protection system guarantees that information will not be available to third parties.
You can edit information both from a personal computer and via a smartphone or tablet. For each person on Google, you can select a photo and add other phone numbers to it.
For ease of searching, the service allows you to divide information into groups: by organization name, address, type of activity, and so on. You can also add:
- Email;
- Date of birth;
- Residence address;
- Personal website on the Internet.
As a result, you receive a unique notebook, where all the necessary information will be described in detail. If your mobile device stops functioning and the information on it is lost, you can restore it through Google.
In order to start synchronization, create a personal account, after which you will understand how to transfer data from your phone
Using a VCF file
The next way to import contacts from one gadget to another is to use a VCF file.
- Open contacts, then click on the “Menu” button and select “Import/Export”.
- Specify your phone as the data source, and then select the internal or external memory into which a copy of the files will be placed.
- Indicate the numbers that are transferred to the new device.
- A notification appears indicating that a new file has been created.
Next, you need to find a document in .vcf format. If it is on an installed memory card, you can remove it and install it in a new gadget. Otherwise, the file can be moved via Bluetooth, sent to yourself via email, Telegram, WhatsApp or other messenger, VK or other social network, or in another way in an archive or in its original form, and then downloaded to the memory of a new gadget.
After moving, you need to click on the file and indicate where the data will be moved - to your phone or Google account.
Another way to import numbers is to click “Import/Export” in Contacts, select internal or external memory (the one in which the VCF file is located), and then specify the Google account or gadget into which the data will be entered. Next, documents are searched and contacts are subsequently imported.
Creating a Google Account
First register your email. To do this you need:
- Go to the official website of the system;
- Then click on the “Mail” tab. If you have never registered an email before, a page with a registration form will open;
- Fill in your personal information, namely full name, number, create a login (it should not coincide with existing ones), select a password;
- Then click "Save".
Google will take you to the created email page.
If you have several means of communication at once, and you need to have the same lists of numbers on all devices, then link each of your devices to an account. Then, when you add a new number on one device, it is automatically duplicated on the other.
Many people wonder how to transfer contacts from a smartphone to cloud storage. Thus, synchronization will extend to notes, calendar entries, photos, videos, applications or other information contained in the phone.
In the next section, we'll look at how to save contacts to Google and how to add them to the service.
Using Bluetooth
Importing contacts via Bluetooth is an easier and faster way to transfer data, in which all additional information is saved.
- Enable Bluetooth on both devices.
- Open the menu, click “Submit”
- Select the contacts you want to transfer to another Andro >
- The search for devices will begin. In the list that appears, select the device to which the data is copied.
- On the second phone, confirm data reception.
- After a notification appears about the successful completion of the operation, click on it, click on the received file, and then select “Import to phone.”
This process takes very little time and does not require any extra steps, such as moving a SIM or memory card from one device to another.
How to sync contacts on your phone
Once your account is created, you can start setting up contact synchronization on Android from cloud storage. To do this you need:
- Enter the main menu of the mobile device;
- Select the “Settings” section;
- Go to “Accounts and synchronization”, where at the bottom of the screen you will find the “Add account” button;
- To do this, use your email that you registered earlier. Some smartphone models may offer to create a new account;
- Enter your username and password, then close the tab;
- Then open the desired section;
- In the settings menu, click the “Import - Export” tab. Among the sources for copying, select your account, which will be presented as an email;
- Then click “Next”. After this, you can mark the numbers that you want to move to the “cloud”. Once finished, click the “Copy” sign, which is located in the lower right corner;
- The system will perform this operation for some time, then you can log into the desired section from your Google account. Edit the list yourself as you see fit.
If you are wondering how to transfer contacts from your phone’s Sim card to Google, then in the “Selecting a source” section, select it.
Bottom line
Google account synchronization feature is one of the convenient features on Android in any situation when transferring contacts
Contacts are one of the most important features of Android OS as they store phone numbers and other information about people you know. The Google account sync feature is probably one of the most used features of Android as it allows users to automatically back up their online contacts. This is not only a good way to recover contacts after a factory reset or after a major update, but also an ideal way to get all contacts back when switching to another Android device.
Find out how to recover deleted files on Android, as well as programs for this and instructions, from our new article.
The first method should work on most Android devices, and once you enable automatic sync, you won't have to worry about syncing your Google contacts anymore. If the first method does not work properly on your device, you can try the second method to manually sync your Google contacts. Whichever method you choose, make sure you follow all the instructions to sync contacts with Google on Android.
How to transfer contacts from Google account to device memory
If you need to pull out contacts and copy them from the cloud to the device’s memory, to do this, go to the website:
- Log in to your email. There is an arrow near the main Gmail logo, click on it;
- After this, it will appear in the menu from which select the item with the data;
- Check all and click "Download".
They can be transferred in three ways:
- Using a program from Microsoft Outlook or Outlook Express;
- Download the notebook directly from the Google service;
- Use your own SD memory card.
The methods are universal, since you do not have to synchronize your phones. In order to organize a transfer from a Google account to Android, you need to:
- Copy it to Microsoft Outlook or Outlook Express. Services are designed specifically for storage;
- Save the document to your computer;
- Connect your smartphone via USB and transfer the document to the phone’s memory;
- Open it through the mobile editor and gradually copy the information in the corresponding section.
If your smartphone is synchronized with Google, then this process can be speeded up several times. For this:
- Open a folder with objects on your phone;
- In the menu section, click “Advanced”.
- In order to transfer them, select the “Import” item.
The source will be a document located on Google. After that, transfer everything to the memory of your smartphone.
Method 2: Manual import
For users who are facing problems using the official Android sync method, manually syncing and manually importing Google contacts to your Android device may be an option. This method doesn't take much longer, but you'll have to manually import your contacts every time you add a new contact to your Google account.
Process of manually importing contacts from Google to Android
This is ideal for users who are unable to access the Internet on their Android devices. Additionally, many users are reporting problems syncing their accounts. You may receive a message about synchronization problems. Manual import aims to sync Google contacts on PC and then transfer them to Android device manually.
Step 1 . Go to the Google Contacts website, sign in with your Google account information.
Click on the “Google Apps” icon, scroll down the menu, click on the “Contacts” icon
Step 2 . Click on the "More" button and select "Export" (as shown in the image below).
Click on the “More” button and select “Export”
Step 3 . Select all your contacts if you want all your Google contacts on your Android device. You can also select a contact group by tapping and selecting the group you want. The screenshot below shows how it should look. In the "Select a file format to export" section, select the vCard format and click the "Export" button. The VCF file should now be downloaded to your computer.
We mark the appropriate option with contacts “All” or “Group”, oh, click “Export”
Step 4 . Connect your Android device to your computer using a micro USB cable and make sure the device is connected in USB Storage mode.
Connect your Android device to your computer using a micro USB cable
Step 5: The AutoPlay window should now pop up. Click "Open Folder" to browse the files and copy the previously downloaded VCF file to your Android device's root storage.
Step 6 . Open the Contacts or People app on your Android device.
Open the Contacts or People app on your Android device
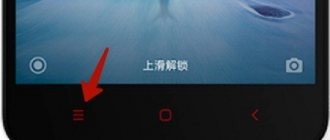
Step 7: Click the Menu button and select Import/Export.
Press the “Menu” button and select “Import/export”
Step 8: Select SD card if you have copied the VCF file to a micro SD card or select internal storage if the file is saved in your device's internal storage.
Select the appropriate option and click on it
Step 9: Under the Create Contact pop-up above your account, select your Google account.
Click on your Google account
Note! This process will look slightly different on different devices.
The app should now scan your device for VCF files. On some devices, you may have to manually select the VCF file. To do this, you need to go to the directory in which it is saved. Your Google contacts should now be available on your Android device.
This article will describe in detail:
- How to add contacts to Google cloud;
- How to view your data on Google;
- How to download data back to phone memory;
- How to save them using your Gmail account.
- Benefits of the sync feature
An important advantage of this method of transferring contacts from Android to Google is the safety of all data. The method is safe, has special technical protection and access restrictions for third parties. It is possible to change data from a computer or laptop, smartphone or tablet. You can add a photo to your account and attach several phone numbers.
Afterword
This article was written so that anyone can easily transfer contacts from Android to Google, as well as move applications and other personal information to and from a Google account on any device. Using the described algorithms, everyone will be able to do this. Using the instructions described in the article, you can easily create an account that will allow you to use Google email clients for free. And they, in turn, will help organize the life and work of an ordinary person.
It will be interesting to read: A simple way to turn a regular SIM card into a micro
Other options for importing contacts to Android
How else can you import your contacts from Gmail to your Android device? Each well-known manufacturer provides special software for working with user contact information. This greatly simplifies the synchronization of devices, and also eliminates errors and bugs that are often found in third-party programs.
Such utilities work with universal extensions (VCF or CSV), which allows you to comfortably move, delete and create new contacts using the proprietary equipment of your device manufacturer.
Via home PC and MOBILedit application
The next way to transfer contacts between Android devices is to use a computer. To do this, install the MOBILedit application on it, and Android Forensic Connector on the smartphone. When you launch the utility on your PC, you are prompted to download the driver database. You should choose your own manufacturer and perform the installation.
In order for the phone and PC to interact correctly, you first need to connect the equipment to each other with a cable, Wi-Fi or Bluetooth.
After this, turn on the developer mode on the mobile gadget by opening the settings, then the “About device” section and click on the build number several times in a row. Then return to the settings and select the “For Developers” tab. It needs to enable USB debugging.
Next, you need to click on the icon with the image of a mobile device, and then in the tab that opens, select “Phonebook”, mark the necessary contacts and click “Export”. After this, you need to select the extension type - .vcf - and click “Export”. The resulting file is moved to a new device and contacts are uploaded from it to the gadget’s memory.
